About John Fisher
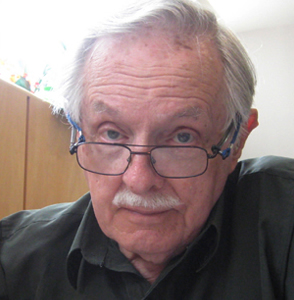 I was born and educated in England, graduating from the Luton School of Arts (now Barnfield College) in 1945. It was my hope to become a graphic artist, but at the end of the Second World War returning service men and women had first crack at the few jobs available, and rightly so. I took a number of jobs while I tried to break into my chosen field, and ended up being a reluctant carpenter. Many years passed and I emigrated to Canada in 1952, married a Canadian woman, started a family, and in 1955 finally started on a career which took in graphic arts, owner of my own graphics arts company, art director at an advertising agency, and careers in marketing, advertising and public relations.
I wish I could claim that my passion for art burned brightly throughout those years, but alas, the need to make a living took prominence. As with many people, I always promised myself that when I retired I would get back to painting again. That time came in 1989, when my wife and I were living the winter months in our condo in Destin, Florida. Robert Long, a talented watercolour artist, was offering private lessons from his nearby condo. He was my mentor, and made my retirement years infinitely richer.
In those days Robert taught only technique, and there were rarely more than four to six of us in those early classes. From Robert I regained my interest in photography as an adjunct to painting, and as the cliche goes – I never looked back. I have had many paintings accepted and hung in exhibitions in Florida and Ontario, where I now live. I’ve won some prizes, come first in some exhibitions, and occasionally won the Citizens’ Choice awards. But I mainly paint for fun – hence the choice of name for this site.
To learn more about John and to view more of his work, please follow the link below:
http://www.watercoloursforfun.com
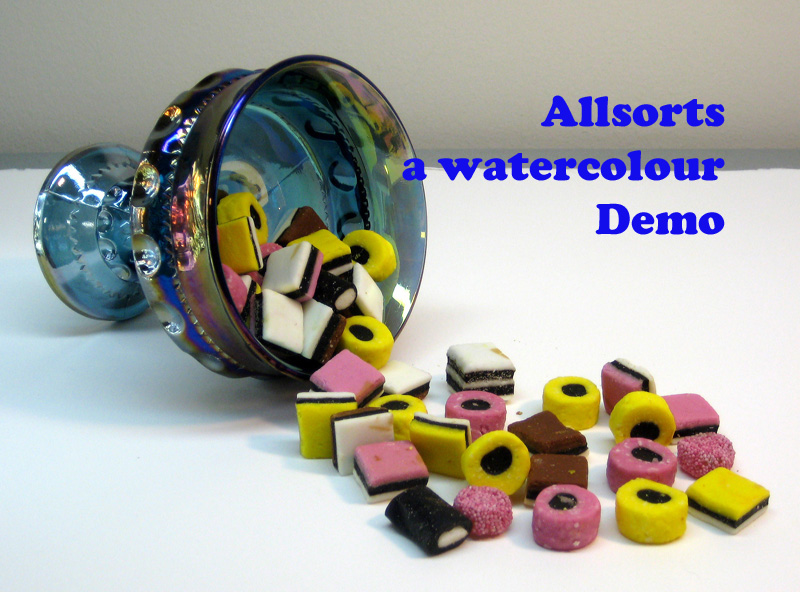
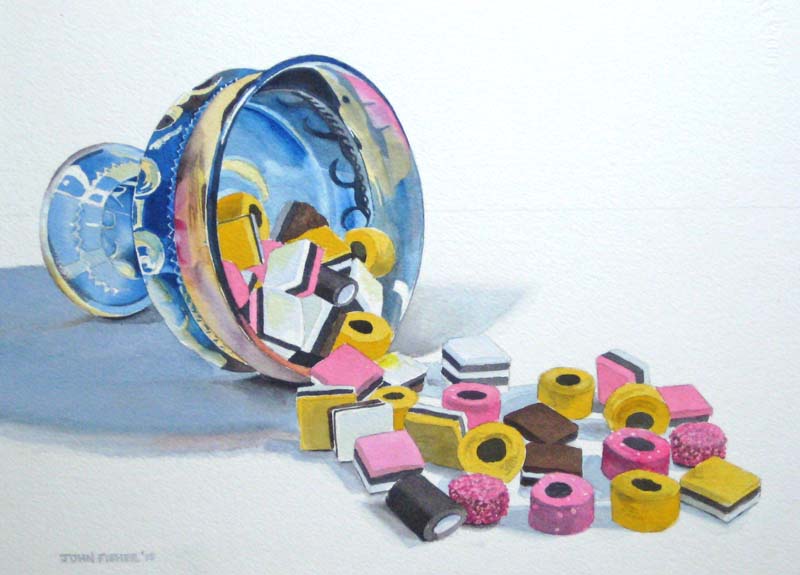
Liquorish Allsorts were a childhood favourite of mine, and bring back memories of long-ago Christmas treats. These days I find them a little too sweet and they discolour my teeth, but they make a colourful still life I thought and a challenge to our little art group. Image size 11 1/2″ x 14 1/2″ , on Arches Cold Press paper using W&N Artist Quality colours.
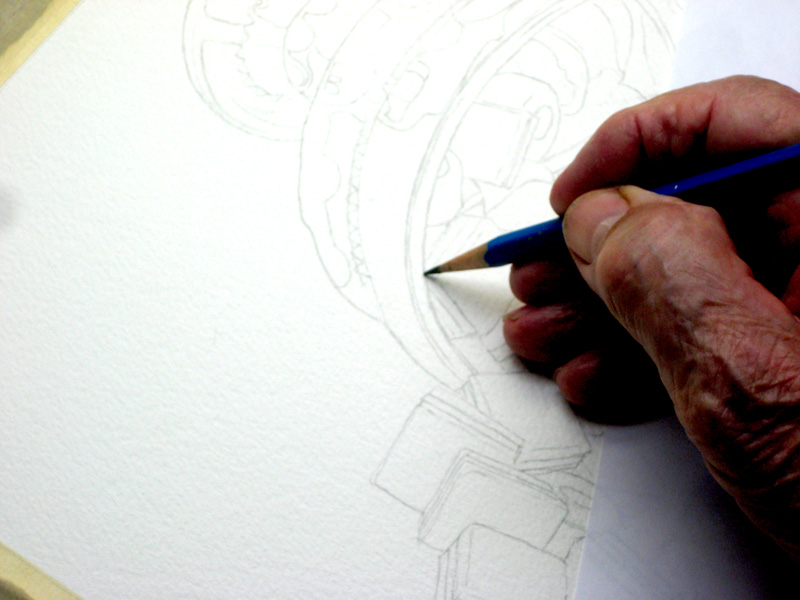
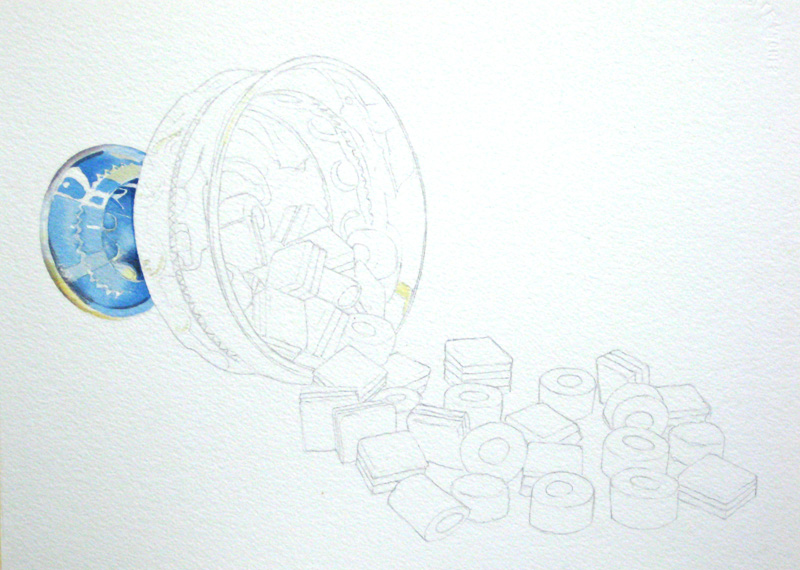
I always start of with a careful drawing so I can work out many of my problems in advance. Depending on the level of realism you want, you will have to get your perspective and curves accurately drawn, so don’t be afraid to turn your board around to suit left-hand our right-hand drawing.
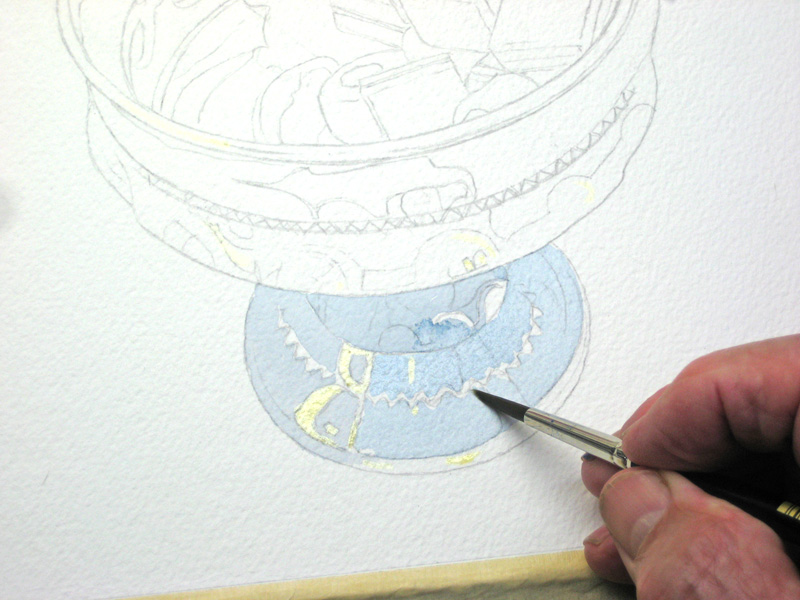
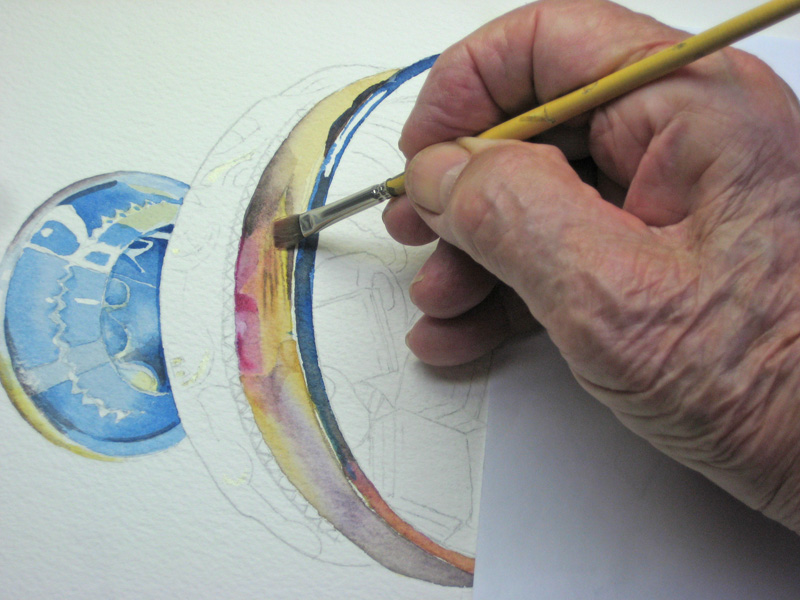
It occurred to me the base of this container could be painted as a separate part of the project and would give me a chance to try out my colours and techniques. I used liquid masking on some small areas and chose to paint around others. I’m using Winsor Blue as I’m always reluctant to run out and buy special colours. They’re expensive and I end up with a drawer full of them. My palette blue is close enough.
All complete. I will go back in later and tinker with this when the container is done and the highly coloured Allsorts are in place. I will also anchor this down with shadows at a later stage.
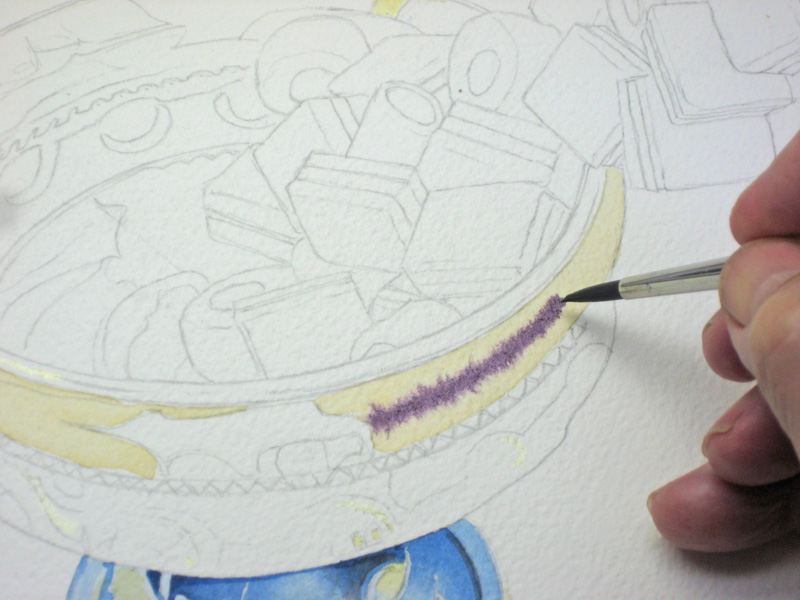
Here I’m working wet-in-wet to start the reflecting colours. The yellow underpainting is at the glisten stage.
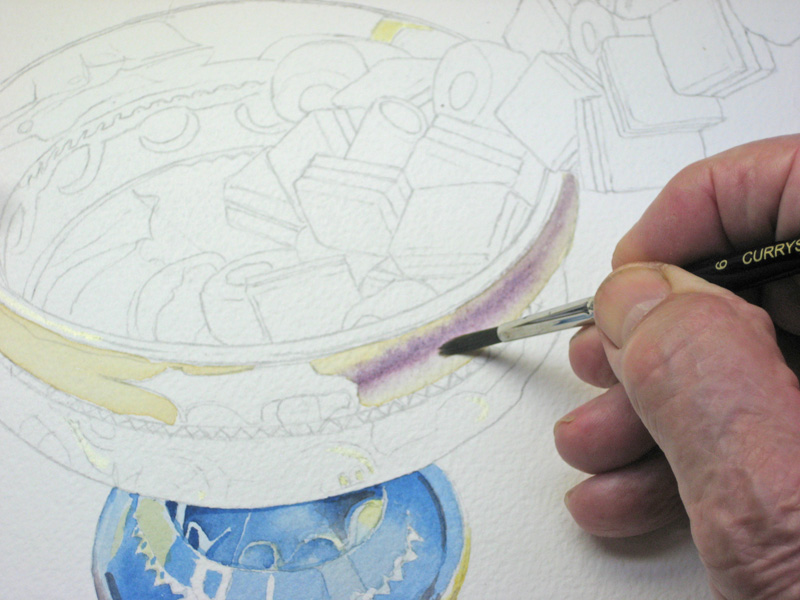
Here I’ve softened the edges to blend this in. The two layers are still at the glisten stage so my brush has very little water in it.
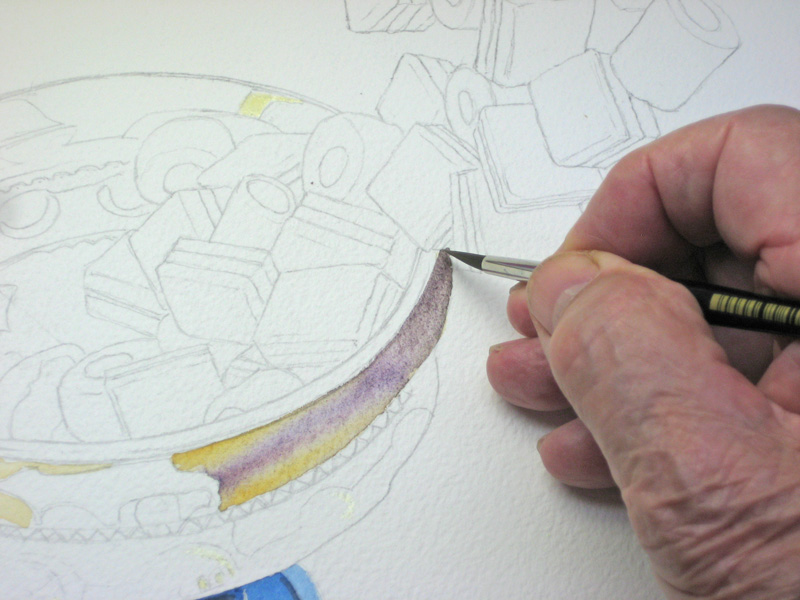
Now I’ve blended all this in and extended it to the corner.
I simplified the many colours in this area and blended them in with my small scrub brush and clear water.
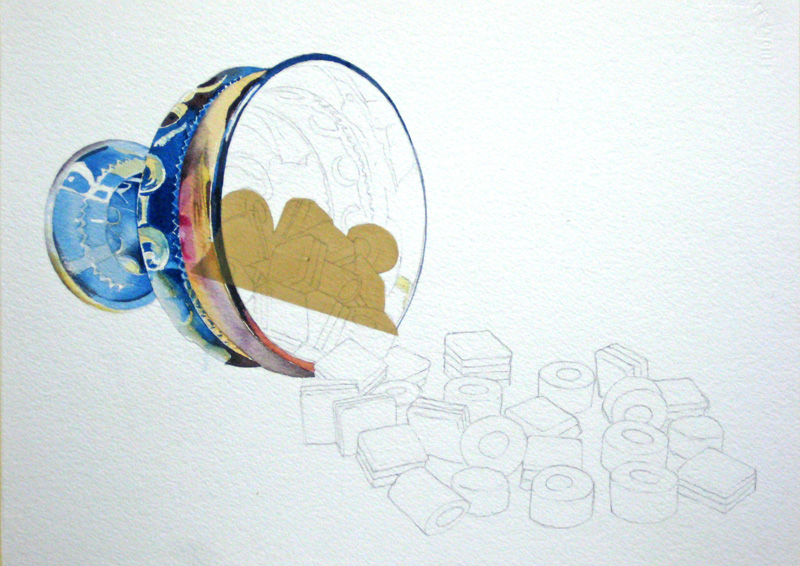
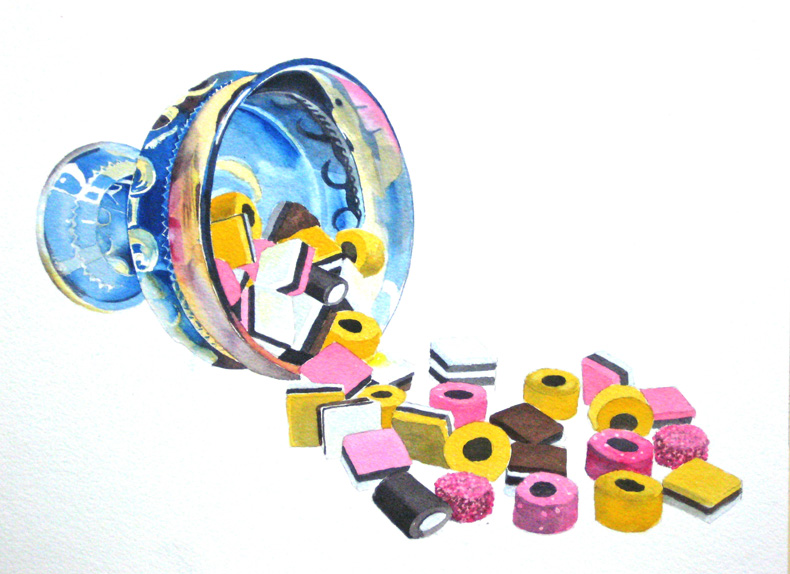
I decided to protect the edges of the individual Allsorts to make my washes easier. I used postal tape and cut the shapes right on the 300 lb. cold pressed paper.
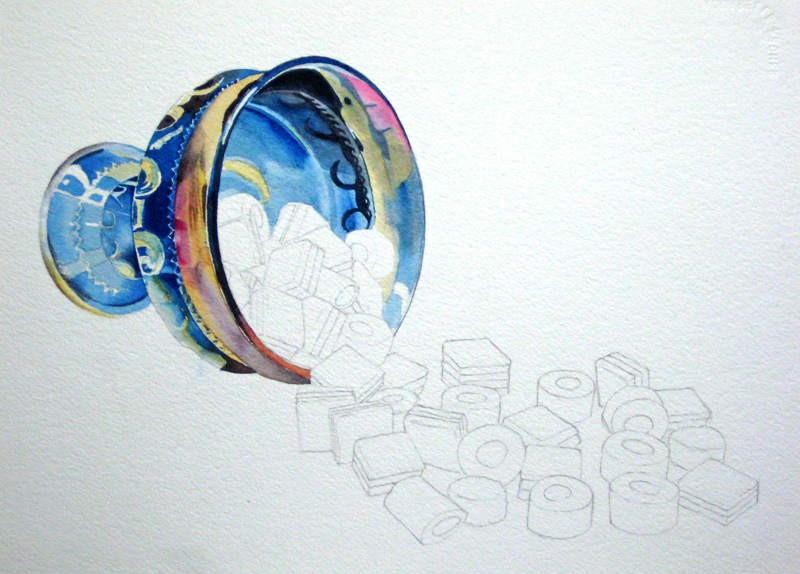
Here I’ve completed the bowl of the container, using the same colours and techniques, blending and lifting as I went. I’ll probably come back in later and tinker with this once the main colours are in.
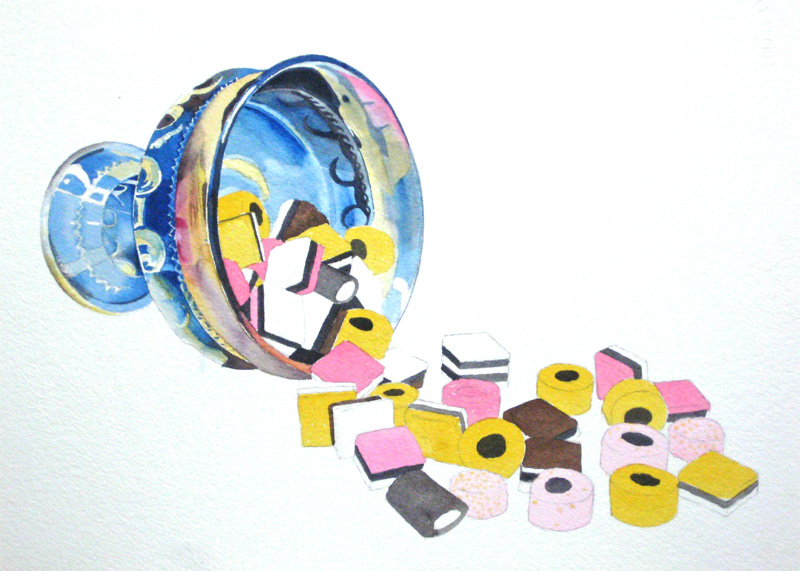
Now for the fun stuff! I mapped in all of the Allsorts with a basic wash. Notice the blacks aren’t solid black as we need to show some shadow and shape.
Here I’ve been building the individual Allsorts with shadows and reflected lights. Two of them had to have masking fluid in little drops to replicate the eventual texture and nubby look. I’ve used Ultramarine Blue in places to make the white look whiter. Now we’re ready to put in the shadows that will anchor the Allsorts and stop them floating.
A high-key photograph with shadows is tricky, but I used a mixture of Ultramarine Blue and some shadow colour made from Antwerp Blue and Brown Madder. I debated whether to put in the background that cuts this picture into to segments, but decided against it. I hope you found this useful.
This is last step-by-step watercolour I will be posting as I’ve finally retired from teaching and no longer need these images for my students. Over the past five years I’ve posted thirty step-by-step projects and received many kind comments, and I thank you for those. Some of them have been translated into French and German for use in France, Germany, Austria and Switzerland, and my students were happy to share these projects down the years. I will continue to post completed watercolours, an occasional alkyd oil and pen and ink studies. Thank you all and goodbye for now.
I’ve painted for years with oils, acrylics and wax based colored pencils, but I’ve never attempted watercolor. I went out a few weeks ago and bought all the supplies for watercolor, but as yet haven’t painted anything. Probably not sure where to begin. Your demo has inspired me and I think I can, I know I can do this. Thank you John.