Here is a wonderful step by step painting tutorial of a still life by artist John Fisher (see bio and website link at the end of the demonstration). Pay attention throughout the lesson and learn some valuable watercolor paint techniques.
Garlic & Copper a Still Life Teaching Watercolor Paint Techniques
[adinserter block=”82″]
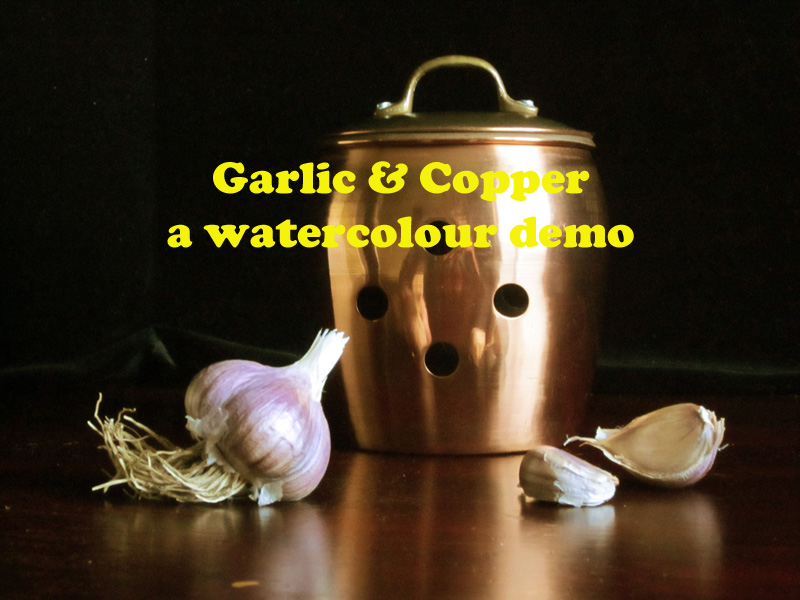
I was looking for a suitable subject to start off the new season of our art club and decided this would make a good challenge. Image size 11 1/4″ x 10 1/2″ on 300 lb. Arches cold pressed and W&N Artist Quality colours. Credit for the photograph goes to Lillian Bell of Paint My Photo. These images are primarily for the class project but we thought you might be interested.
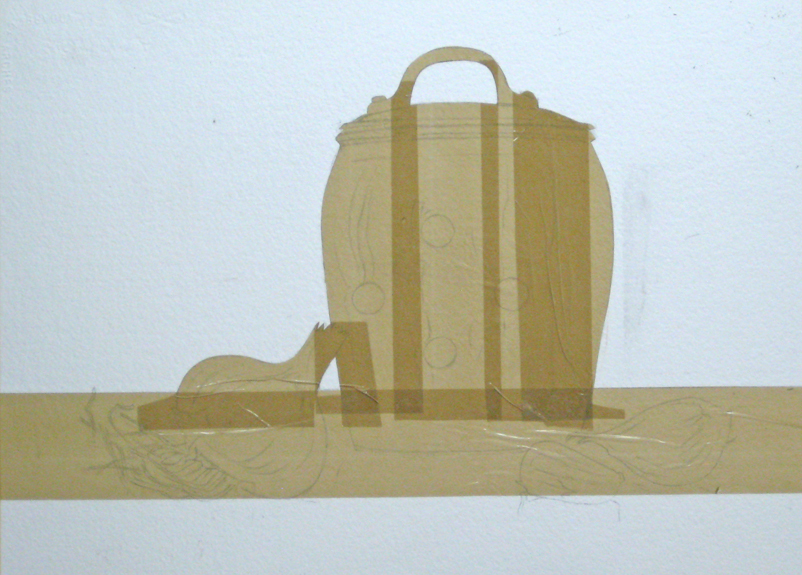
I always start off with a careful drawing as I like to achieve a high degree of realism, and I can often work out my problems in advance as I pencil in the details. I decided to put in the dark background first as I find it tricky to put in the several washes needed to get the dark background I wanted. Here I’ve used postal tape to mask out the garlic and copper container, and cut it around the shapes right on the 300 lb. paper with a sharp Olfa knife blade. If you’ve never done this, practice first as you don’t want to cut too deeply.
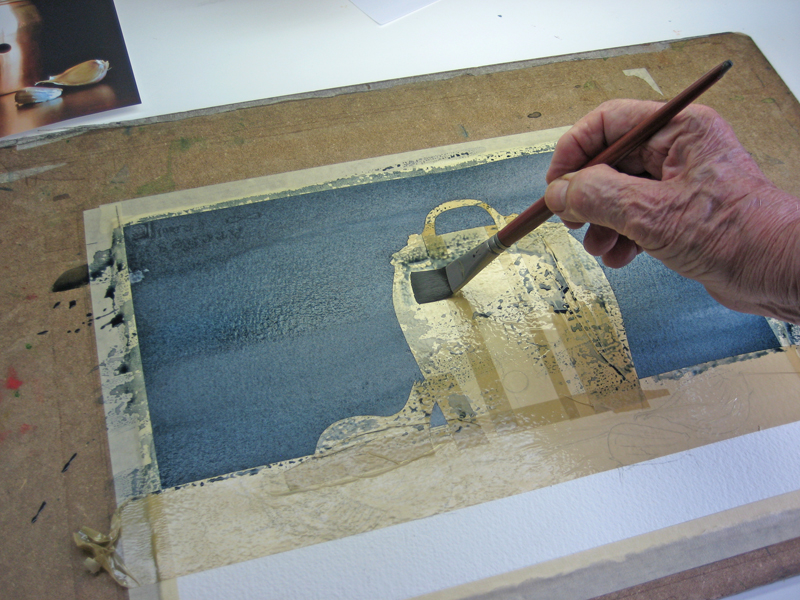
I will be applying four washes made from a mixture of Winsor Blue and Brown Madder, using a 1″ square brush. Make sure you mix up plenty of colour as you don’t want to run out half way down. Use steady horizontal washes with a fully loaded brush. Don’t dab and don’t go back in and fuss with it.
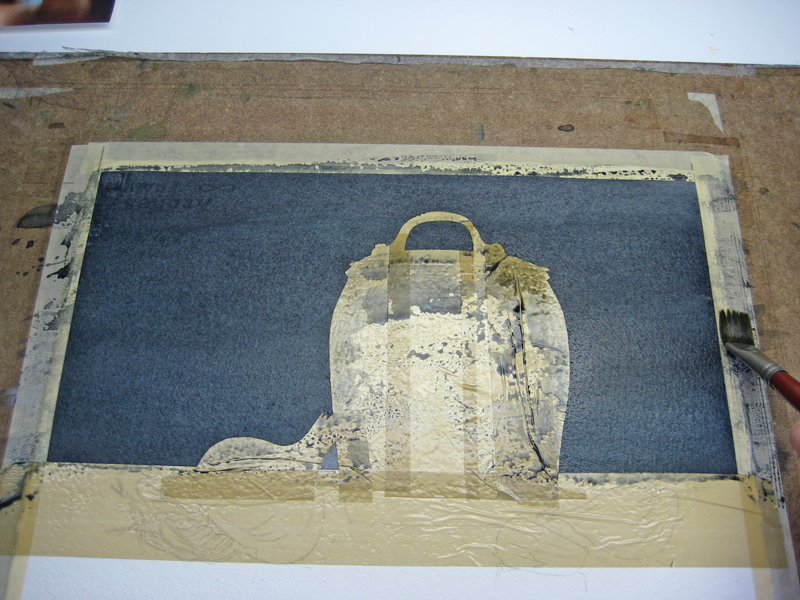
Here I’m soaking up surplus paint with a dry 1″ brush to make sure the paint doesn’t bleed back in and cause a blossom. Facial tissue will also do.

Next I carefully remove the postal tape masking, using a hairdryer to help soften the adhesive. Do not simply rip this off as you might damage the surface of your paper.
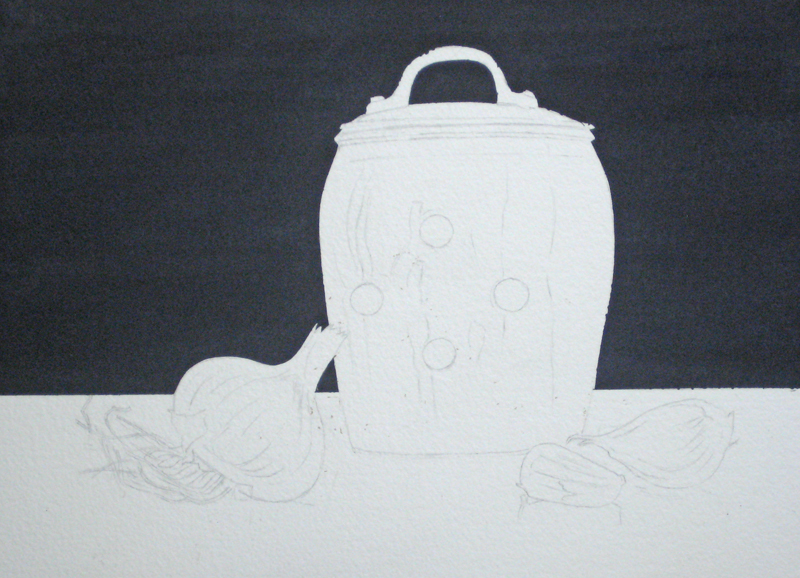
Now your background is complete, but be careful not to splash any water on it as you work or you’ll have a blossom impossible to remove. If you do spill any, leave it alone and hope it dries unnoticed, or dry it carefully with a hairdryer. Be careful not to blow the water around and make it worse. Next, use liquid masking to protect those areas where the garlic cloves touch the copper container and the highlights on the handle and rim. Do NOT mask out the highlights on the edges of the air holes as they are outside the darker area of the hole itself and should be scratched in later with a fine knife blade.
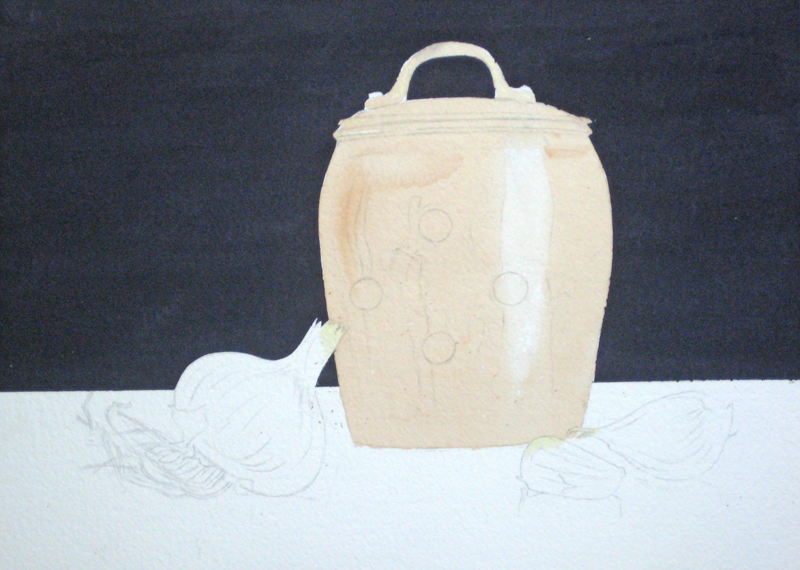
My basic copper wash was Burnt Sienna, with a little Cadmium Yellow Deep and a tiny dash of Alizarin Crimson.
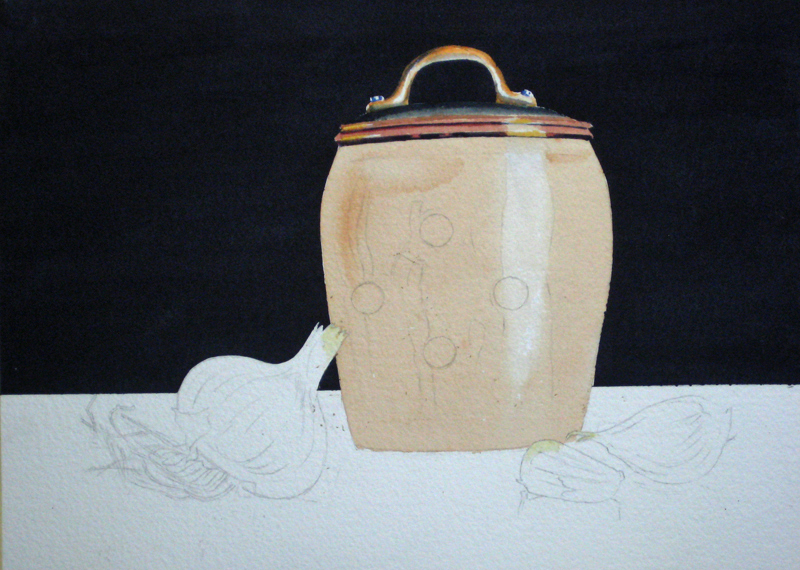
Here I’ve painted in my handle and rim details. I used a mixture as before but used my standard shadow colour of Antwerp Blue and Brown Madder. I removed the liquid masking and blended this slightly with a small scrub brush using water and a facial tissue
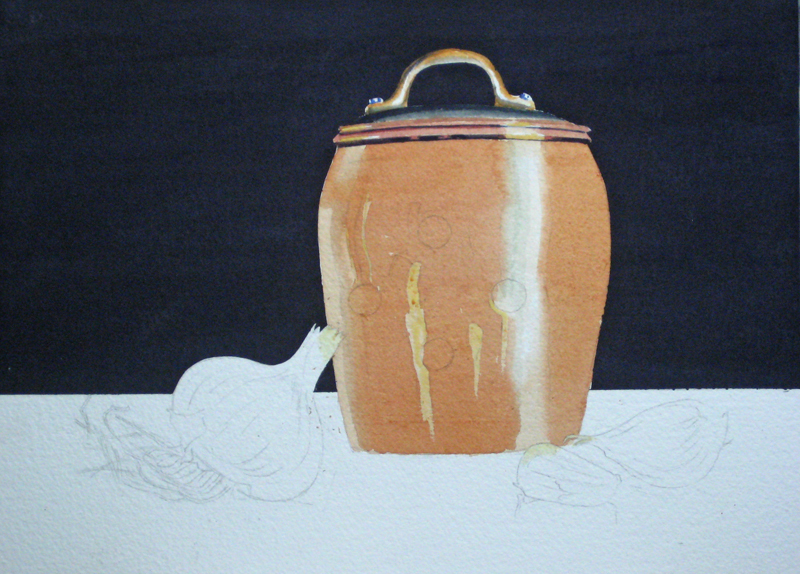
Here I’ve used liquid masking to protect some of the eventual highlights and I begin painting some of the layered washes. I’m using a mixture of Burnt Sienna, Brown Madder and a touch of Alizarin Crimson. This will look messy for quite a while now, but don’t be discouraged as you will be using blending and lifting techniques as we go. I’ve removed some of the liquid masking and began the process of softening those hard edges.
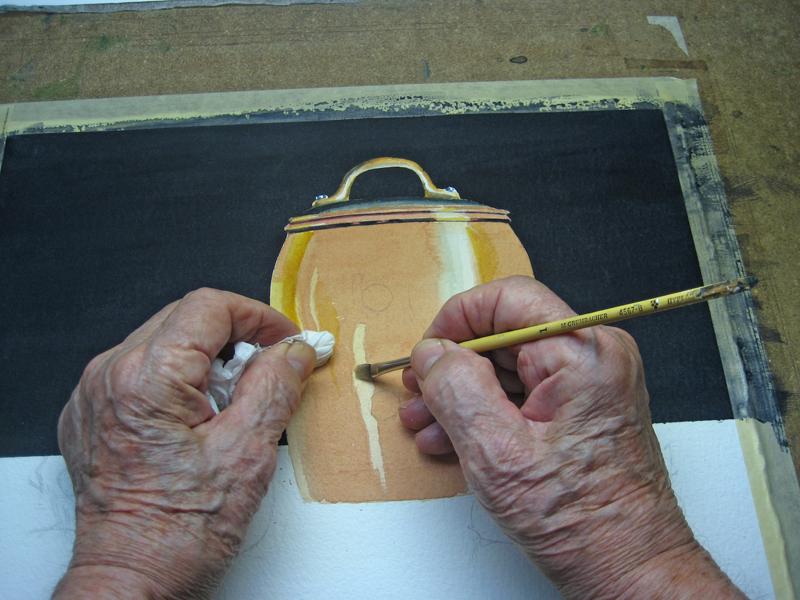
Here I’ve removed the remaining liquid masking and I’m using my scrub brush, water and facial tissue to continue softening those hard edges.

Here I’m using a 1′ flat brush and clean water to blend the layers. Note: I spilled some clean water just to the right of my brush. Whatever you do, don’t touch this or you’ll have a nasty blossom on your hands and you won’t be rid of it! I left mine alone and you’ll see no harm was done. Just be careful how you handle this fully loaded brush.

I decided to put in the port holes at this stage. I noticed in the original reference photograph there was a glimpse of the holes in the other side of this container, so I tried to indicate this, as without them this could look like a flat cardboard cut-out. I used two coats of a shadow mixture made from Antwerp Blue and Brown Madder.

I decided to put in the counter and reflections next, so I protected the garlic areas with liquid masking. I always pour a small amount into a cap and keep the bottle well away from my work. Years ago I spilled most of a bottle all over my painting and my studio floor! This way, if I spill any it will be a very small amount.

I put in the basic wash on the counter area, using the same colours as before. I pulled out a few lighter areas but I will be going back in later with a scrub brush to lift out specific highlights

At this point I decided to pick out those little highlights around the ages of the container air holes with a sharp knife, and painted the base shadow. Notice I’ve softened the bottom edge more than the top and gone back in with the darkest tone once this was dry.

[adinserter block=”82″]
From now on this will look messy, but the next wash of dark tones was put in leaving those lighter areas, then some copper colour added to the reflection. I’m still using the same basic colours.

In this extreme close-up I’m using a small scrub brush, water and facial tissue to soften and lift out one of the reflection features. If you’ve never done this, practice on some scrap paper first as the amount of water and pressure you apply will vary and you don’t want to damage surface of your paper. This is why I always use 300 lb. cold pressed paper which can stand a lot of abuse and come up smiling. I had to go back in re-do that dark shadow of course as my scrubbing lifted some out.

Some more lifting and scrubbing starts to blend everything in and begin the technique of making those reflections look real.

Here I’ve placed a standard double mat over my progress to date, to sort of cheer myself up as I prepare to start on the garlic bulb and cloves. The liquid masking has removed much of my pencil drawing so I will have to re-draw this before i begin. After I complete the garlic items I will go back in and polish up that reflection area and make judgements about other areas that need adjustments. Those of you who teach and demonstrate will know the value of a mat at this stage of a project. Students often need to step back from what they’re doing and “see” their progress to date. Even the most experienced of us need a lift at some point in a lengthy realistic project such as this one!

I started painting in the garlic bulb wet-in-wet, using a mixture of Permanent Rose and Antwerp Blue. Unfortunately I failed to leave a highlight on the bulb and will have to go back in later and lift one out. As my old mentor Robert Long used to say “Don’t paint ahead of your brain John!”

Progress up to now. The garlic elements seem to be floating in the air at this stage, but I will anchor them down later when I complete the reflections, shadows and reflected light. Already I find the need to make the copper a richer colour, so I may go back and tinker with that later.

Here is an extreme close-up of some modifications I made to the garlic bulb by lifting out more reflections ready for my final approach.

Here is final result. This had been a very difficult project to photograph as the dark background tends to overpower the camera’s reading of light, dark and colour. No amount of tinkering with my version of Photoshop reproduces the original which has more sparkle. Here I’ve added more copper “colour” to the container and tinkered with the reflections. I hope you found this useful as it involves the use of many watercolour techniques you might adapt to your own personal style.
About John Fisher
I was born and educated in England, graduating from the Luton School of Arts (now Barnfield College) in 1945. It was my hope to become a graphic artist, but at the end of the Second World War returning service men and women had first crack at the few jobs available, and rightly so. I took a number of jobs while I tried to break into my chosen field, and ended up being a reluctant carpenter. Many years passed and I emigrated to Canada in 1952, married a Canadian woman, started a family, and in 1955 finally started on a career which took in graphic arts, owner of my own graphics arts company, art director at an advertising agency, and careers in marketing, advertising and public relations.
I wish I could claim that my passion for art burned brightly throughout those years, but alas, the need to make a living took prominence. As with many people, I always promised myself that when I retired I would get back to painting again. That time came in 1989, when my wife and I were living the winter months in our condo in Destin, Florida. Robert Long, a talented watercolour artist, was offering private lessons from his nearby condo. He was my mentor, and made my retirement years infinitely richer.
In those days Robert taught only technique, and there were rarely more than four to six of us in those early classes. From Robert I regained my interest in photography as an adjunct to painting, and as the cliche goes – I never looked back. I have had many paintings accepted and hung in exhibitions in Florida and Ontario, where I now live. I’ve won some prizes, come first in some exhibitions, and occasionally won the Citizens’ Choice awards. But I mainly paint for fun – hence the choice of name for this site.
To learn more about John and to view more of his work, please follow the link below:

Leave a Reply