About Mary Ann
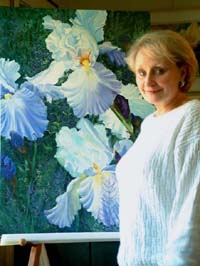
Raised in Mississippi, my interest in art began at an early age, but was secondary to my study of music until at the college level when I decided to pursue art as my major…..then studying Advertising Design, and not taking up watercolor painting until much later when my children were in school all day and I could devote long hours to the practice of painting. Eight to ten hours a day were spent trying to “catch up”. I was driven by the desire to learn the craft and excited when I began winning awards in both local and national shows.
My subjects have been so varied over the years, that I don’t know which is my favorite. As I tackle a challenging subject, and learn the ins and outs of painting it successfully, I move on to another challenge. I, perhaps will never be known for painting one thing all my life, as the world is so full of wonderful experiences that I want to paint them all!
At my ripe old age, I am really having fun learning new things about waterbased mediums, and my latest is painting in acrylics with a palette knife. Using blending mediums and retarders, I can make it feel as if I am painting with oils, yet they dry much faster. It is fun to get three-dimensional textures to my work. Another avenue, another adventure. I try to upload images frequently so that my students and the public can see what I am up to! It is fun, and I encourage your responses to what I produce…
Mary Ann’s Websites:
https://www.watercolor-painting-tips.com/ – Great website loaded with free watercolor painting tips and techniques.
https://www.maboysen.com/ – This is Mary Ann’s personal Website. Learn more about her and view her exceptional work.
https://www.youtube.com/user/maboysen – This is Mary Ann’s YouTube page . Visit today to watch her video lesson and demonstrations.
Watercolor Blooms – Making the Best of the Bloom
By Mary Ann Boysen
My first watercolor instructor, a very fine artist, was opposed to using watercolor blooms. I assume that because his paintings are highly detailed and controlled works, that he found no use for these so-called mistakes. They do begin as mistakes when you are first learning to paint, but I have discovered a way to make them work for me…especially in flower paintings.
At this time, try to force a bloom on your watercolor paper. First, lay down a colorful wash. Any color. Then dip your brush in water, swirl it around if you like, and then, without blotting it on a towel, touch it to the paper where your wash is. Have your painting surface rather flat; not too tilted.
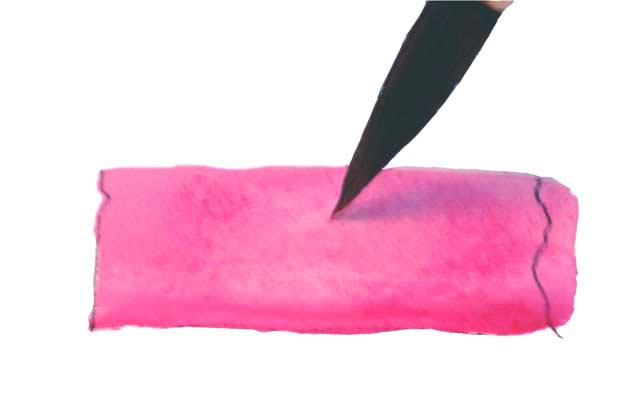
You need not rub it around. What you have just done is add more water to a portion of the wash, and this water will force the pigment into a circle. The edges will be rough, and look somewhat like ruffles. If you do not want this look in your painting, then you must not go back into a wet area with a very wet brush. It is advisable to allow a wash to lose its shine before adding another color. Even then, you must be sure that you brush is not loaded with too much water.
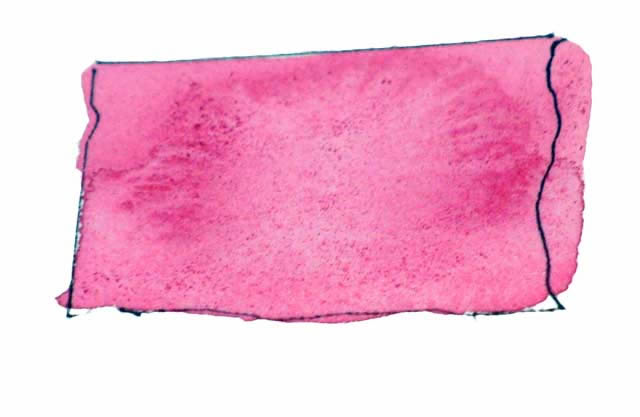
Another way to cause watercolor blooms is to put a very wet wash of color across your painting surface. Tilt the surface slightly or even more drastically. Allow this wash to dry. Notice that the color has drifted to the bottom of the page, and when it had nowhere else to go, it started floating upward again….thereby causing another type of bloom.
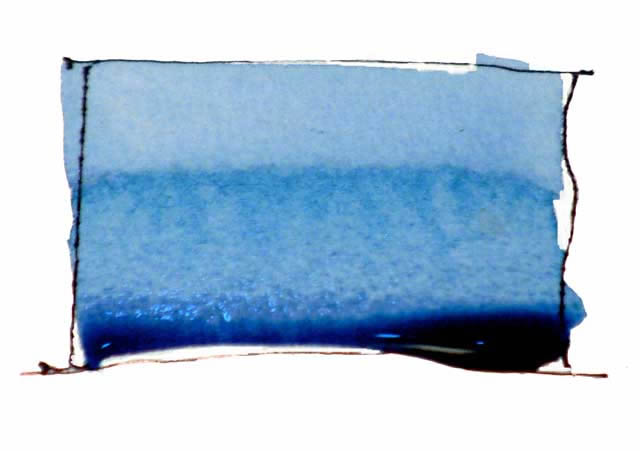
These are the kinds of watercolor blooms that you usually have no use for. Therefore, you should soak up the extra wet pigment as it collects at the bottom of the paper. Illustrations below.
By doing these intentionally, you will learn just what causes watercolor blooms. To avoid problems (if you think they’re problems) like these, there are steps you can take to avoid them. When you dip your brush in water and then color, slightly blot the excess water on a paper towel or sponge. Blot at the ferrule end so that the towel will absorb more water than pigment. Also, if you allow your wet paper to lose its shine, the addition of more color will not cause a bloom.
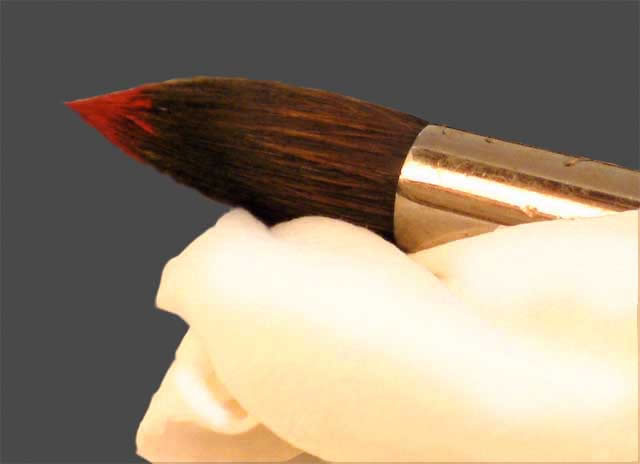
If your paper is tilted quite a bit, and you are doing very wet washes or glazes, you must be attentive to the puddle at the bottom of the wash, or at the bottom of the paper. You can take the very tip of a towel to touch that puddle and it will be absorbed into the towel. Allowing the paint so be soaked up in the towel is much more effective than blotting the color.
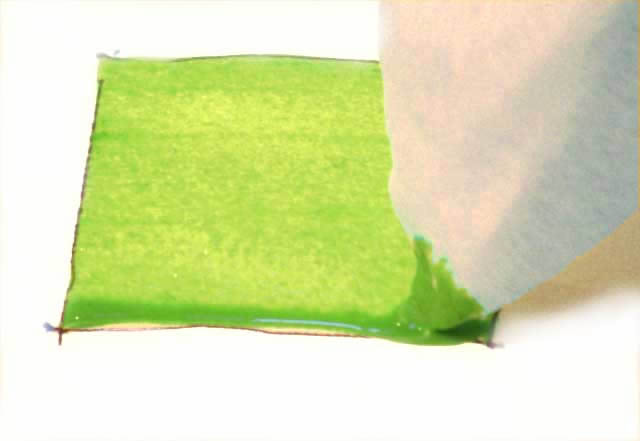
If you blot it with pressure you will lift the entire color!
To make use of the watercolor blooms, let’s try painting a bearded Iris. The petals of these flowers are slightly ruffled at the bottom, or they appear that way. So when I make the stroke that forms the petal, I allow the color to slide to the bottom and create that appearance without having to labor over doing it with brush strokes. If I haven’t made the wash wet enough, I can always drop a little water into the petal while it is still damp, and the same thing will happen.
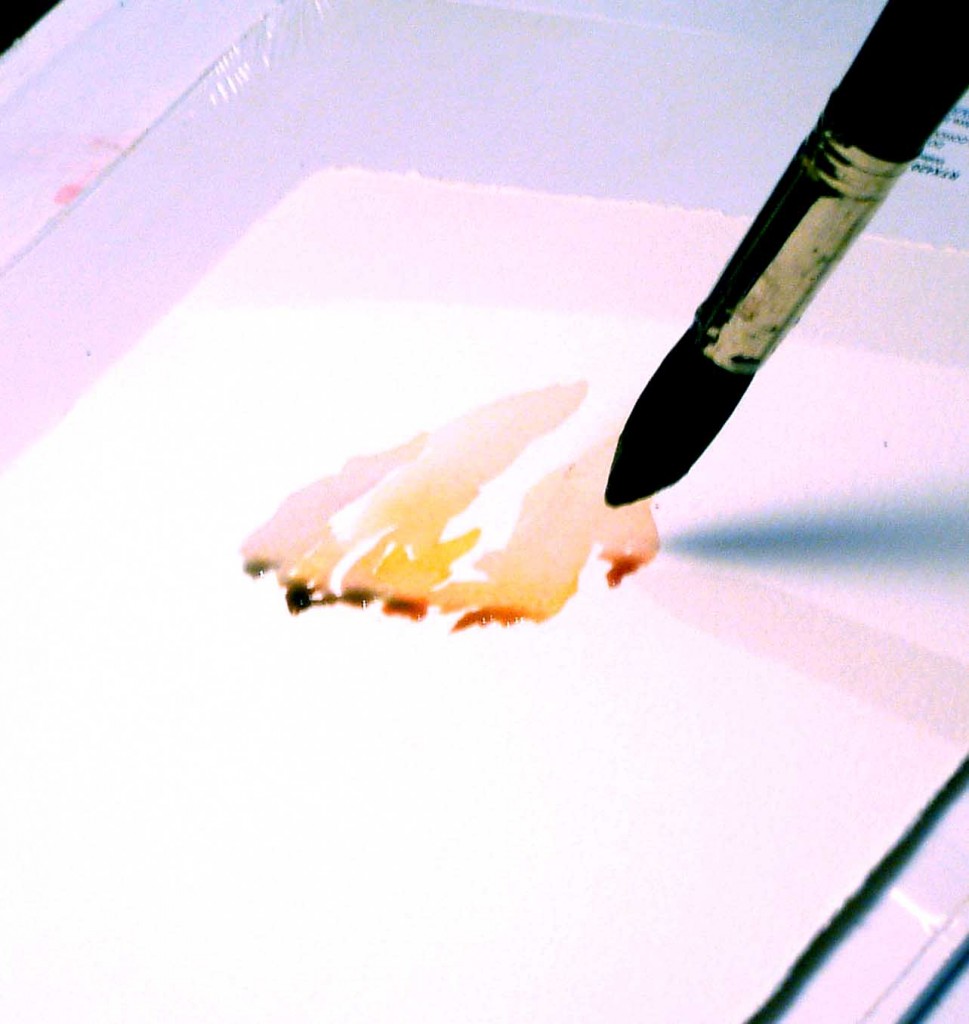
Working on a small piece of 200# Waterford Cold Press watercolor paper, this is my first wash depicting the top petals of the Iris. I rarely draw a flower first, because I love the spontaneity of the color as I lay it down. I am not inhibited by the lines, and can drop color in at random.
Of course, there is nothing wrong with drawing it first, but you should really try a loose approach. It makes you think in shapes, and work the brush to create these shapes with simple movements. My board is tilted about 20º to allow the pigment to flow and puddle. I could not photograph it in the upright state for fear it would drip down the page.
Learning to paint without drawing will be in a future newsletter. It is easily applied to flowers, but more importantly it can be used in architecture…and even figure painting.
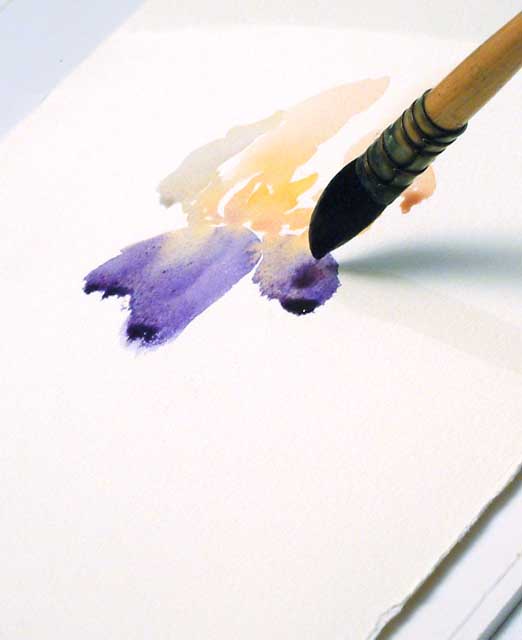
Before the color of the top petals dries, I begin the lower petal wash allowing the previous wash to bleed into it. This ties the two together with a fresher look. Detail will be added later. I have always told my students, “Detail comes at de-tail.”
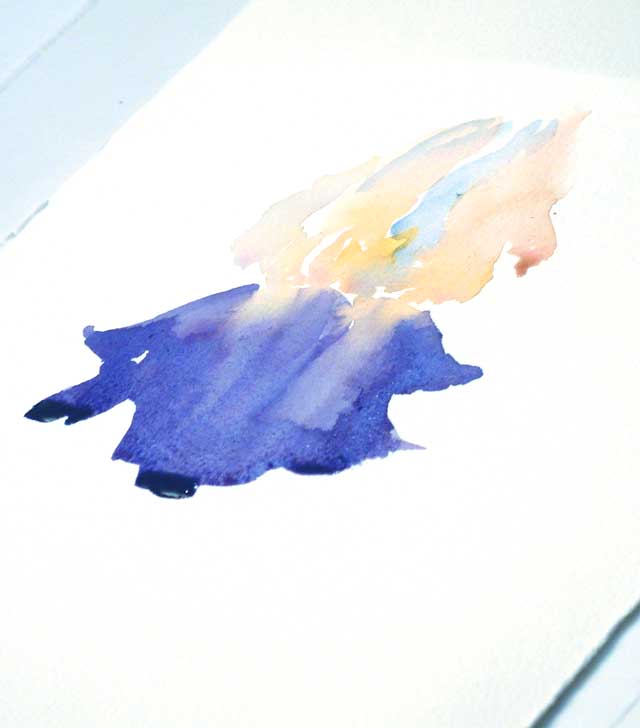
When the lower petals are painted, notice the pigment and water pile up at the bottom of the petal. This is the time when backwashes or watercolor blooms will begin to work for you. The pigment (unless it drips off the page) will have no where to go, and as the water evaporates, the pigment seems to run back into the painting.
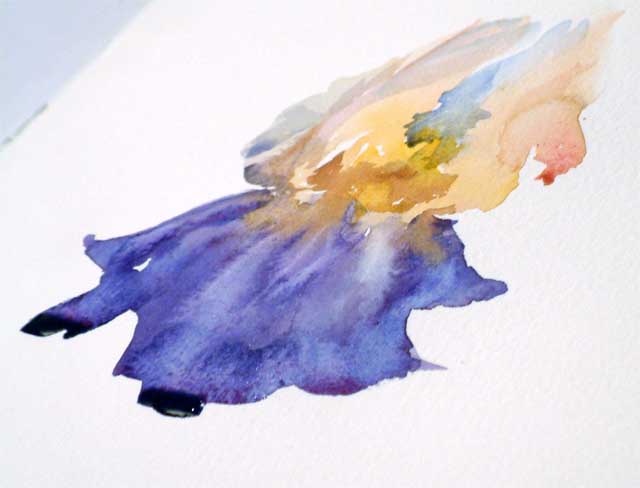
While the pigment is beginning to run back up into the petal from the bottom, I worked on the more intense color in the upper part. You can begin to see the watercolor blooms in this illustration. I also took a small brush filled with water and drew it down into the blue petals to create more backwashes in a linear form.
When the first Iris was dry, I added a second one behind it and tilted the photo just a bit more vertical so that you can see the detail. Notice, at the point of the arrows, the backwashes at the bottom of the petals and also in the throat of the darker Iris. More detail was painted into the throat of the first iris with a little less water on the brush. I actually planned this “so-called” mistake that so many artists think should be avoided. You be the judge.
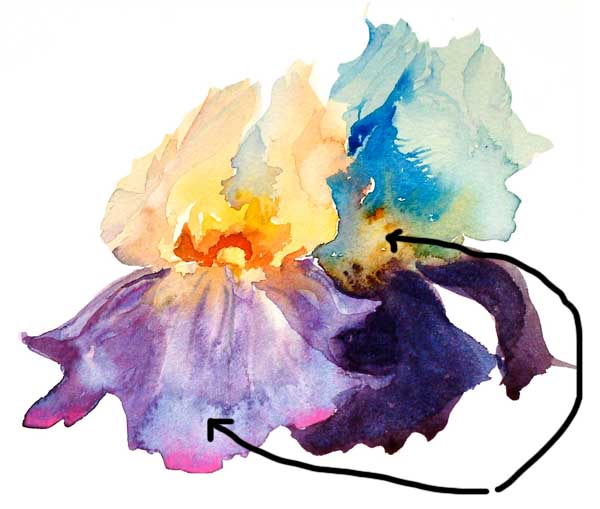
When painting flowers and delicate subjects,try to never use heavy pigment when working on watercolor paper. It begins to look dull and pasty. In working on watercolor canvas, I have used more opaque pigments with some success, and they look more like oil or acrylic paintings.The heavier pigment work well on the watercolor canvas but I do not get the ruffled edges without painting them. On paper, I allow the water to help create the effect. It is my belief that watercolor is the only medium that does not require laborious brush work to create effects, if you just give up a little (or a lot of) control and let the water do the work!
We can also use watercolor blooms in a landscape. First paint in your mood, your sky, and cover the entire paper with these washes. Never paint just down to the horizon, as the color of the sky is usually reflected in everything in the foreground landscape. Sometimes you will have a body of water in the landscape, and it is important to paint the sky color into the foreground, since the water reflects the sky.
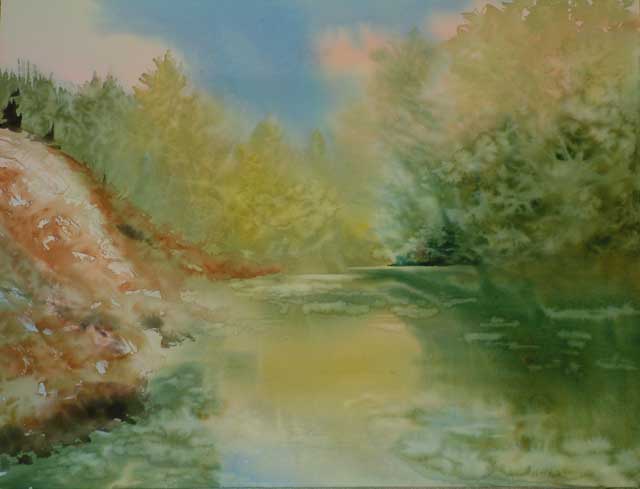
Paint background trees, whether dark or light in color. Allow the pigment to lose its shine. You can see the shine when held up to the light. That is the water that is still sitting on the surface of the paper… or whatever surface you are painting on.
In this painting I put in pale yellow green foliage, as if sunlight is filtering thru the trees. Then, when almost dry, I loaded the tip of a round brush, and brushed lightly back and forth to simulate leaves and limbs.
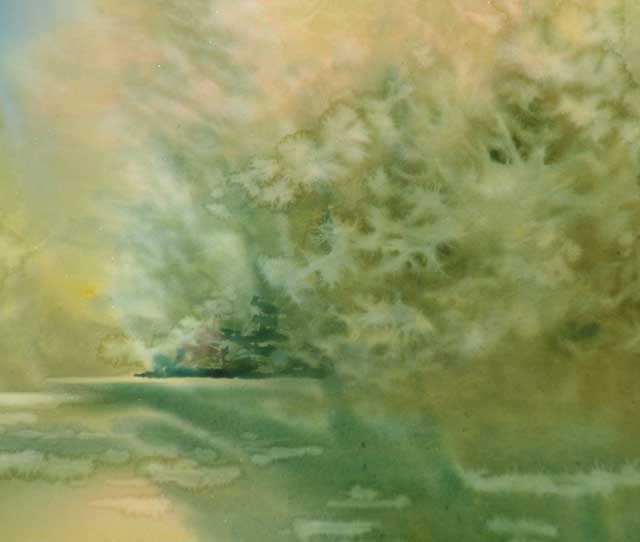
The water pushed aside the pigment, creating the watercolor blooms that we have been discussing. They have feathered edges and add to the visual as leaves and sparkle. I even added strokes in the stream of water to be leaves and rocks on top of the surface of the water.
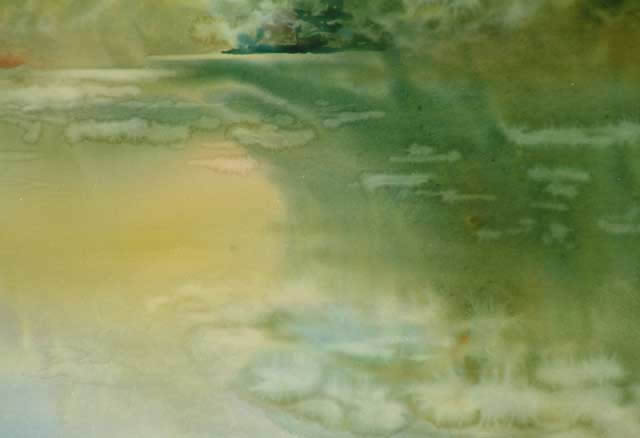
I also used this technique in the hillside to the left to simulate leaves on the ground. I will go back into the painting with darker pigment for those trees and leaves that are silhouetted against the light.
See the details of the Watercolor Blooms
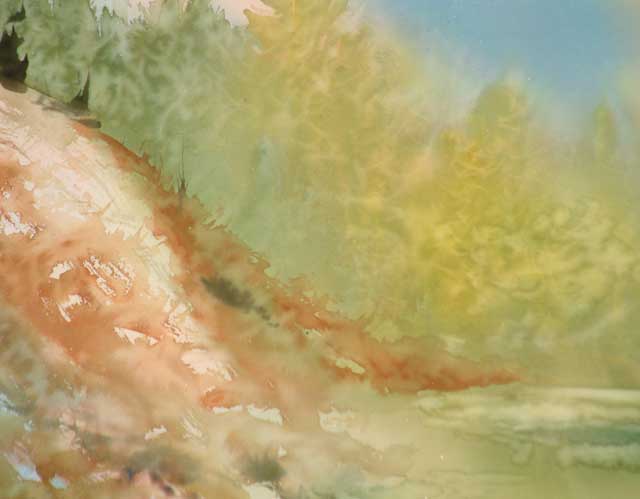
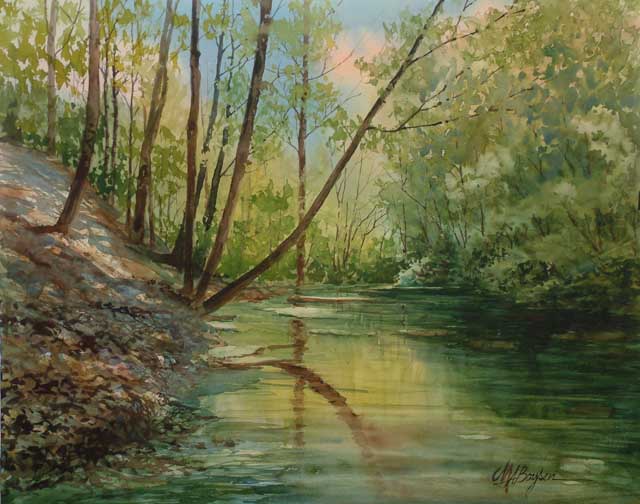
To finish the painting I added all the silhouetted tree trunks, and with a number of glazes of color, I darkened the shadows and some of the leaves. In doing so, I painted over many of the watercolor blooms, but this is OK, as we always should hide our technique whenever possible. To have a painting that is only blooms, doesn’t show our ability to finish a painting. Here is the finished painting: Woodland Spring
It is fun and relaxing to paint this way… No real attention to detail unless I need it later. I always said that watercolor will paint for you is you let it, and this is an example of just that! When you drop the water in, just let it “do its thing”. Wait, give up control, and watch what happens.
Love the variety of information and free flowing guidance. I have wonderful admiration for all paint mediums and styles, and watercolor is one that I feel is really very fluid in all creative movements of the brush or tool. Enjoy your talent as much as possible, I hope to return the favor also! 😉 Liz
Mary Ann,
thanks for this post, I really enjoyed it! This post was really interesting – thanks so much for sharing!
I love this page!! I was searching for a list (if there is one) of the colors that ‘bloom’ instead of just lay there?