Teapot and Daisies a Step by Step Watercolour Painting Tutorial
A class project for the Testa Heights Art Club
[adinserter block=”86″]
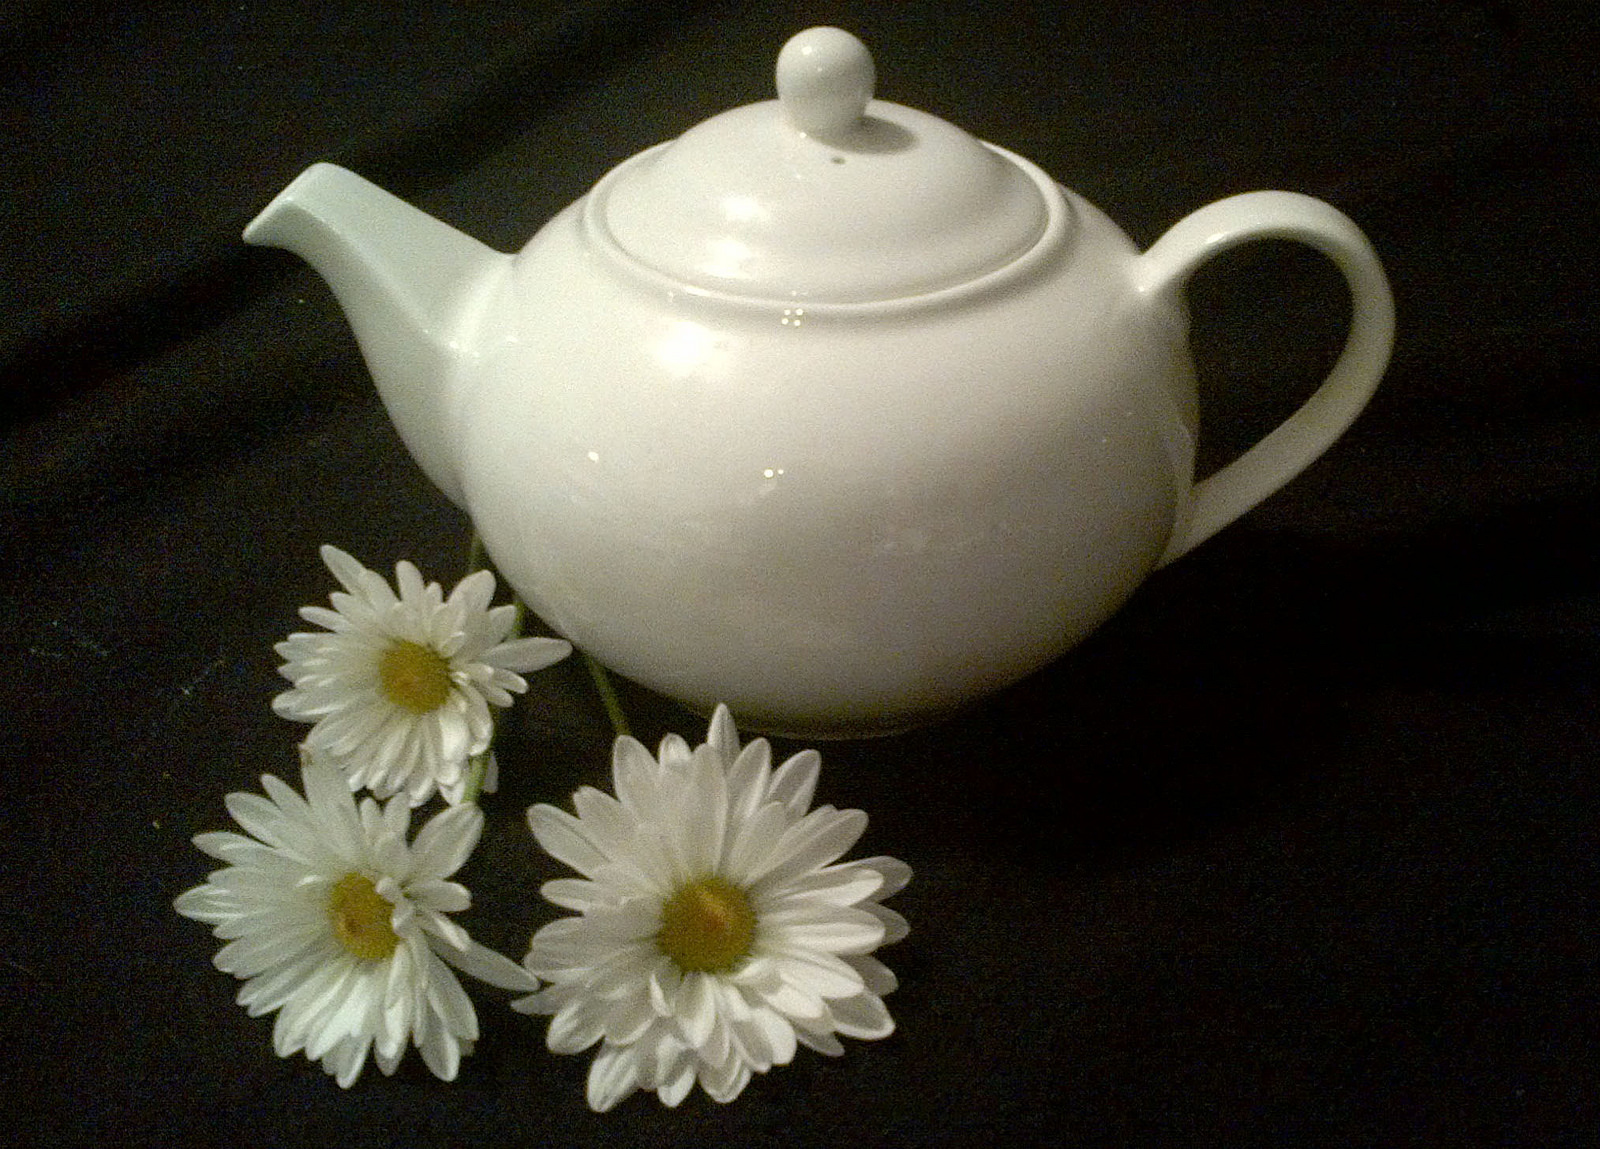
This simple little still life was a class project from a photograph supplied by student Barbara Elliot, and used with her consent. Image size 11 1/2″ x 14″ on 300 lb Arches cold pressed paper, using Winsor & Newton Artist Quality colours. This step-by-step will be posted as usual on my Flickr page in case anyone misses a class and we invite anyone out there to join in the fun. This proved very difficult to photograph as I’m not a professional with sophisticated equipment and the subtle tones of white on white are hard to capture. I used a mixture of Canon Powershot SD750 and my iPhone5 which I found useful for extreme close-ups. Hence the lighting will vary.
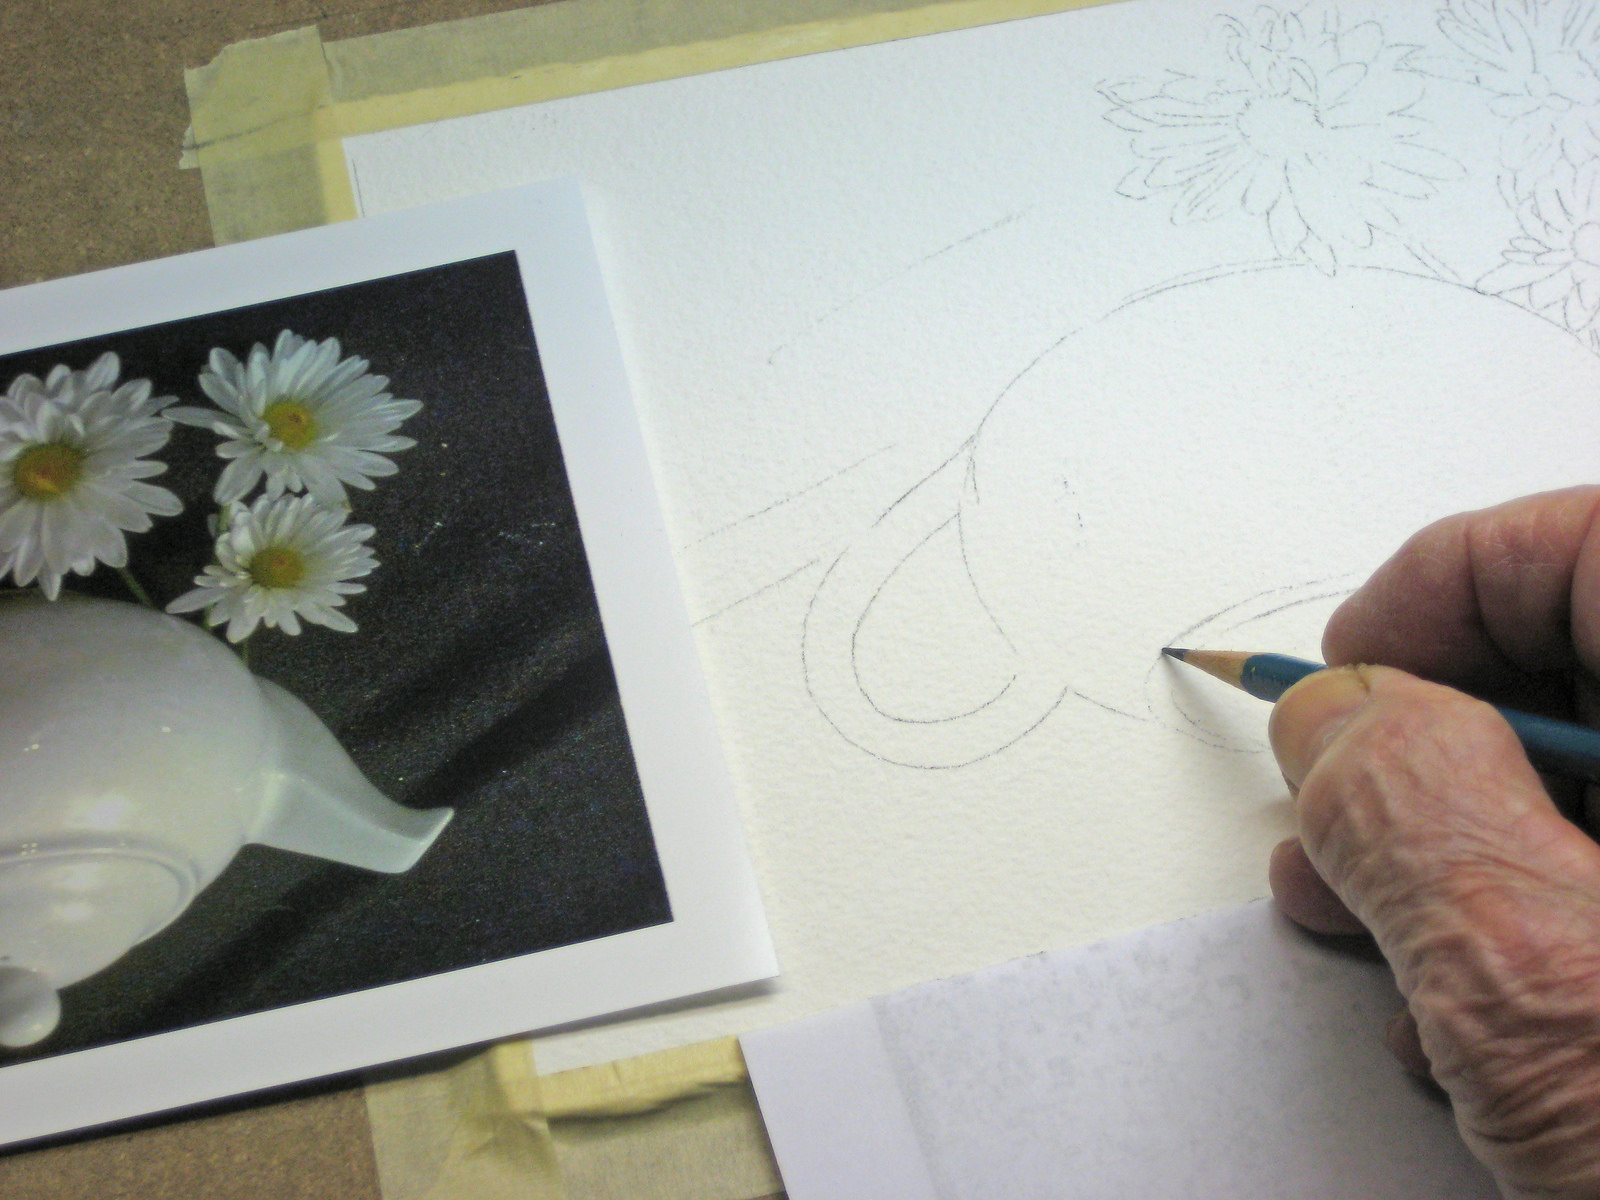
Although we use tracing aids to help get our image on paper I encourage you to re-draw the first rough tracing. Keep the first tracing as light as possible so you can better interpret the reference image and learn “see” what is in your photograph. You’re all beyond the beginner stage now and I encourage you to develop your own style and decide what to put in and what to leave out. As you re-draw this be sure to turn your board upside down as you will find curves easier to render. If you are left-handed you may want to use this method even more.
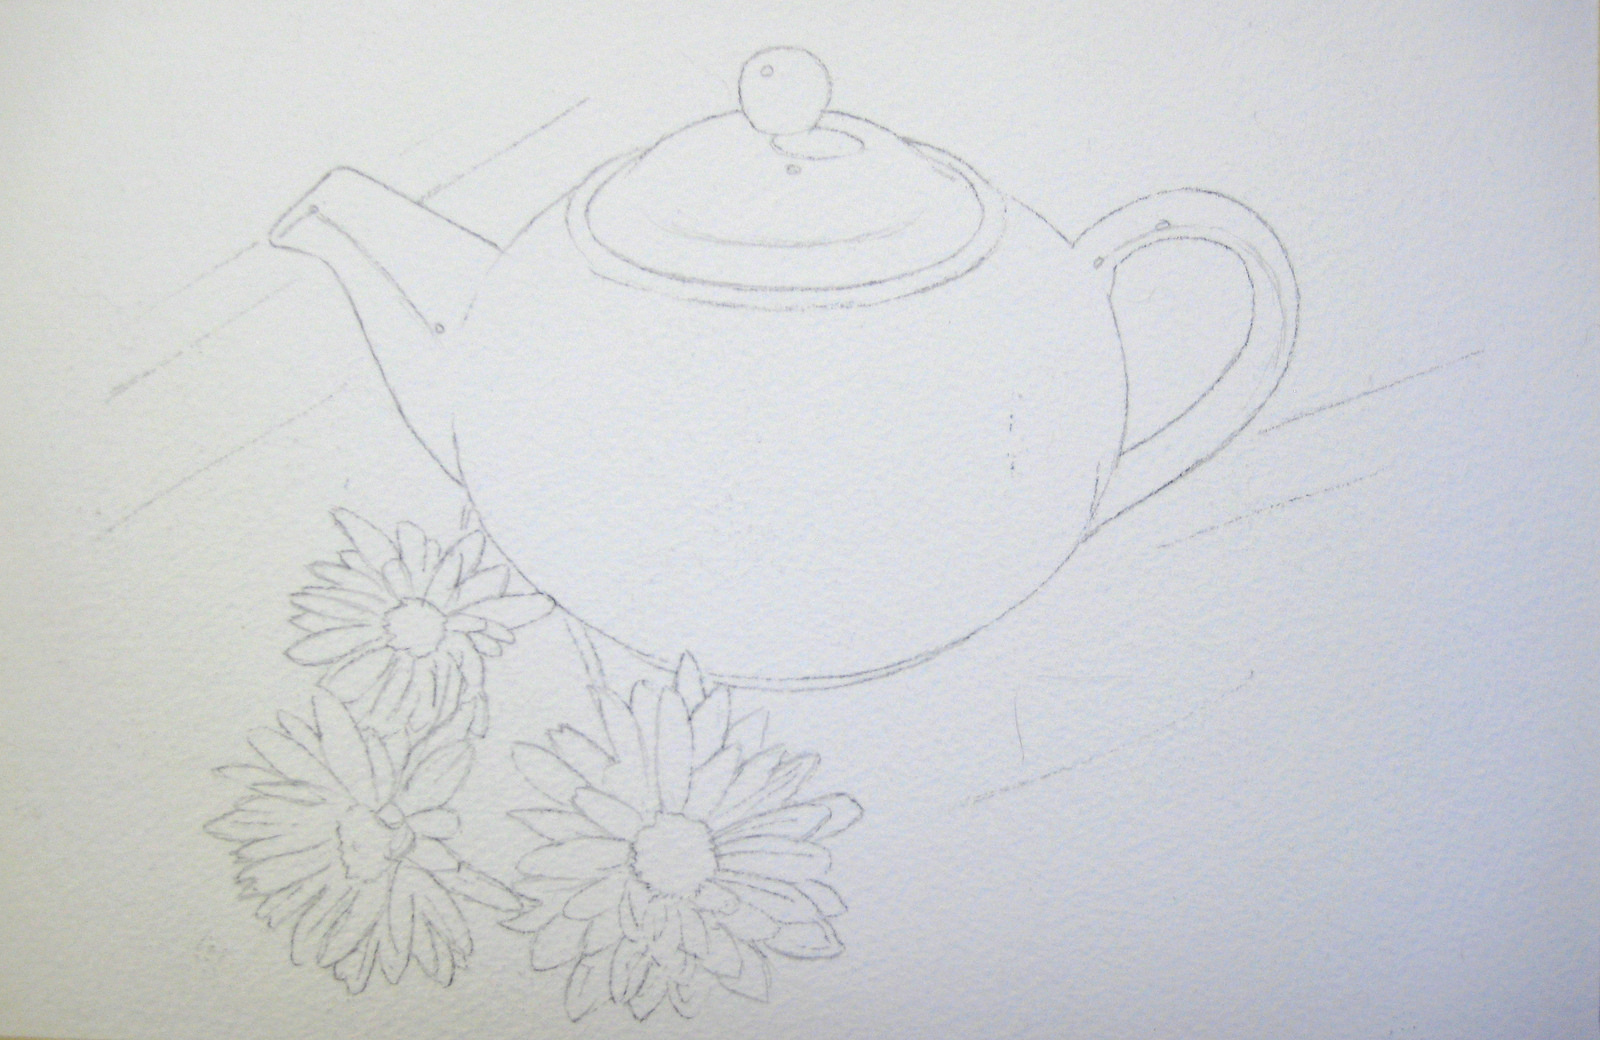
Here is my re-drawn version of the project. Yours may differ and that’s fine. Keep your pencil lines as light as possible as we’re working white on white, which is tricky in watercolour. Note I have indicated some highlights for liquid masking. The other light areas will be lifted out later with a small scrub brush.
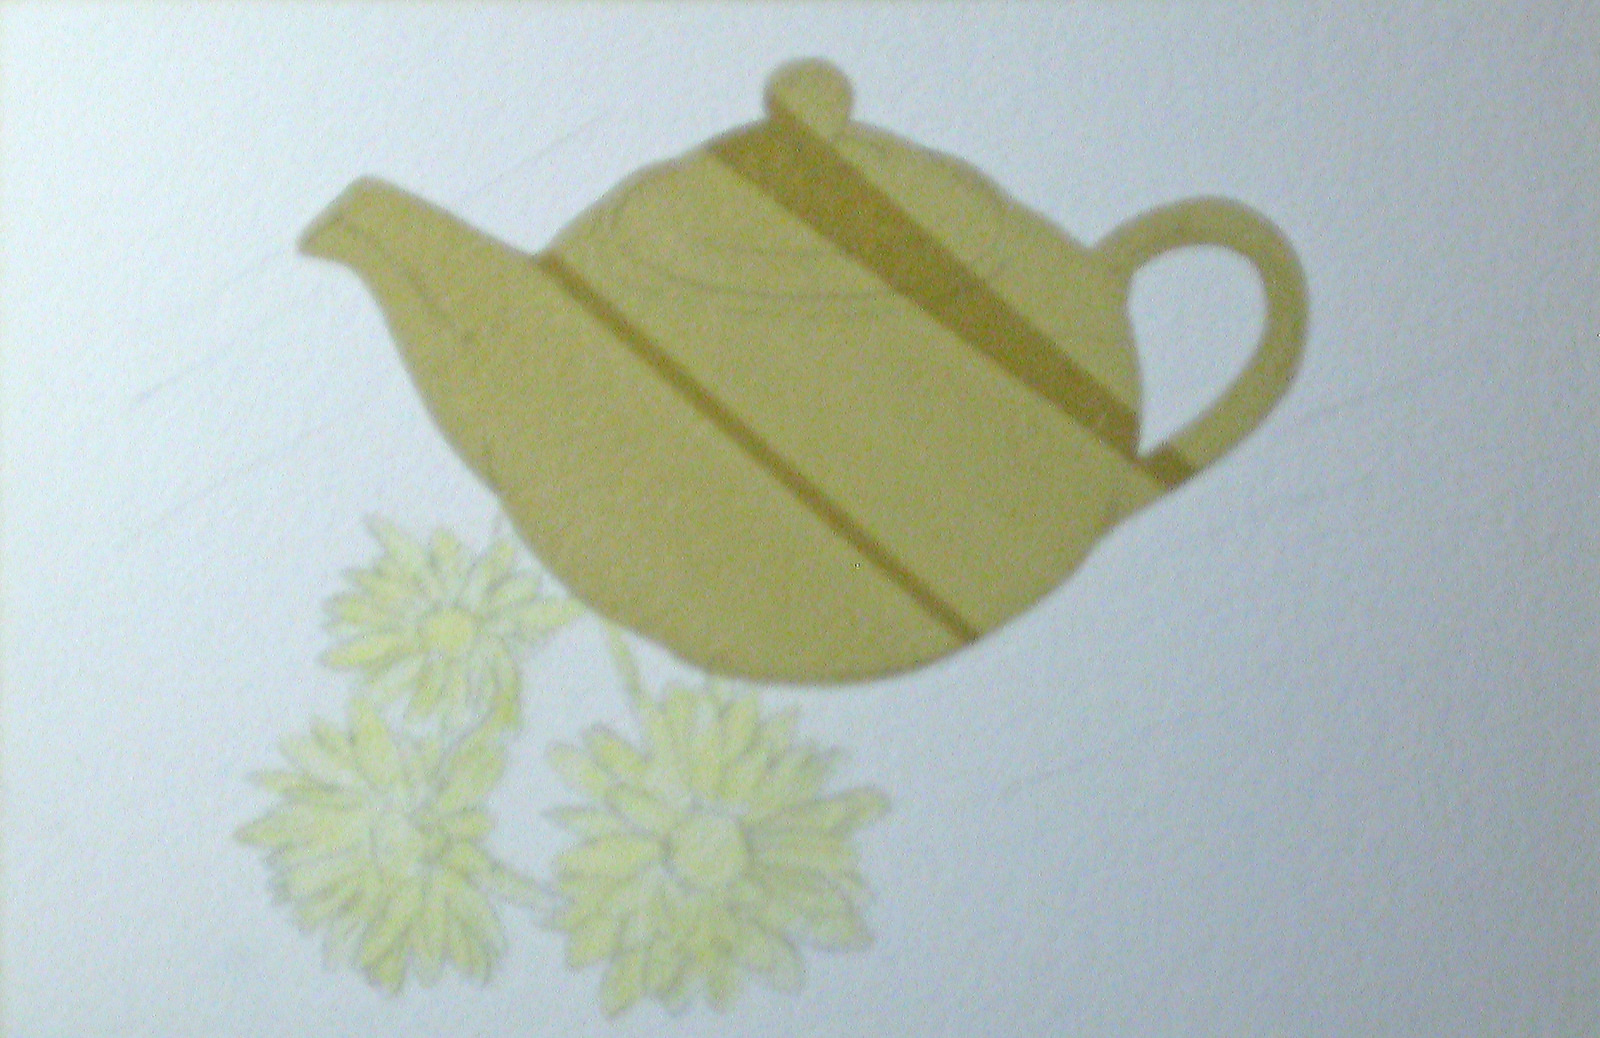
I usually paint my centre of interest first and put in the background later, but working with white on white made this difficult in watercolour, so I decided to put the dark background in first. Here I’ve used a combination of postal tape and liquid masking to mask off the white teapot and Daisies. To get a clean, sharp edge to the teapot I used a sharp Olfa knife to trim the tape. You can use liquid masking of course, but remember to carefully paint around the contour as the slightest error will show up and your teapot will look bumpy. Practice this first on scrap paper.
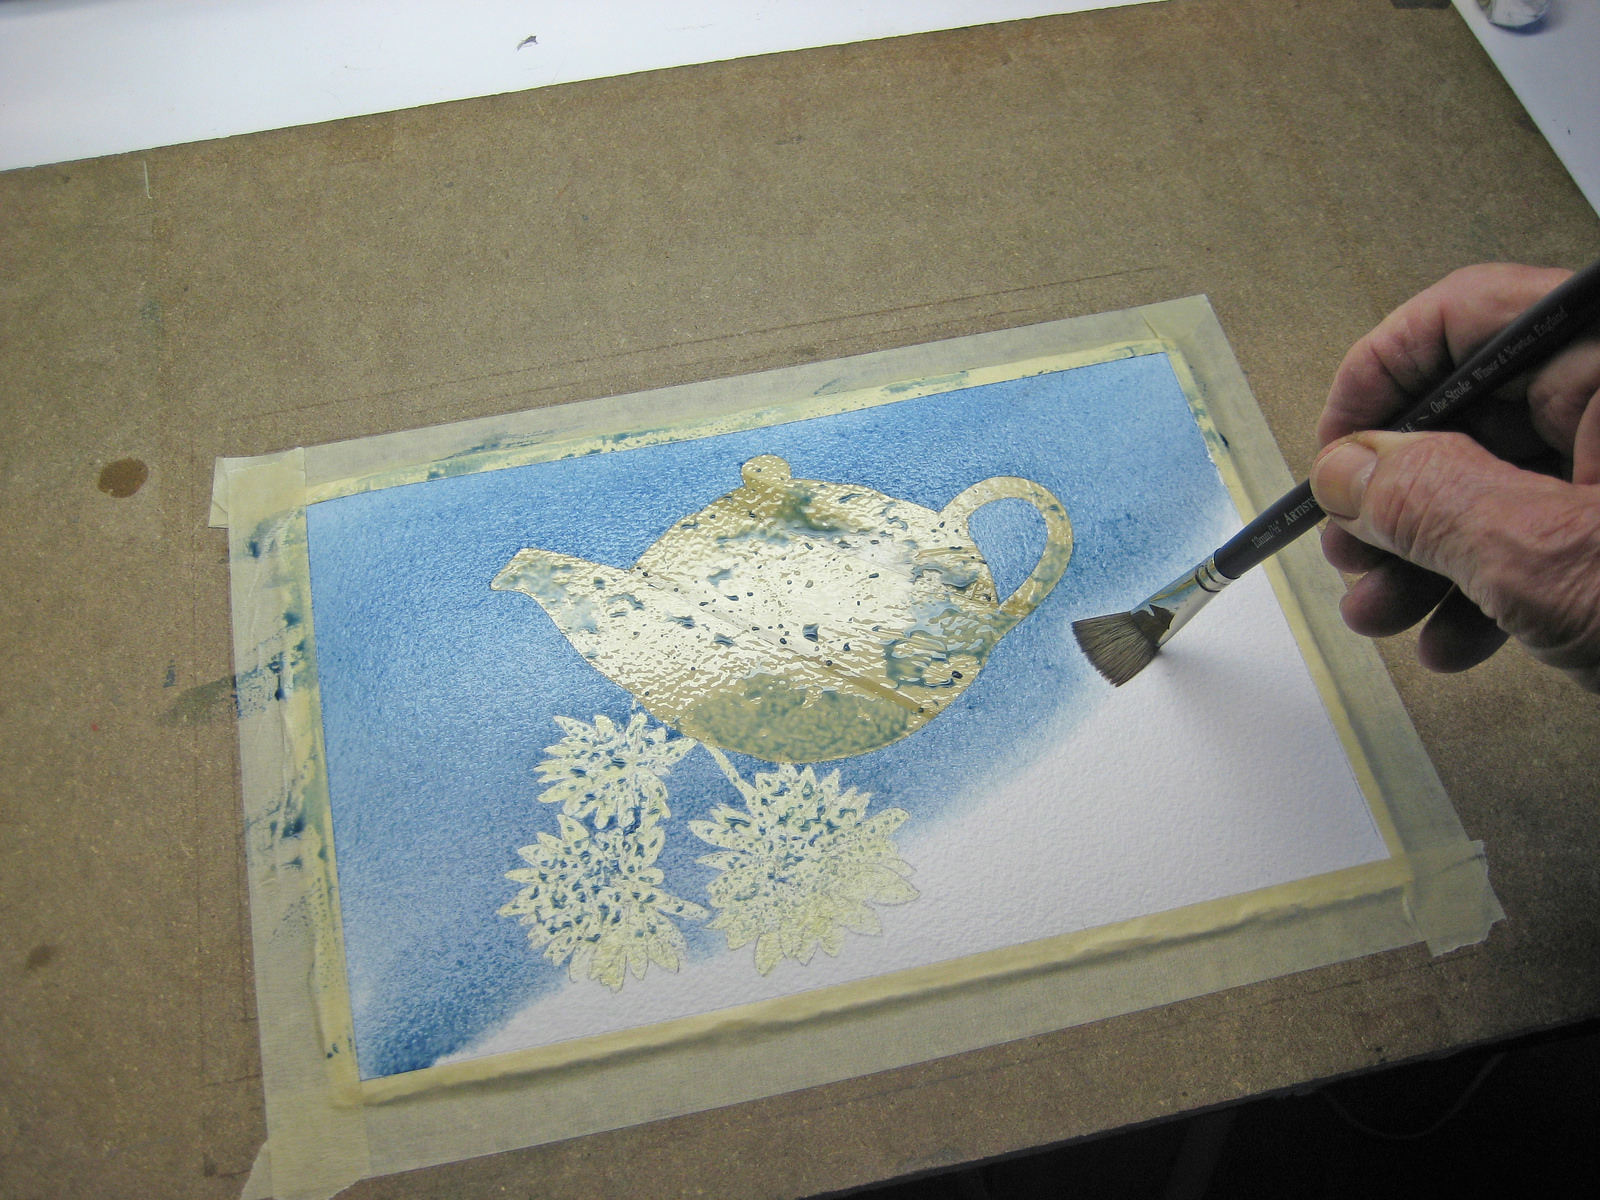
At this point I was undecided on just how to render this background area, so I worked wet-in-wet using a mixture of Antwerp Blue and my standard shadow colour made from Antwerp Blue and Brown Madder. I decided to follow the diagonal shadow shapes in the original photographic reference in case I wanted to emphasize tonal values.
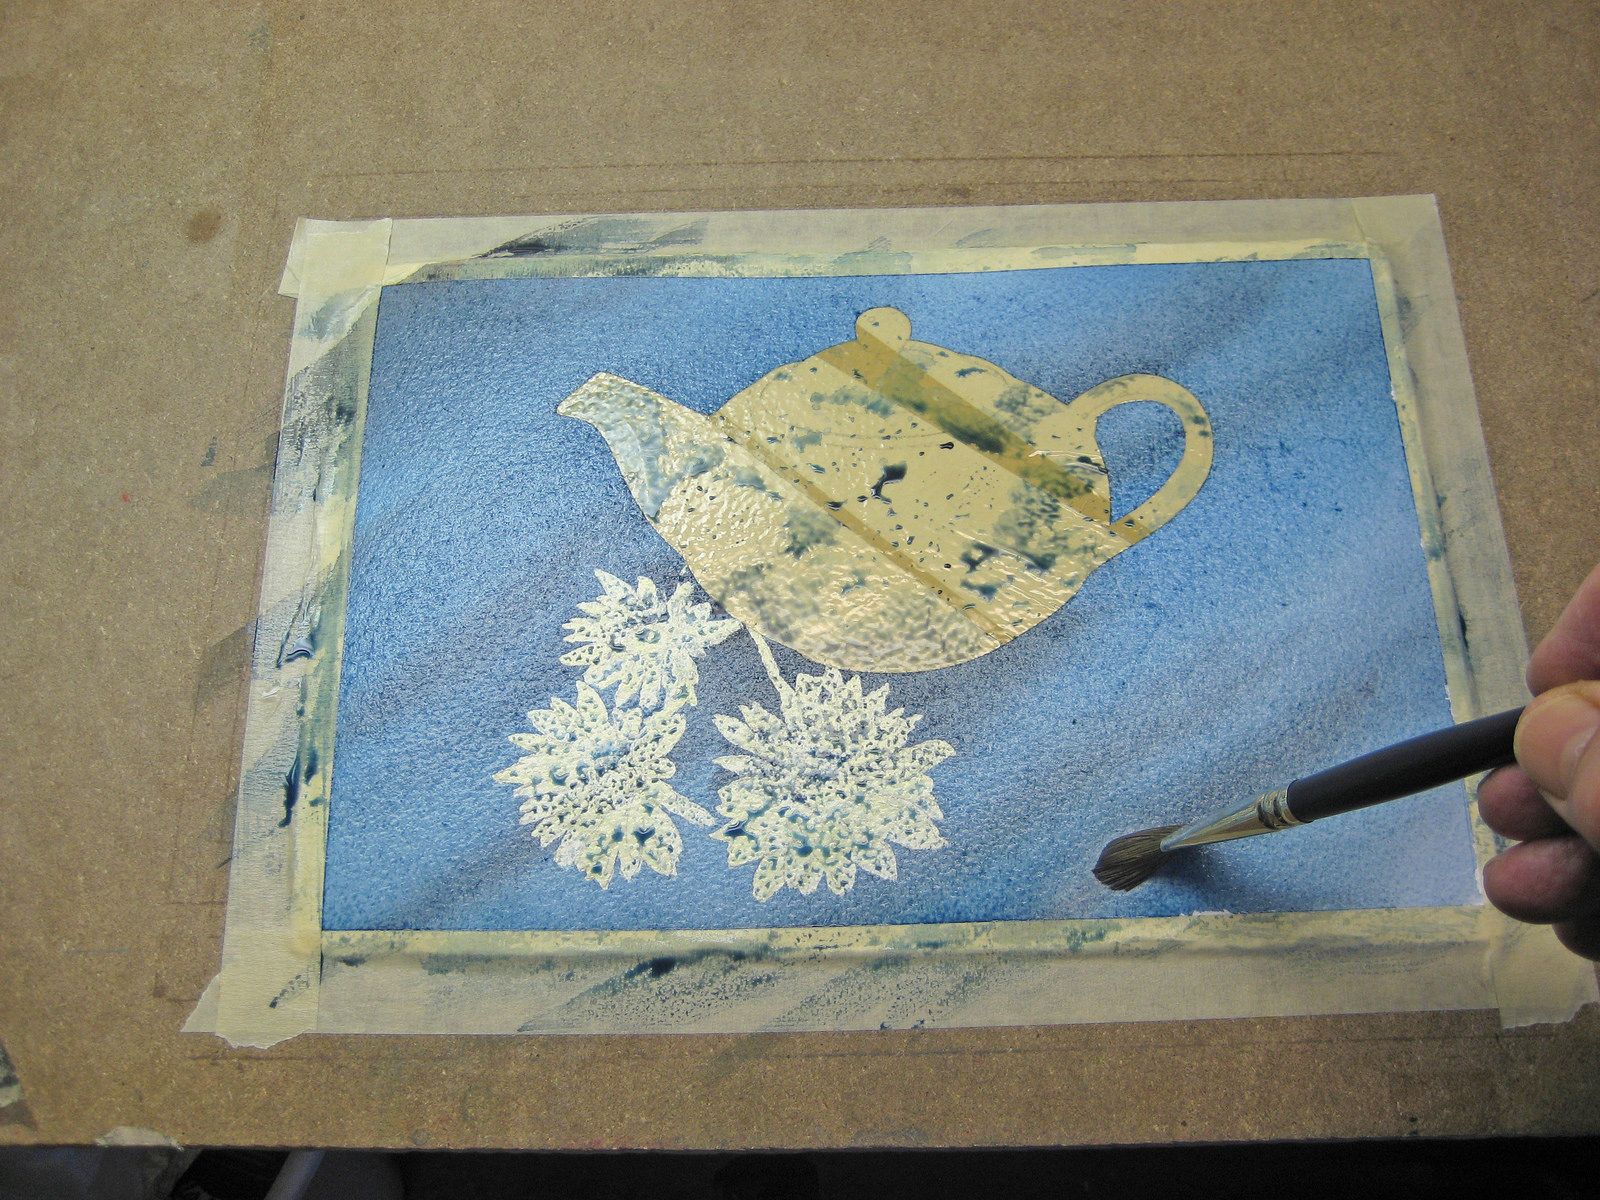
Still working wet-in-wet I darkened my basic blue background and kept my diagonal strokes to see how it looked.
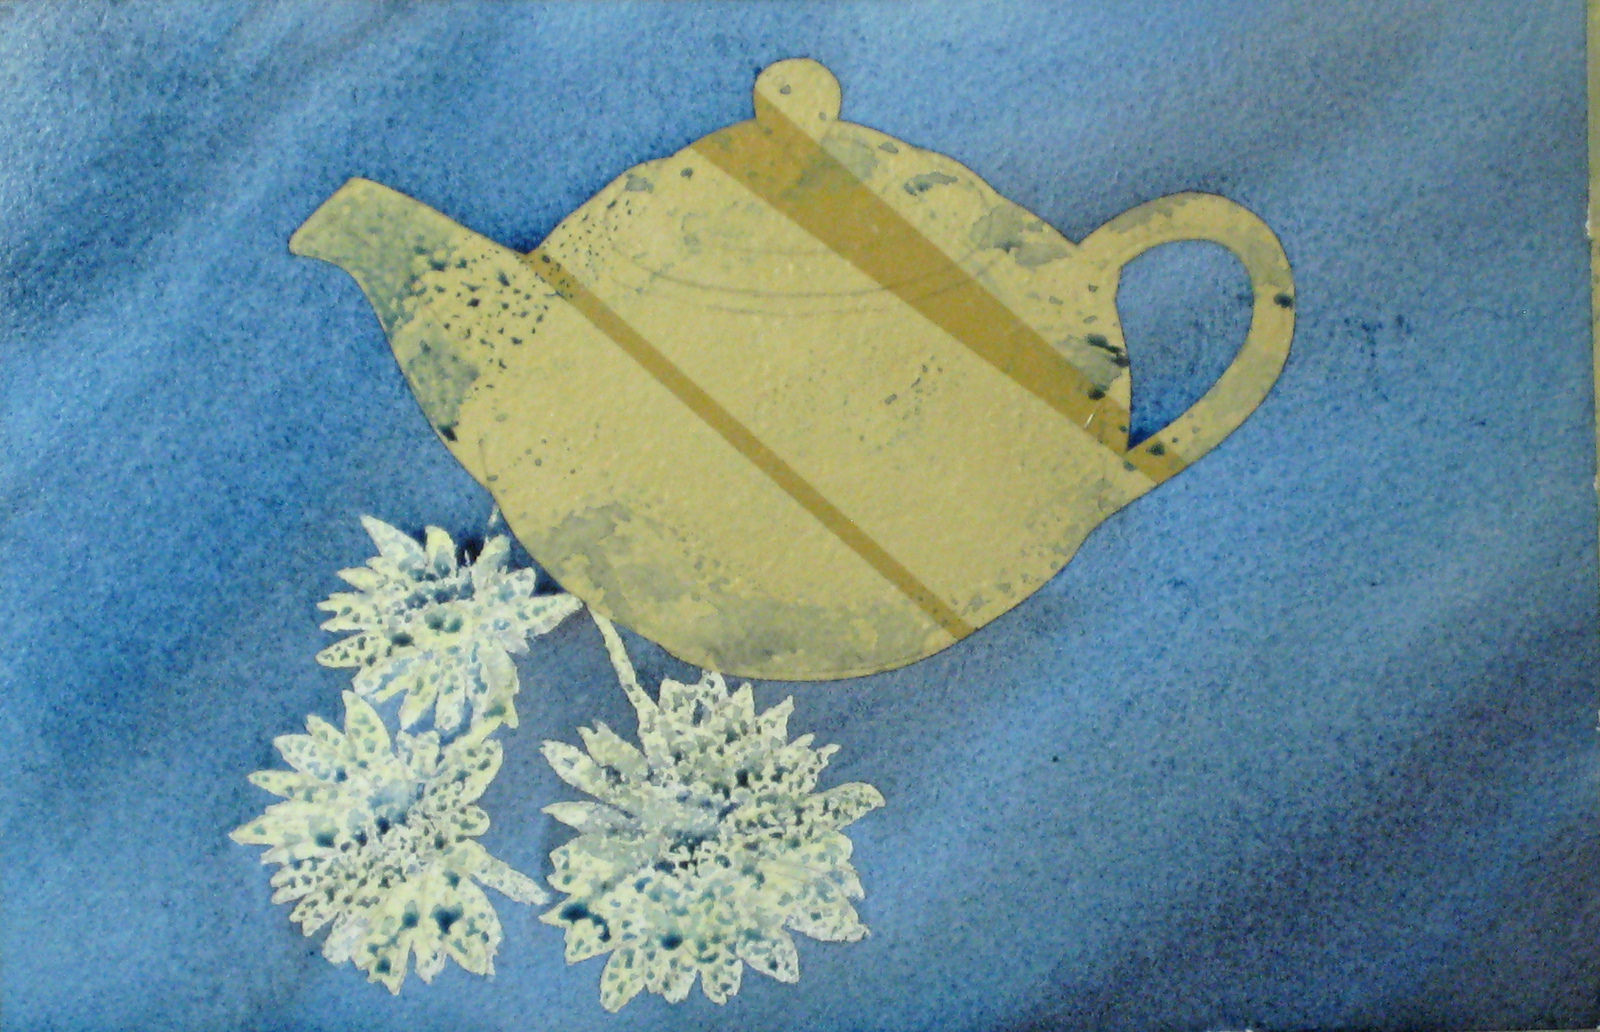
The result wasn’t quite what I wanted so I let this dry before moving on.
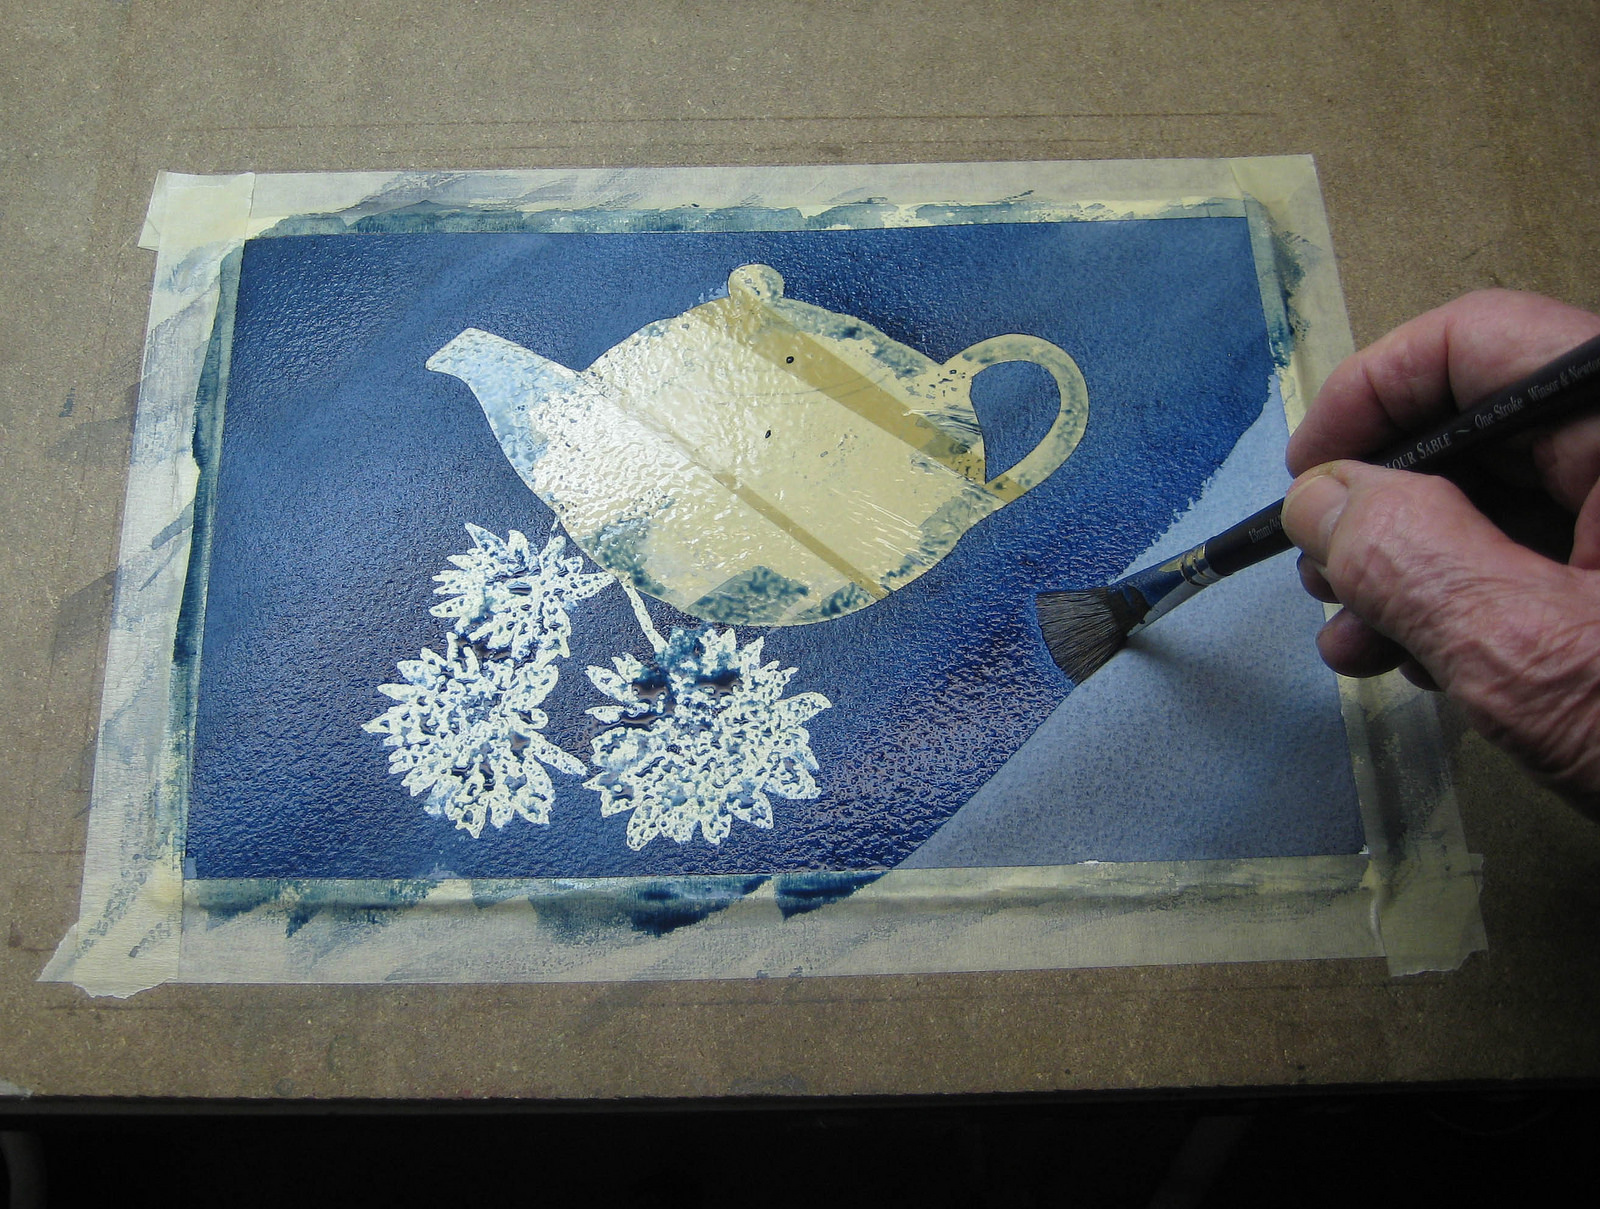
Now I’m working wet on dry and applying another darker mixture of Antwerp Blue, some Winsor Blue and a touch of Brown Madder. Later I will add some shows under the teapot and Daisies to anchor them down.
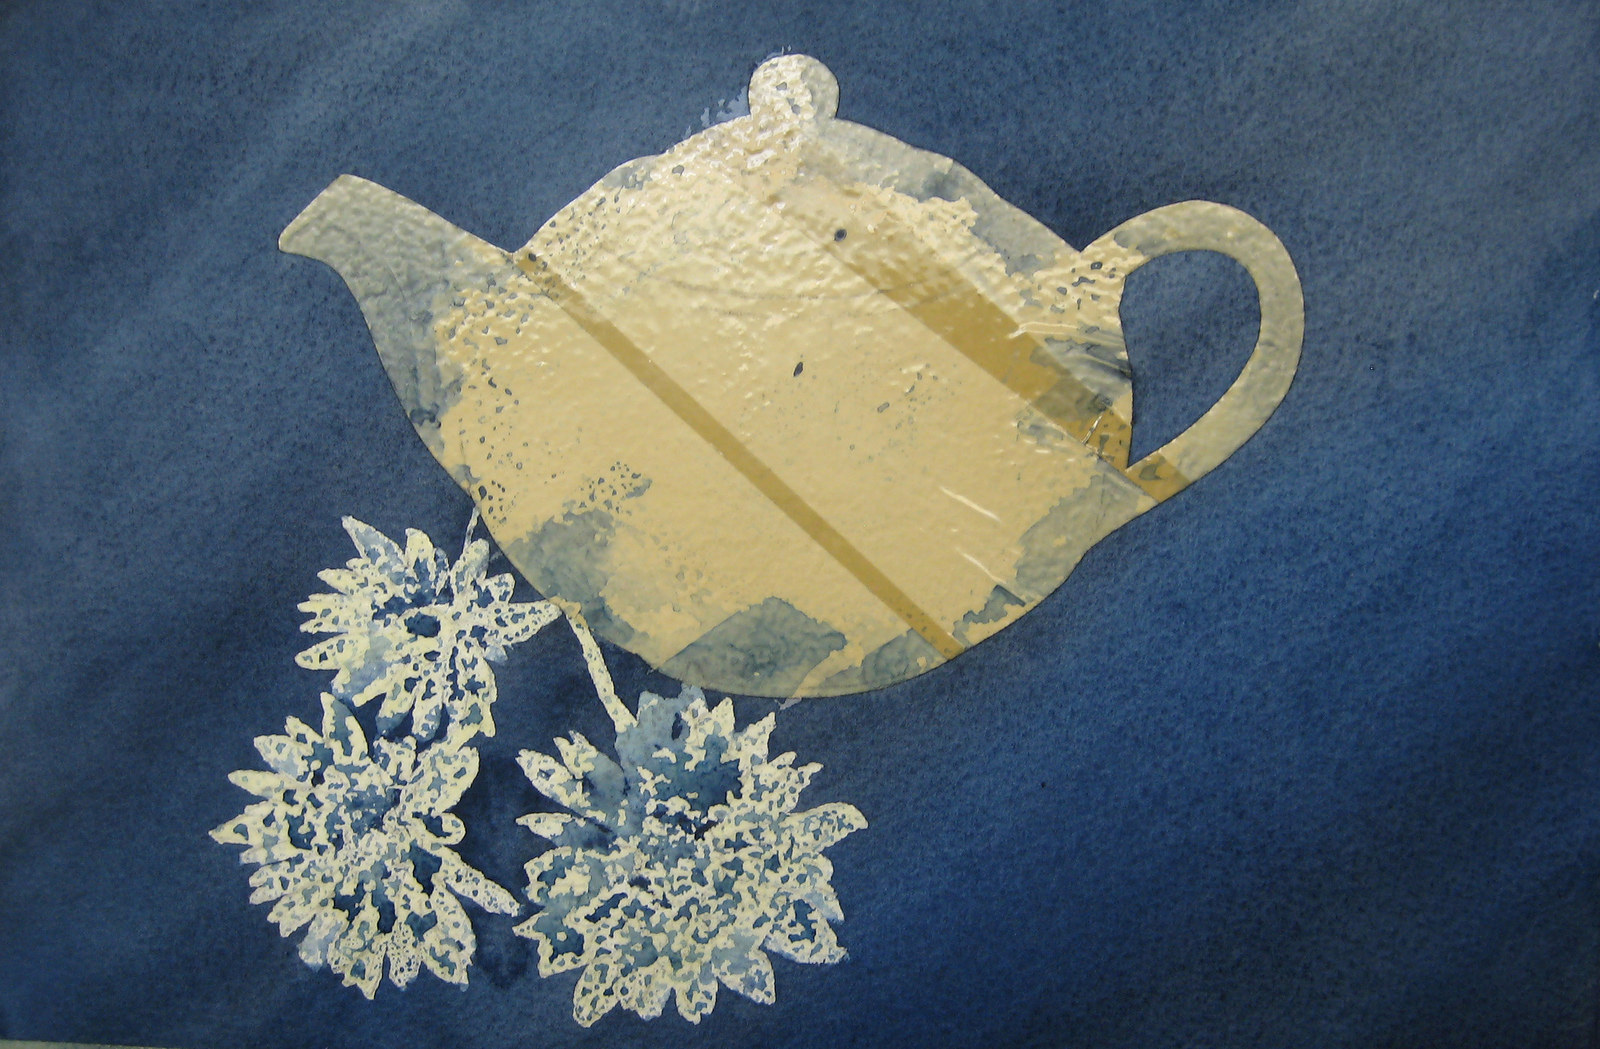
This seemed more in keeping with the subject.
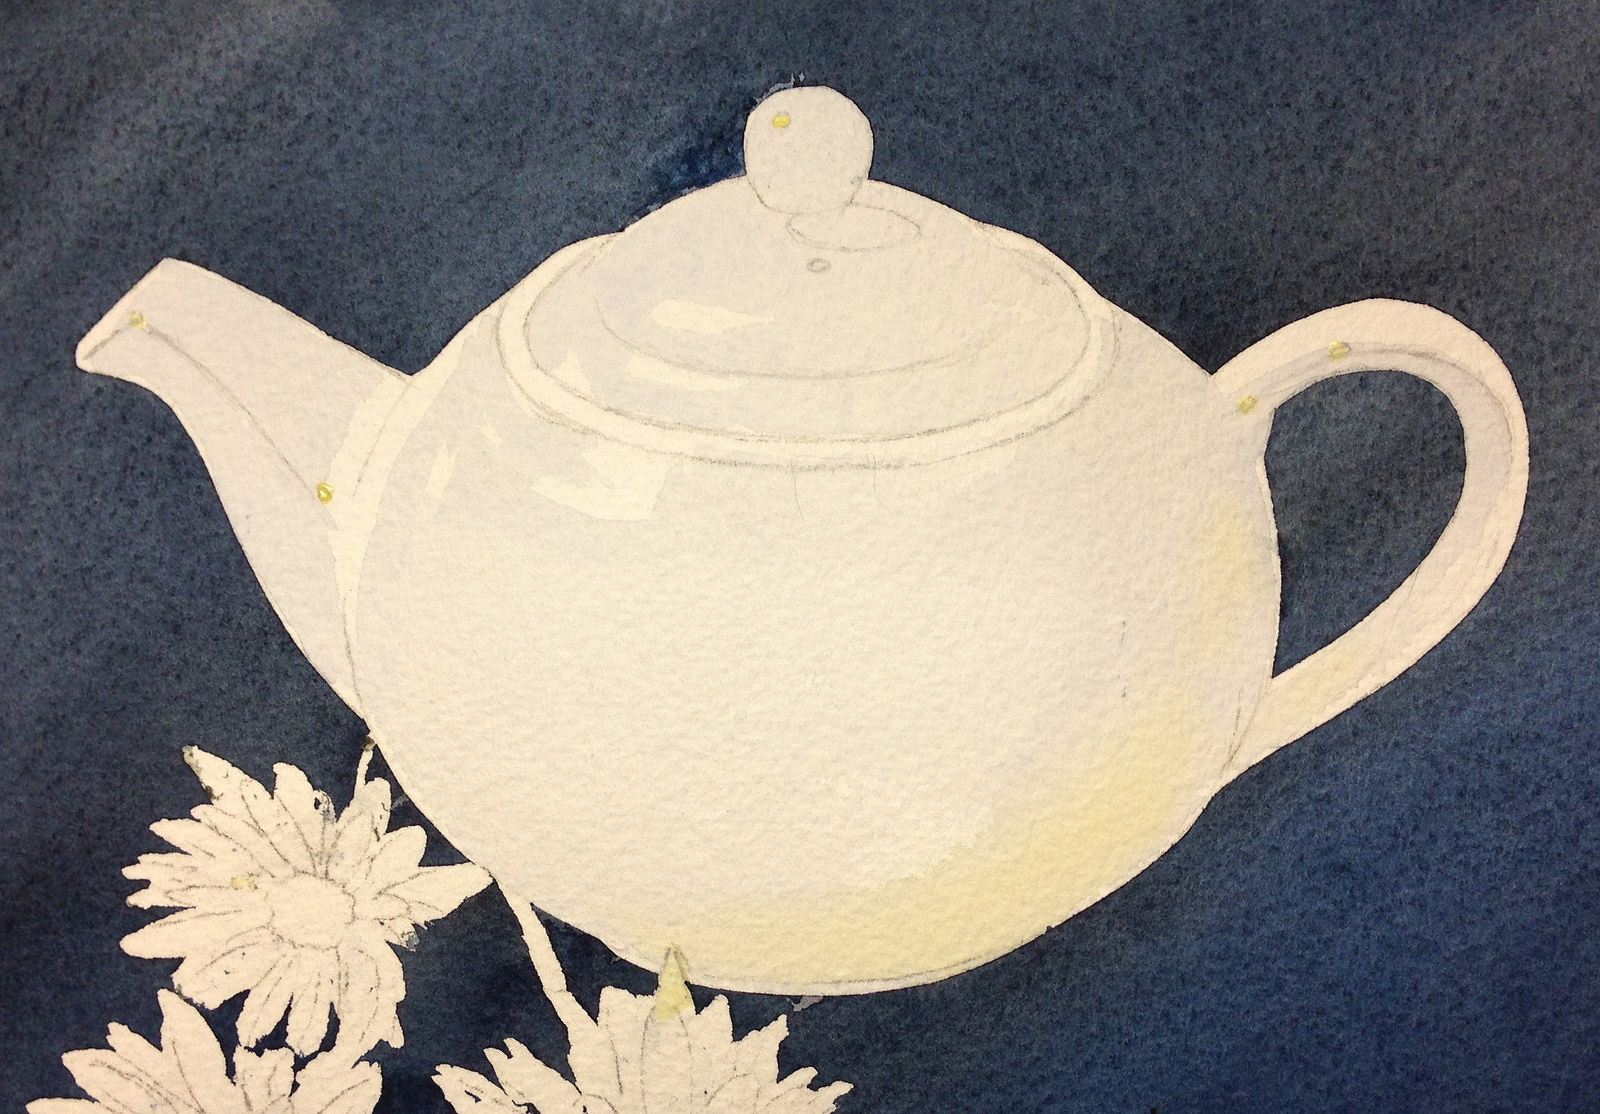
I removed all the masking and cleaned up the white areas before putting in some highlights with masking fluid. Then I began mapping in the teapot with a very light initial wash of Ultramarine Blue, leaving some white areas for later scrubbing and lifting. Working wet-in-wet I added a touch of Yellow along the bottom.
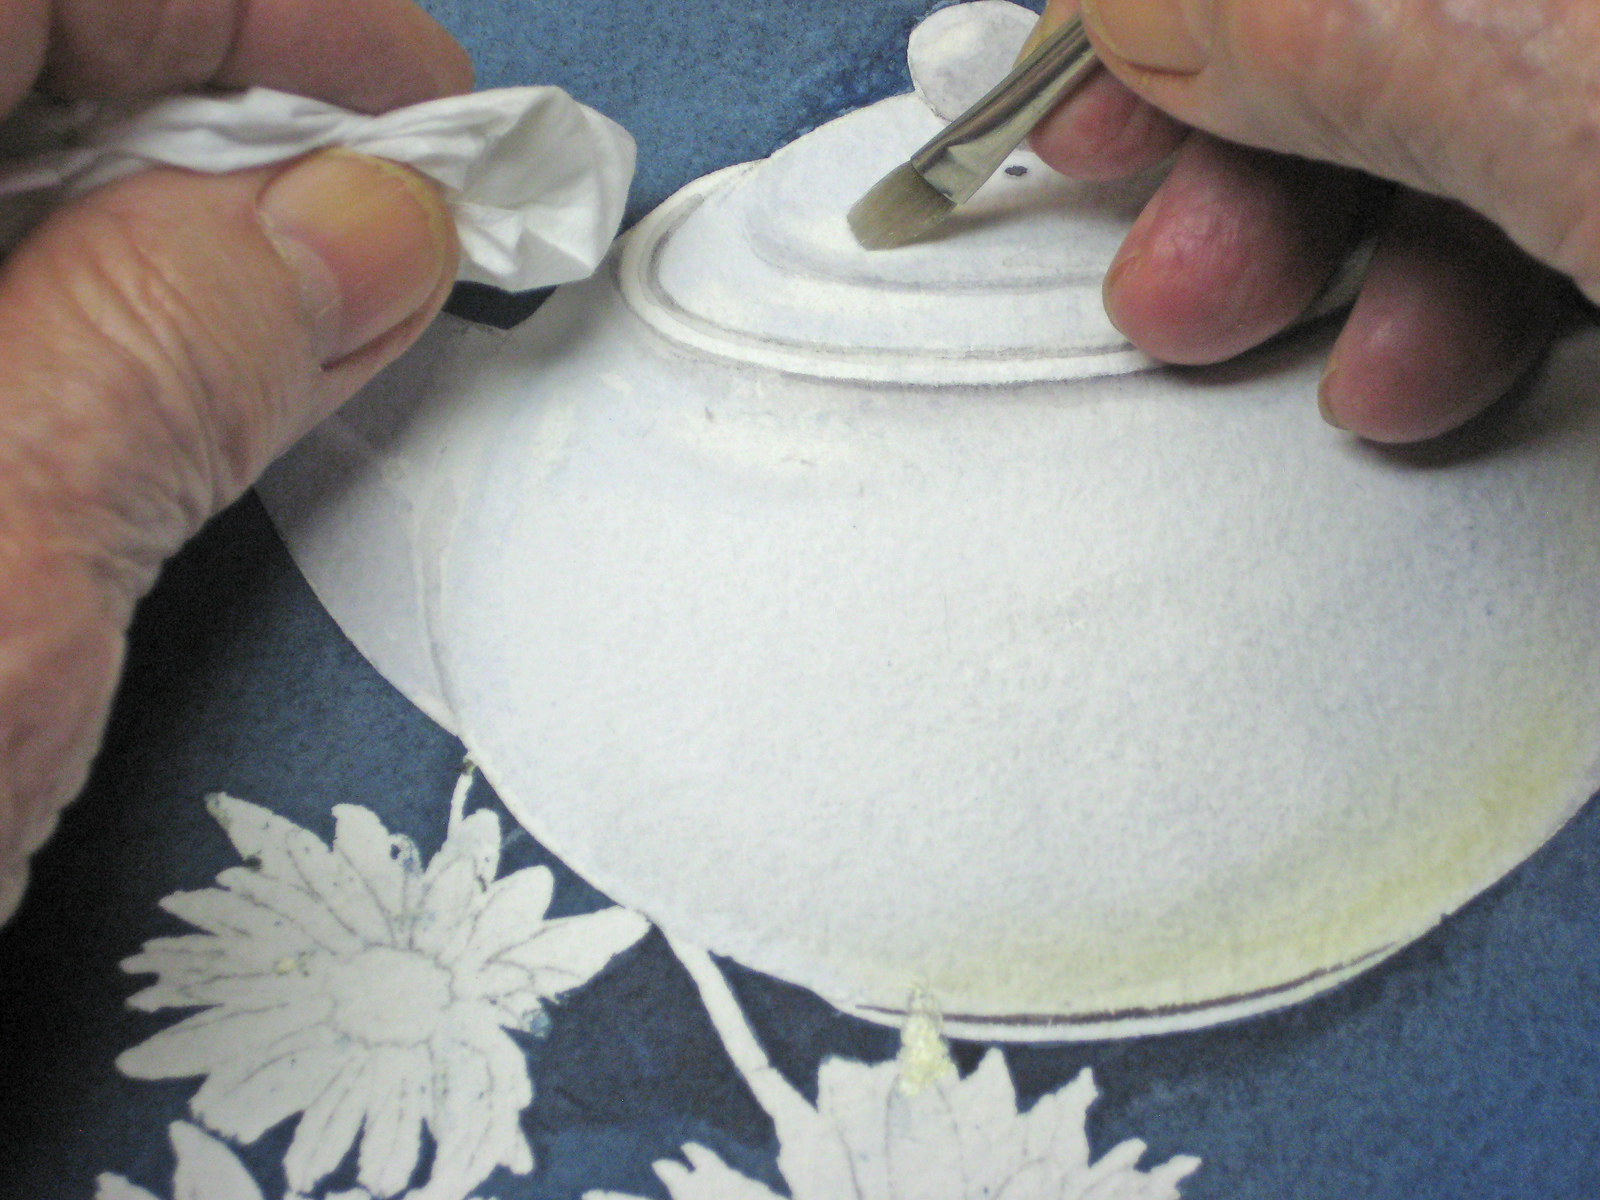
Work your layers gently as you strive to get that glazed slightly ivory look, then lift out the larger highlights with a scrub brush, water and facial tissue. Don’t overpaint this as you’ll have trouble getting it light again and your washes may overpower your painting. You can always come back later and put in a few finishing touches.
[adinserter block=”86″]
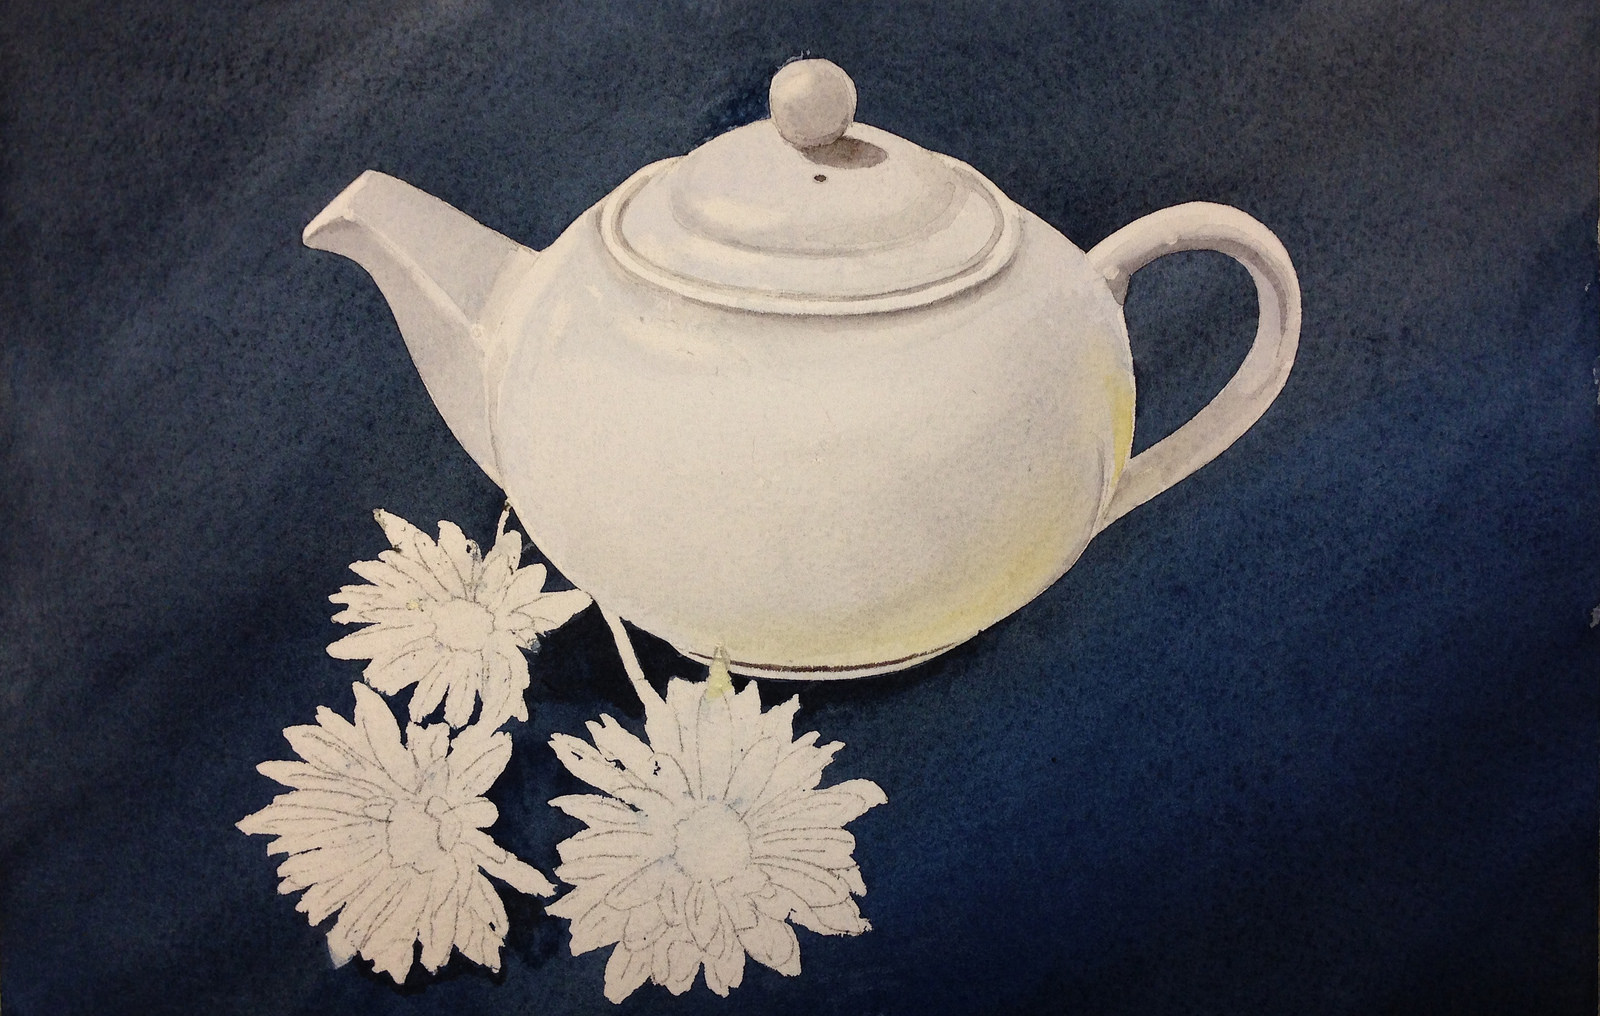
The completed teapot for now.
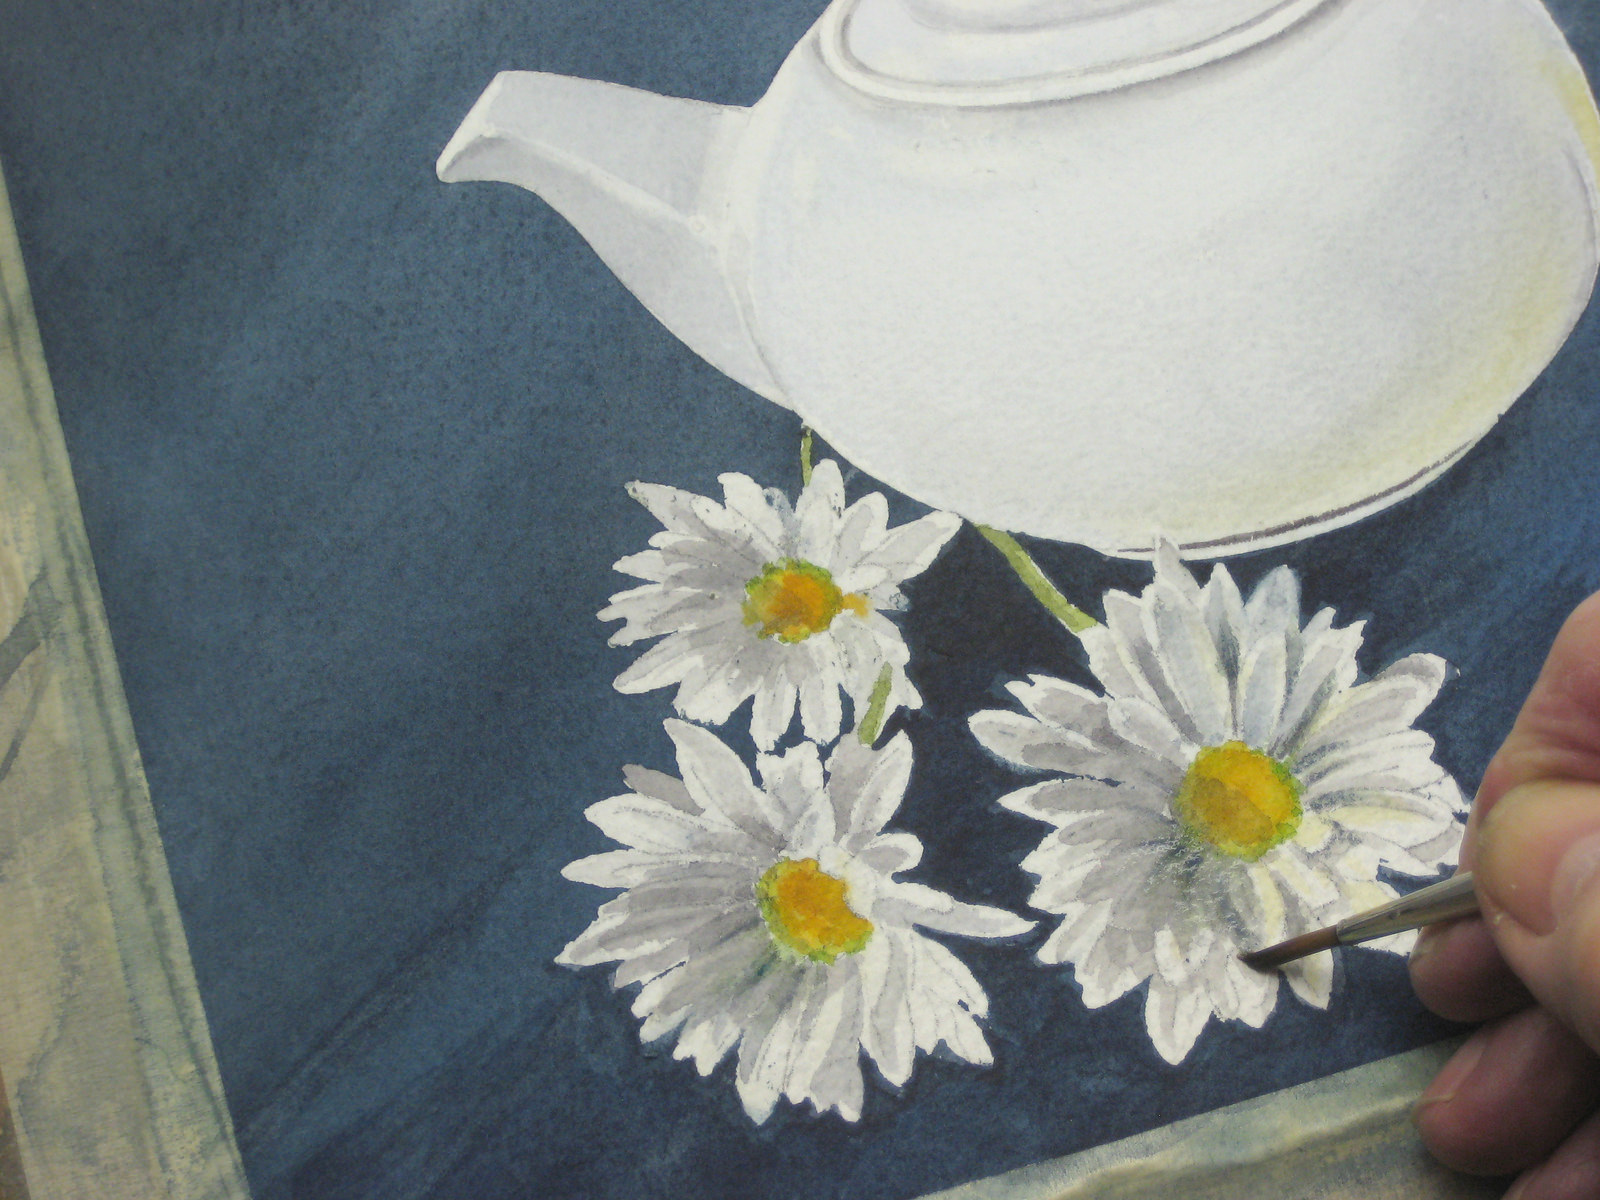
My white-in-white got a bit heavy-handed and in my class demo I will show you how to moderate this. I’m using a pale wash of Antwerp Blue and Brown Madder and painting behind the petals to make them stand out.
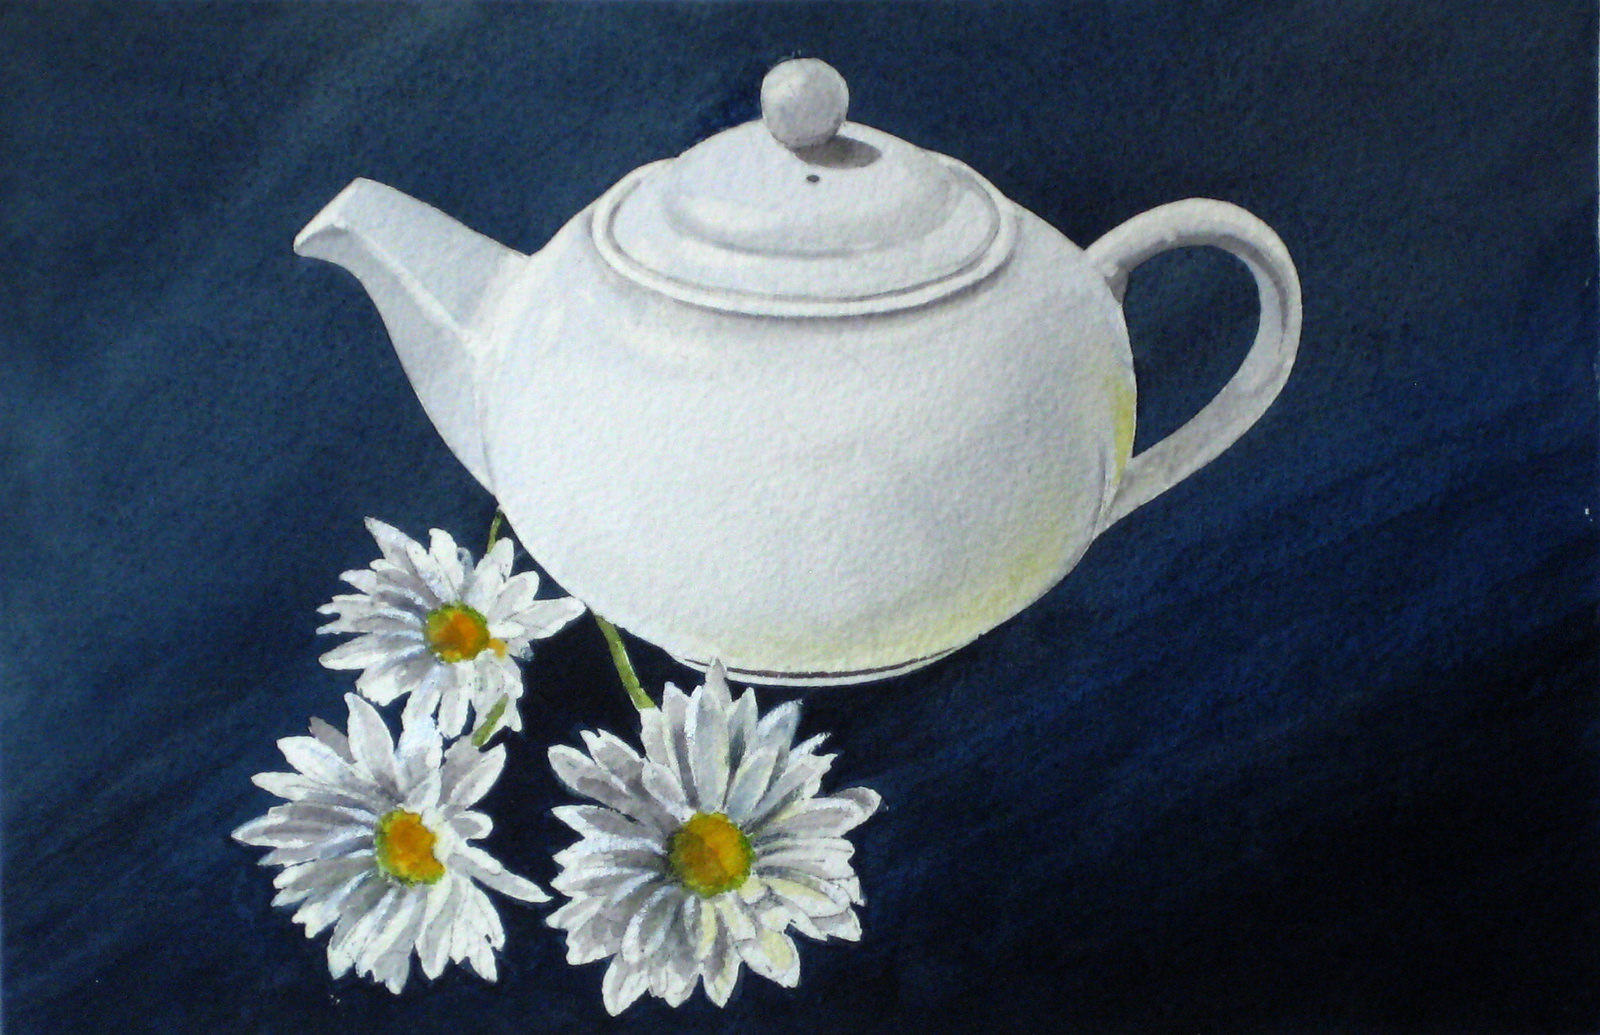
This first attempt had me going back in with what I term “rescue paint” – a little Acrylic white here and there as the size of this painting precludes extensive lifting. Don’t worry about the “Art Police”! I won’t tell them and your secret is safe with me. As I re-paint this with you I’ll show you how to correct my over-painting.
About John Fisher
I was born and educated in England, graduating from the Luton School of Arts (now Barnfield College) in 1945. It was my hope to become a graphic artist, but at the end of the Second World War returning service men and women had first crack at the few jobs available, and rightly so. I took a number of jobs while I tried to break into my chosen field, and ended up being a reluctant carpenter. Many years passed and I emigrated to Canada in 1952, married a Canadian woman, started a family, and in 1955 finally started on a career which took in graphic arts, owner of my own graphics arts company, art director at an advertising agency, and careers in marketing, advertising and public relations.
I wish I could claim that my passion for art burned brightly throughout those years, but alas, the need to make a living took prominence. As with many people, I always promised myself that when I retired I would get back to painting again. That time came in 1989, when my wife and I were living the winter months in our condo in Destin, Florida. Robert Long, a talented watercolour artist, was offering private lessons from his nearby condo. He was my mentor, and made my retirement years infinitely richer.
In those days Robert taught only technique, and there were rarely more than four to six of us in those early classes. From Robert I regained my interest in photography as an adjunct to painting, and as the cliche goes – I never looked back. I have had many paintings accepted and hung in exhibitions in Florida and Ontario, where I now live. I’ve won some prizes, come first in some exhibitions, and occasionally won the Citizens’ Choice awards. But I mainly paint for fun – hence the choice of name for this site.
To learn more about John and to view more of his work, please follow the link below:
===> https://www.watercoloursforfun.com/
I hope you enjoyed this free watercolour tutorials step by step. Find more free step by step watercolour painting tutorials from our site here.

Thanks for your instruction in teapot and daisies. It would be great if you did instructional videos
Peter Bresnen
Montreal, Quebec, Canada