About John Fisher
 I was born and educated in England, graduating from the Luton School of Arts (now Barnfield College) in 1945. It was my hope to become a graphic artist, but at the end of the Second World War returning service men and women had first crack at the few jobs available, and rightly so. I took a number of jobs while I tried to break into my chosen field, and ended up being a reluctant carpenter. Many years passed and I emigrated to Canada in 1952, married a Canadian woman, started a family, and in 1955 finally started on a career which took in graphic arts, owner of my own graphics arts company, art director at an advertising agency, and careers in marketing, advertising and public relations.
I wish I could claim that my passion for art burned brightly throughout those years, but alas, the need to make a living took prominence. As with many people, I always promised myself that when I retired I would get back to painting again. That time came in 1989, when my wife and I were living the winter months in our condo in Destin, Florida. Robert Long, a talented watercolour artist, was offering private lessons from his nearby condo. He was my mentor, and made my retirement years infinitely richer.
In those days Robert taught only technique, and there were rarely more than four to six of us in those early classes. From Robert I regained my interest in photography as an adjunct to painting, and as the cliche goes – I never looked back. I have had many paintings accepted and hung in exhibitions in Florida and Ontario, where I now live. I’ve won some prizes, come first in some exhibitions, and occasionally won the Citizens’ Choice awards. But I mainly paint for fun – hence the choice of name for this site.
To learn more about John and to view more of his work, please follow the link below:
===> https://www.watercoloursforfun.com/
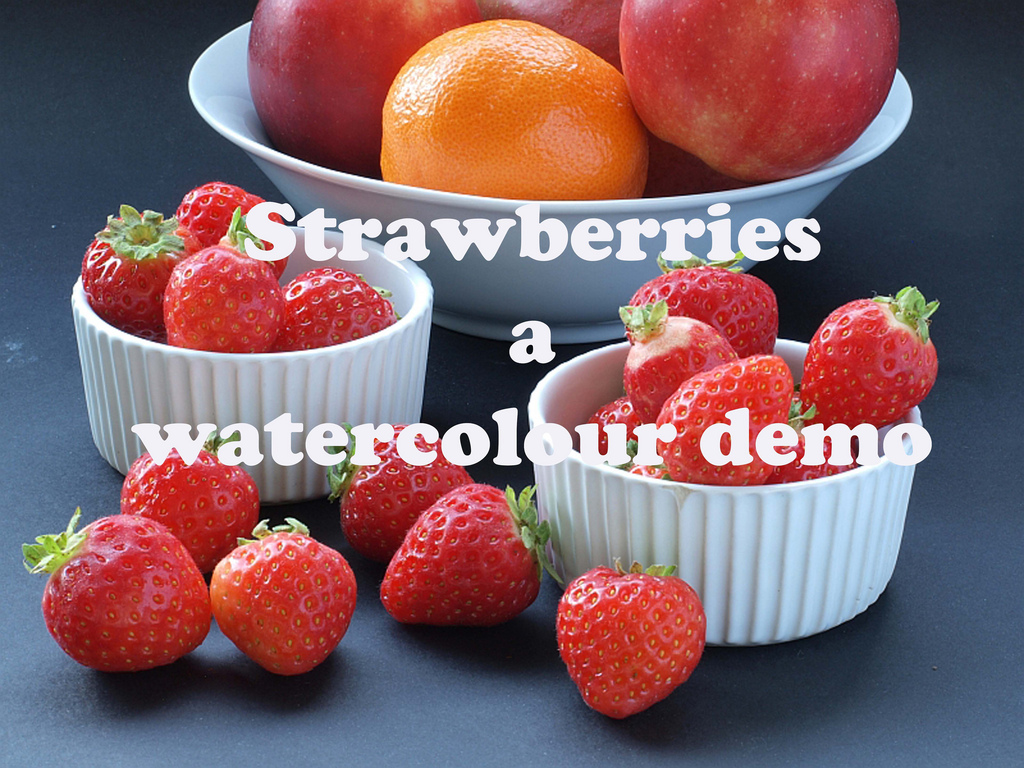
Strawberries – a watercolour demo
(Click images throughout demo for larger views)
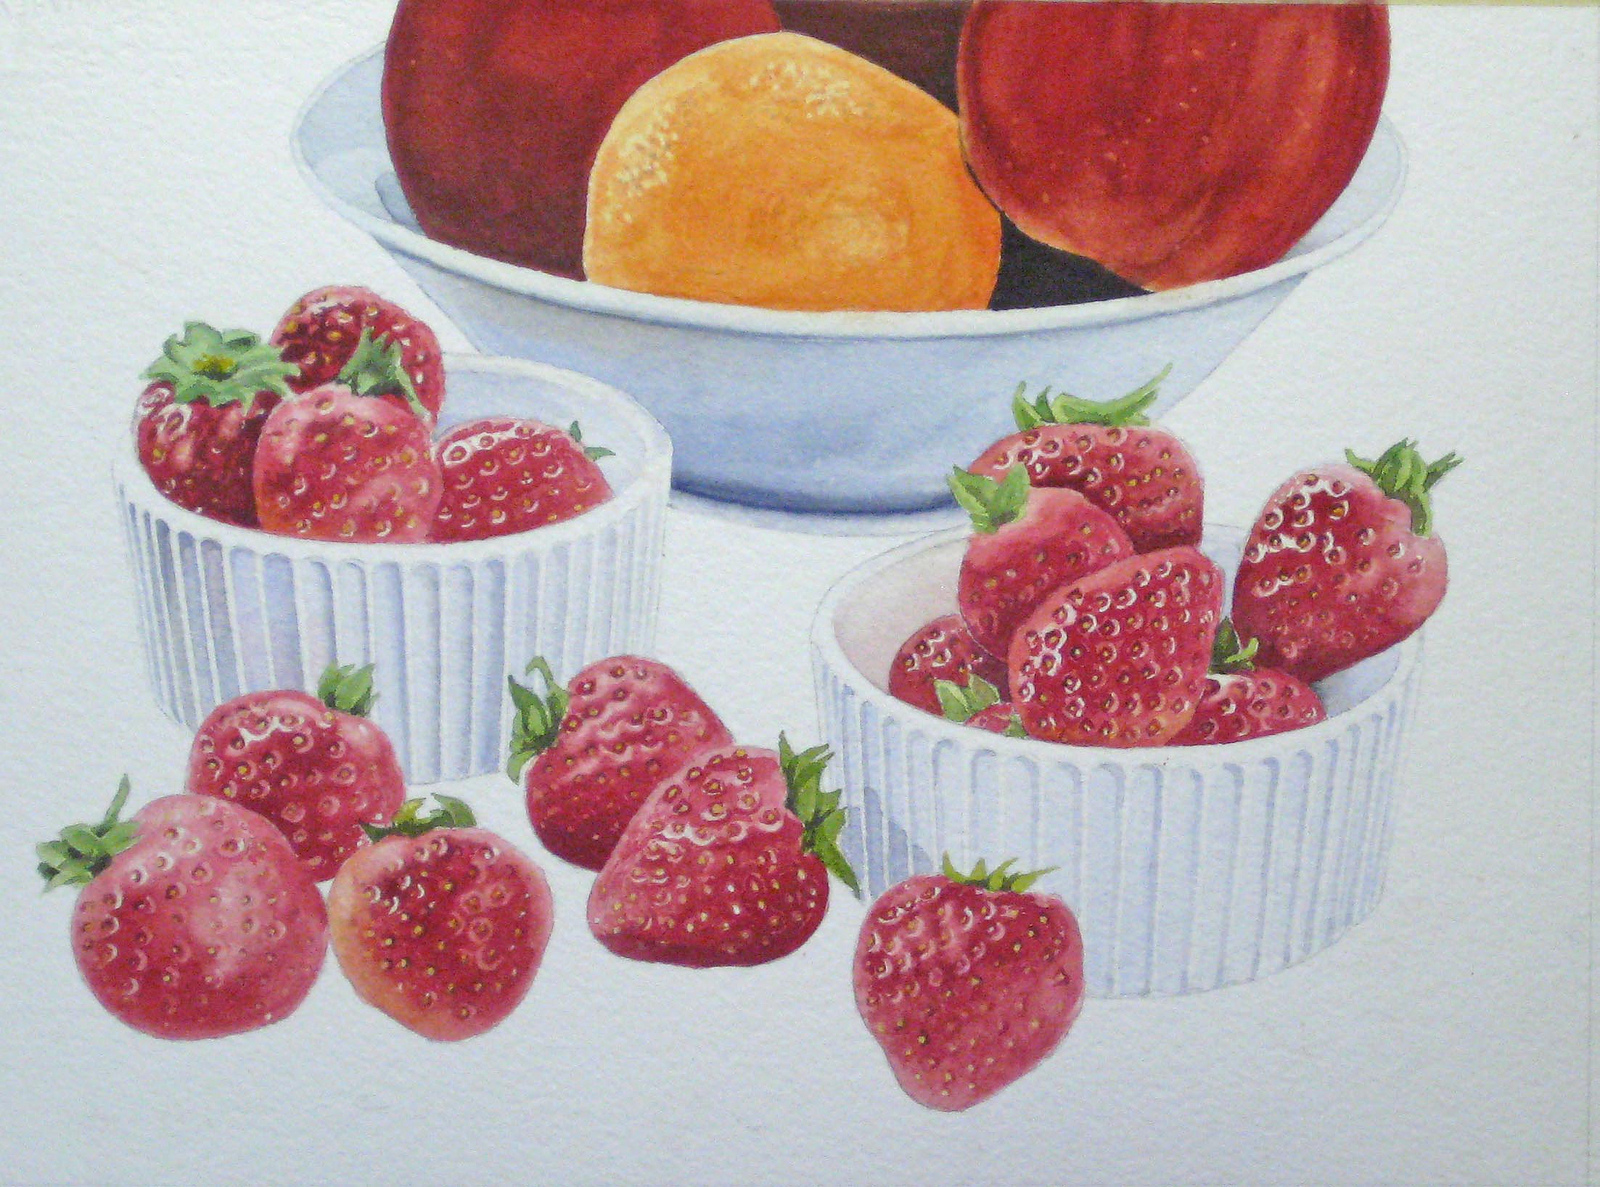
This still life with strawberries and fruit in bowls will be one of the projects for the 2012/13 season of the Testa Heights Art Club, in Uxbridge, Ontario. Our members are all seniors who have progressed to Intermediate watercolour painters after two years of instruction in a number of techniques. None of them had any experience of drawing or painting, and have produced a wide variety of paintings from still life, portraiture to landscapes. Image size 10 1/2″ x 14″ on 300 lb. Arches cold pressed paper using Winsor & Newton Artist Quality colours.
Credit for this beautiful still life must go to C O’Flanagan, posted on Paint My Photo (PMP), January 23, 2012, and used with his kind permission.
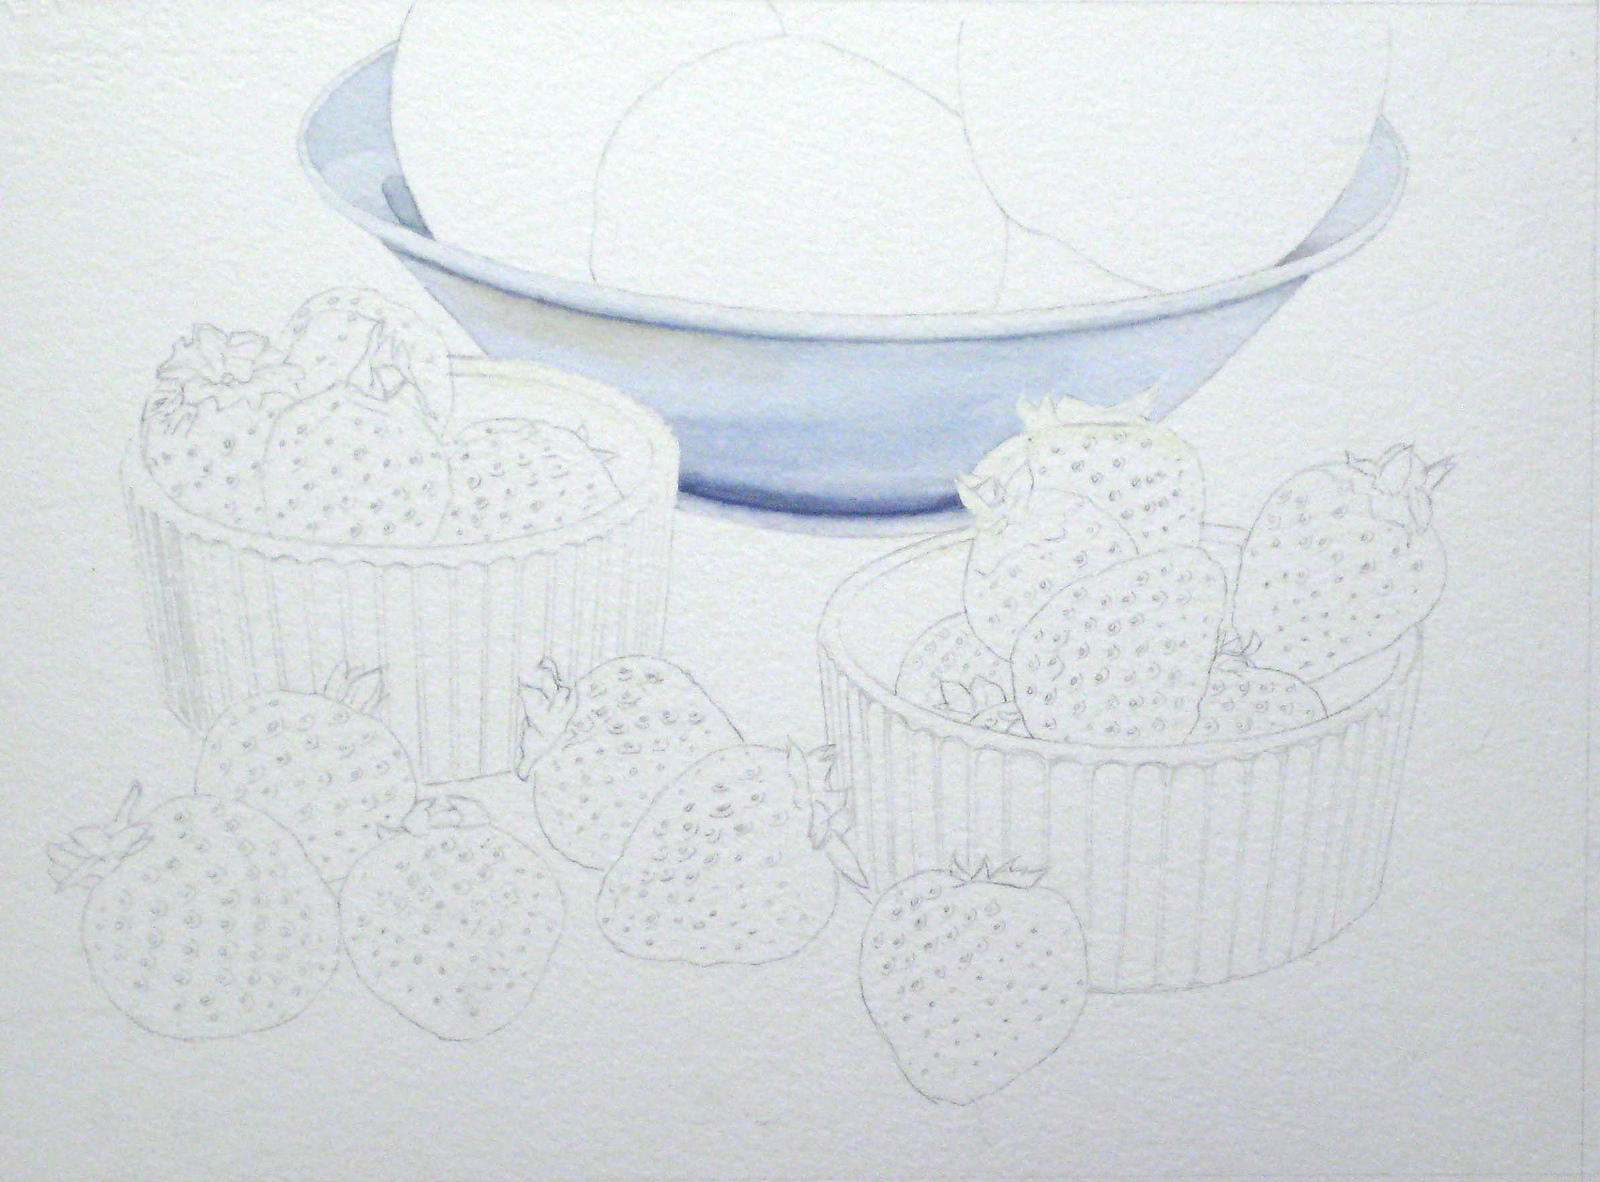
Part 1
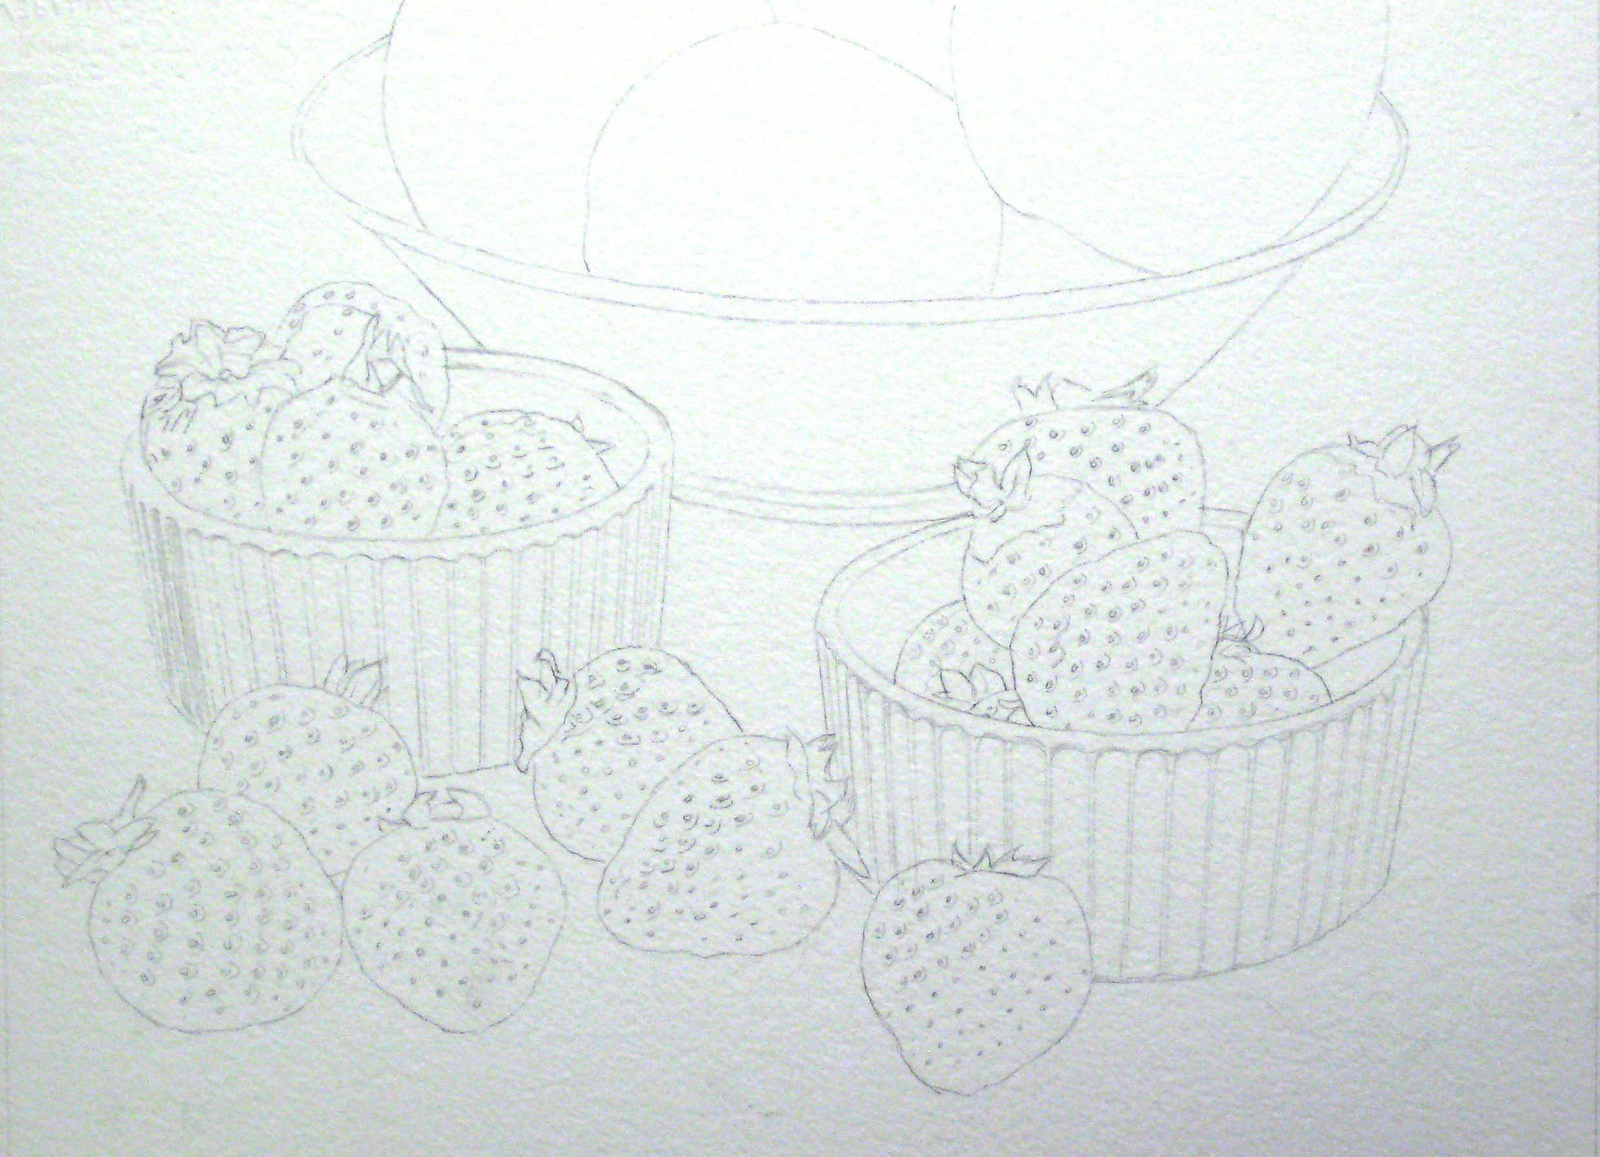
I always start off with a careful drawing, and then list the steps by which I will paint the project. I find this helps me keep track of where I am in case I’m away from this project for several days. e.g. Which parts need liquid masking? Where will I start? How many layers and where?
Part 2
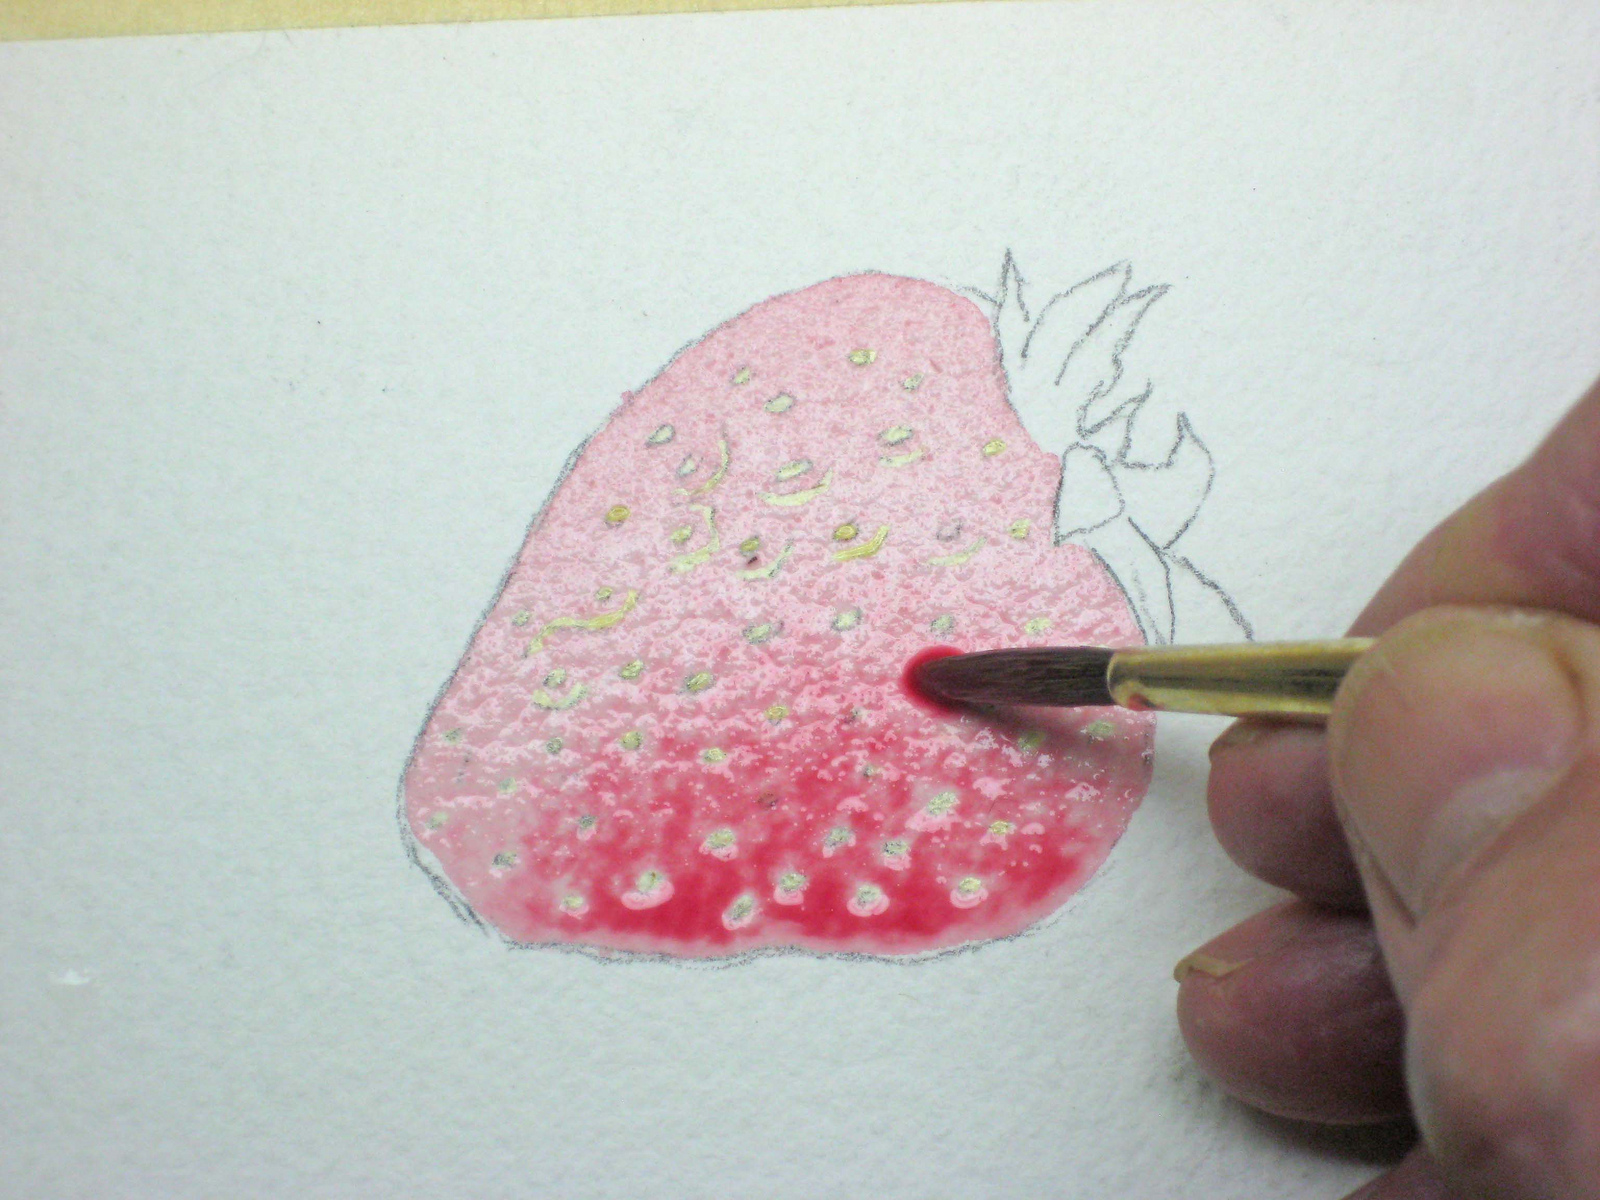
Problems ahead. I soon realized I would have to simplify the strawberries in order to demonstrate this to my students, so I did an extreme close-up of one typical strawberry and decided I would get my class to do the same. Note these are extreme close-ups and you should probably stand back from your computer monitor at least four to five feet for normal viewing distance. It took three tries to get this into a teachable format. It was much harder than it looked. Here I’ve masked out the little seeds and the surrounding highlights, after a pale wash using Winsor Red and a touch of Alizarin Crimson. While still at the “glisten” stage I’ve dropped in a little darker colour.
Part 3
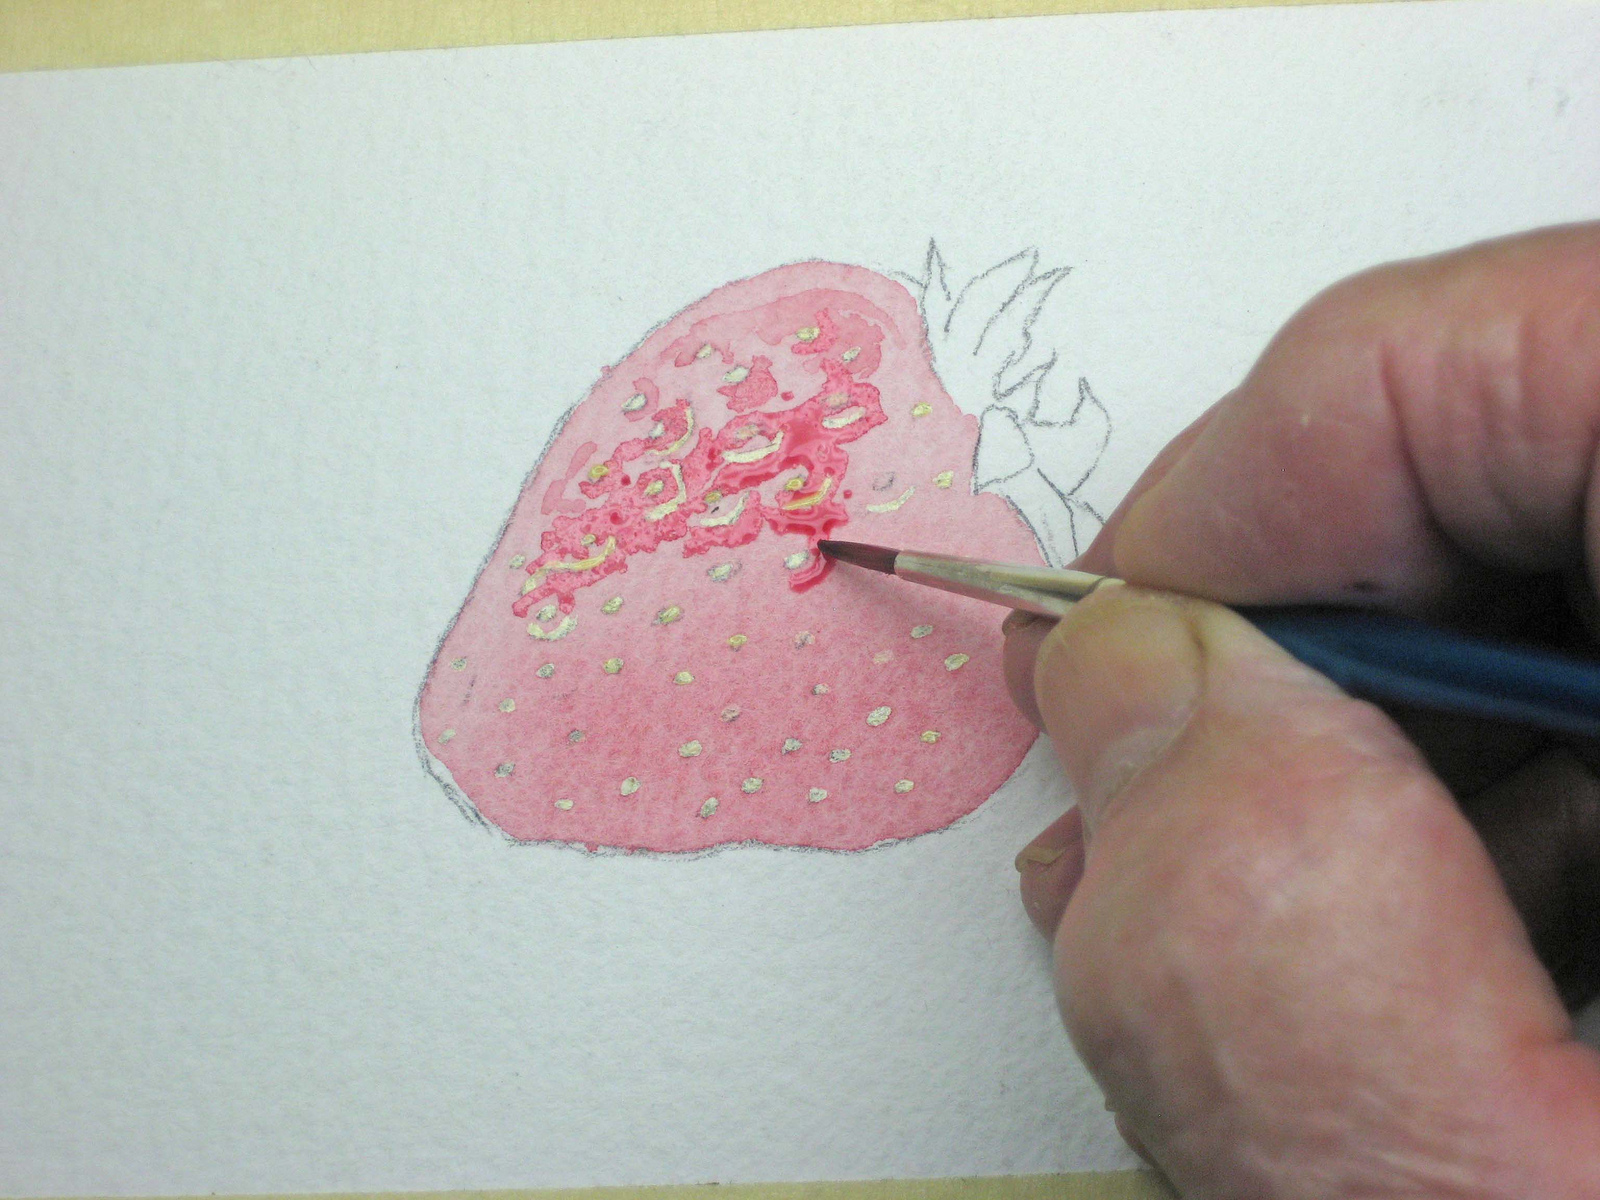
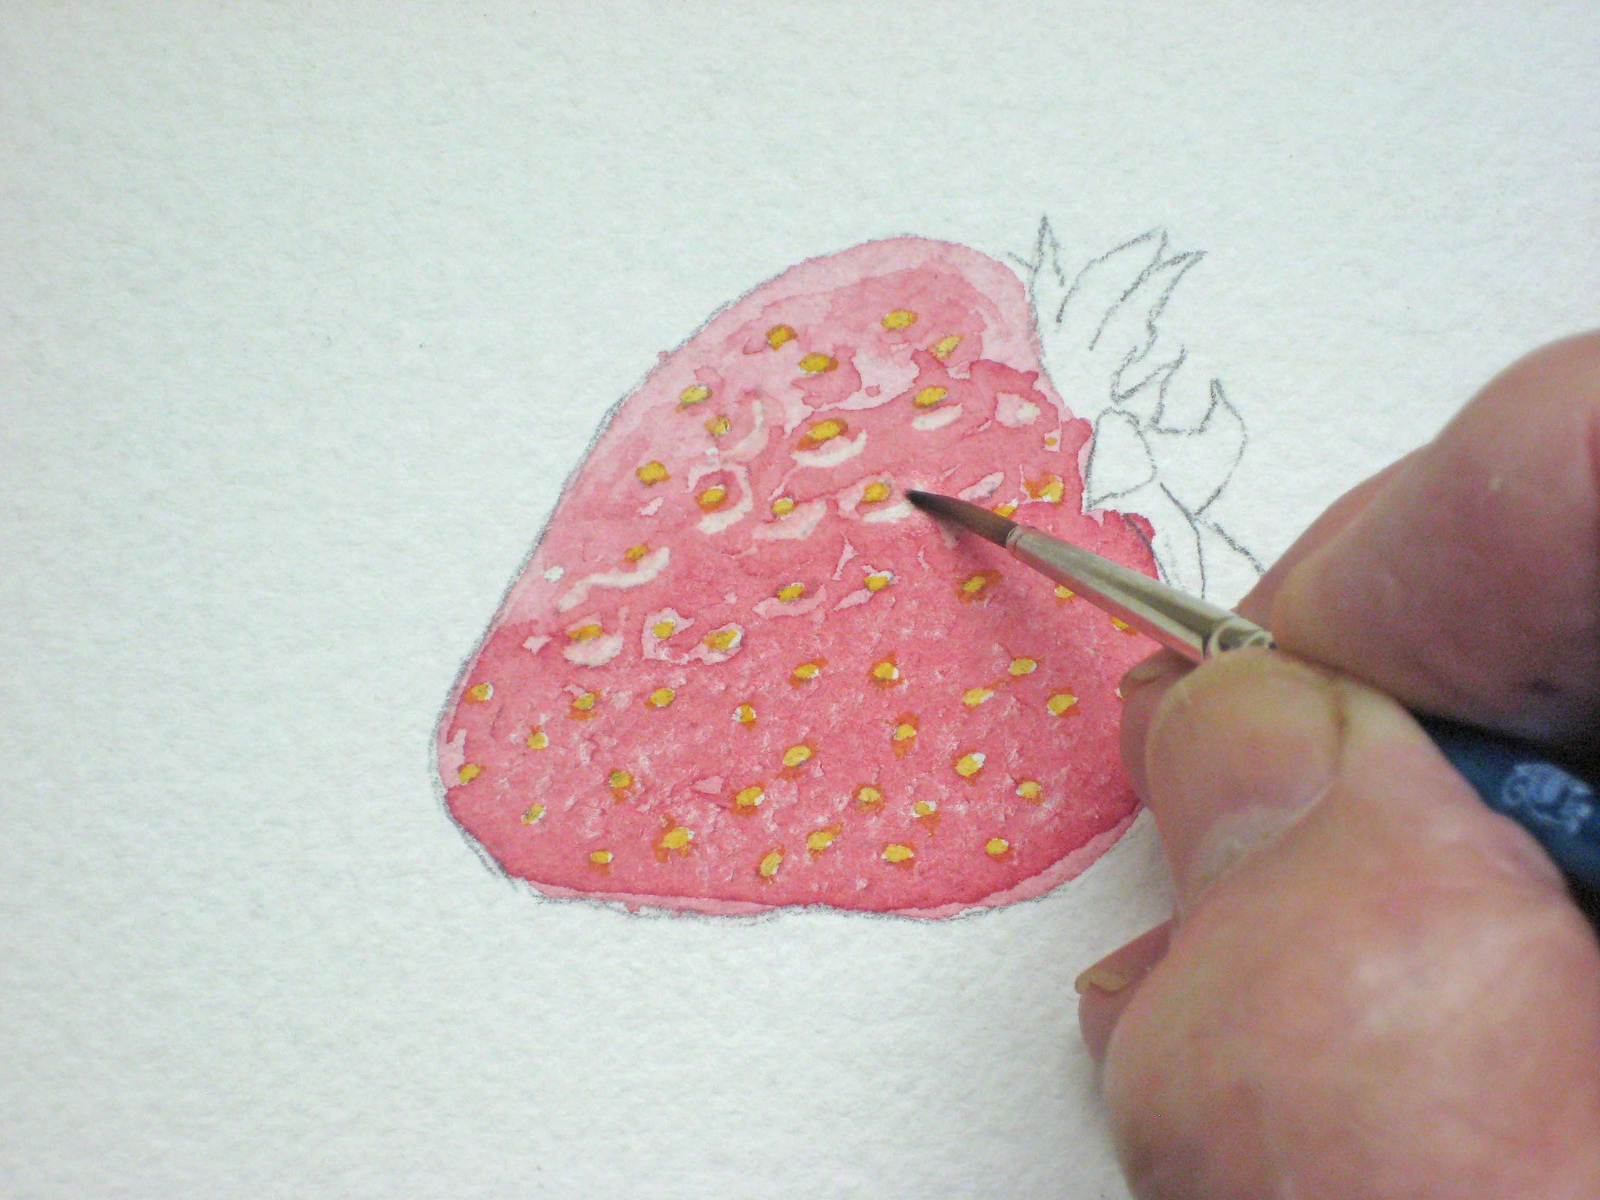
When bone dry I began painting around the typical hollows in which are set those little yellow seeds.
Part 4
After covering the rest of the strawberry I began blending in the sharp edges of those ridges, using clear water and a small brush. The liquid masking has been removed and the areas underneath painted in yellow
Part 5
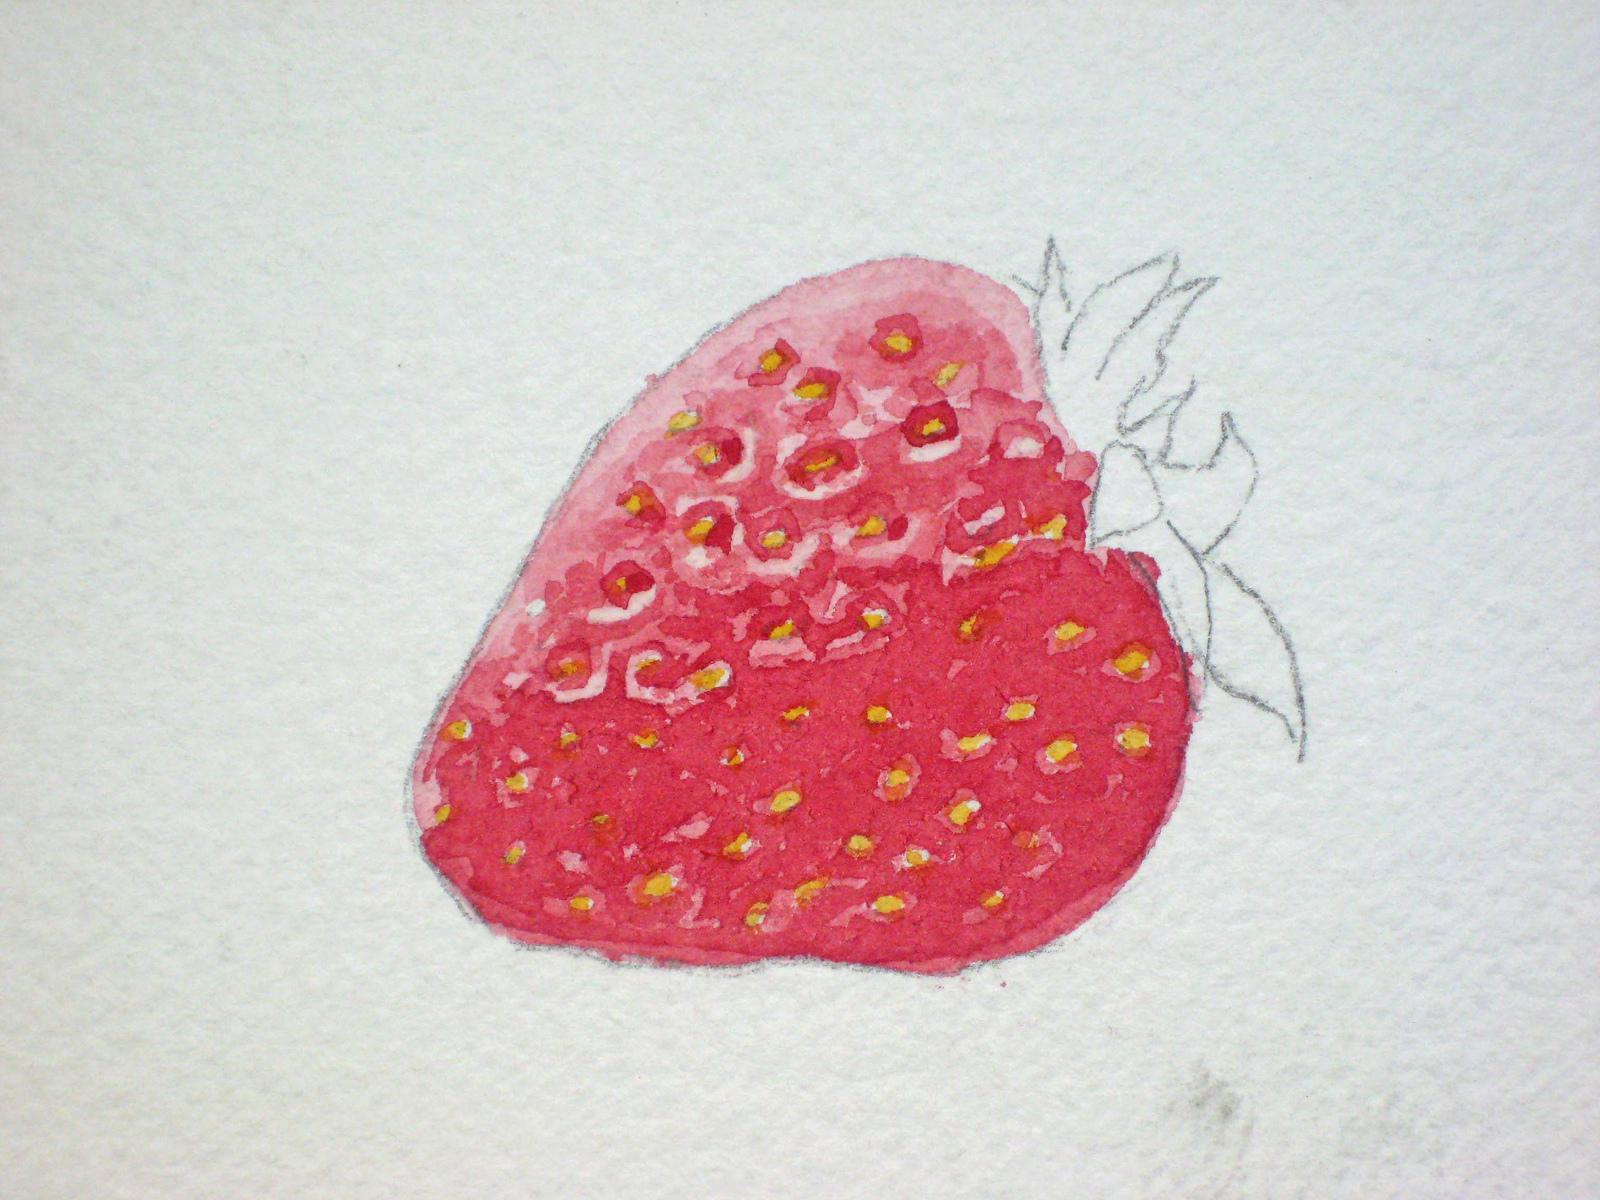
The rest of the strawberry is filled in and some of the areas blended a little with a wet brush.
Part 6

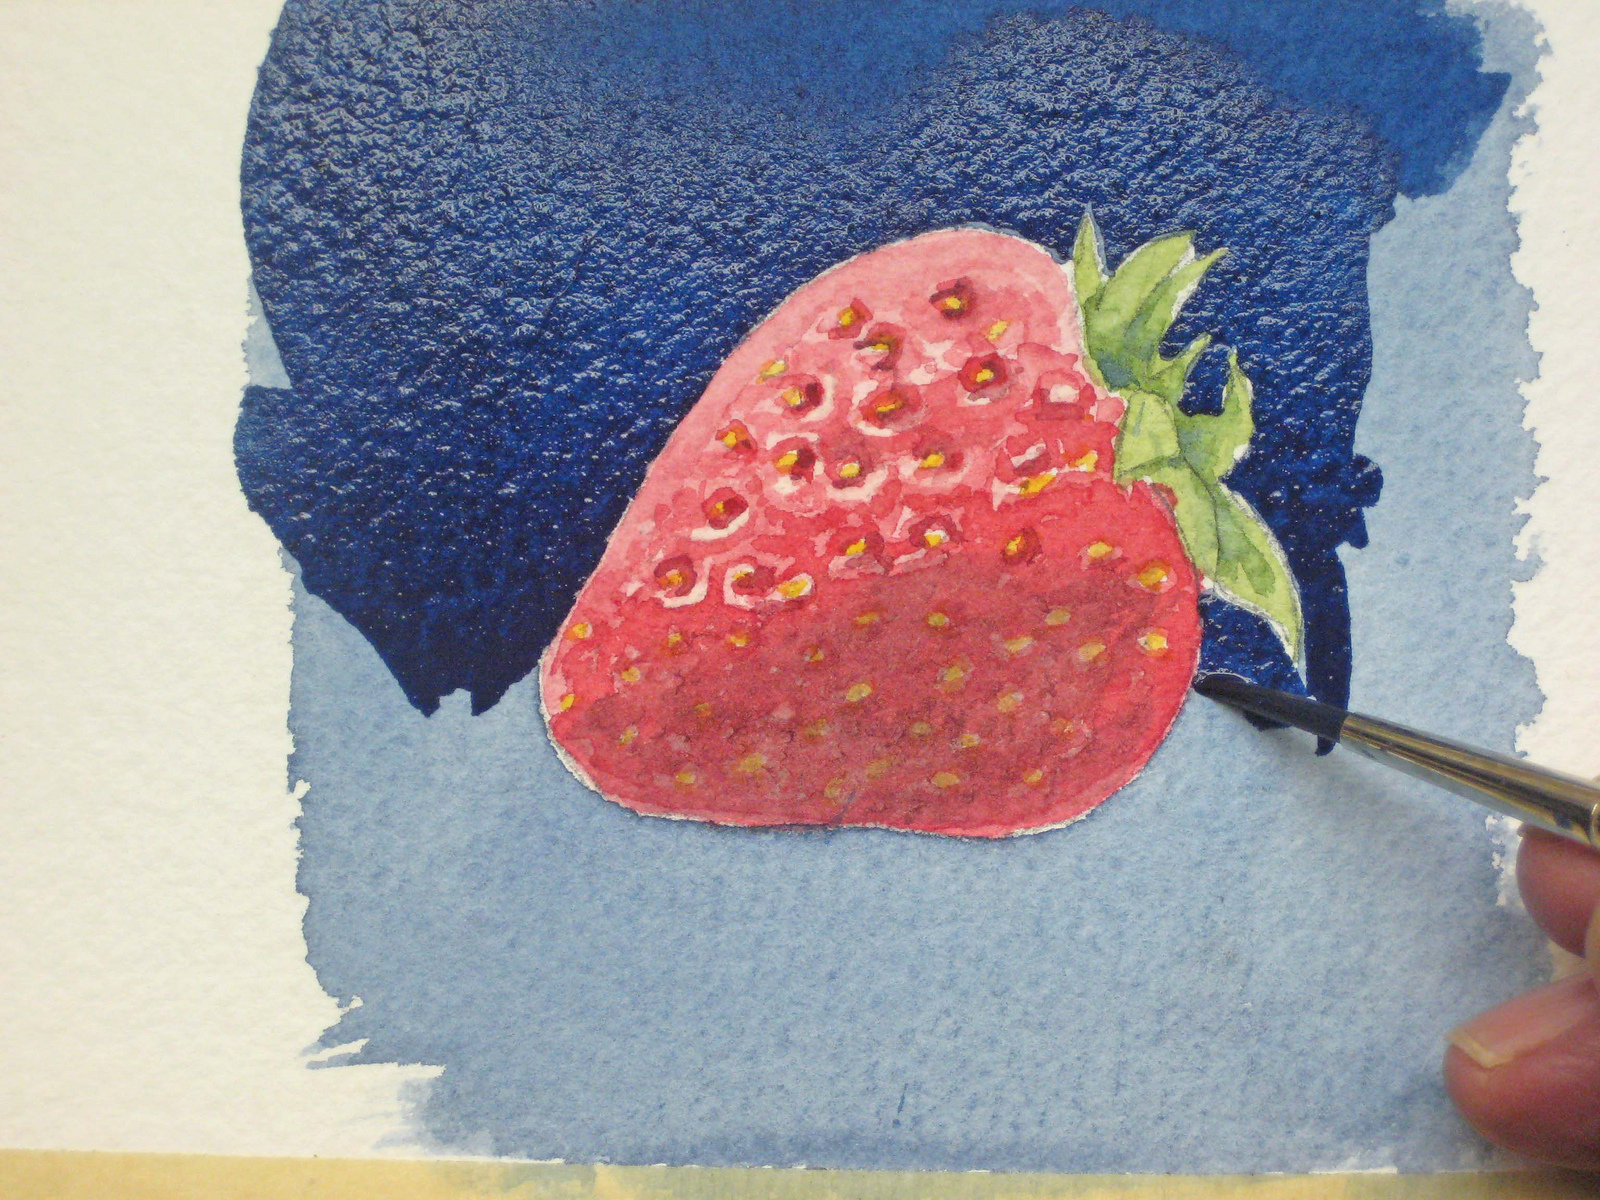
Here I’ve added some green leaves and some shadows to the little indentations in the fruit, plus a shadow along the bottom area made from Antwerp Blue and Brown Madder.
Part 7
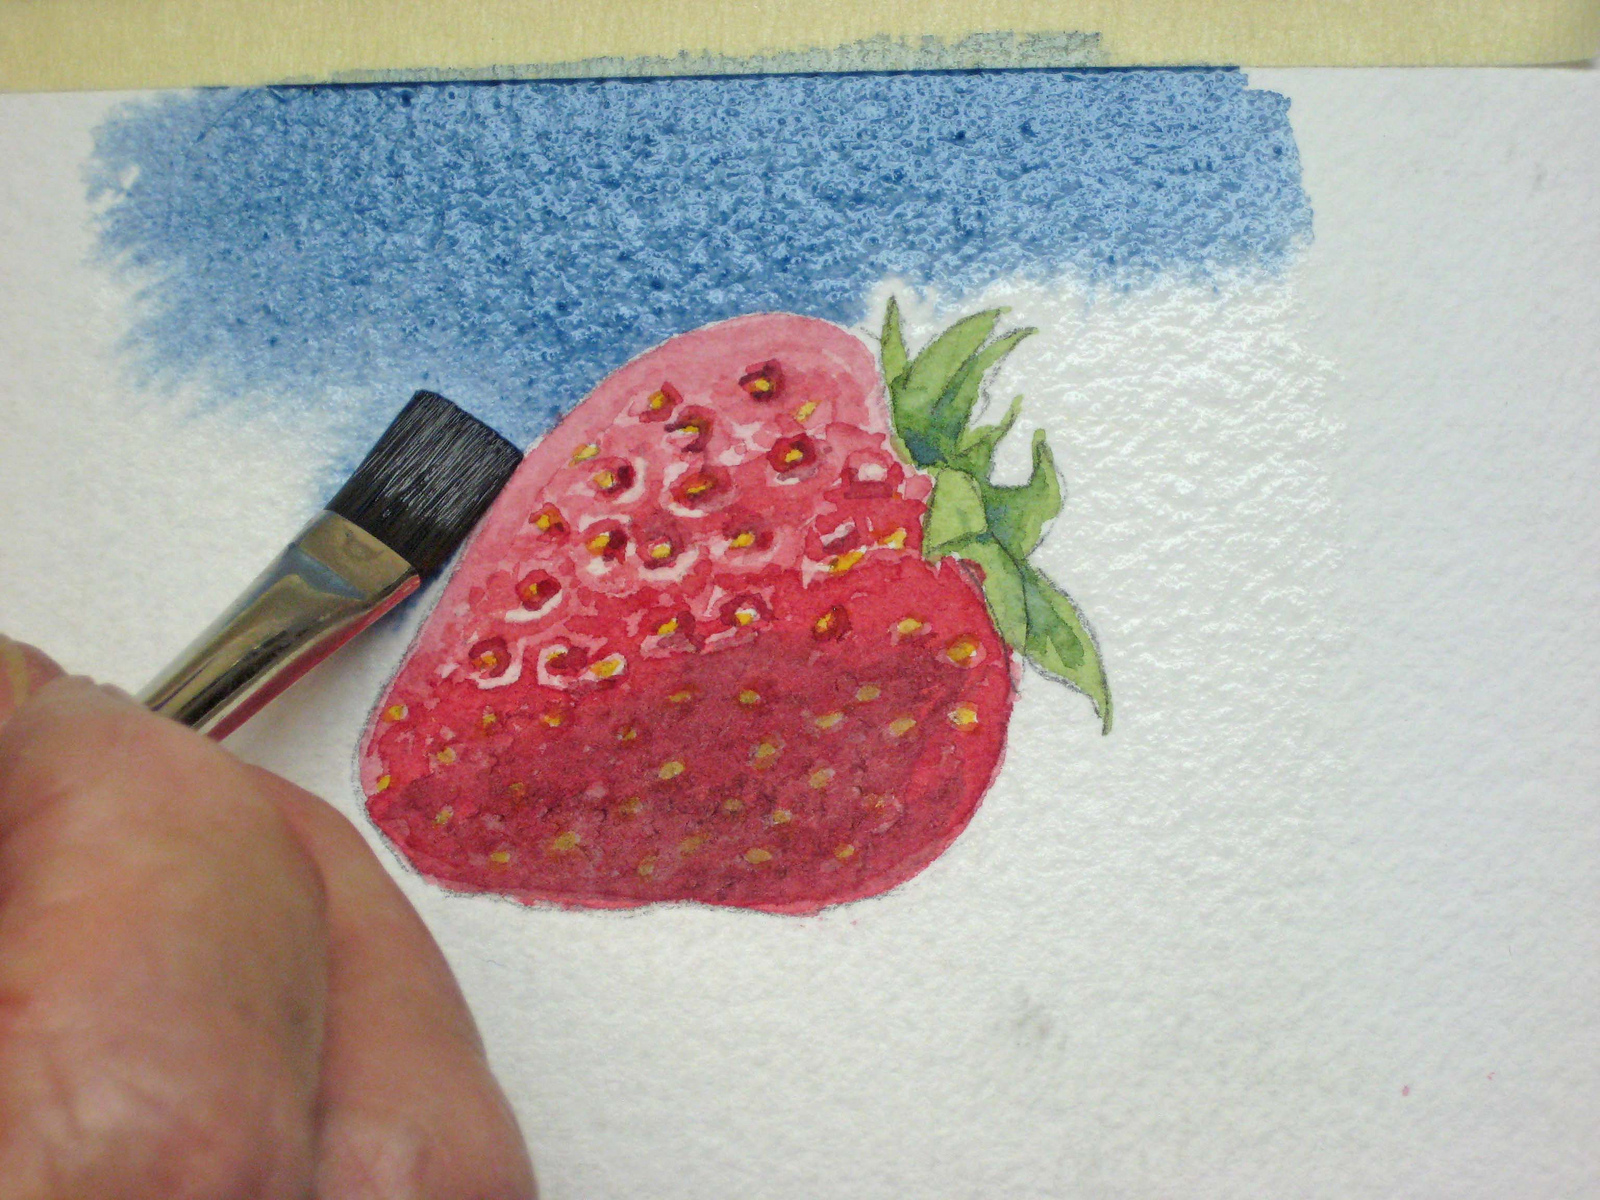
Now for the background wash. I wetted the background up to 1/16″ of an inch from the edges with clear water, then at the “glisten” stage I used a strong mixture of AntwerpBlue, Winsor Blue and my usual shadow colour, painted in the first background wash, pushing the colour around the leaves with a No.2 round brush. Colour follows the water wash so it’s vital you paint this in carefully.
Part 8
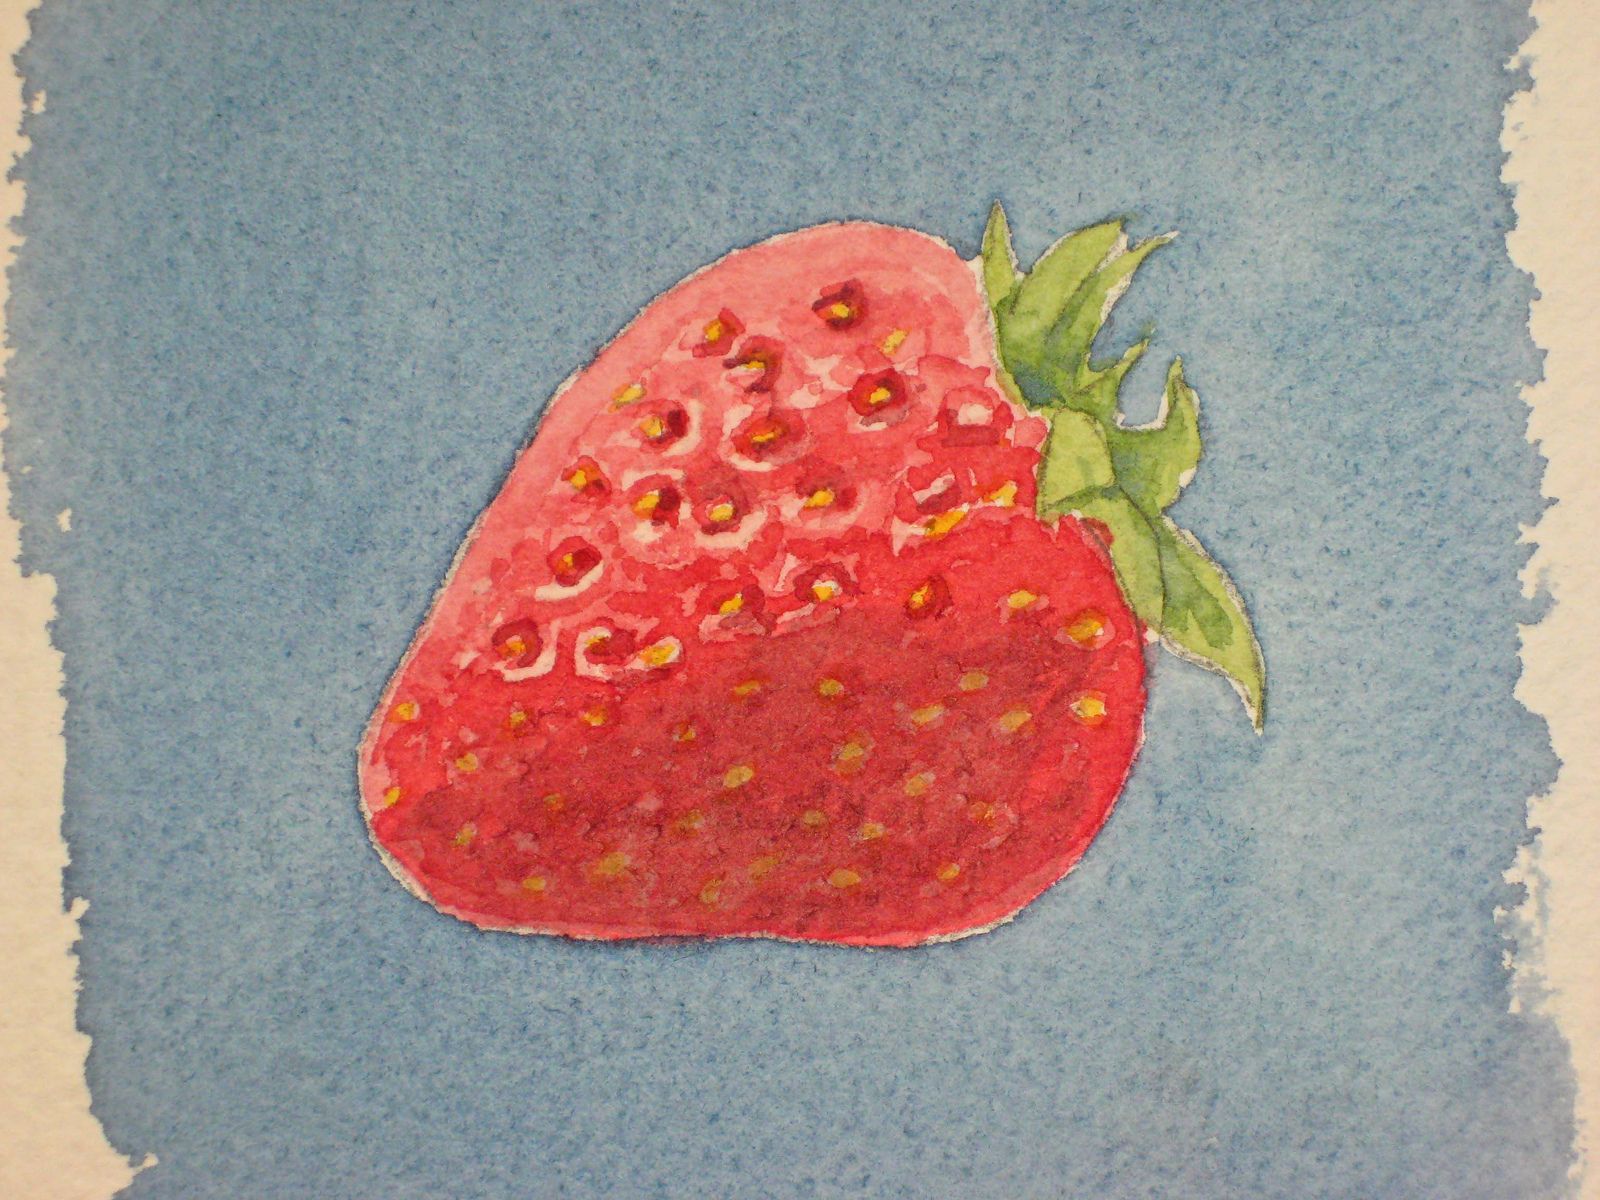
The first wash. Why not try to do this in one try? You might get away with it in oil or acrylic, but such a dark tone needs more than one wash in watercolour to avoid it looking muddy.
Part 9
Here is the second wash. Paint carefully around those edges.
Part 10
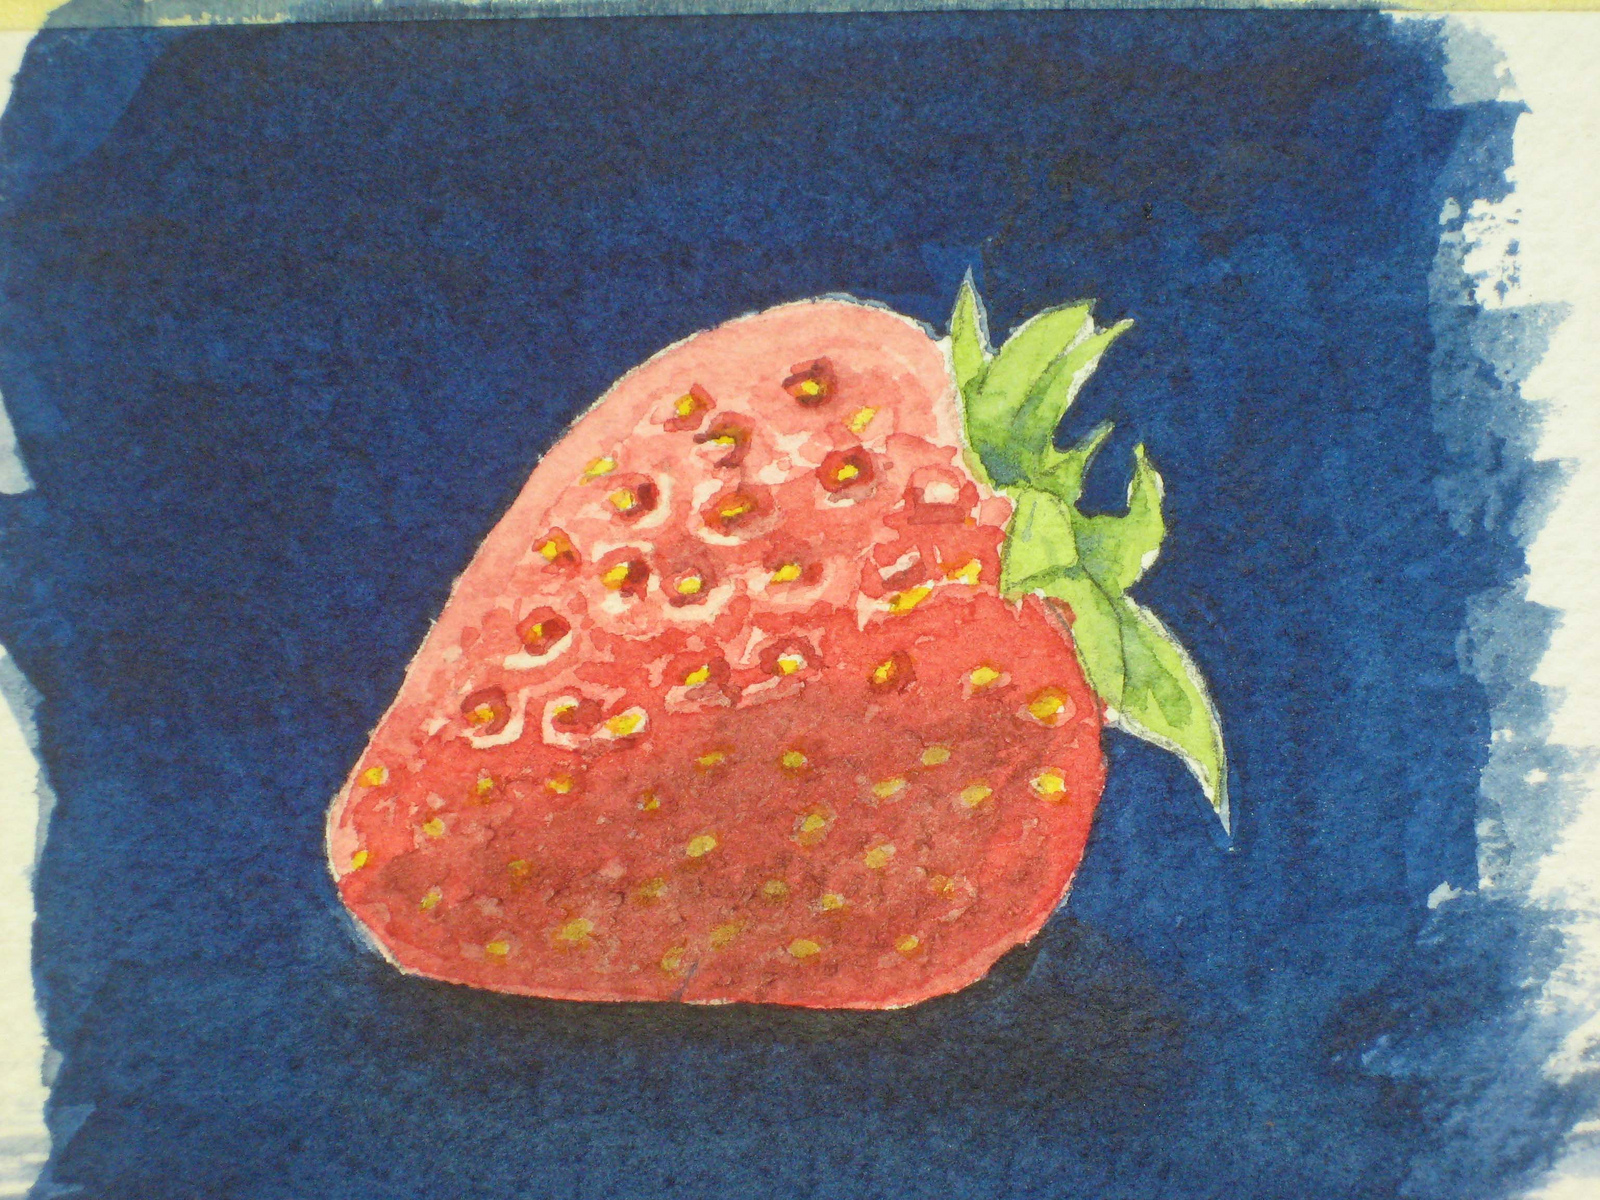
The final experimental rough. Remember to stand well back for normal viewing distance
Part 11
Now for the main event. I protected the edges of the lower left-hand bowl and the right-hand strawberry with liquid masking before painting in the main white bowl. This may look a little blue at this stage, but the darker blue background will eventually correct this optical illusion. Some highlights may be lifted out at a later stage, and this is the benefit of using 300 lb. paper. The bowl colour was a pale wash of Ultramarine Blue with a touch of our shadow colour. Edges were blended and softened.
Part 12
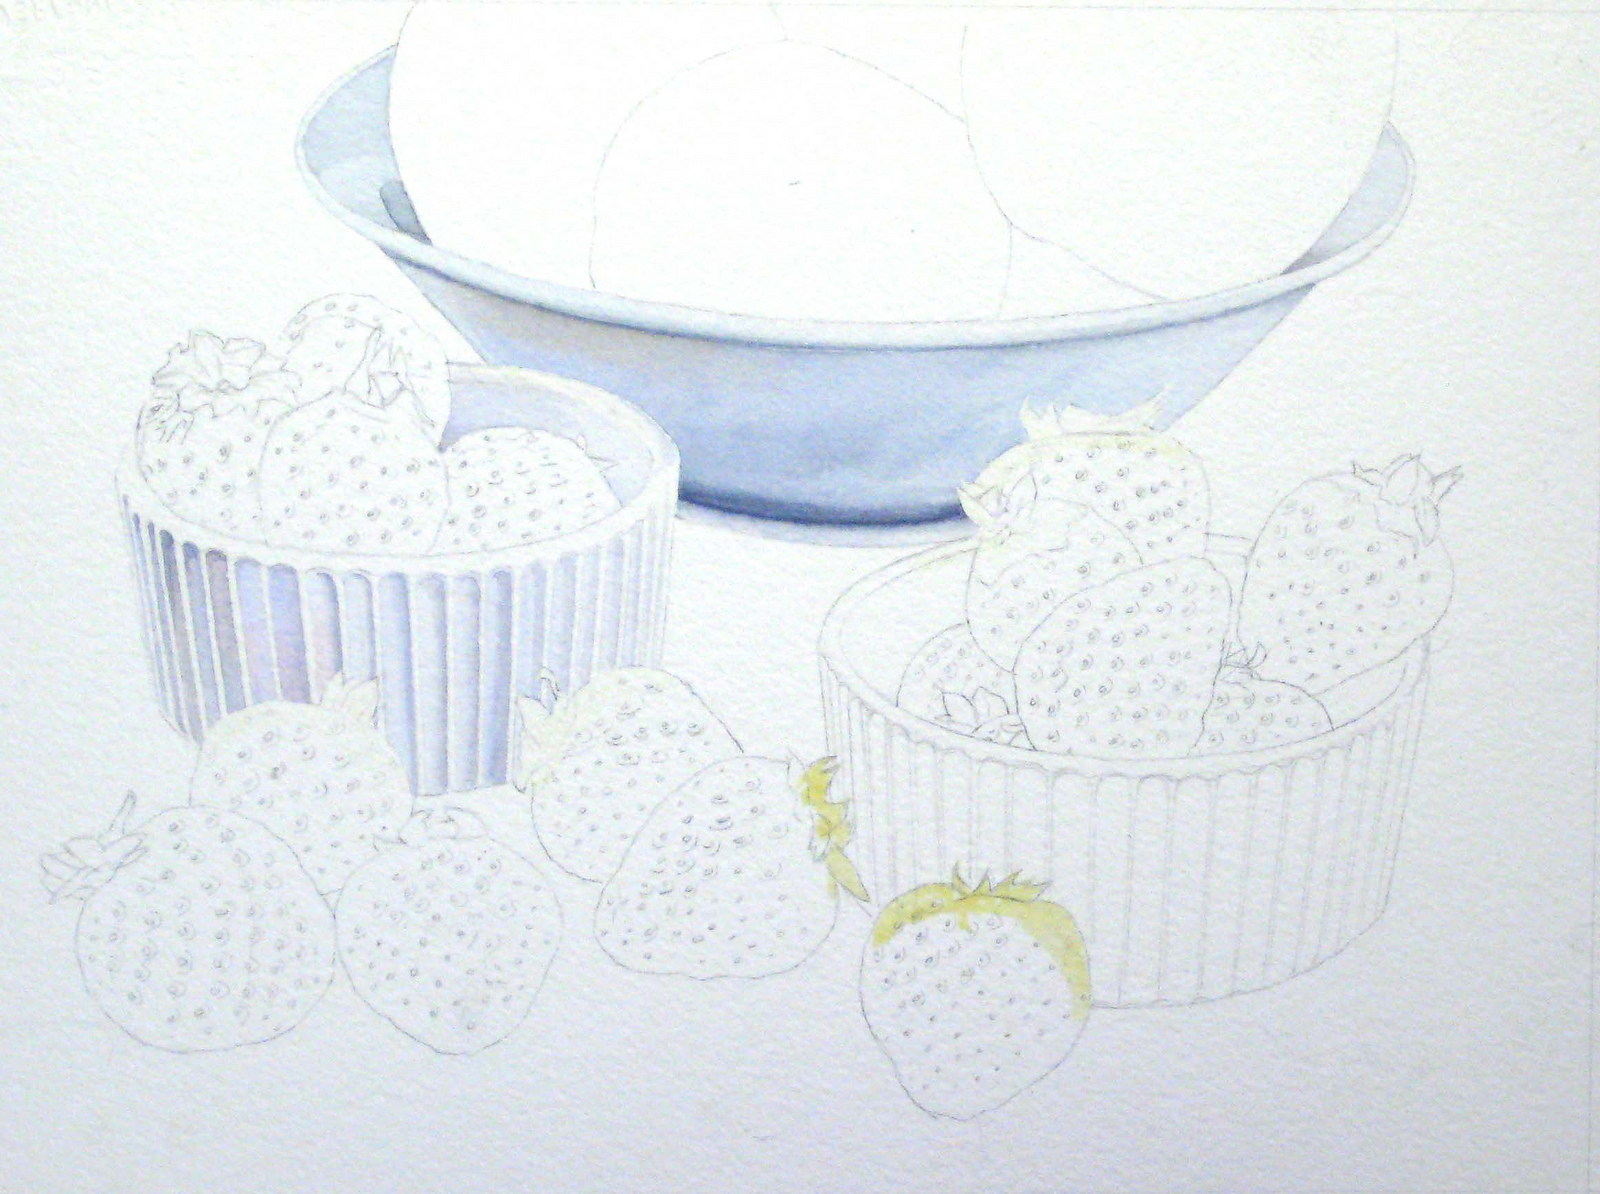
Here I’ve shown the first bowl for the strawberries. I used liquid masking to block in where the strawberries touched the bowl (as shown on the RH strawberries) to make the delicate pale washes easier to do. I used a pale Ultramarine Blue for the underlay and the shadows were picked out with the same colour with a touch of shadow added.
Part 13
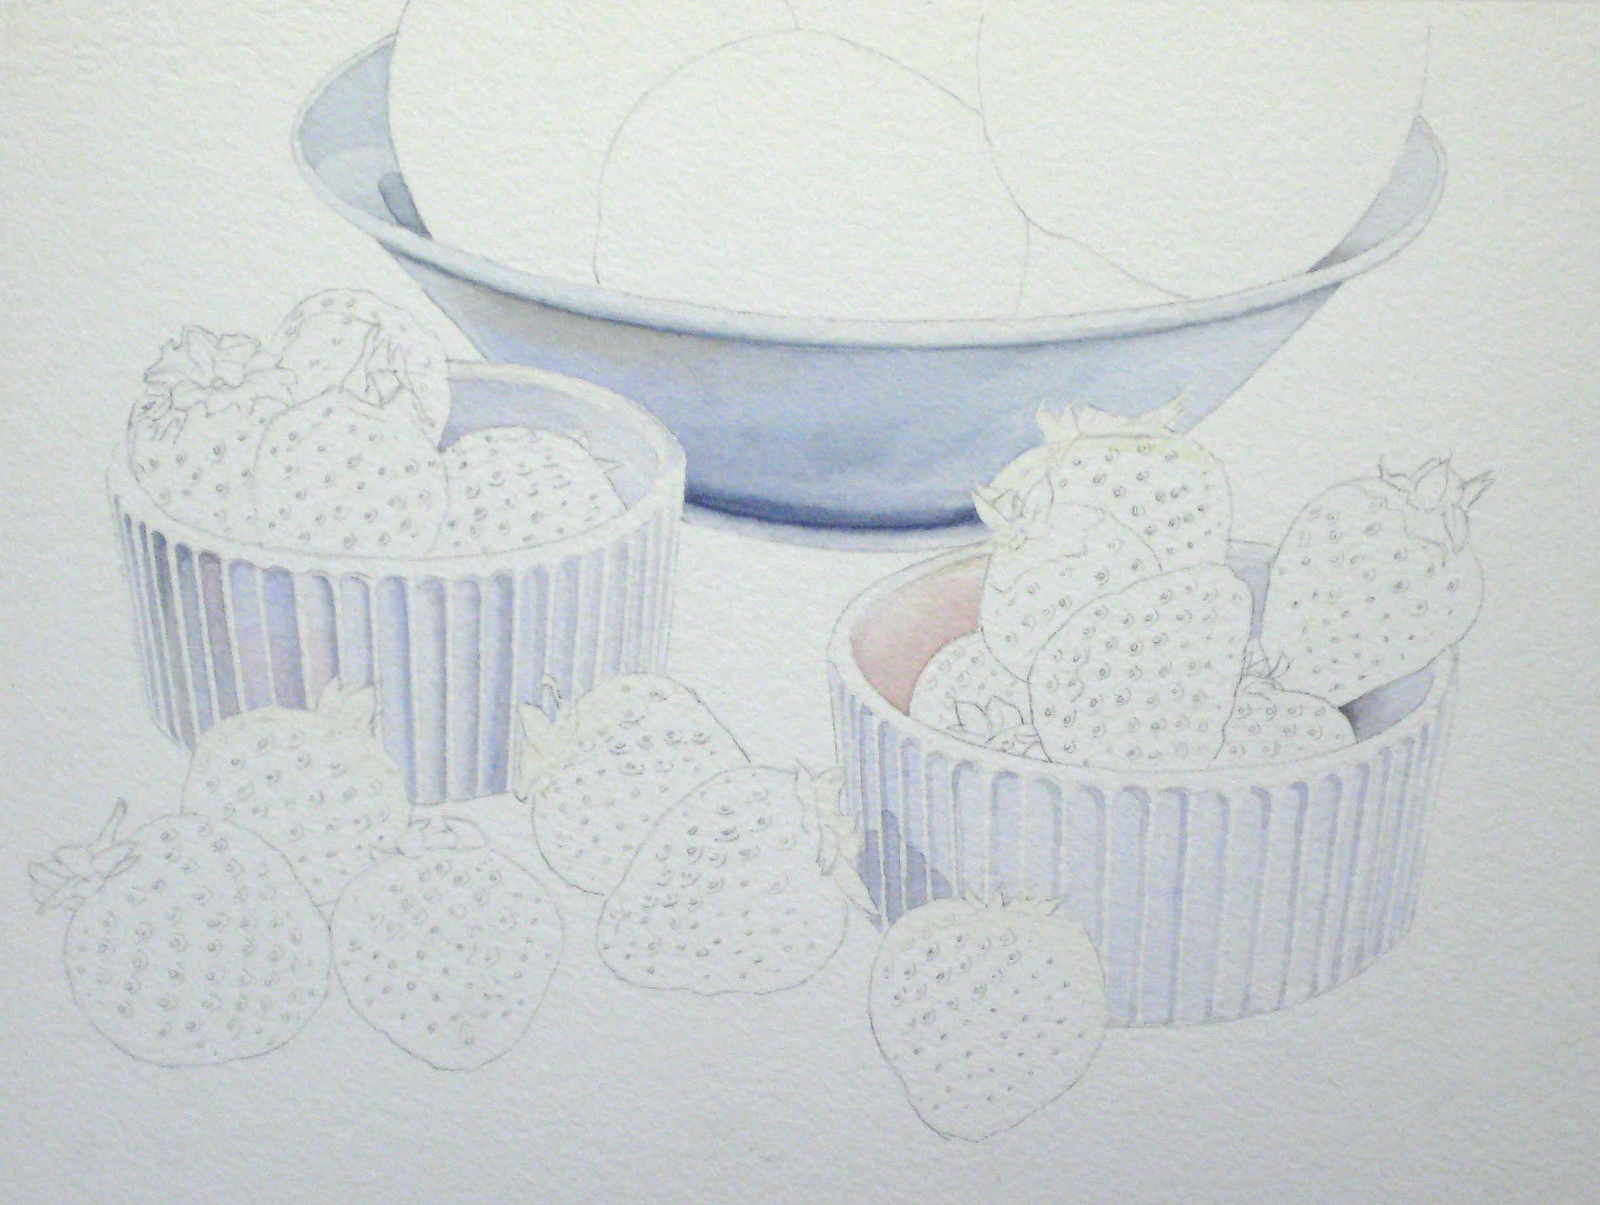
Here is the completed RH bowl using much the same technique. Things still look a little blue, but the red strawberries, green leaves, apples and orange, and dark blue background will lesson this effect.
Part 14
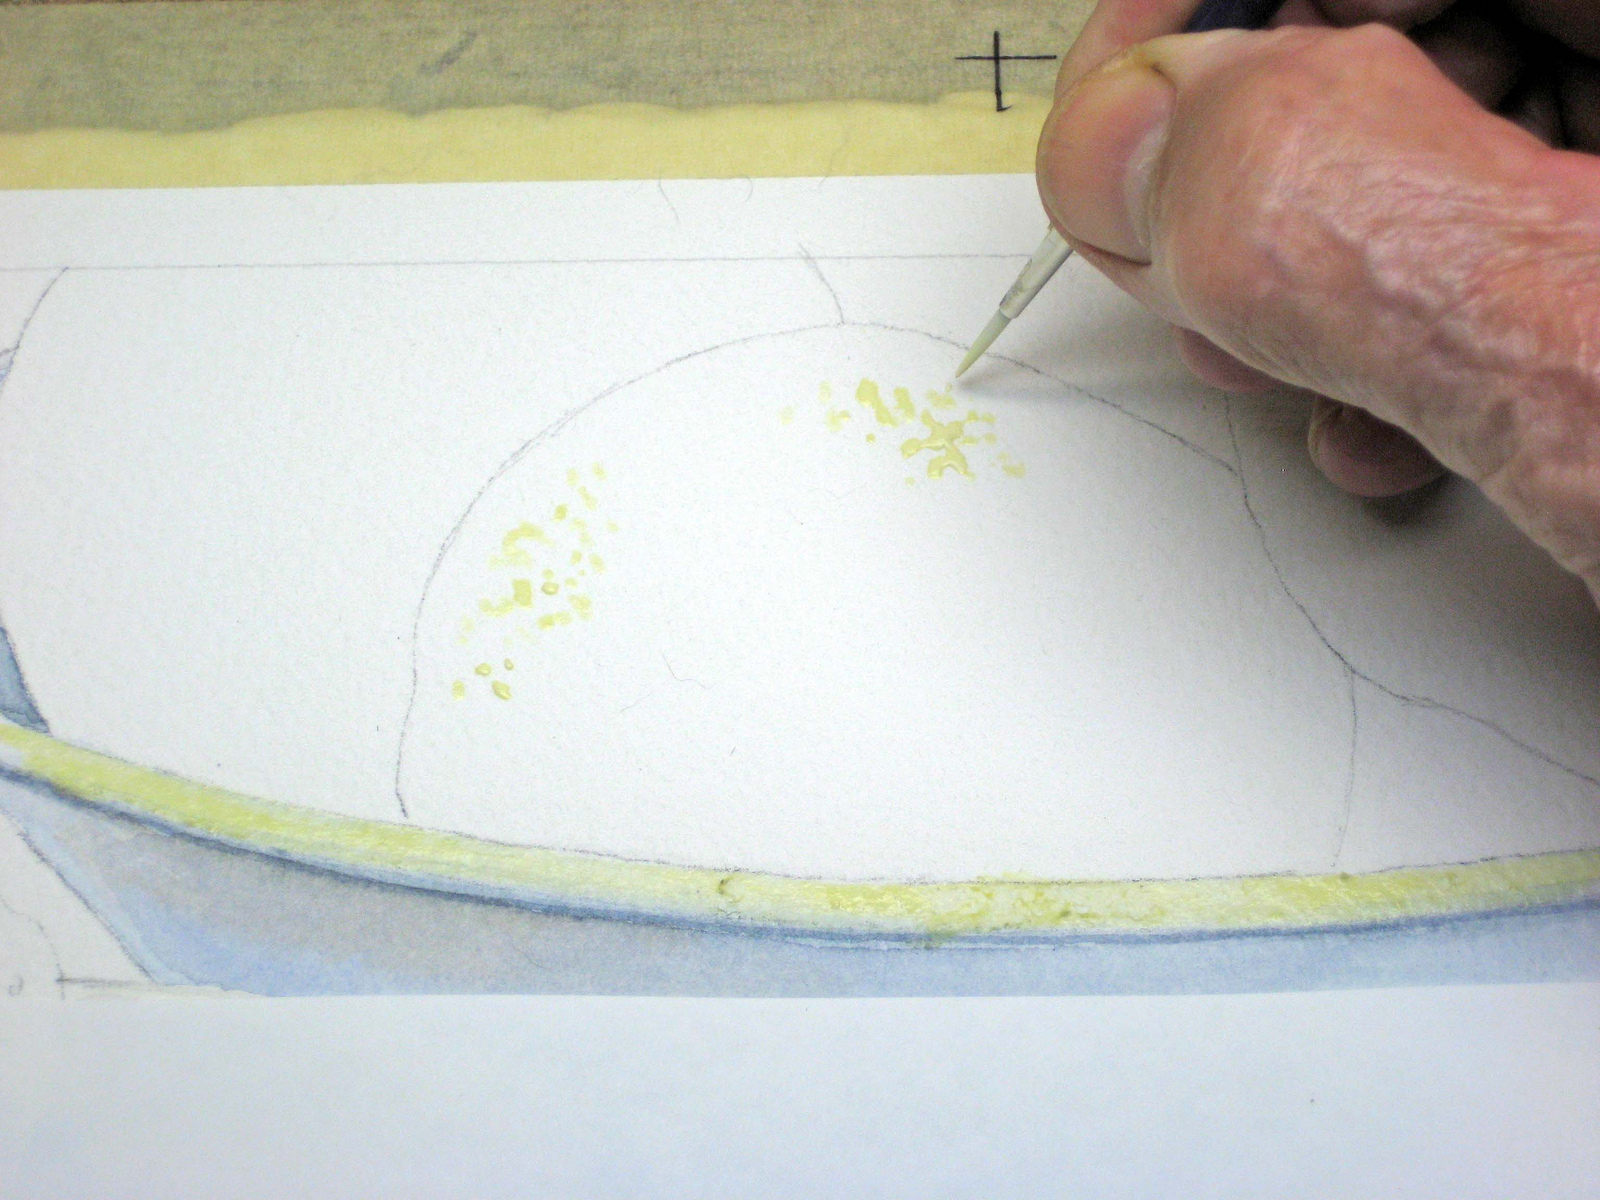
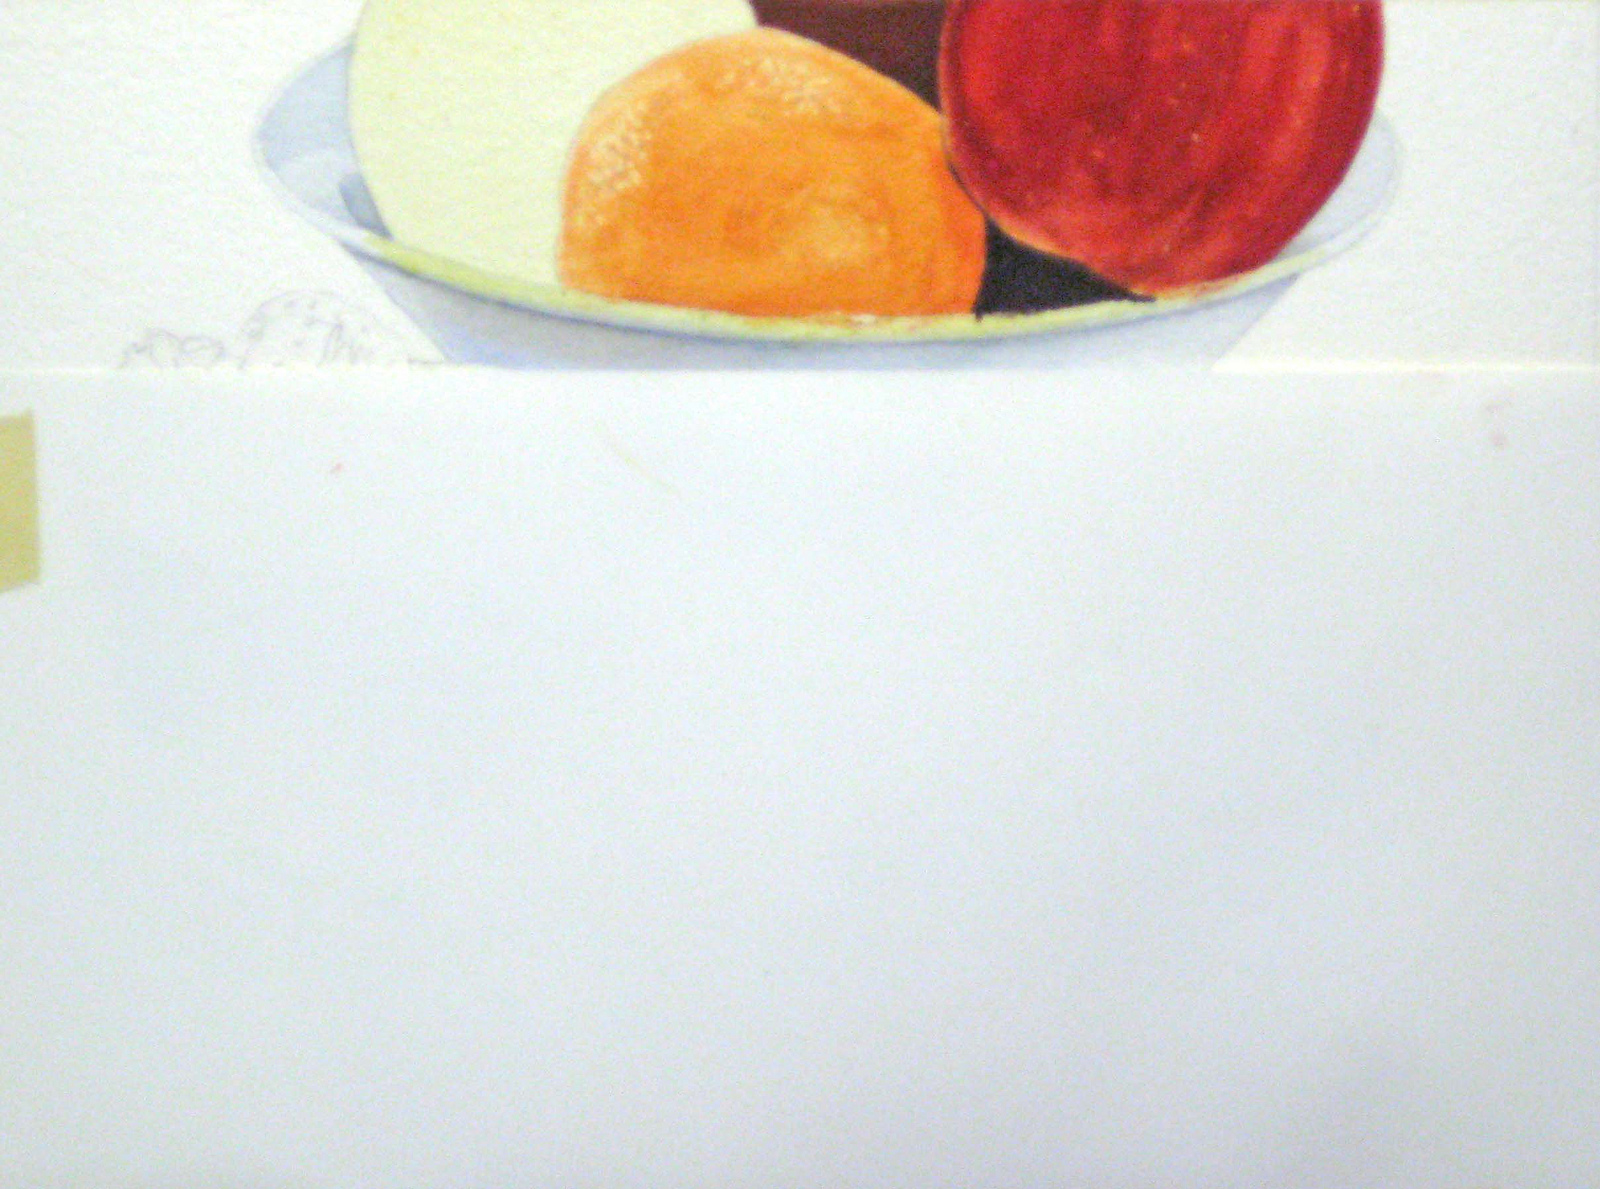
Here I’ve masked off the lip of the bowl and put in some textured highlights on the orange for later modification. Notice I’ve covered up the rest of my painting as I’m a slow painter and over time white paper can get dirty and smudged.
Part 15
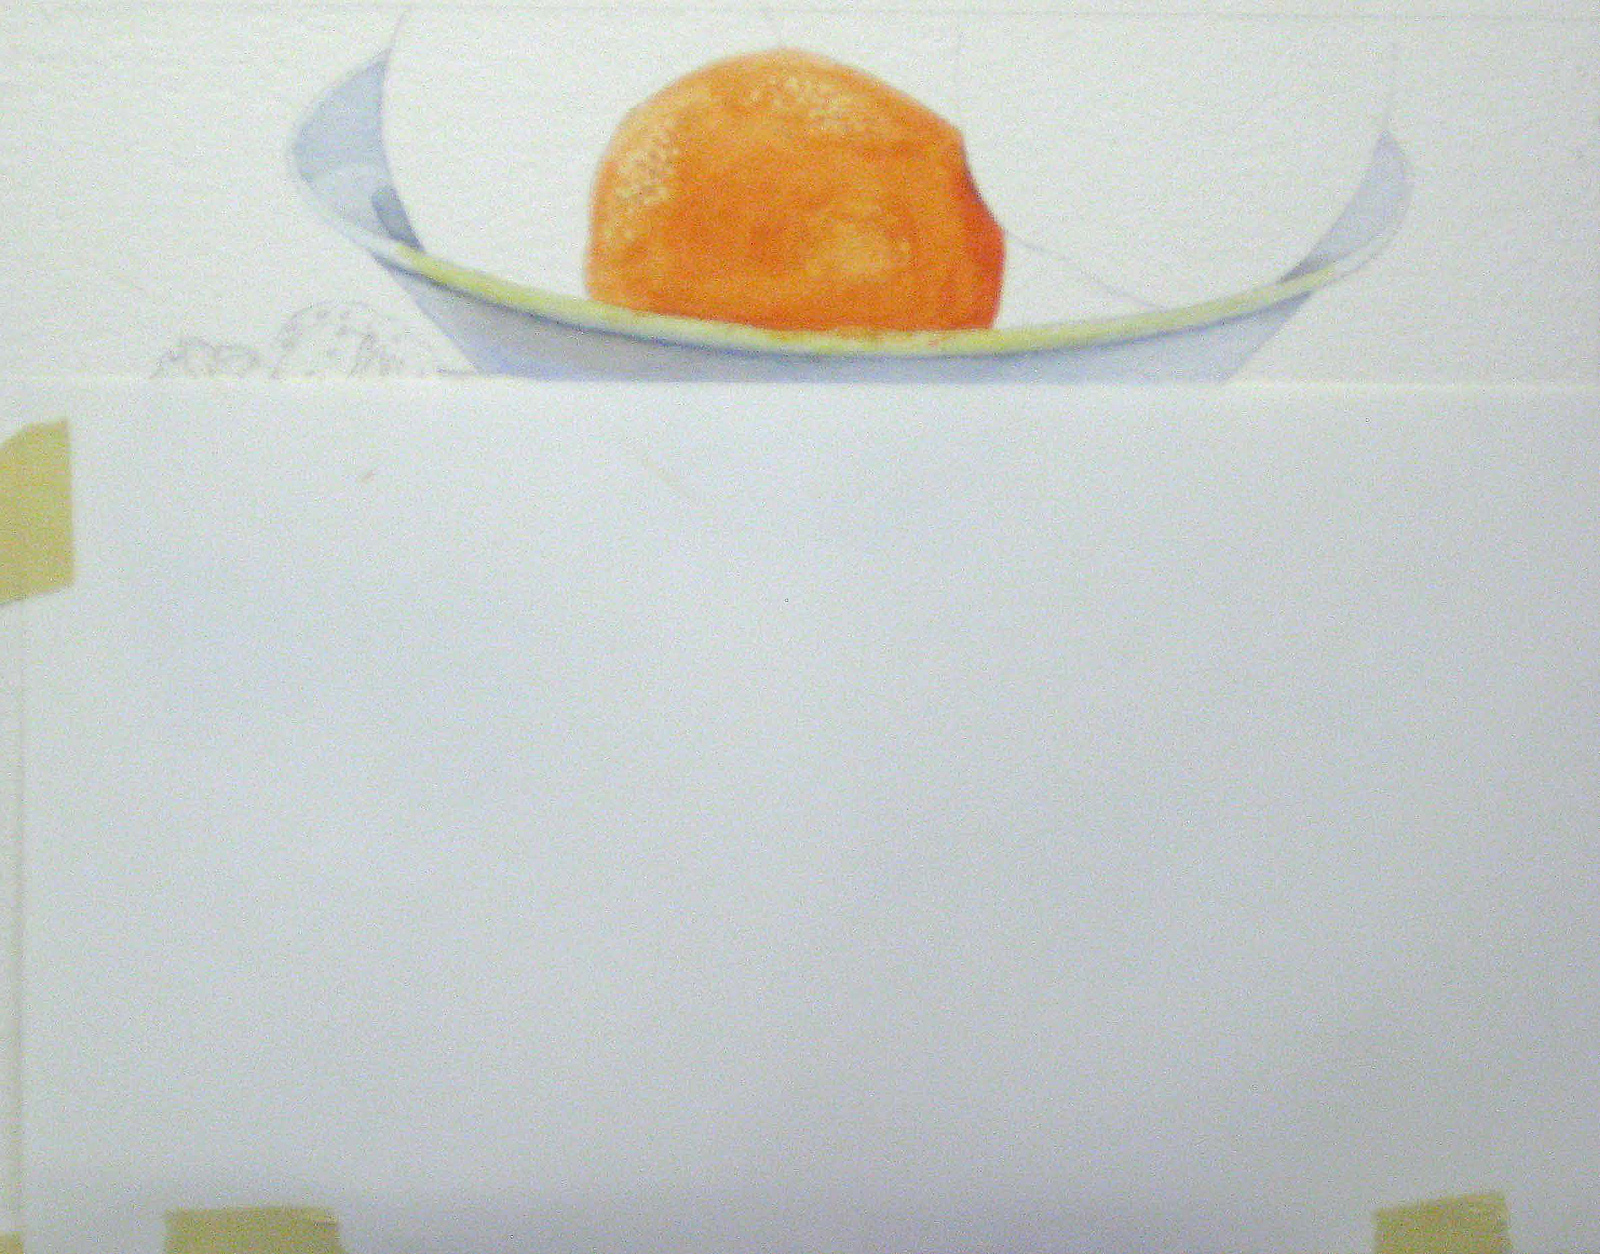
The completed orange. I used Cadmium Red and Cadmium Yellow Deep for my base colour. The masking highlights were removed and some blending added. With plenty of colour you’ll have lots to play with, using a small scrub brush and clear water.
Part 16
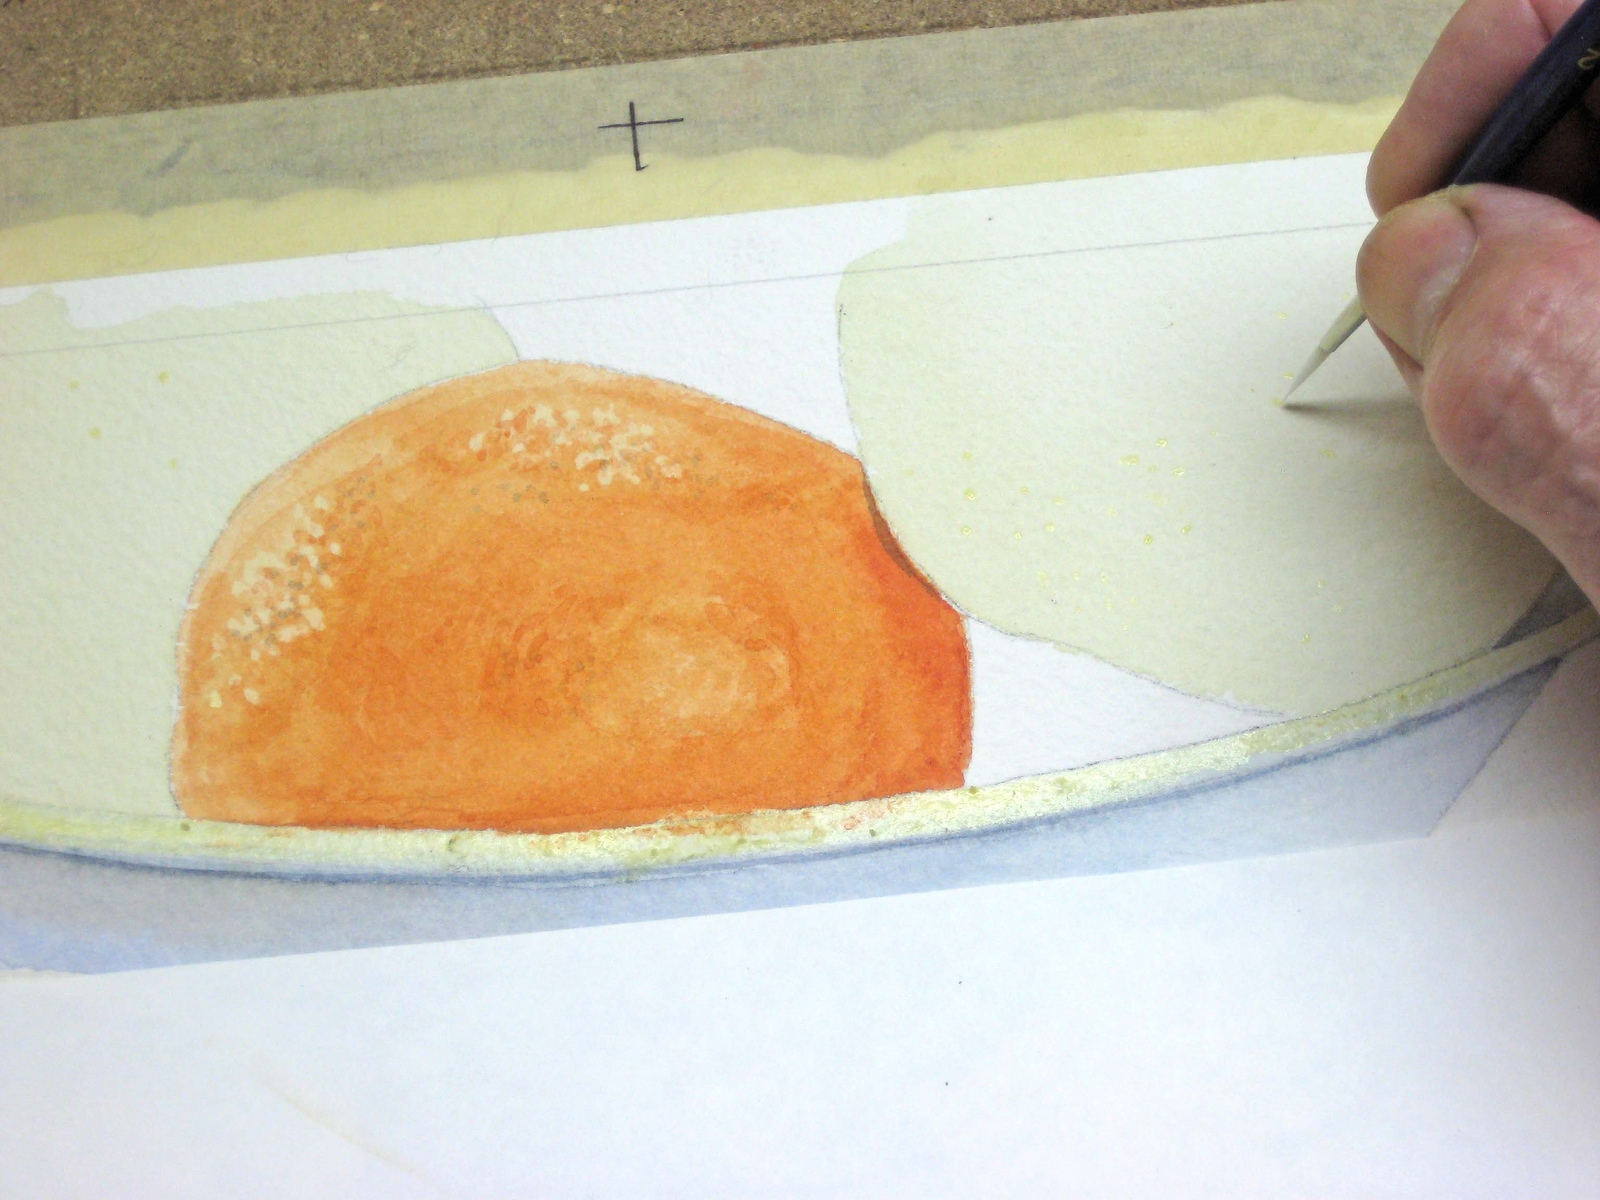
Now I’ve put on a pale base colour of Aureolin yellow and Sap Green, then applied some liquid masking dots to try to capture the apple texture. Click Here for a step-by-step watercolor demo on apples.
Part 17
Here is the completed right-hand apple and some dark interior shadows to make it stand out.
Part 18
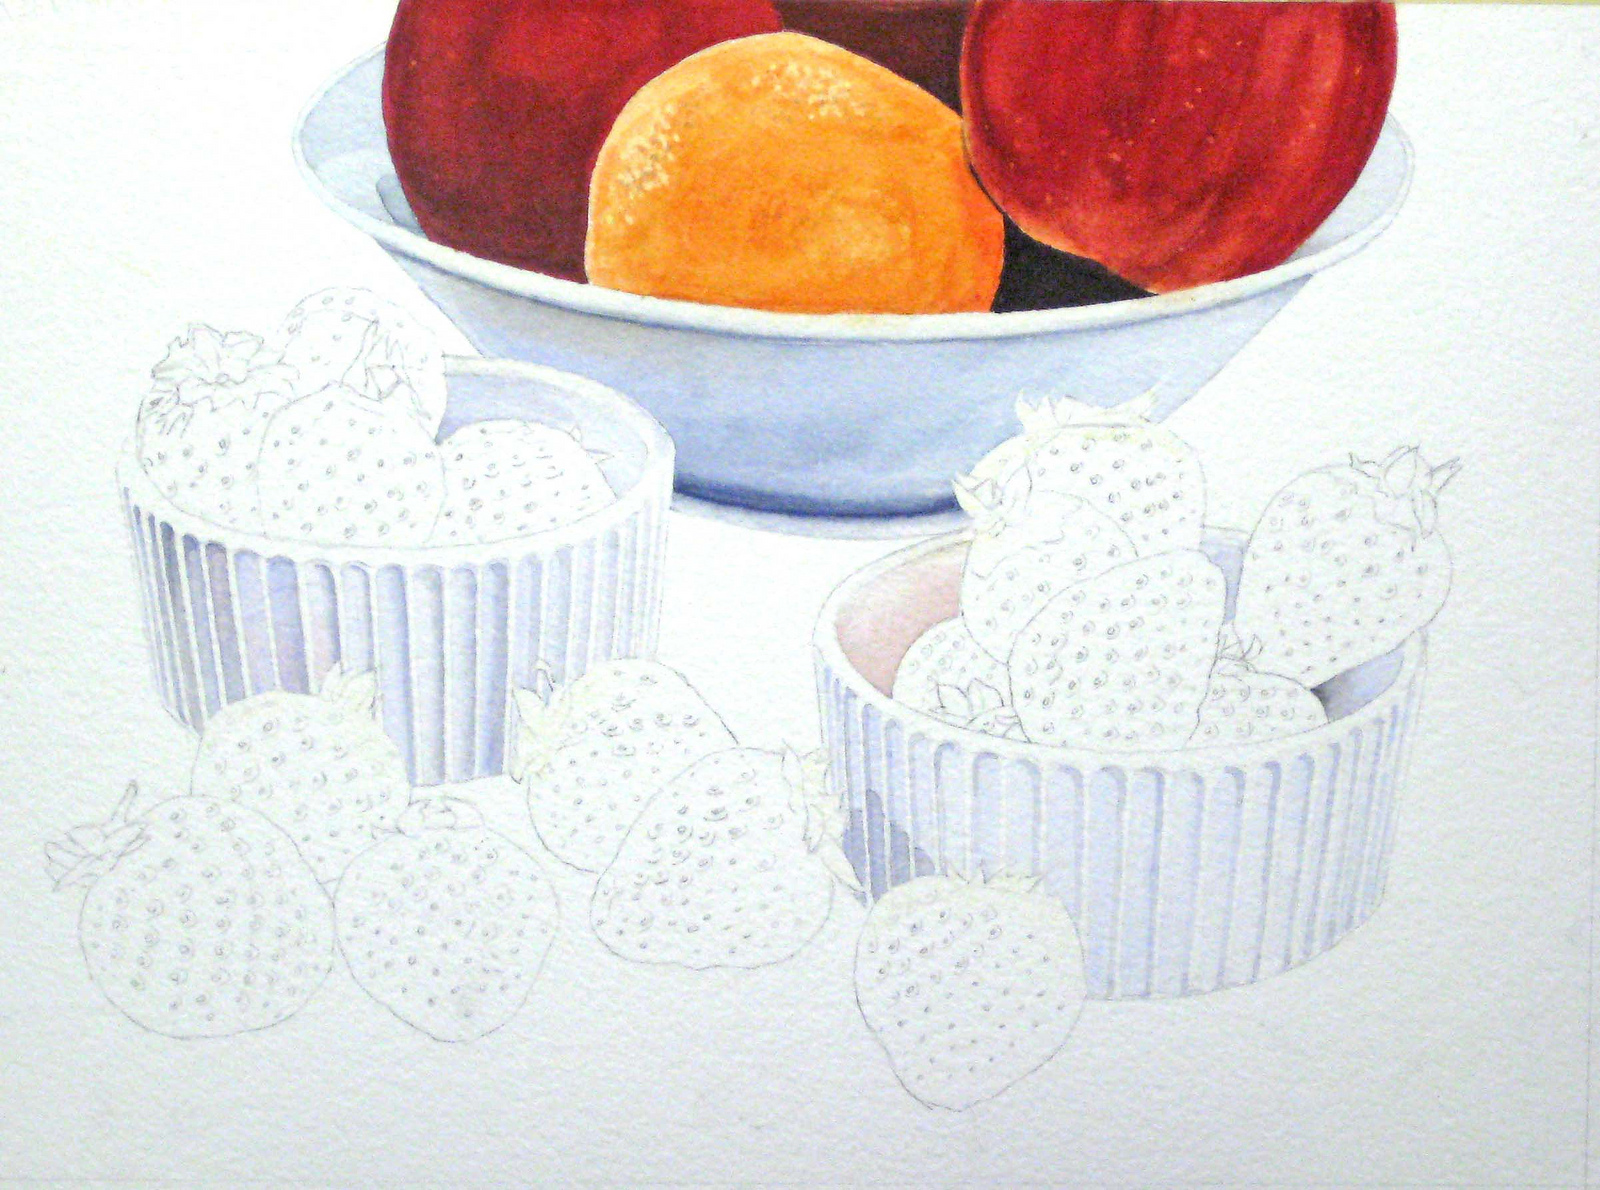
After completing the left-hand apple I’ve cleaned up some edges and blended in the various colour applications. I removed the paper cover and now we’re ready for the strawberries.
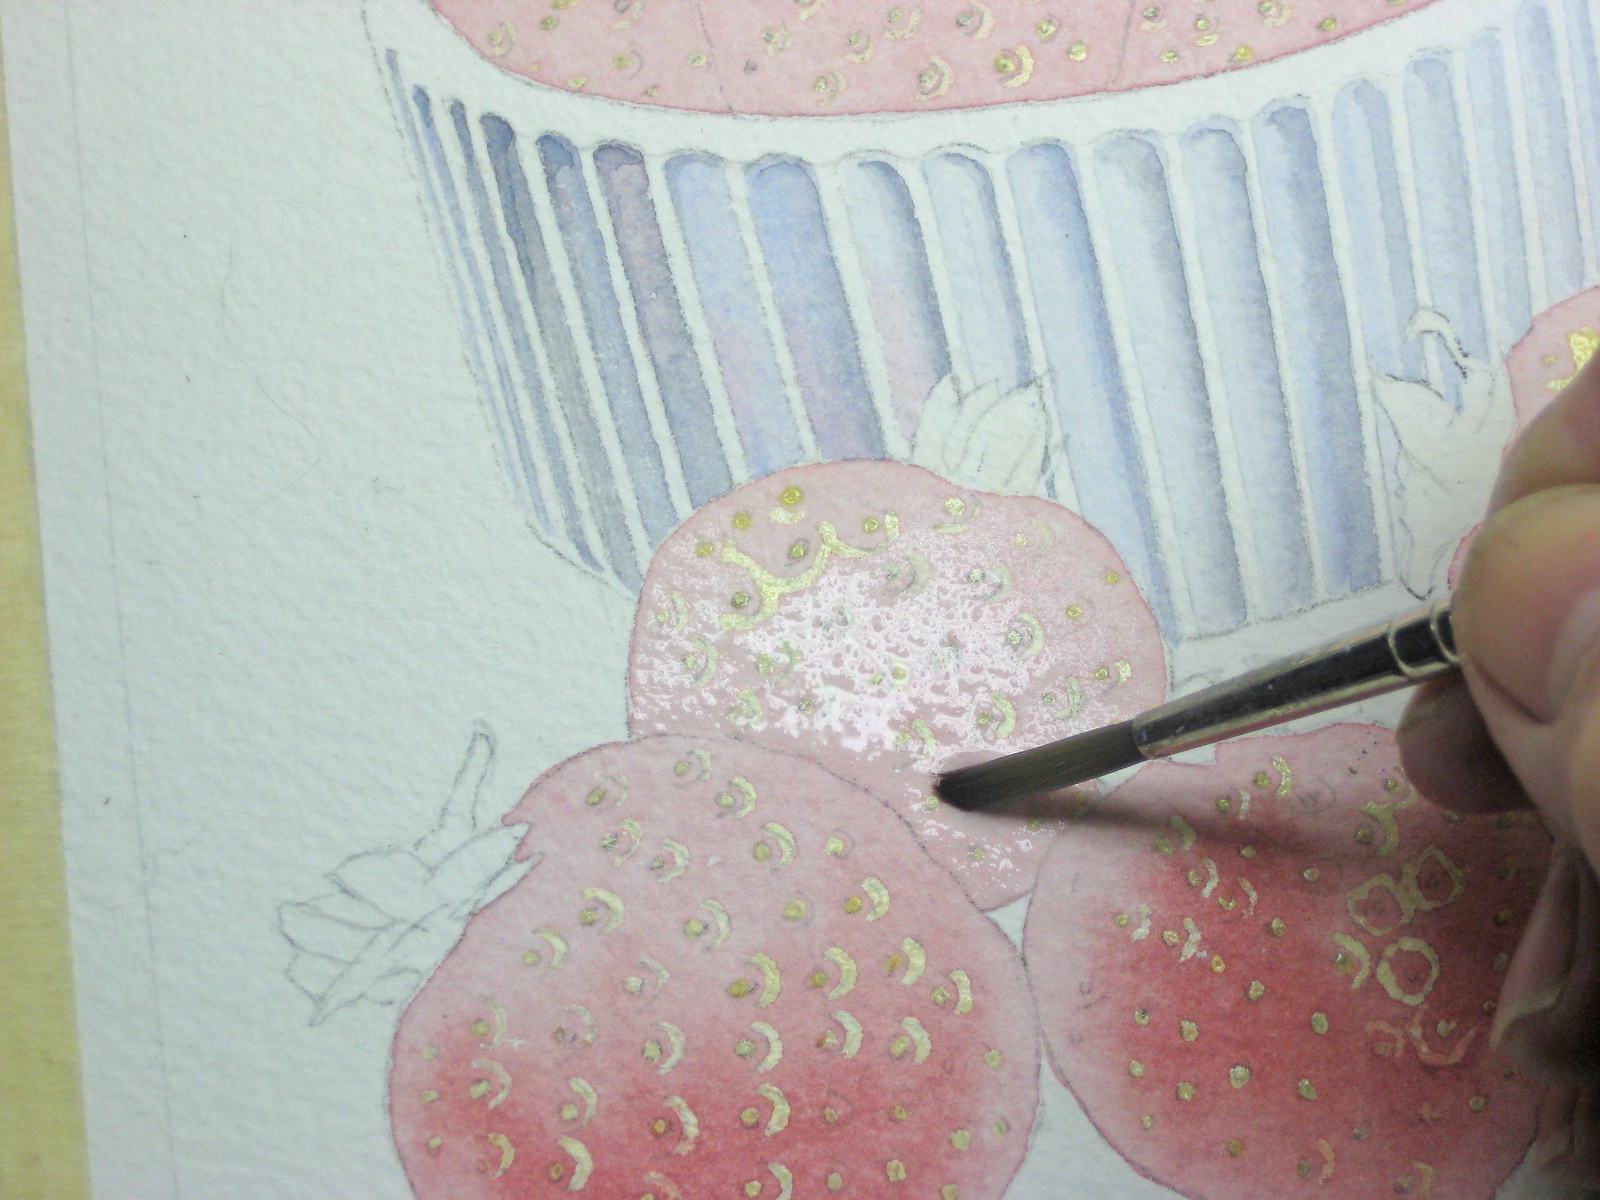
Part 19
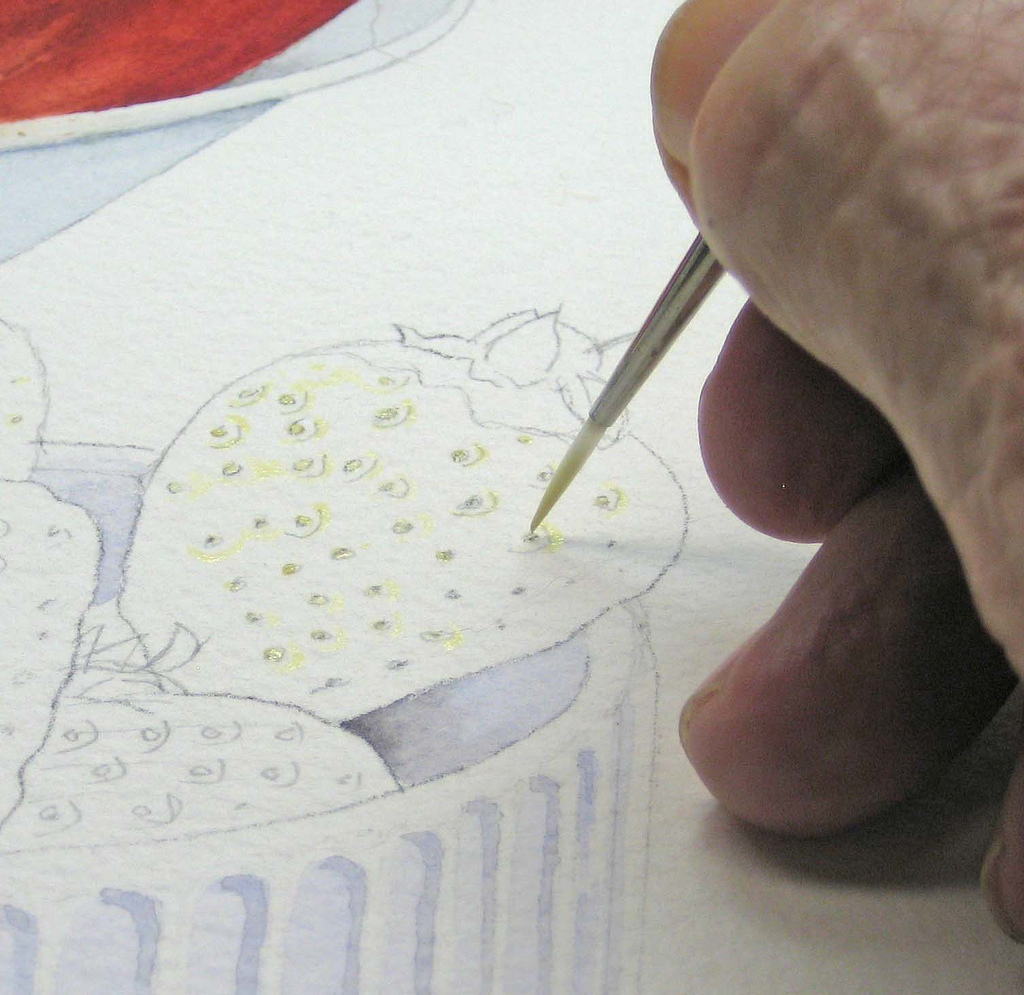
The next step is a tedious one. It involves using liquid masking on all those tiny yellow seeds as we did with our trial strawberry. In this close-up I show how to use a No. 2 round brush to gently put in these seeds and a little surrounding area that will eventually give the illusion of that shine. Keep a sheet of clean white paper under your hand as you work on this, as you can easily transfer moisture from your wrist to the paper. Don’t rush this. The results will be worth the effort.
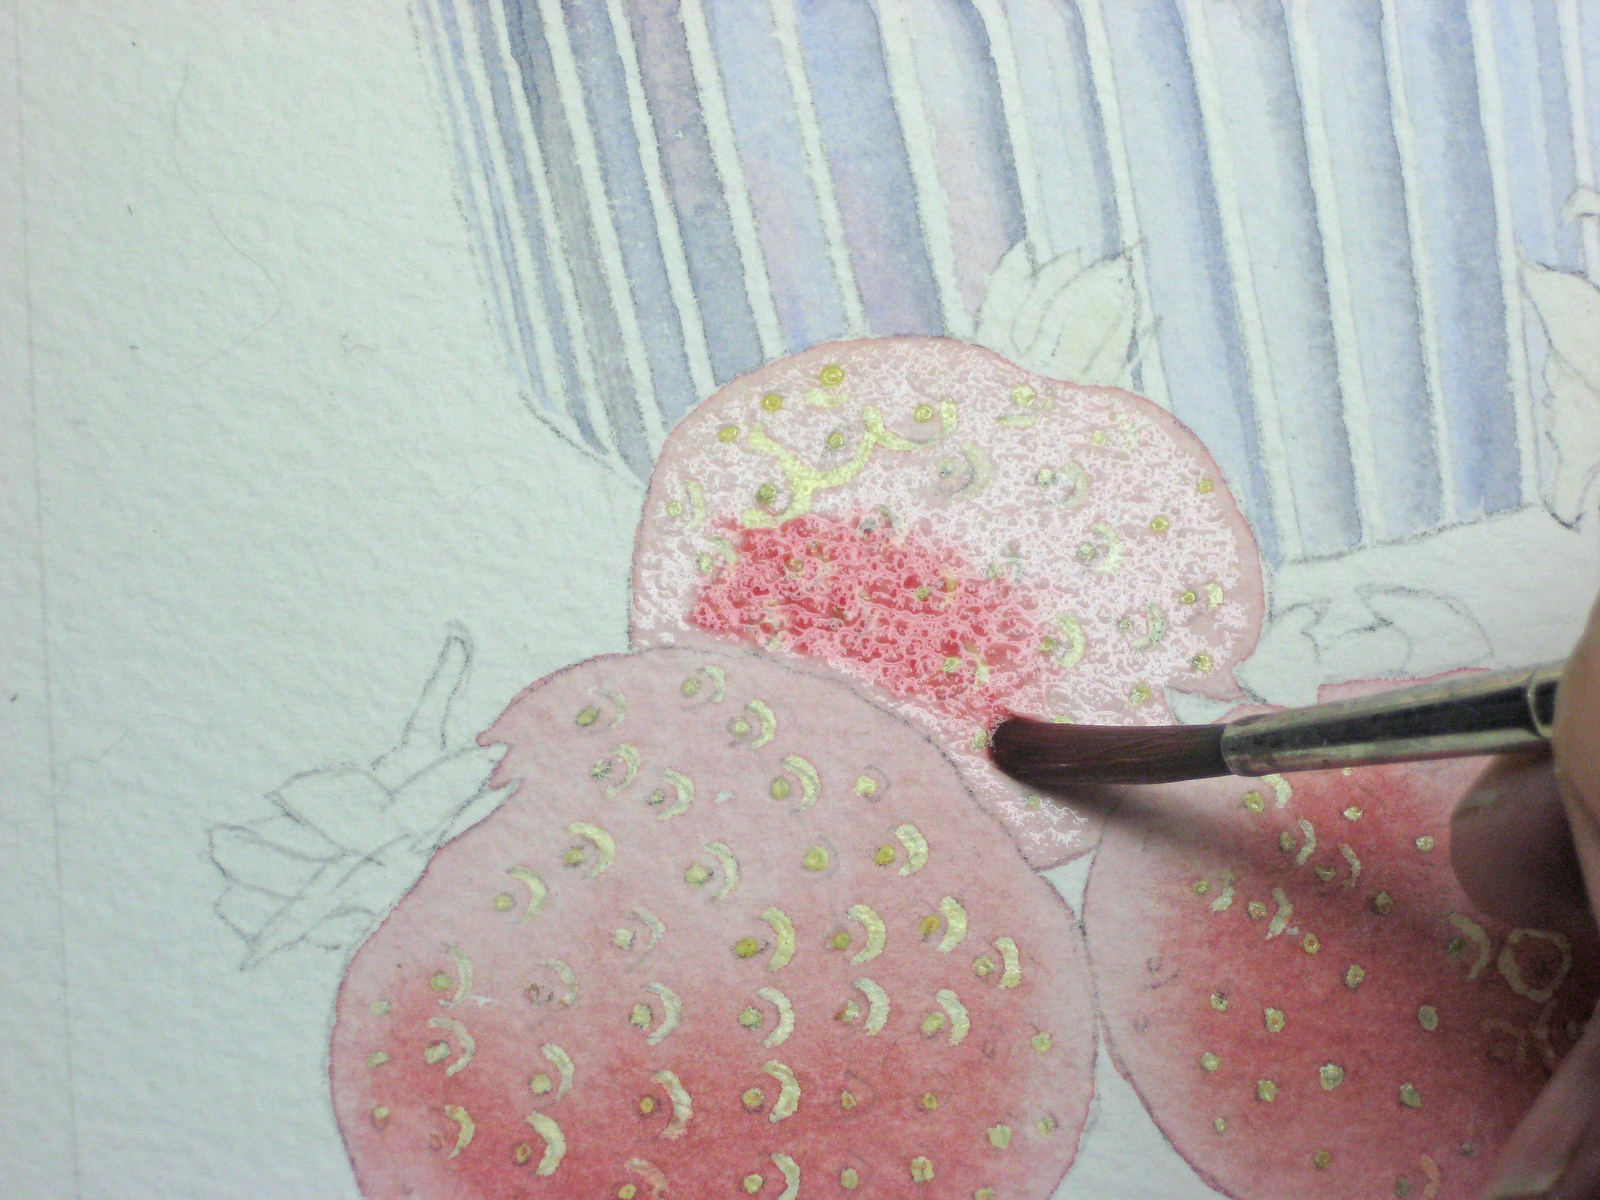
Part 20
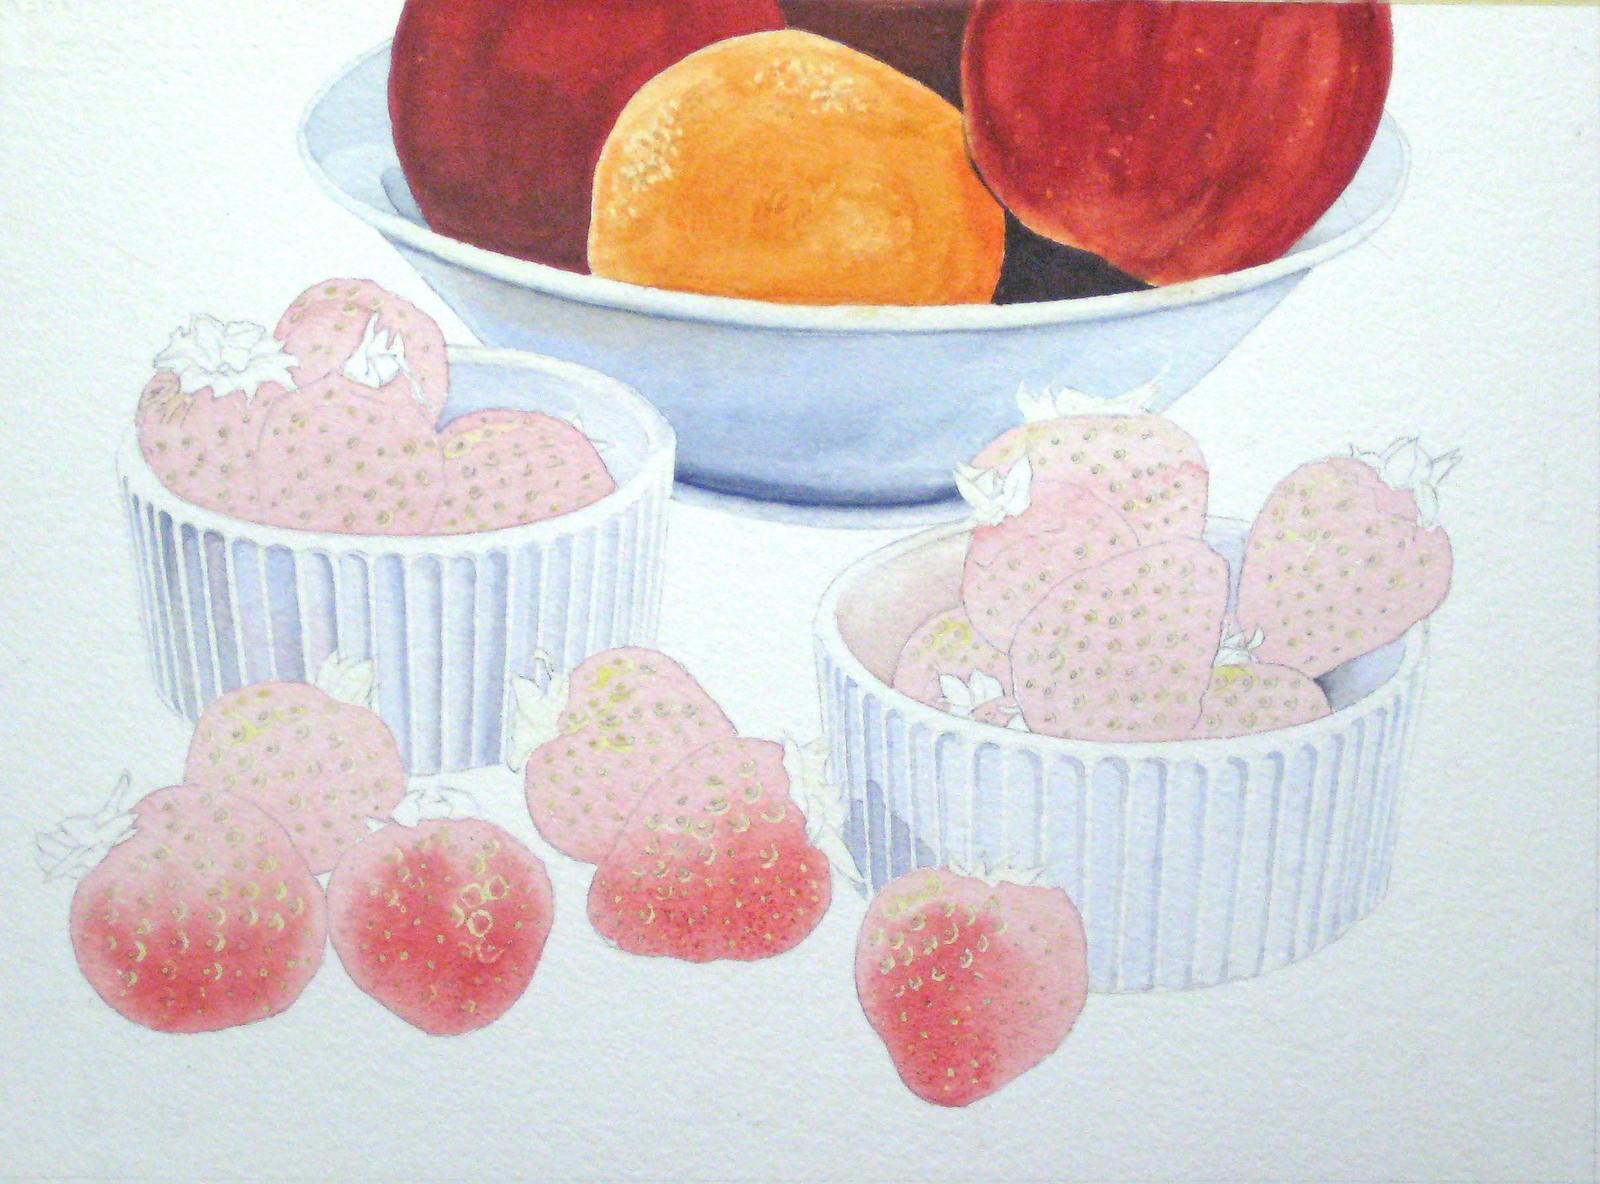
Now I’ve jumped ahead a bit and put the first pale wash of Winsor Red with a touch of Alizarin Crimson over all the strawberries, leaving white paper for the green leaves later. Paint very carefully around those containers as we want to keep that clean white edge. Notice I’ve dropped a little darker colour into some of the lower strawberries and blended the edges. I did this while still at the “glisten” stage, but we’ll have to do the other berries when they’re dry or they will bleed into each other.
Part 21
I made a mistake by removing the liquid masking that will be the green leaves. Using wet-in-wet as I build up the strawberries proved tedious, so I eventually re-did them. Here I’m using a clear water wash so the colour will flow where I want it to and allow blending.
Part 22
Using a fully loaded brush I begin dropping my darker colour where needed. With this realistic technique using watercolours, you must have patience as you build up each strawberry to achieve that shiny look.
Part 23
This is how it should look at this stage. There is much more blending to be done. Be patient and the results will please you.
Part 24
Here are the rest of the strawberries done one by one with a wet-in-wet technique. At this stage our strawberries look as though they have a nasty disease, but be patient again.
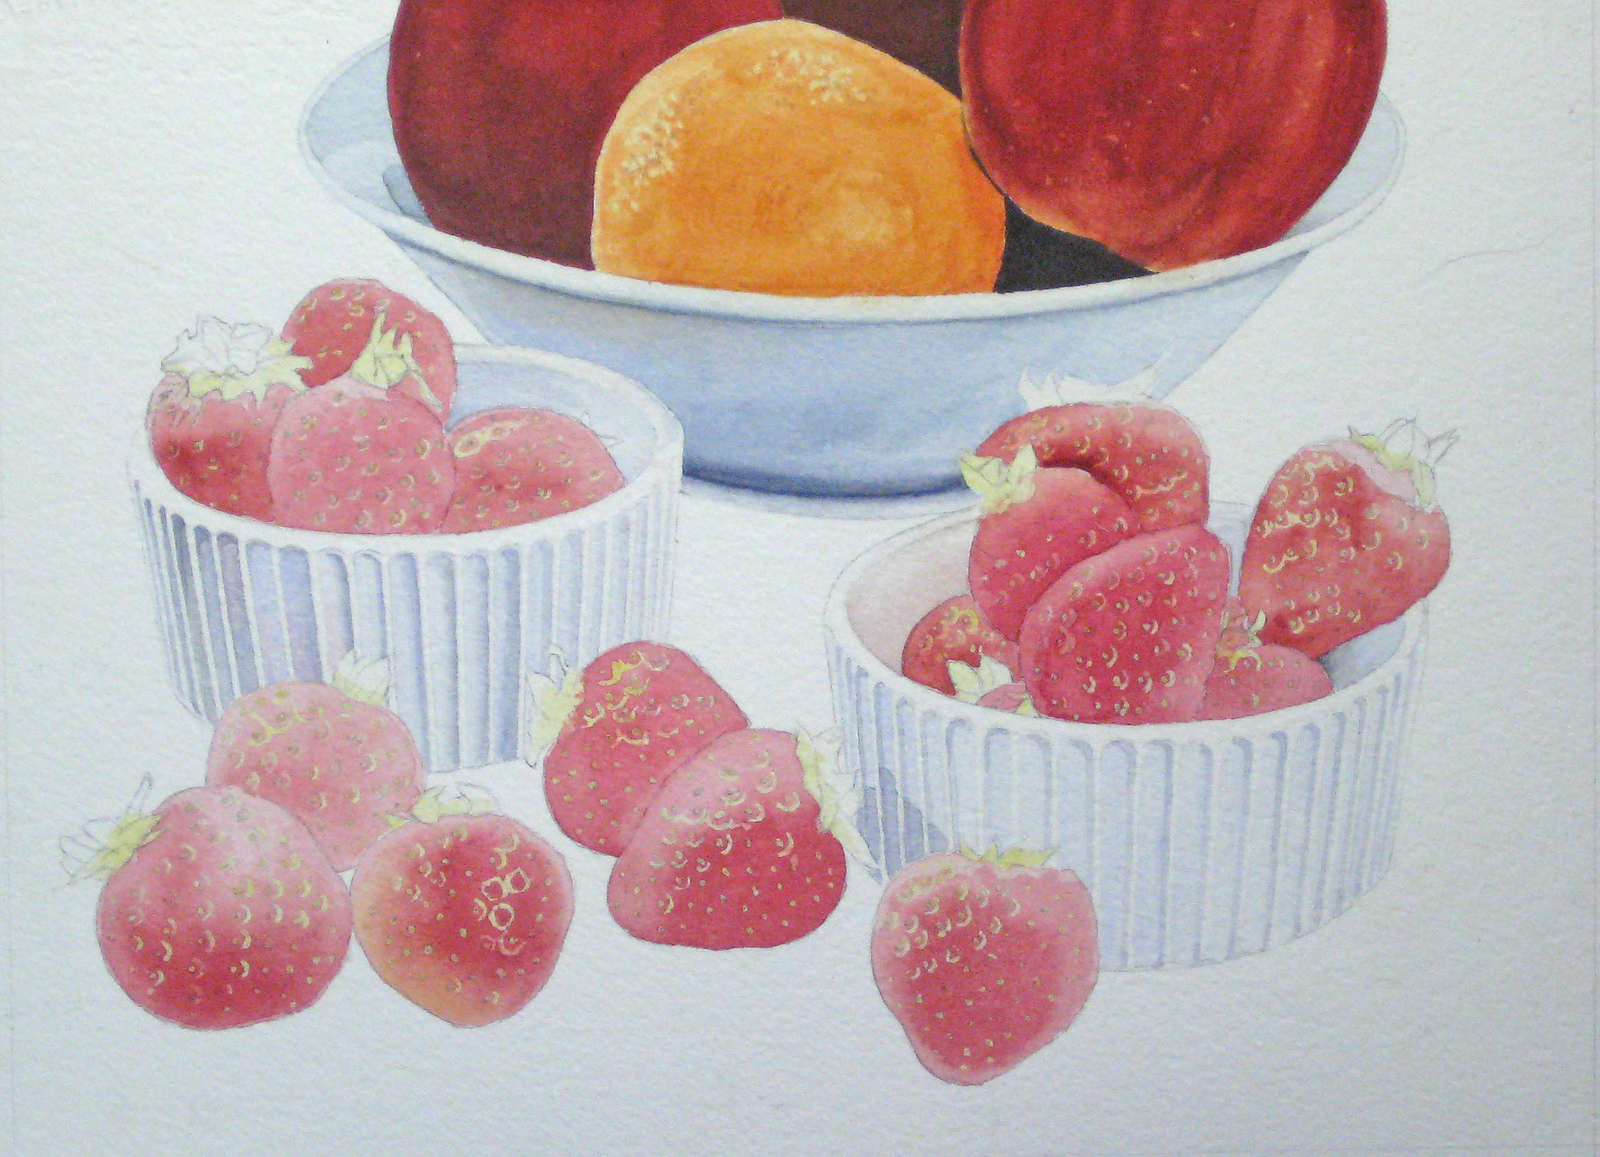
Part 25
Here I’ve completed one container of strawberries using the techniques we covered in images 2-7. You may have difficulty of keeping that clean white edge along the rim of your white china container, in which case you can use liquid masking to protect it. I’ve done some further modification by using a stiff wet bristle brush and facial tissue to give that diffused shine.
Part 26
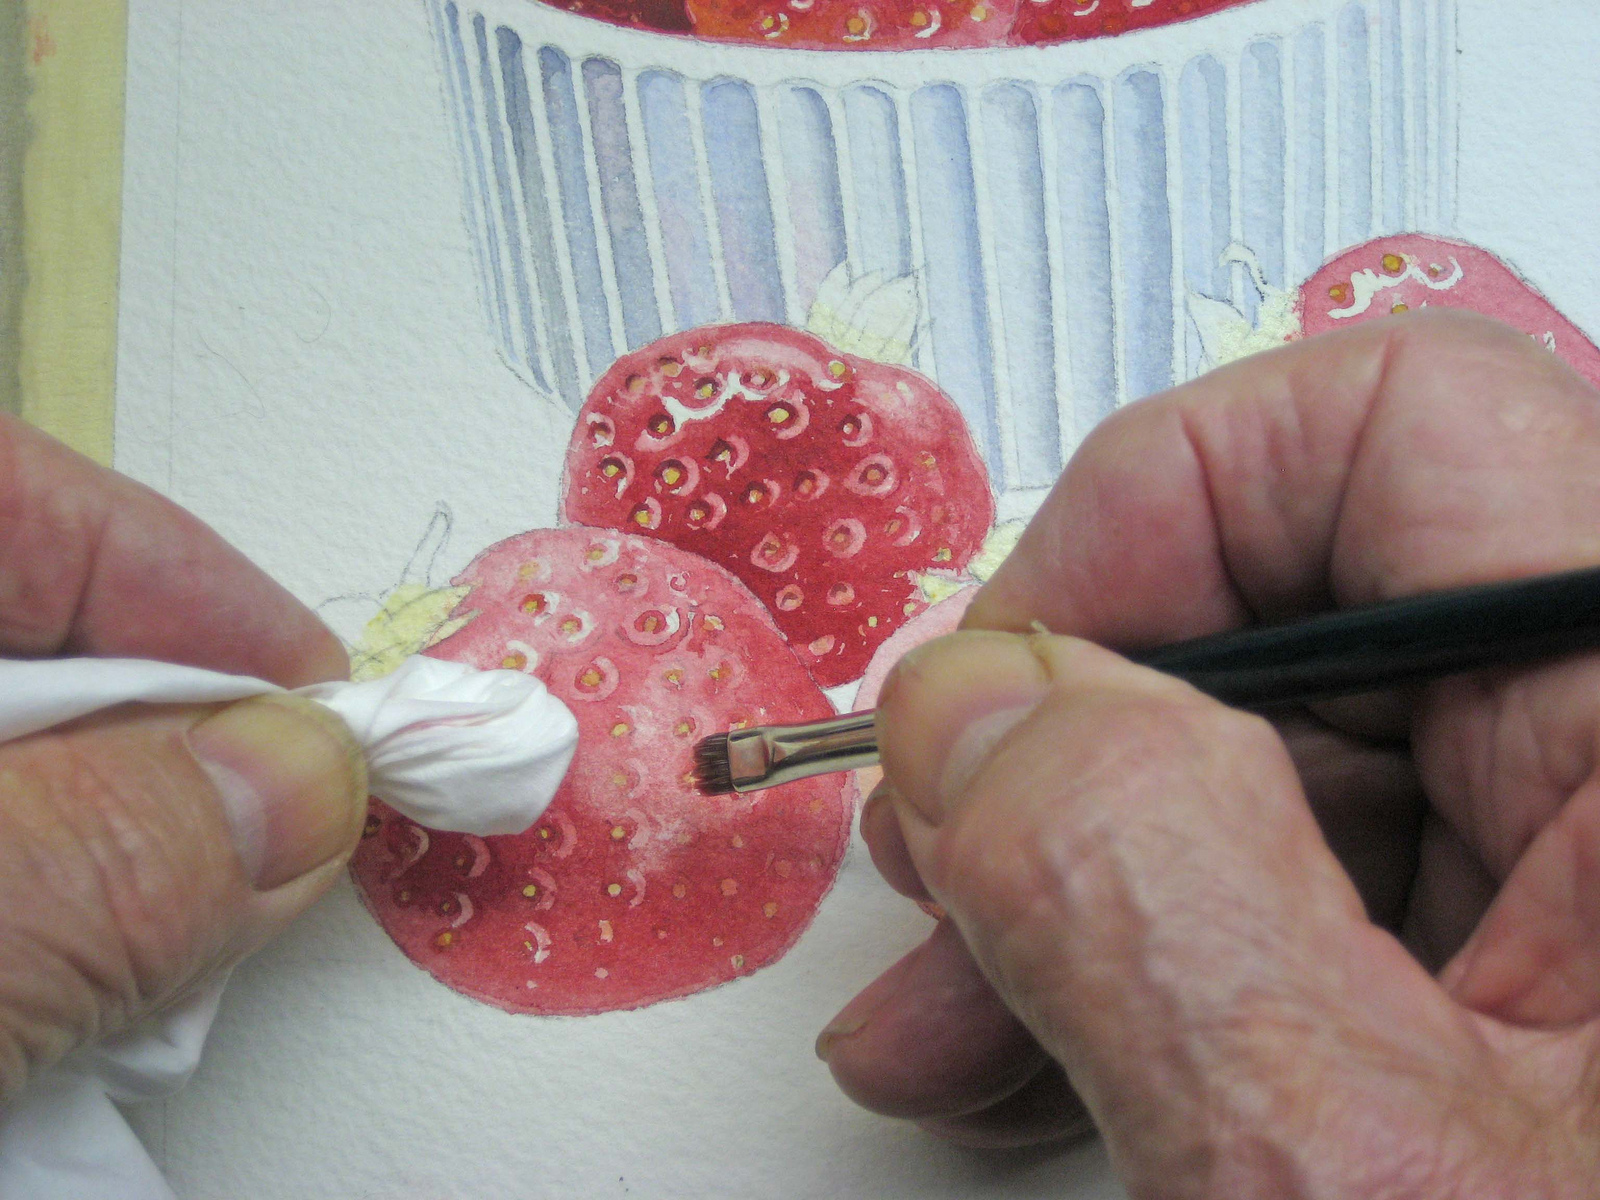
In this extreme close-up I’m using a small scrub brush and facial tissue to lift out and blend in areas I think need a more subtle light. Sometimes I use a 1/4″ square brush for even subtler effects. All this is difficult to show in a single image, and watching an actual demo is better. Pretend I’m at your elbow showing how this is done.
Part 27
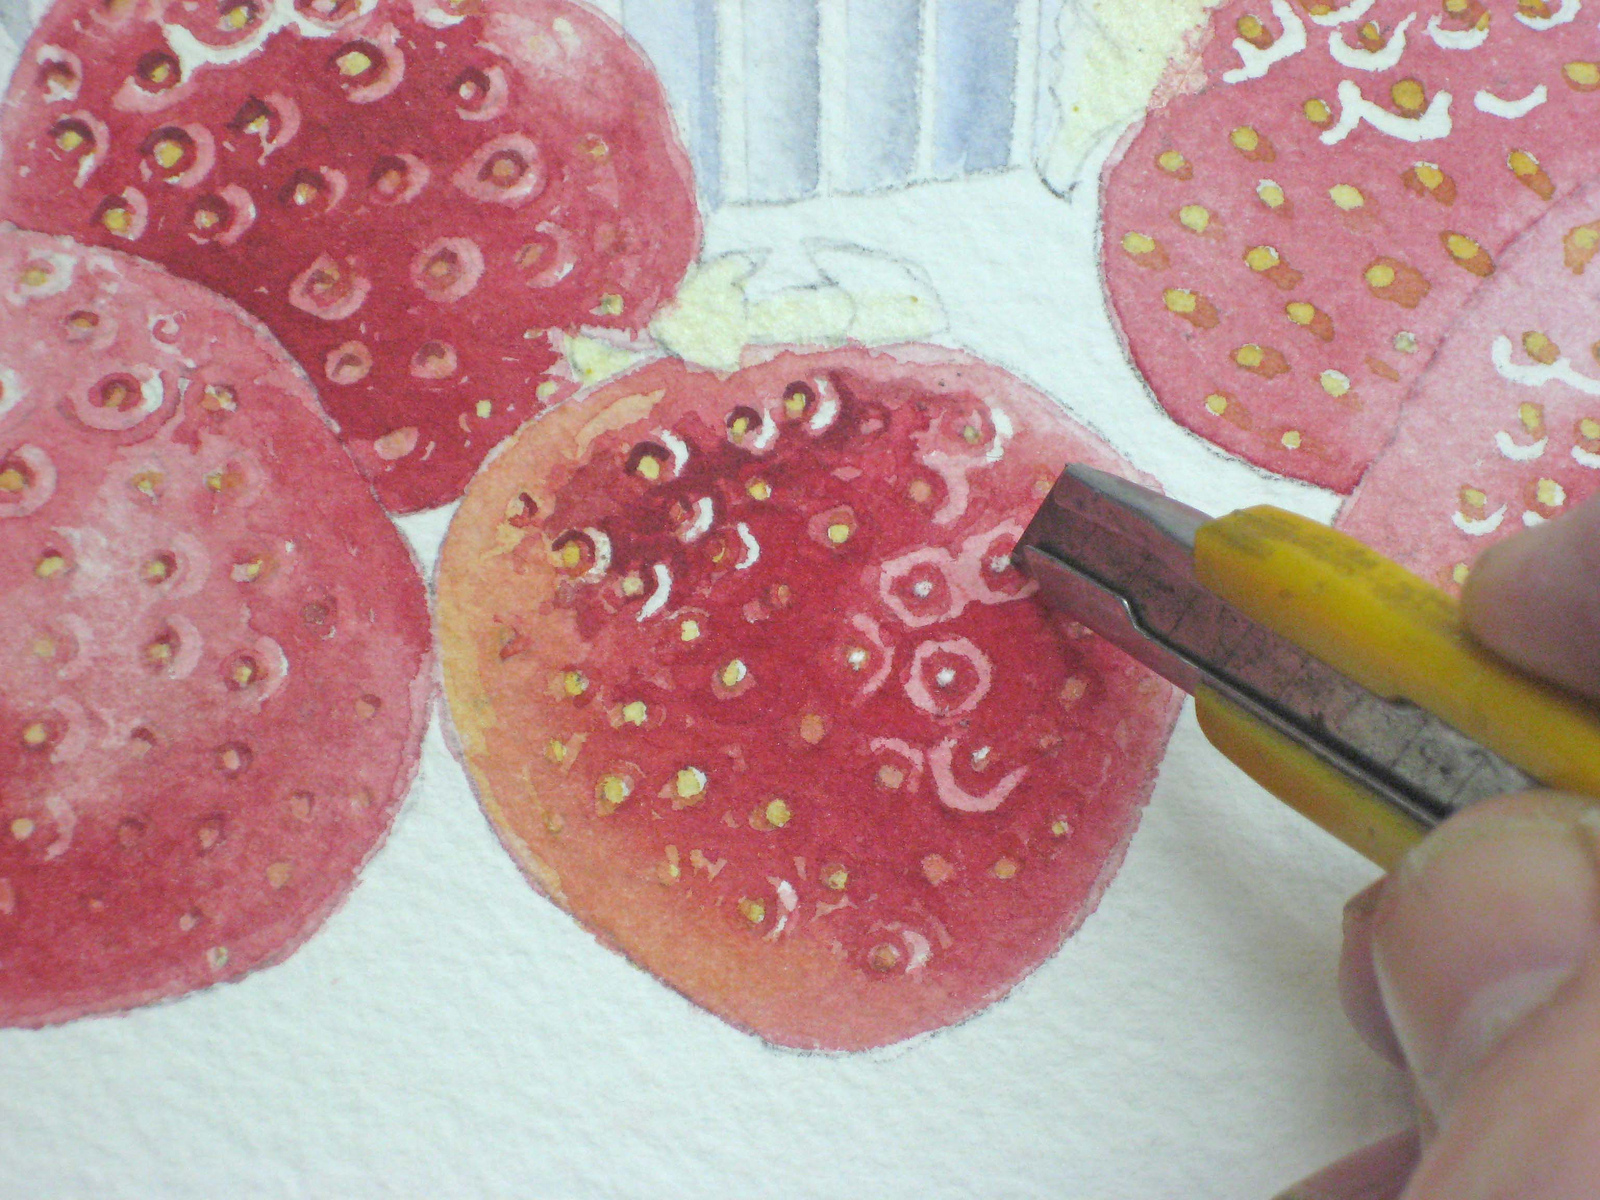
If you lose some of these tiny seeds you can restore then with a sharp knife as shown here in this extreme close-up.
Part 28
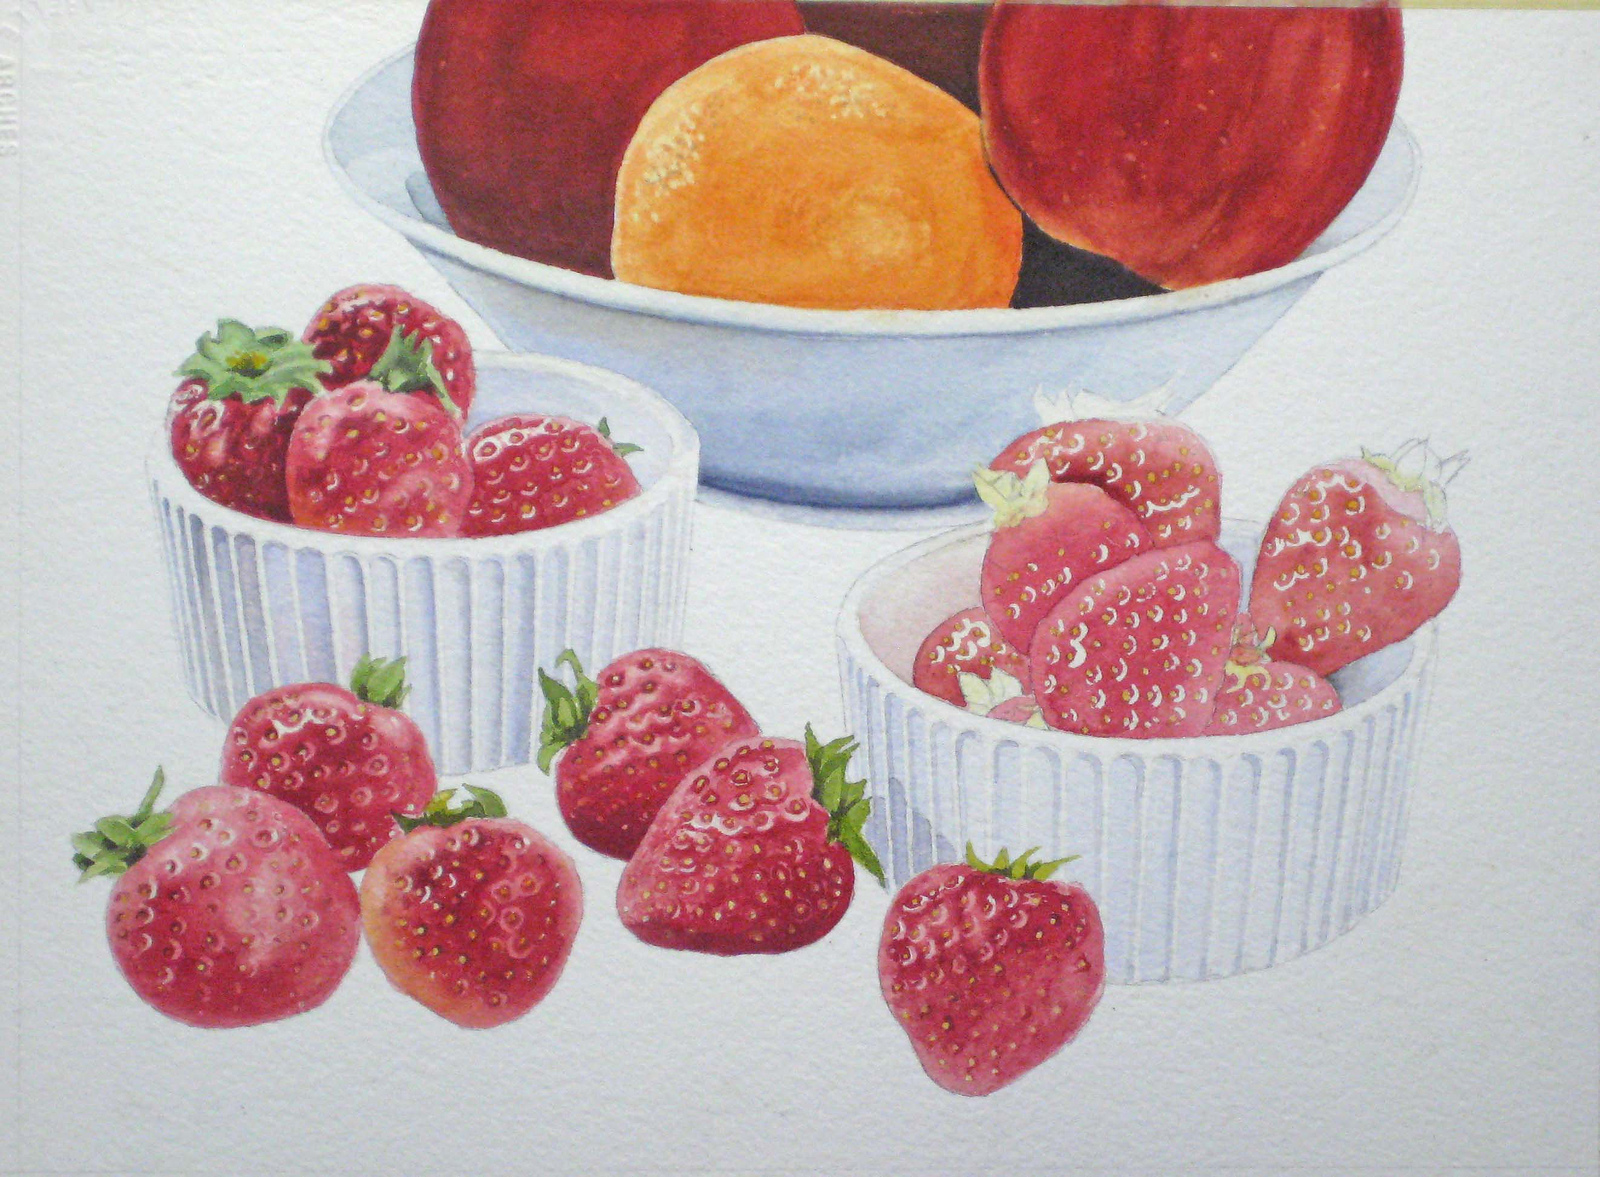
OK – are you still with me? Or have you decided to take up knitting or rock climbing as an alternate hobby? Here is how it should look at this stage. I decided to break up the tedium of doing all those strawberries and paint in the leaves – just to sort of encourage me before tackling the right hand bowl and then the dark background. If you’re looking at this with a 21′ computer monitor, you should be about five feet away for normal viewing.
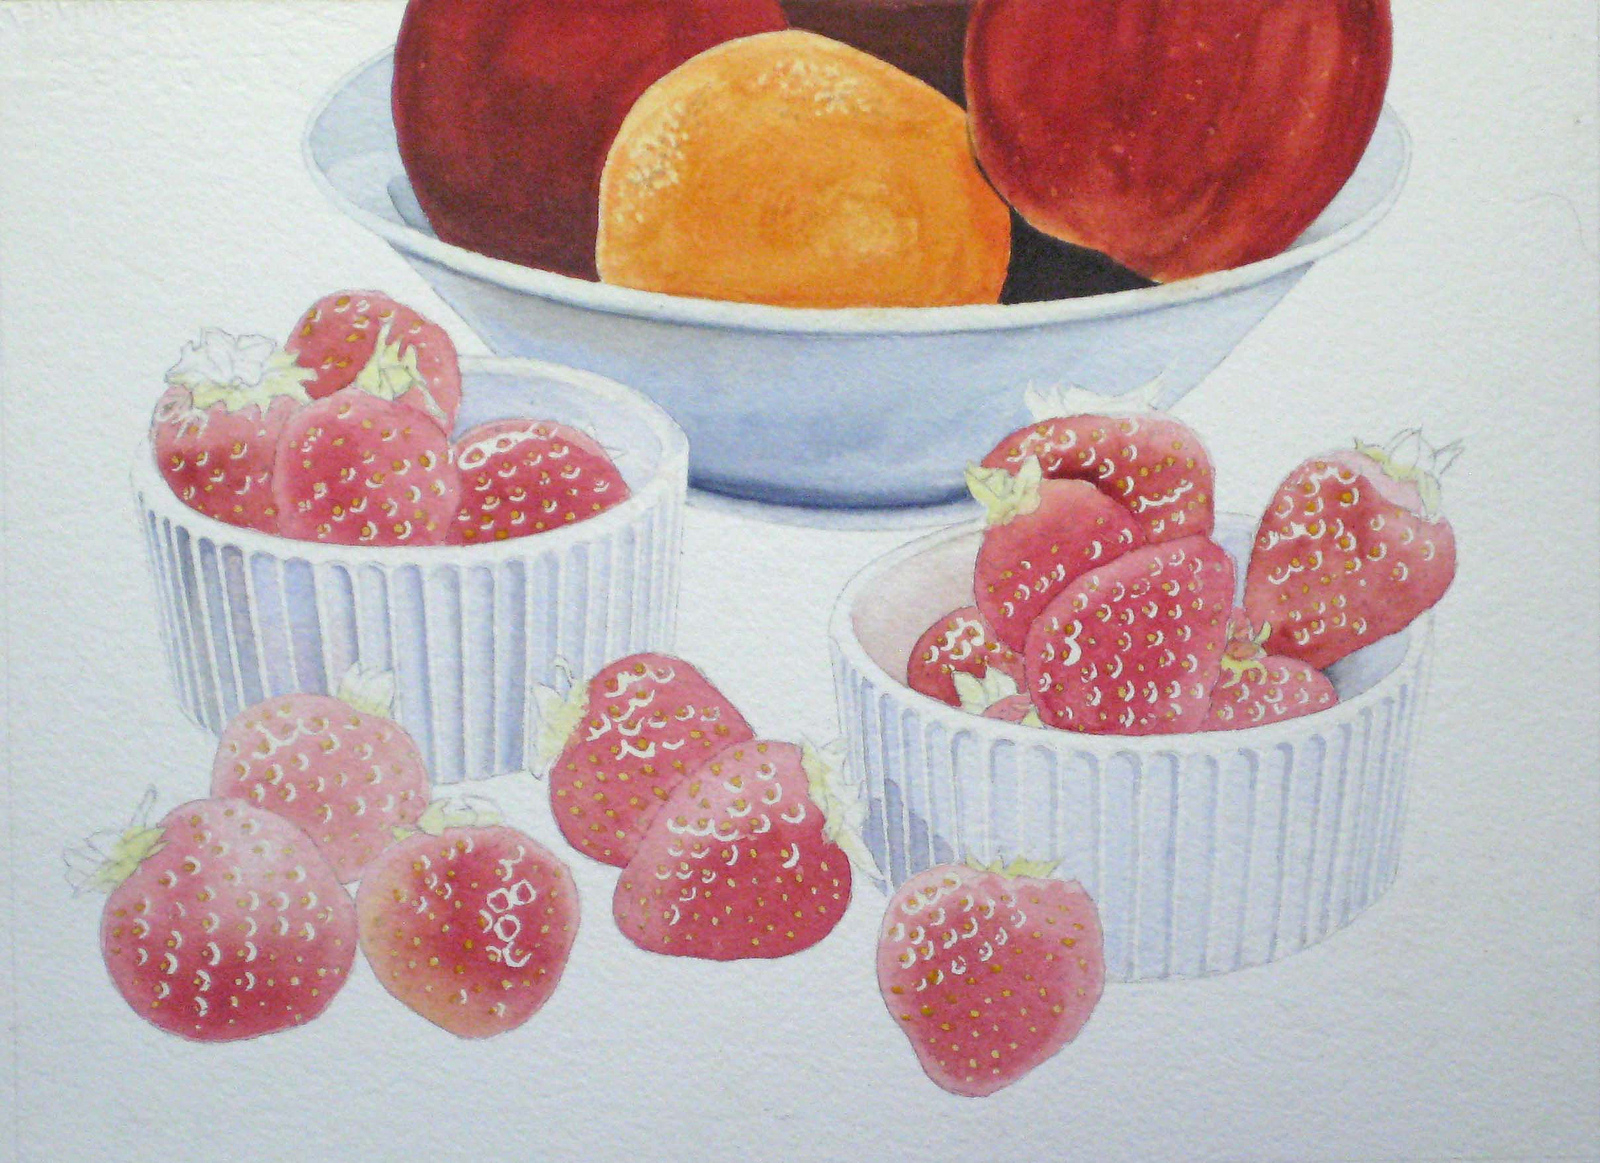
Part 29
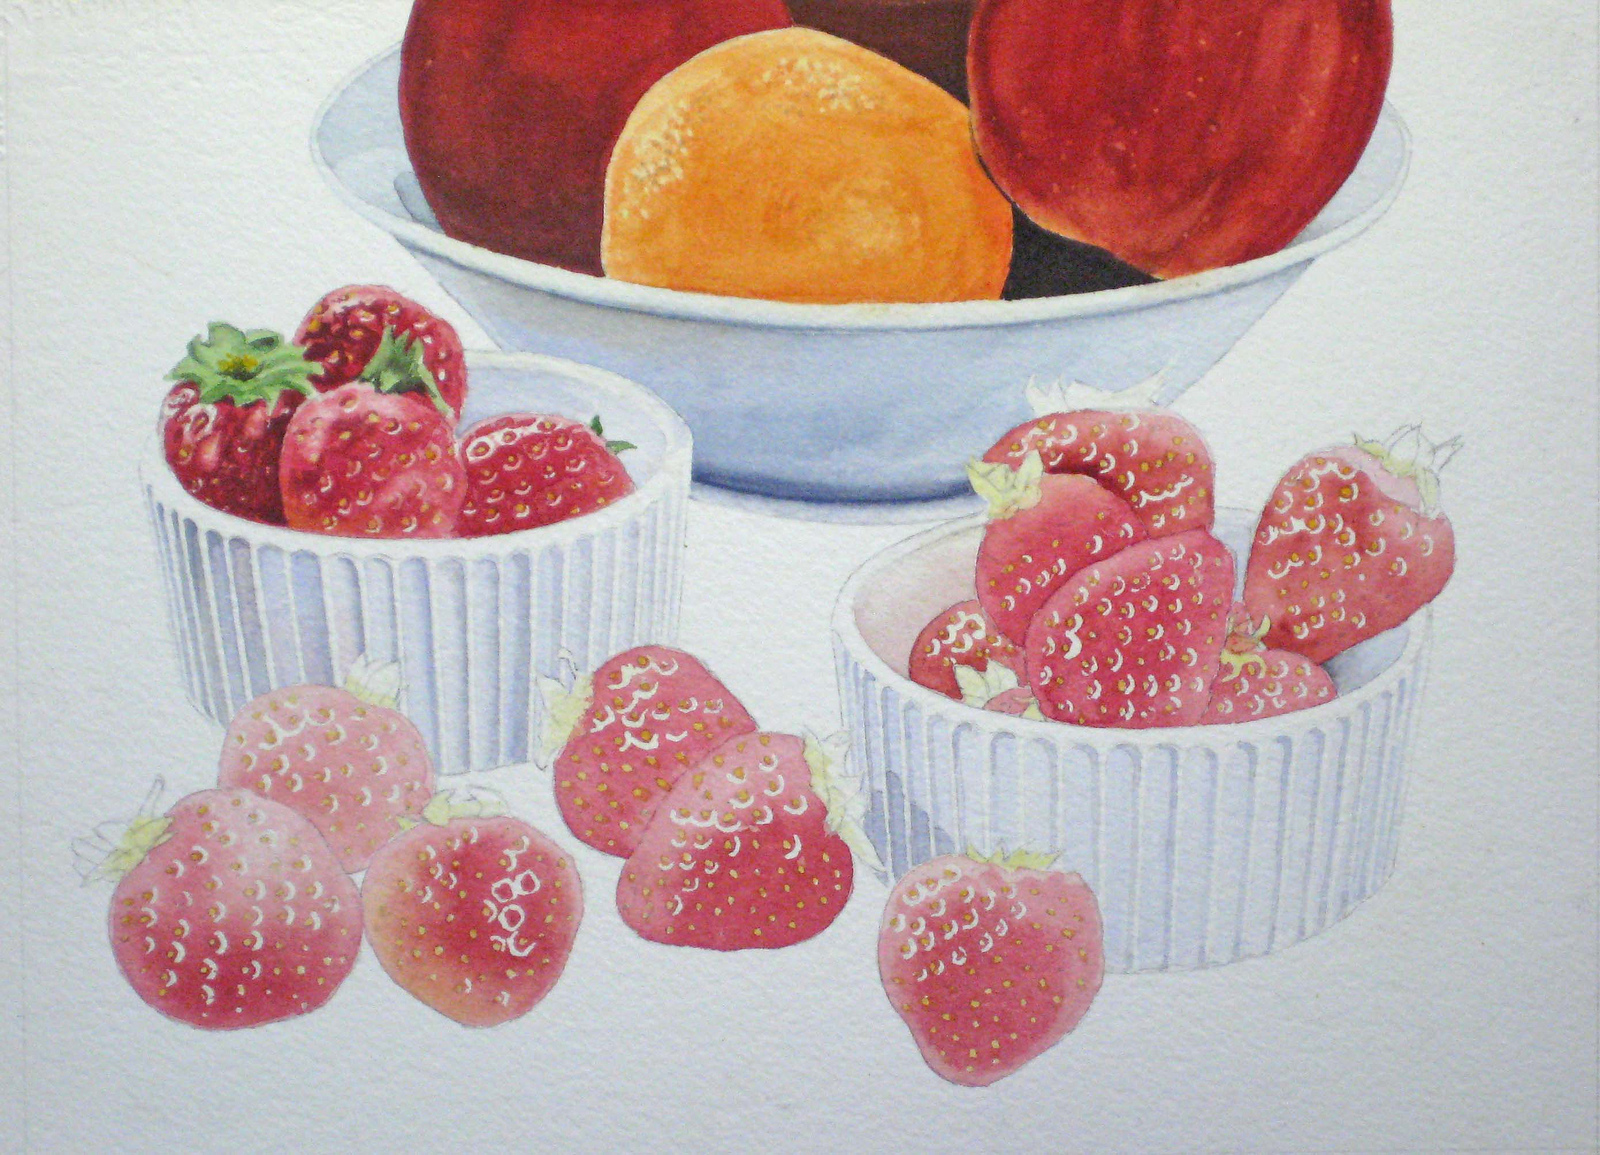
Now we’ve completed all the strawberries and their leaves, and we’re ready to put in the dark background wash.
Part 30

This technique is very difficult to describe in still images, and it involves wetting the paper almost up to the edge of the surrounding objects, then applying the first dark wash, pushing the final colour up to the edge with a fine brush. My blue is made from Antwerp Blue and Winsor Blue with a touch of Sepia.
See my on-line demo on painting metal in watercolours and scroll down to the images showing how this is done.
DO NOT RUN OUT OF PAINT! Mix more than you think you need as you’ll have to work fast and efficiently. Practice this several times before tackling your project. Be as careful as you can and start in the middle so you don’t get your wrist in the colour.
Notice how white the containers suddenly seem to be as the first dark coat makes them stand out.
Part 31

In this extreme close-up I’m using a No.2 round to carefully delineate the edge of the white bowl.
Part 32

Here is the first coat. With a complicated collection of items being outlined, it’s almost impossible (without using and air-brush and masking) to get a completely smooth first coat. Later washes will smooth this out. Things look a little odd and floating at this stage. The shadows will pull everything together.
Part 33
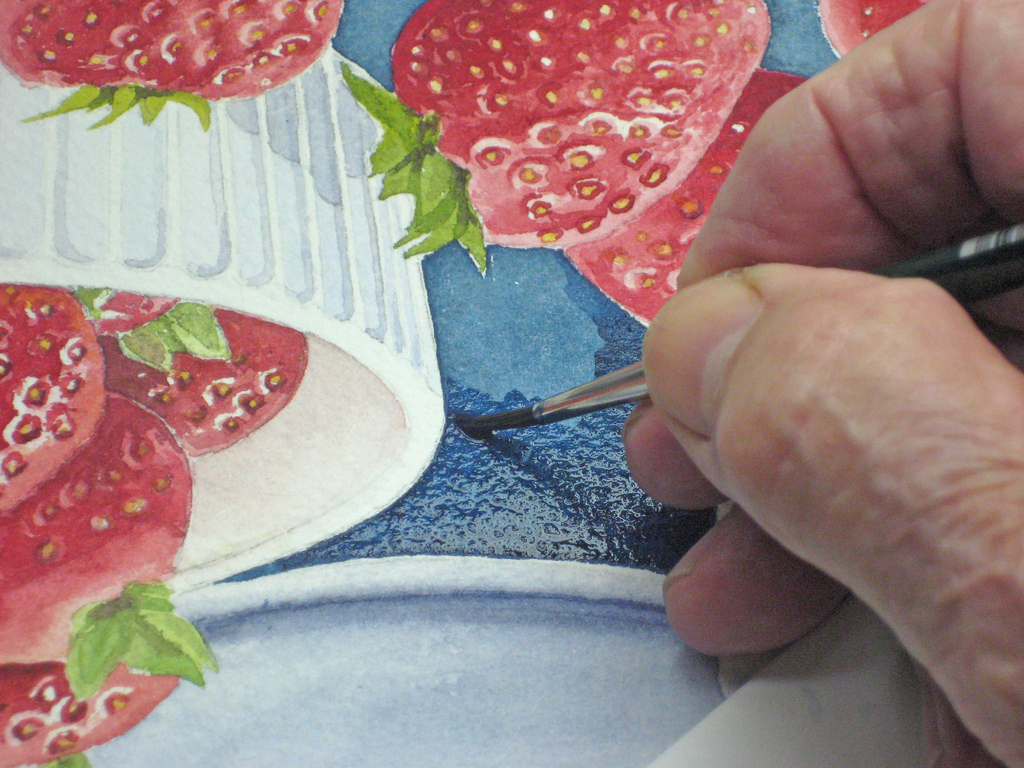
An extreme close-up shows a careful No.4 round brush starting the second coat. Use a paper protector to keep your painting clean and be careful not to to drop blobs of colour on your bowls and strawberries. This blue is a very staining colour and hard to remove.
Part 34
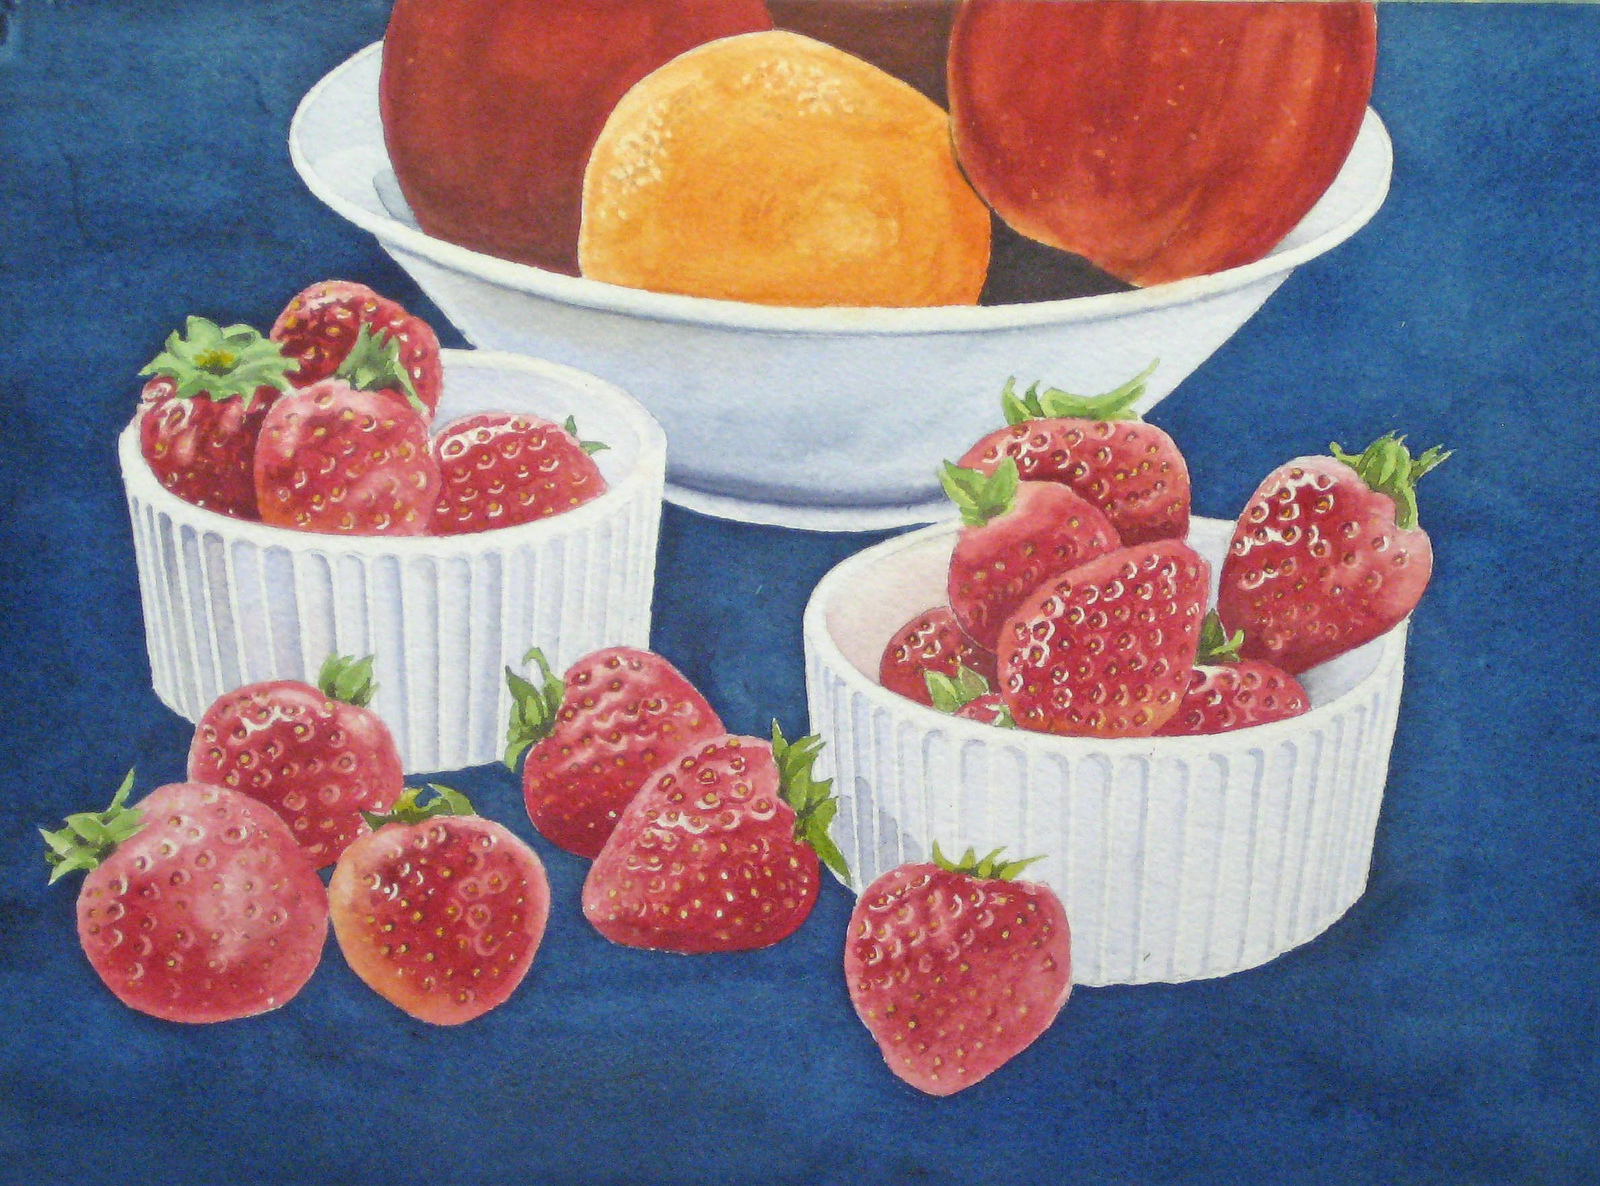
Here is the completed second coat. Still some brush marks showing, but another coat and shadows will take care of that.
Part 35
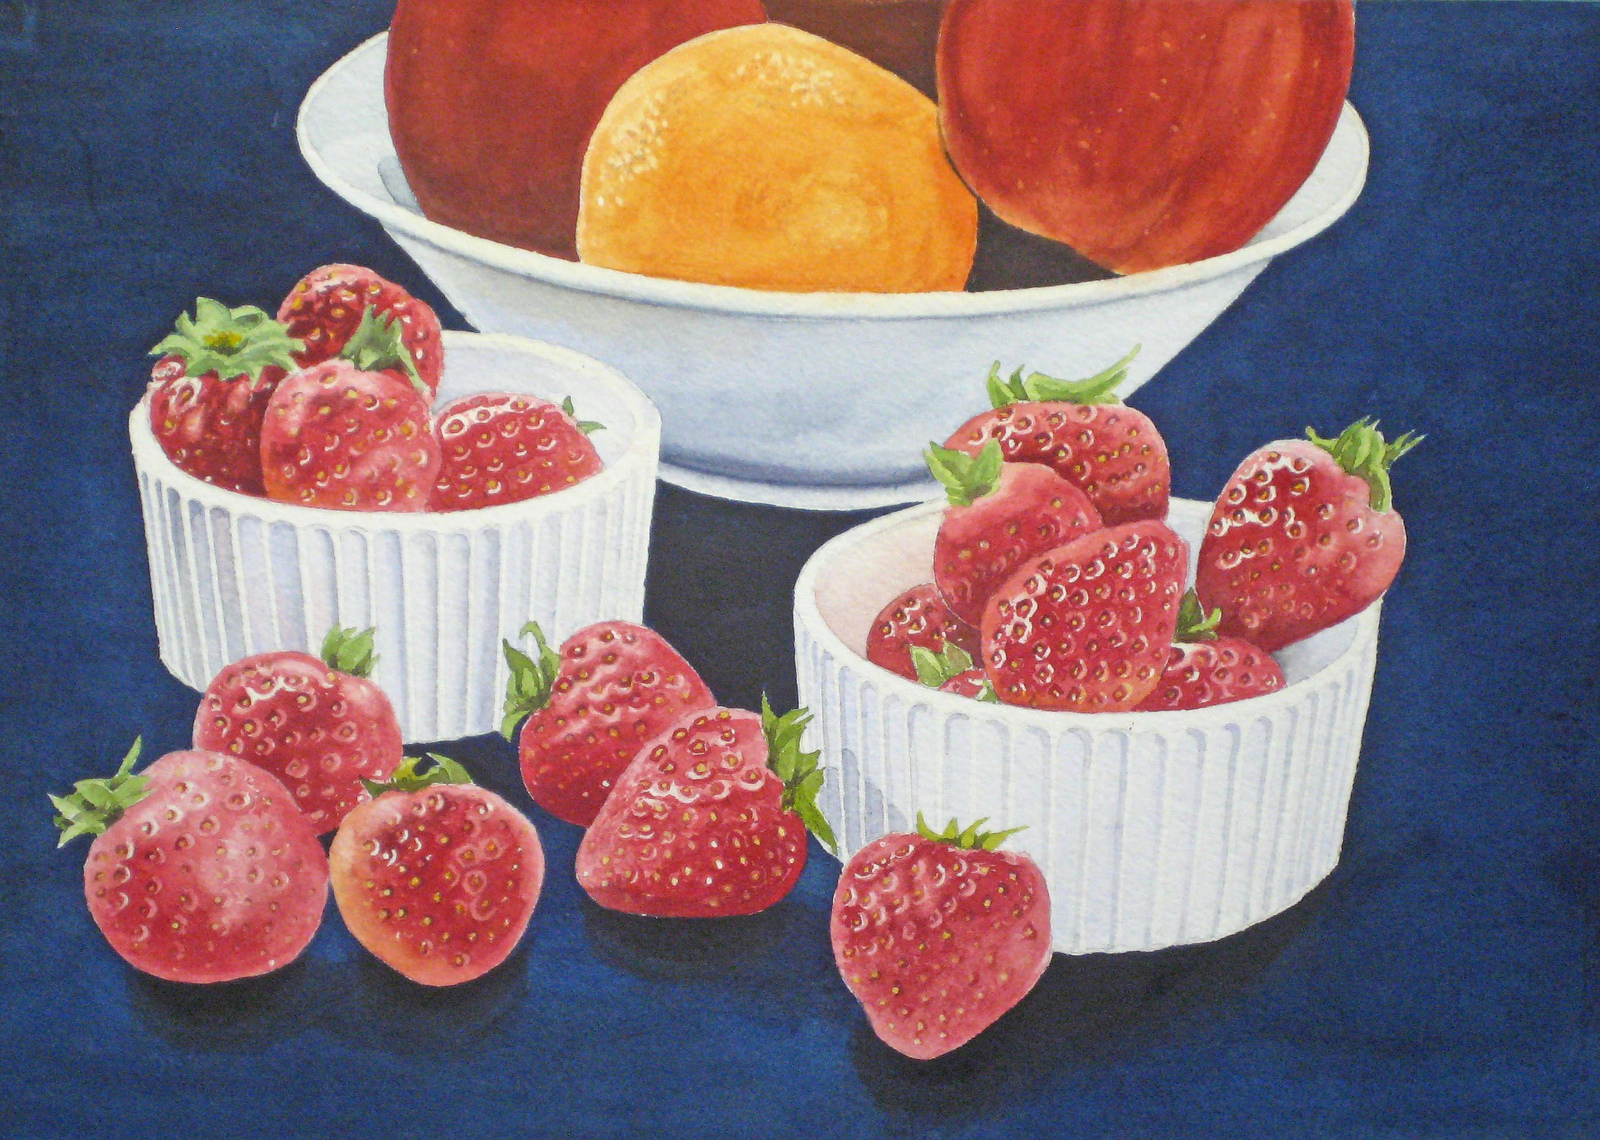
The final background coat and shadows reveal some adjustments needed. Some of the colours now look too pale and some strawberries seem to “float”. Minor tinkering and we’re done.
Final Step
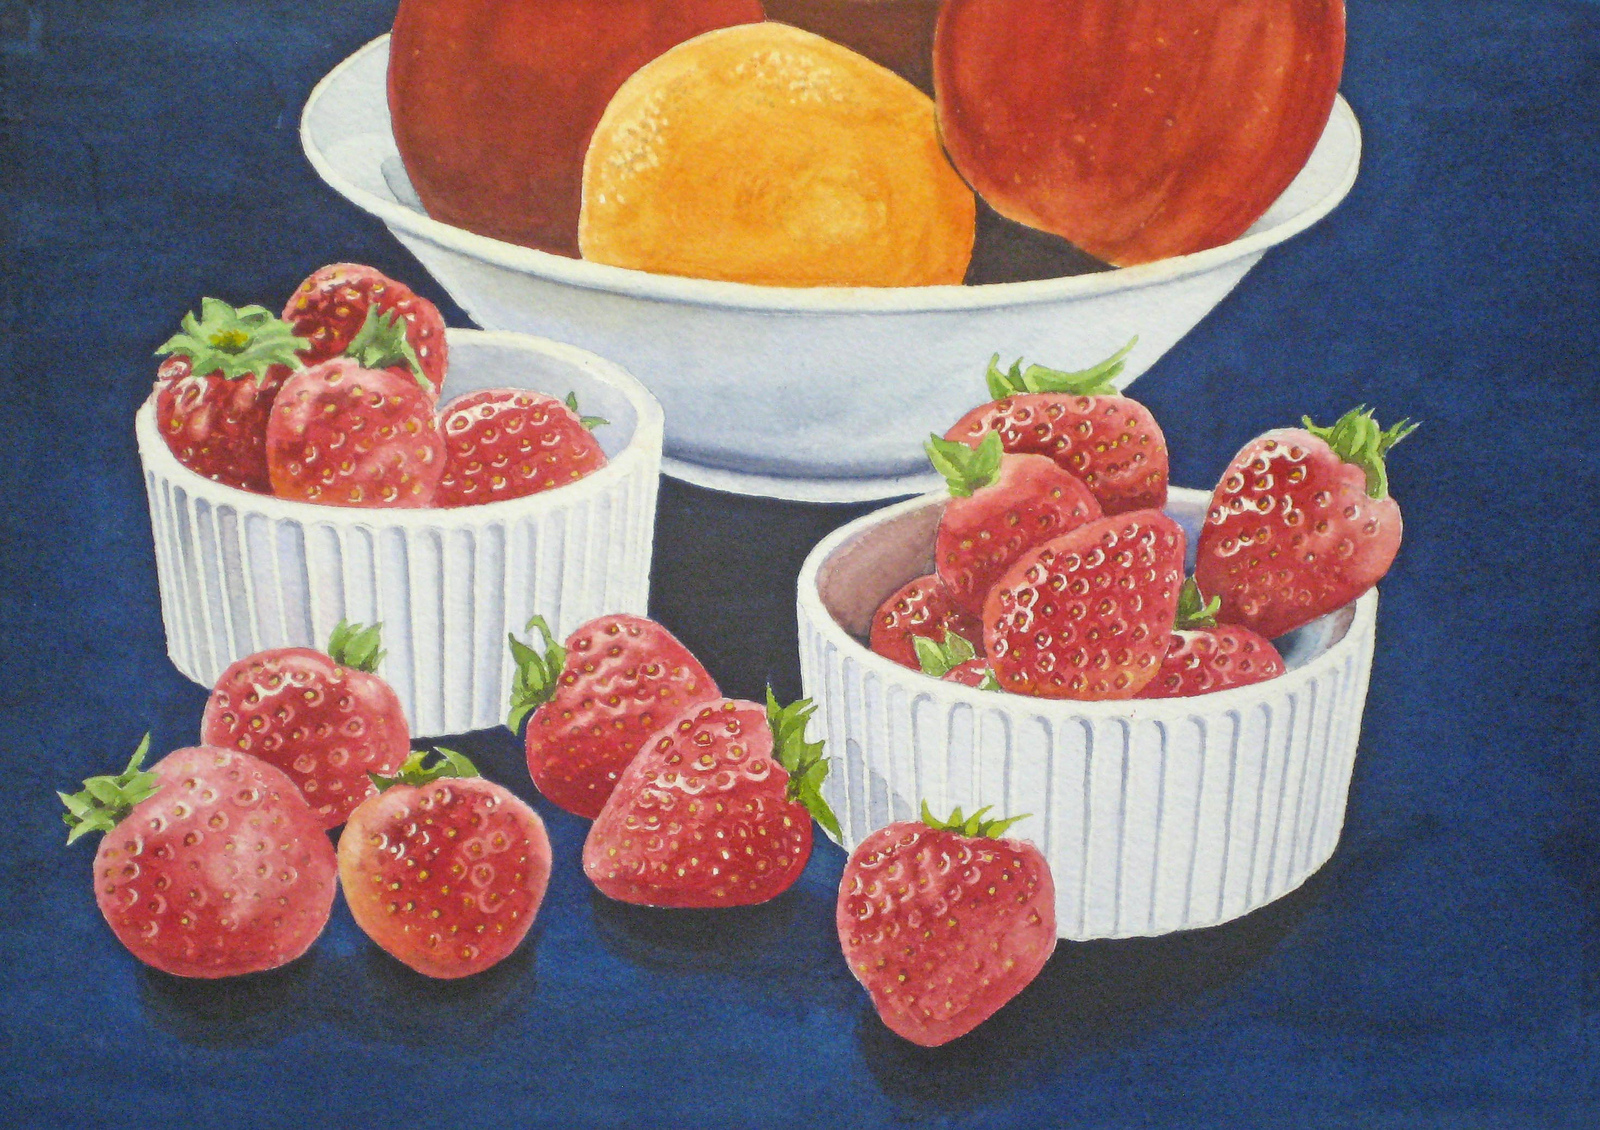
The final result. Properly matted and framed this would make a nice gift for a family member and look well in most kitchens. This has been a lengthy and complicated demo, and I hope you find it useful.
John – have you noticed that one of the strawberries has gone missing? That’s because I picked it up and ate it! Your work is so real and stunning I could literally touch them! Thanks for a super detailed account of how to get the pip dimples and shadows – what strawbs are all about really – wonderful work – Alison
John, this is just so lovely. What detail!! What an inspiration also. Alison is right, they definitely look so real and ready to pick up and eat! Just lovely work, Leta.
I loved going through the detailed demo. thanks John for this effort.
Thank you so much. I oil paint and have tried water. Its hard ! but you explained it so well. I will try again with strawberries. Again thank you.
Joyce
Sir, if I may ask, what brushes do I need and watercolor? I am a tole painter and an amateur one. I’ve used acrylics but never used watercolor. Can you give me a list of items I need to start off so I can use your demo to try my skills? I will appreciate any assistance you can give.
As a parting note, I am truly amazed at how you teach. Thank you for sharing your talent.
Carina Tabalanza
This was extremely beautiful! Sir, have you ever considered painting people, like say, One Direction’s Zayn Malik? I would LOVE it if you could! Thank you! ~Jordana Walton
Thank you so much for this. Beautifully done and great instructions.
Half way through the tutorial I thought you are touching real strawberries.. such a lovely tutorial and soo real fruits.. am new to watercolors after working with acrylics and oil.. this one is a great tutorial to start learning..
I’m looking forward to another watercolor painting session after reading this demonstration 🙂