This lesson is courtesy of Rod Webb. Rod is a veteran Watercolorist from New Zealand. You can learn more about Rod and view more of his work by following this link to reach his Website.
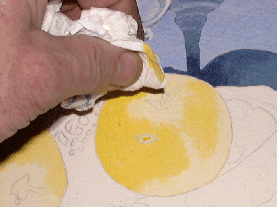
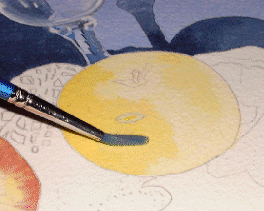
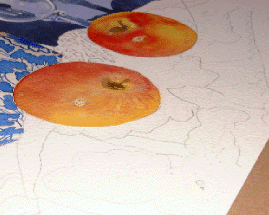
Wash of light yellow and a touch of sap green painted over apple.
Before the wash dries, some areas are lifted with tissue, giving a lighter shade.
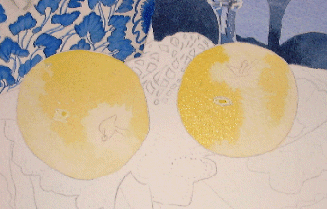
Results after applying wash and lifting with tissue.
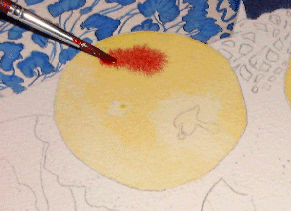
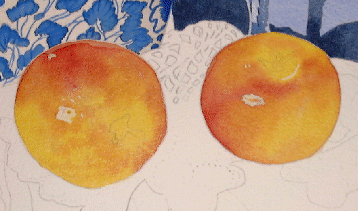
Wet all of the apple with clear water. Using a mix of Alizarin Crimson and Light Red drop in some color wet into wet.
Wash can be controlled, placed and moved around with your brush. If you get paint in the wrong place lift immediately using tissue or blotting paper.
Always make sure paper is thoroughly dry before you re-wet the surface. Then it will not disturb the original washes.
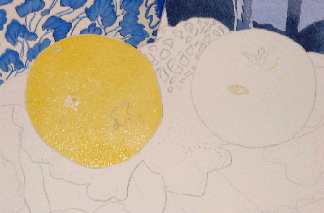
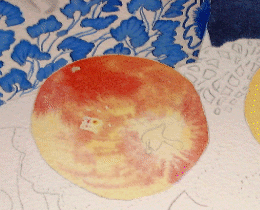
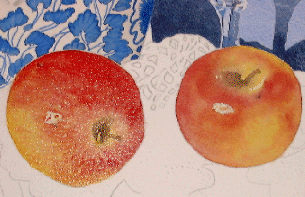
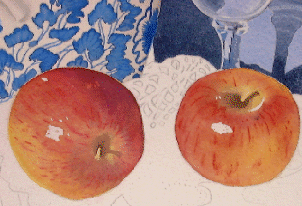
First glazes have been applied to both apples.
The color was too weak, so I added another wash of yellow!
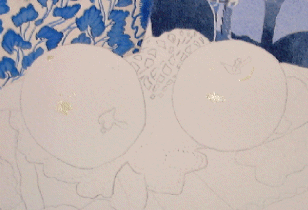
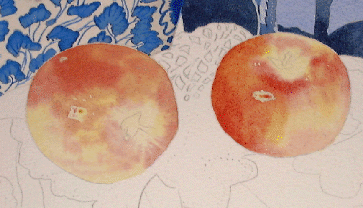
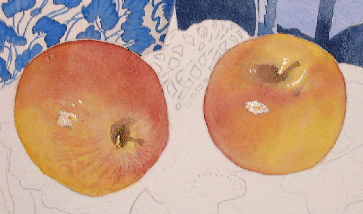
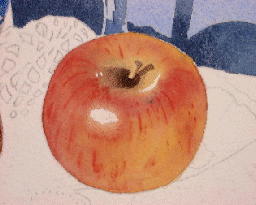
Masking fluid painted on stems to preserve lighter shade. Shadows added showing core shape and shadow of stem.
I re-wet the apple with clear water. Lower your head and look across the paper, you should see just a shine on the paper. No sign of surface water.
While the paper was wet, I added a reddish brown wash to top of apple and around the core to get a bit more shape. If the paper starts to dry, stop! Let it completely dry the re-wet it and start again. If you continue to add wash to drying paper, you will get a cauliflower effect.
A watercolor pencil can be used while the paper is wet. Fine red streaks added this way. Or you can use with paper dry and if necessary softened afterwards by lightly brushing with a soft wet brush.
Shadow around stem darkened. I first applied pencil with paper wet then added final sharp lines when dry. The apple stem is also defined using pencils.
The masking fluid was removed. Larger highlights had edges softened by wetting and dabbing with a tissue.
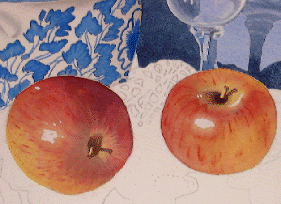
Now I have two apples defying the laws of gravity. Lace cloth will be the next task. That should tie everything down!
Què bueno!!!!!!! Muy bueno!!!!!!!!!!!!!!!!!!!
Felicitaciones – Impecable!!!!!!!!!!!!!