About David Te
Hi, my name is David Te. I began thinking about art seriously when I was 18 after seeing my sister Faith, who is also an artist, draw a portrait of a person. It immediately inspired me to draw portraits as well.
I have had no formal art schooling at all so I learned entirely by reading art tutorials and forums and also by myself.
I work mainly in graphite and charcoal pencils but since we bought some tubes of oil paints, I have been learning to paint in oils too. I also wish to work in pastels and colored pencils in the future.
Apart from portraits, I also do still life drawings and animals.
I strive to achieve realism in my work while capturing the likeness, feeling and emotion of my subjects. With every artwork I create, I always pay close attention to shadows, lights and other details.
I hope with this, you will get to know me better. If you would like to commission me for a portrait, please do not hesitate to email me at any time. Have a nice day!
Please take a moment to visit David’s Website and Blog to learn more about him and his products and services.
His Website: https://www.artisticrealism.com/
His Blog: https://www.artisticrealism.com/artstudio/
Step by Step Graphite Pencil Drawing by David Te
Medium: Graphite Pencil
Paper: Rough Side of Bristol Board
Size: 25 × 33 cm (10″ × 13″)
Stage 1
The outline was drawn freehand on newsprint and then transferred to Bristol Board using graphite-coated paper.

Stage 2
Rendered the eyes first as I usually do, using 0.5 mm 2B and HB mechanical pencils and 6H and 8B wooden pencils.
Next, I began to add the skin tones around the surrounding areas with circular layers of HB.
Afterwards, I started on the subject’s right cheek working inwards towards the nose using the same pencil and strokes.
Leaving the nose still unfinished, I proceeded to work on the forehead with 2B and HB.
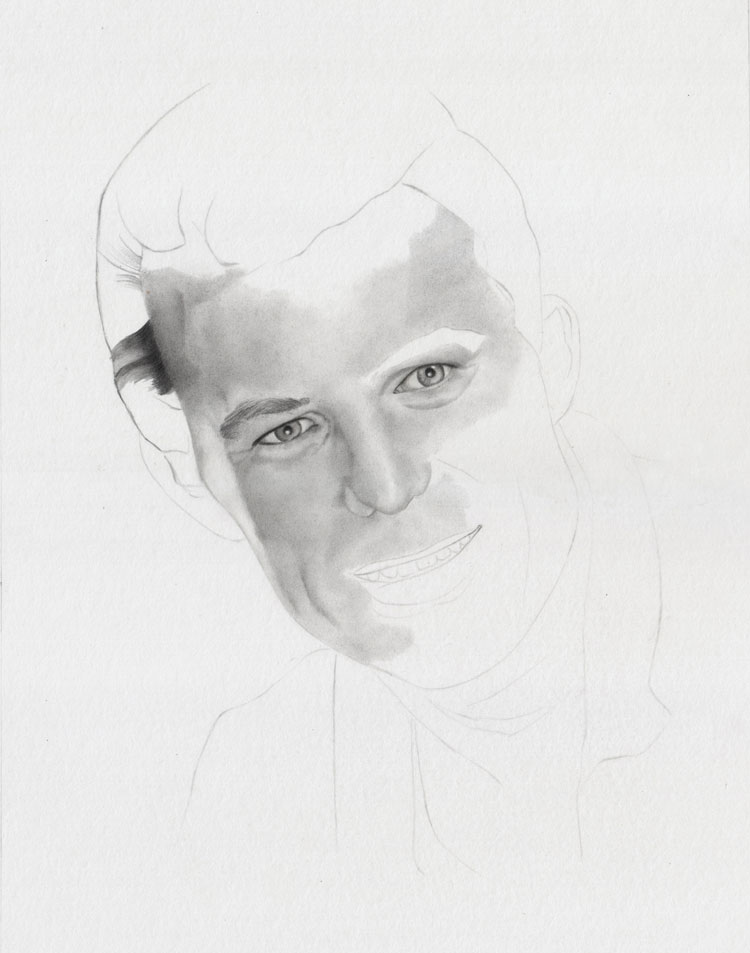
Stage 3
Still using 2B, I did the other eyebrow and finished layering the initial skin tones on the forehead.
I darkened the left side of the subject’s nose (viewer’s right side) and continued to the other side of the face.
I also applied more tones on his cheeks.
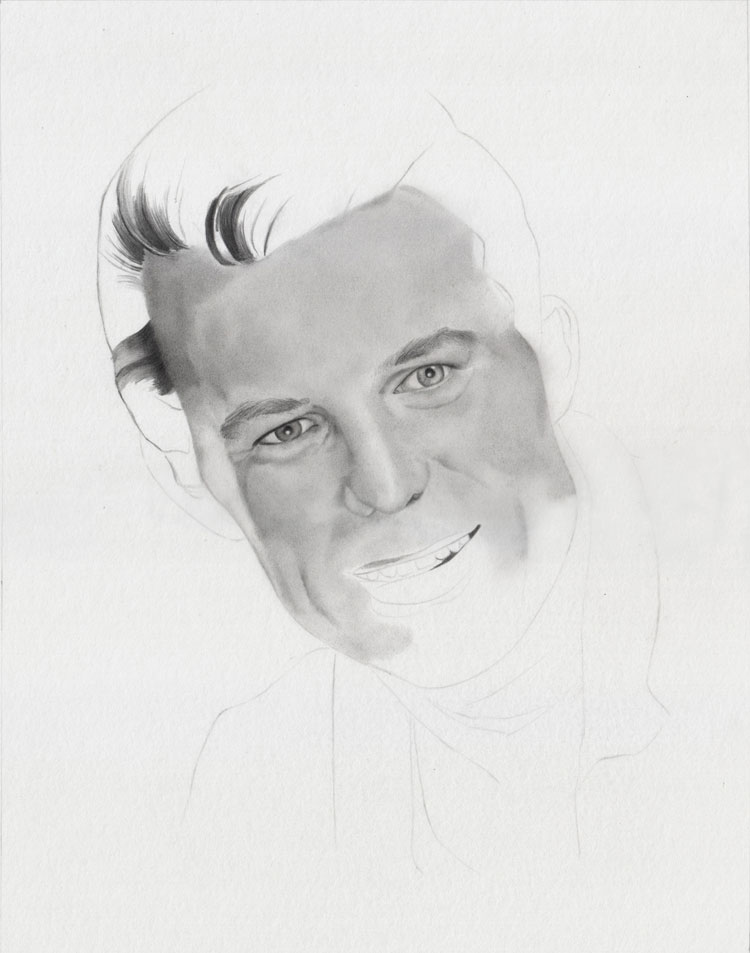
Stage 4
The drawing is progressing mostly from the right side of the head (viewer’s left).
Using 2B and HB mechanical pencils, I darkened the forehead especially the right part.
I also applied more graphite to his eyebrow, skin around the eye, and the side of the nose. Next, I began layering in the shadow under the nose.
The hair is done with the 2B pencil following its growth. I pulled out the highlights with a kneaded eraser.

Stage 5
Using the 0.5 mm HB mechanical pencil, I darkened the area just above the eyebrows and the bridge of the nose.
I also added more tones to the eye and the side of the nose (viewer’s right).
I did some of the hair.
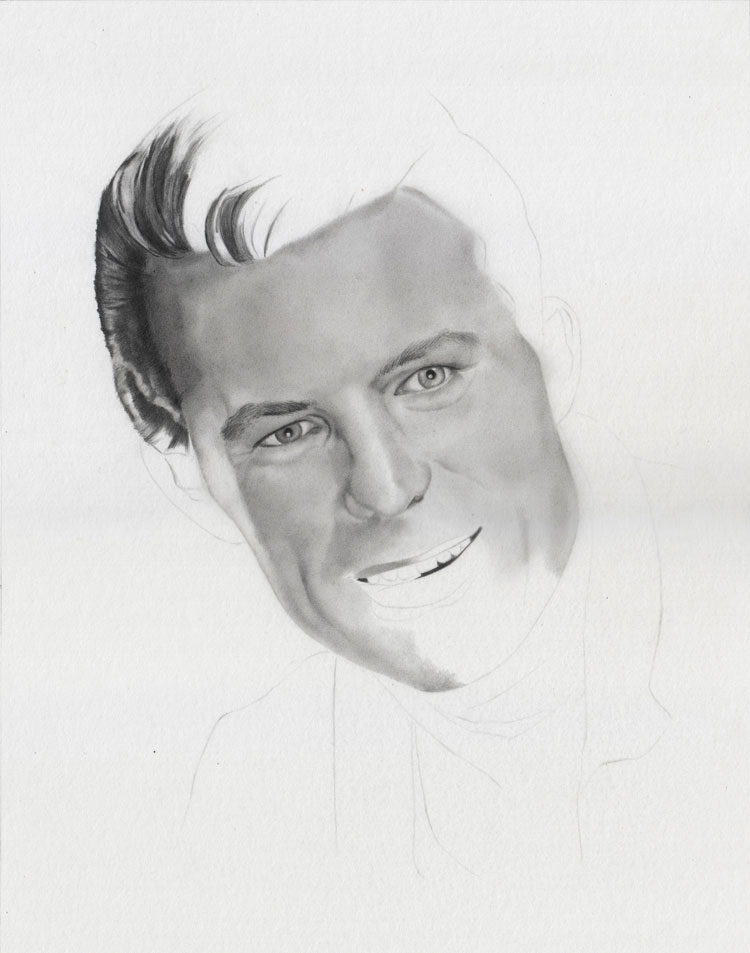
Stage 6
I added the first layers of skin tones on the chin and lower lip using a 0.5 mm HB mechanical pencil.
I also did the ear using 0.5 mm 2B and HB mechanical pencils.
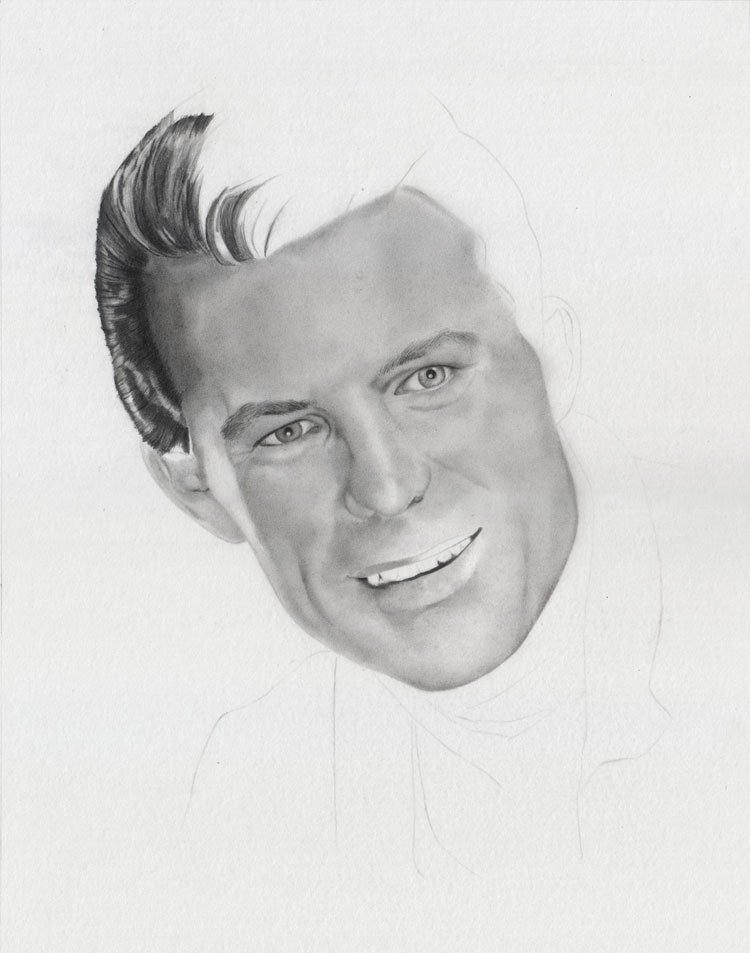
Stage 7
I did the subject’s left ear (viewer’s right) and part of the neck using 0.5 mm HB mechanical pencil.
With the 0.5 mm 2B mechanical pencil, I did the other side of the hair and darkened the other eyebrow.
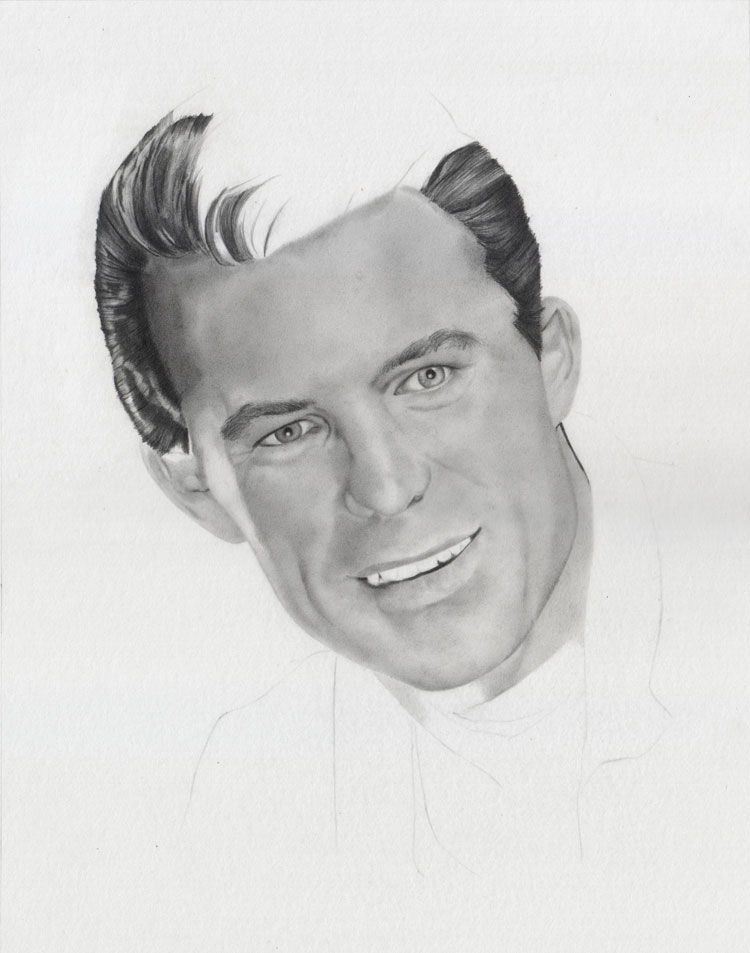
Stage 8
I continued to do the neck and it is almost finished.
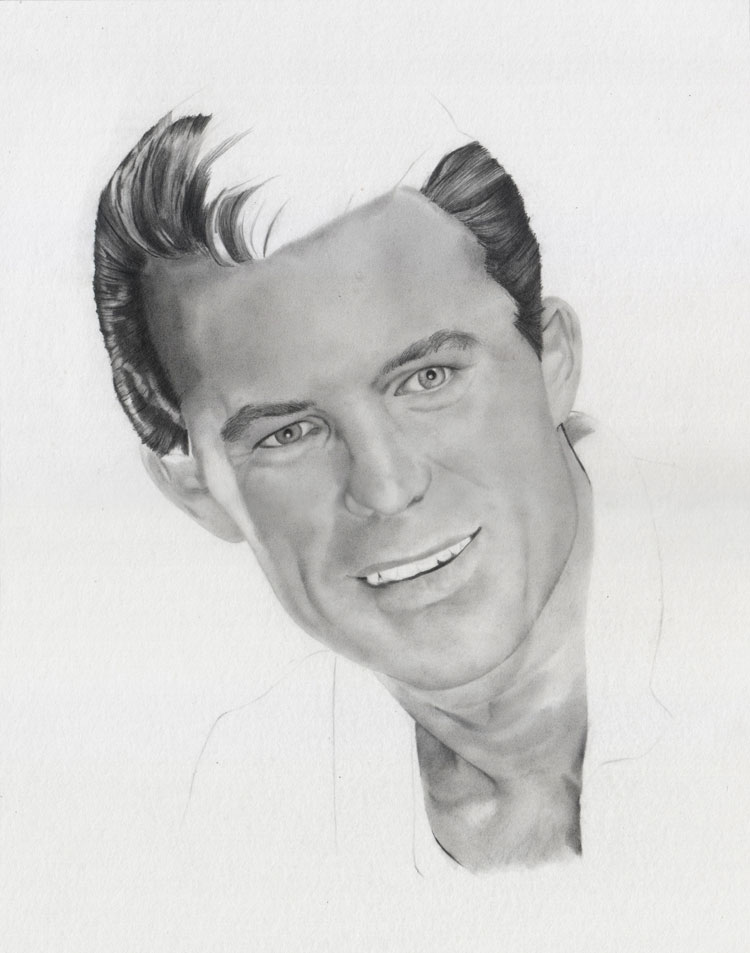
Stage 9
I used the 0.5 mm 2B mechanical pencil to do the hair and clothes.
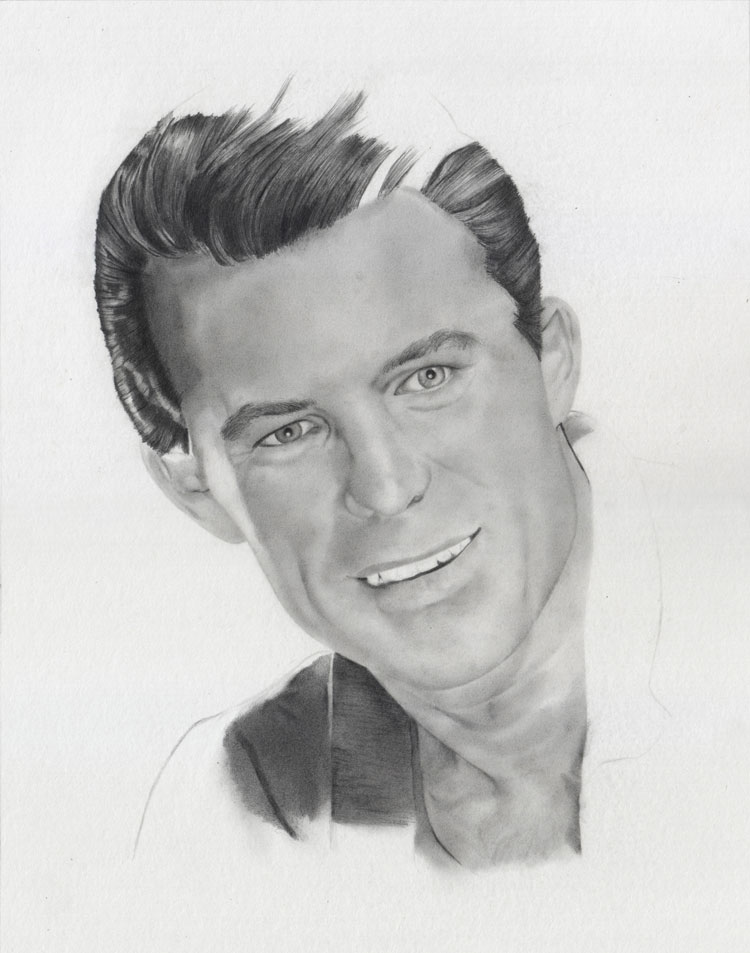
Stage 10
I finished the clothes and pulled some highlights in the hair.
For the teeth, I used 5H and 3H wooden pencils and a cotton bud.
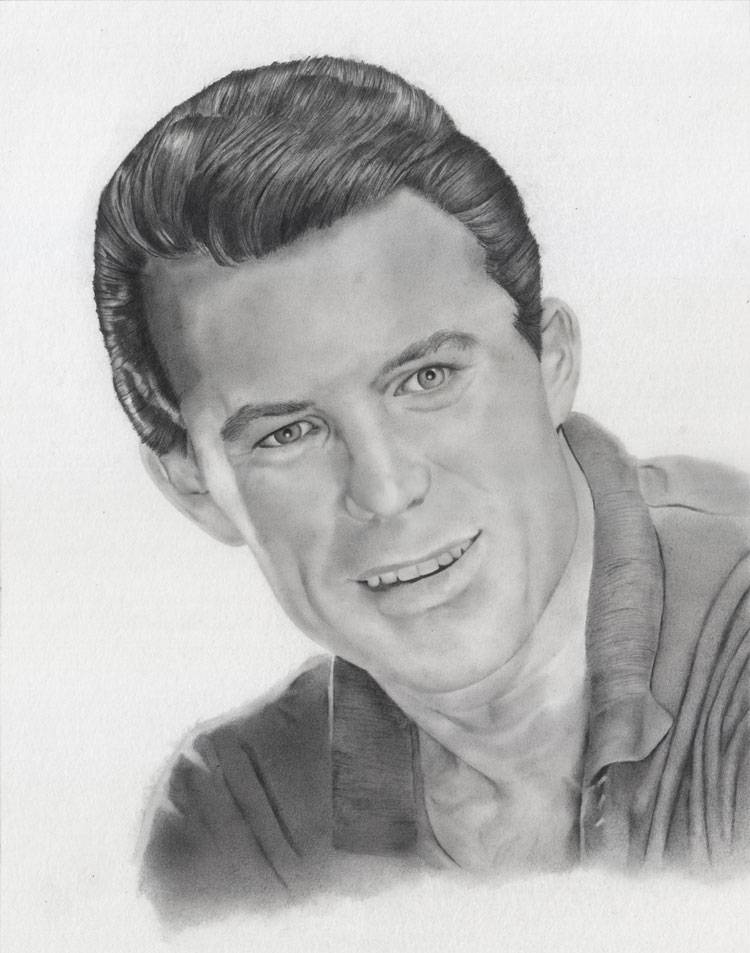
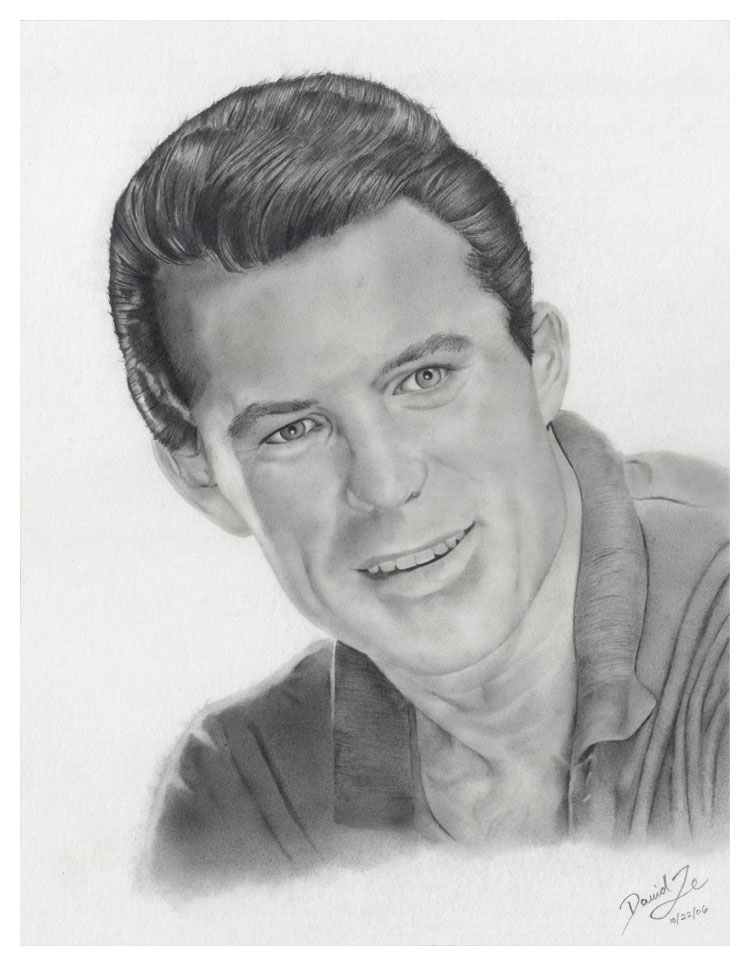
Stage 11: Finished
I added some finishing touches, especially on the teeth and hair, and darkened the shadow under the nose a bit.
So here is the finished drawing. Thank you for viewing my work. I hope you enjoyed it.

Leave a Reply