About Brian Oliver
Living in Orange County has been a joy for me. The hills, the ocean, and everything in between begging to be painted. I strive to give my paintings emotions which are generally happy and uplifting although nature can have a terrifying side. Nature’s beauty and power is one of the best subjects an artist has.
I believe that art comes in many varieties, but feel that true art is made to trigger a feeling from inside the viewer, and is not true art if that feeling must be described to the viewer by anything other than the artwork.
A strong sense of light and color are the aspects I most often try to capture in my paintings. In the end, I paint because it is a true joy, and a unique experience for other people to be involved with.
To learn more about Brian and to see more of his artwork, please visit his Website by following the link below:
===> https://www.brianoliverfineart.com/
Seascape Painting Demonstration By Brian Oliver
This demonstration will be about creating a warm glowing scene at the beach. Using what you have already learned about color and value, we’ll create a complex scene with simplified shapes and color/value relationships.
The relationships of color are very important, you must gauge everything off the major color in a scene. In this case, the major color is brown, and everything will be in relation to it. The light of the scene influences the color of every object. Greens you will mix might look tan when compared to pure blue, purples and blues may appear gray. When these colors are put together, they form the relationships that we subconsciously understand.
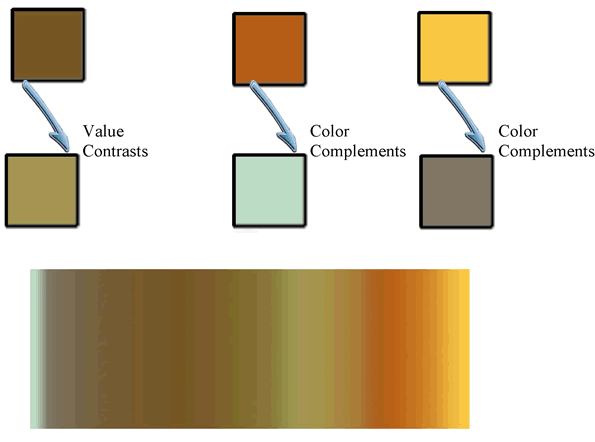
Above is a generalization of how this color scheme will work with the lighting of the scene. To the left are the colors of cool shadows and reflected highlights. To the right are the colors of the warmest, most brightly lit areas. Reflected highlights are a great way to add interest and variation to the lighting in a painting.
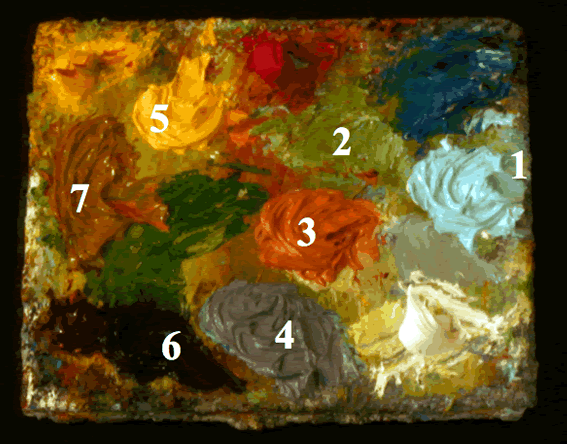
The palette foundation is cadmium yellow light, cadmium red, maganese blue, burnt sienna, and titanium white. The colors mixes are (1) white+blue (2) white+yellow+blue+red (3)red+yellow
(4) blue+red+white (5) yellow+white+red (6) burnt sienna+blue (7) yellow+burnt sienna.
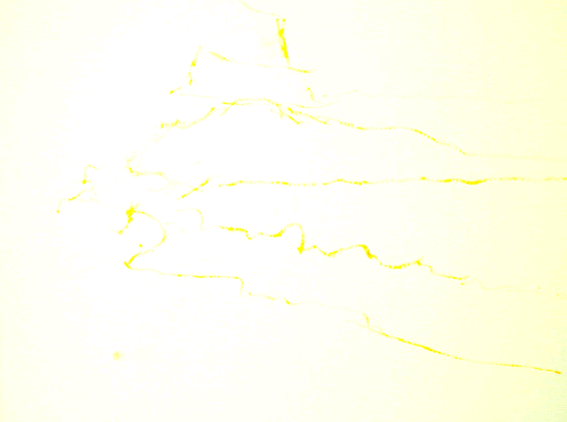
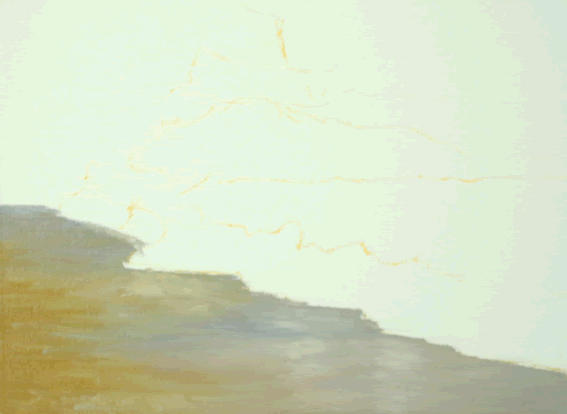
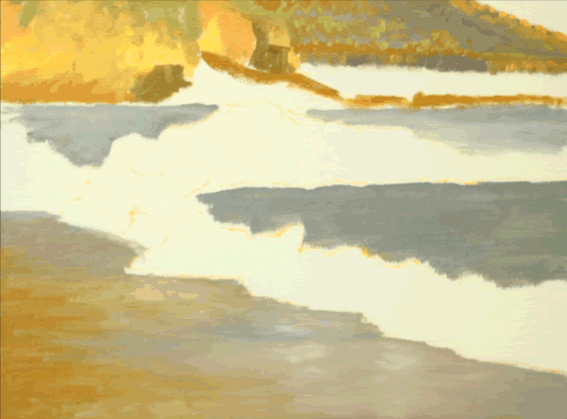
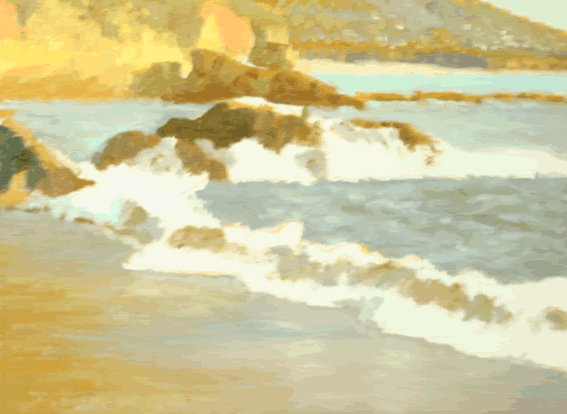
I sketch in the main outlines to plan the painting using a light color. This step is important to keep very basic proportions correct from the beginning rather than at the end.
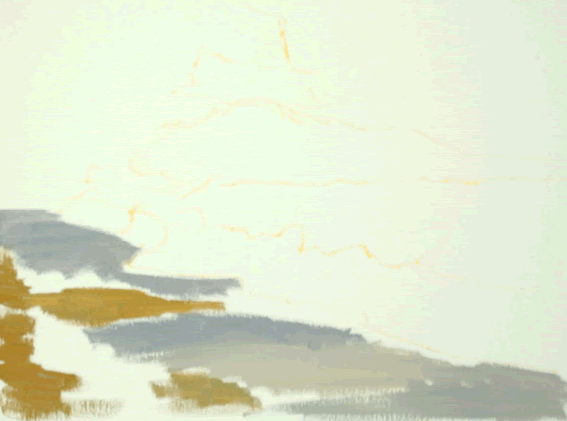
Paint the foreground sand with (4) in the areas near the water and to the back, and (7) near the left. Mix (3) + (4) and white to get a nice gray and include that color as well. Cover most of the area with the gray color.
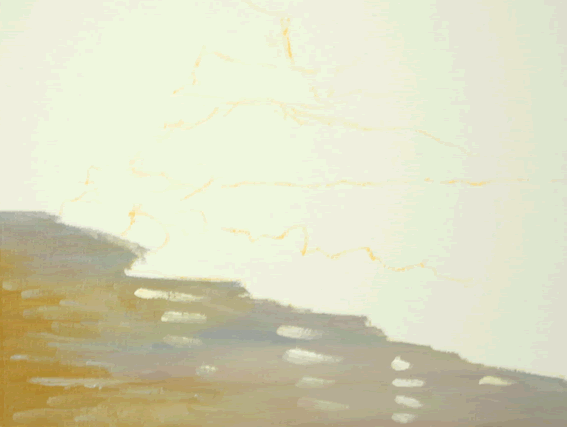
Blend the sand colors together somewhat where the edges meet. Then add streaks of white in front of any place where the foam might stick out some. These will be reflections on the wet sand.
Use a soft brush, a nylon filbert works well, to blend the sandy colors together. Use very little pressure and sweep back and forth horizontally. This will imitate blurred reflected colors.

Fill in the sea areas with a purple gray (4). The middleground sea can be slightly lighter in value.
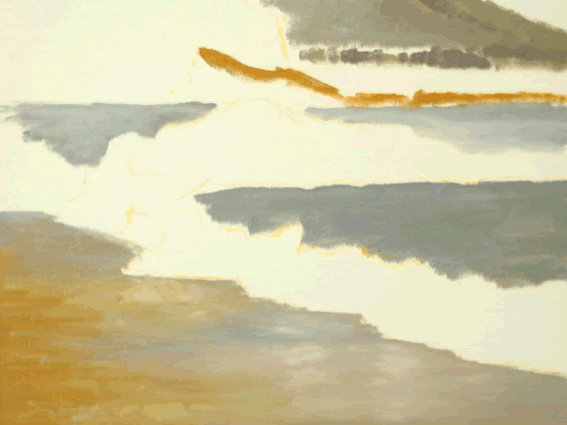
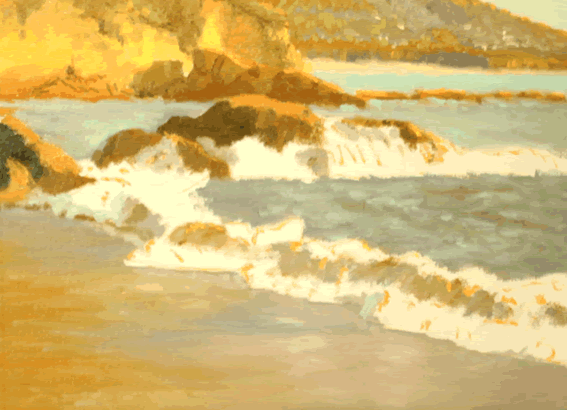
Use the purple gray (4) and mix with green (2) to get a nice gray for the background peninsula. Keep the diagonal near the edge of the painting. At the base, use short vertical strokes. Some strokes should be of the purpl (4), and others should be of orange (7) as seen in the next step. Also add the orange to the line of rocks.
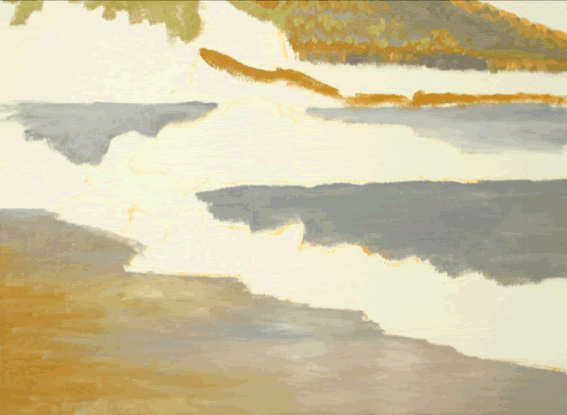
Next, place small amounts of the orange at the upper edge of the distant penisula, and along the base. Use a gray green (2) in some of the peninsular and on the top of the middleground headland.
Fill in the middleground headland with a tan color (5). Add stroke of other browns and grays,
(7) at the base, and (3) near the center. The rock casts a light gray shadow on the headland. Mix the shadow color with (7+6). It should be lighter than the darkest area of the rock. Add the same shadow color to the edge of the headland where it creates its own shadow.
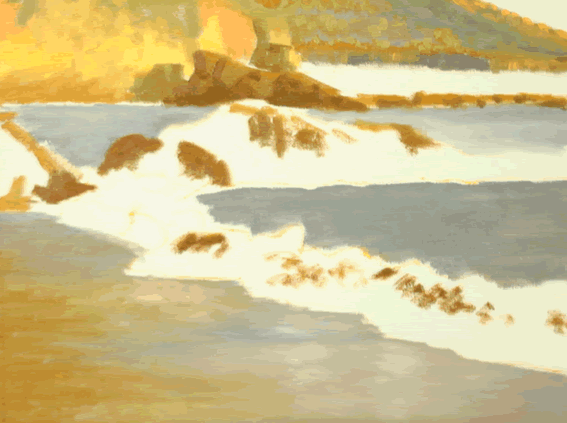
Use a brown color (7 + burnt sienna) to fill in the background rocks and the foreground rock areas. Also put the brown color in small strokes in the middle of the foreground wave. Don’t create one solid mass.

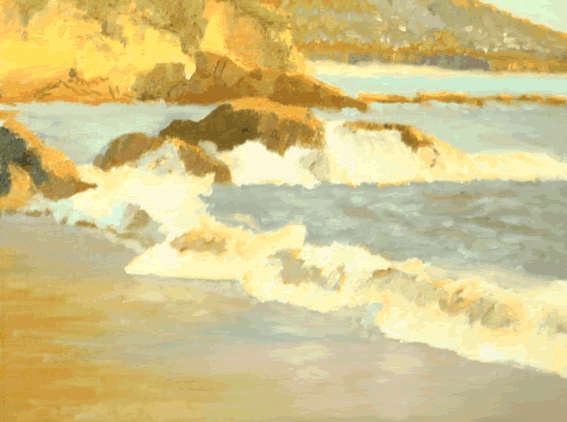
Add the distant sea with a light blue (1). Then add white to the same color to paint in the sky. The beach color should be a light tan (7+5+white). Some white strokes in the distant hills adds depth and interest.
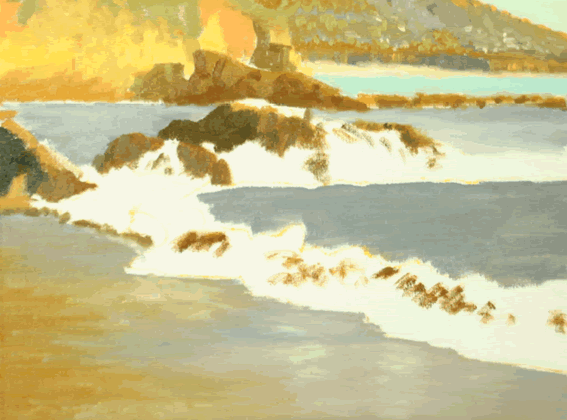
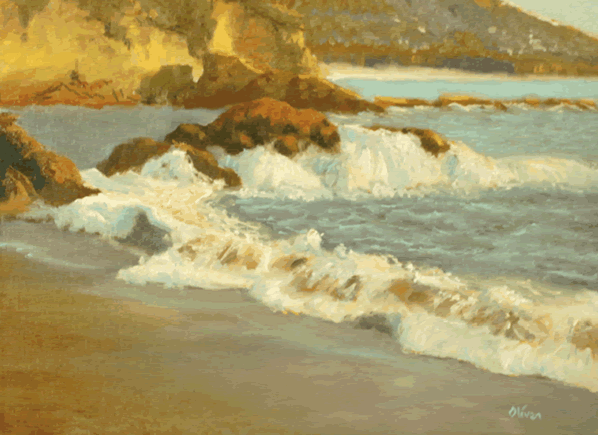
Finish the foreground rocks with darker browns. The closest rock should have the darkest shadow. The next furthest should have more burnt sienna in the mixture to lighten the color. Put short, choppy strokes with the same color at the base of the wave as it recedes.
The shady areas of foam should be light gray, so use a mix of purple (4) and white. Add to the foam on areas of the rocks and also mix in with the brown color in the wave. Now this middle area of the wave can become more massed.
Next, add a light blue (1) at the foam’s base near the front rock. Use the same color and small, shallow, “U” shaped strokes to the ocean to create wavelets.
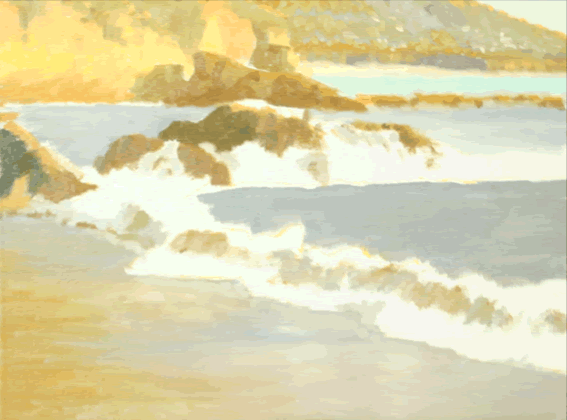
Add the light color (3) to the rocks to complete them. Also add some of the orange color to the brown parts of the wave.
Use a rigger brush to add warm, light color (7 + white) to the edges of the foam, all around the white area edges. This will keep the white in the center more pure and warmer at the edges.
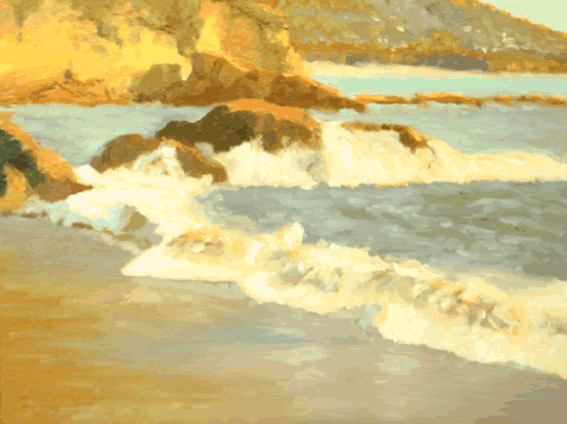
Now, use a small round brush to smooth clean white paint over all the foam areas.
The final touches are straight forward. Add purple
(4) or light blue (1) to the shady areas of foam. Touch up the rock color with varying shades of orange. With pure burnt sienna, dab at the lower left corner to create a felling of broken reflections. Lastly, paint in another layer of very thin water in front of the foam with light blue (1), blend it back towards the wave and foam.
very nice and helpful indeed!!
L-O-V-E Love. It.
Very good, i like how we see the artwork develop 🙂