About John Fisher
I was born and educated in England, graduating from the Luton School of Arts (now Barnfield College) in 1945. It was my hope to become a graphic artist, but at the end of the Second World War returning service men and women had first crack at the few jobs available, and rightly so. I took a number of jobs while I tried to break into my chosen field, and ended up being a reluctant carpenter. Many years passed and I emigrated to Canada in 1952, married a Canadian woman, started a family, and in 1955 finally started on a career which took in graphic arts, owner of my own graphics arts company, art director at an advertising agency, and careers in marketing, advertising and public relations.
I wish I could claim that my passion for art burned brightly throughout those years, but alas, the need to make a living took prominence. As with many people, I always promised myself that when I retired I would get back to painting again. That time came in 1989, when my wife and I were living the winter months in our condo in Destin, Florida. Robert Long, a talented watercolour artist, was offering private lessons from his nearby condo. He was my mentor, and made my retirement years infinitely richer.
In those days Robert taught only technique, and there were rarely more than four to six of us in those early classes. From Robert I regained my interest in photography as an adjunct to painting, and as the cliche goes – I never looked back. I have had many paintings accepted and hung in exhibitions in Florida and Ontario, where I now live. I’ve won some prizes, come first in some exhibitions, and occasionally won the Citizens’ Choice awards. But I mainly paint for fun – hence the choice of name for this site.
To learn more about John and to view more of his work, please follow the link below:
===> https://www.watercoloursforfun.com/
“Puddles” A Watercolour Demo
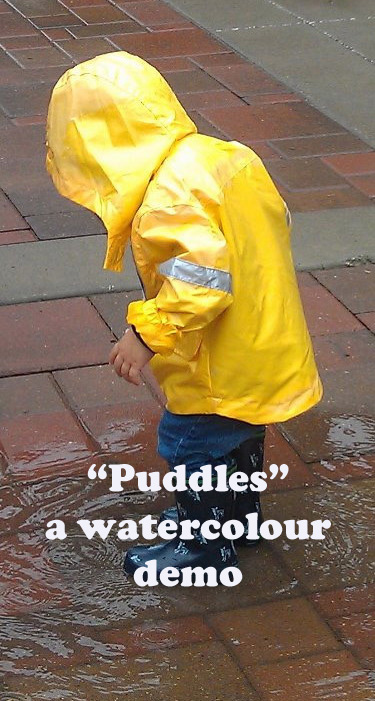
“Puddles” is a charming child photograph courtesy of Suzanne Wallick of Paint My Photo (PMP) and used here with her kind permission. I chose this for my students with the Testa Heights Art Club as a small project after a particularly difficult series this season. Image size 7″ x 11′ on 300 lb. Arches cold pressed paper using Winsor & Newton Artist Quality colours.
Step 1

I use modern technology in my classes with this step-by-step demonstration showing up on a flat screen television set as we go through each step. This full sized image helps to establish colours, textures and values.
Step 2
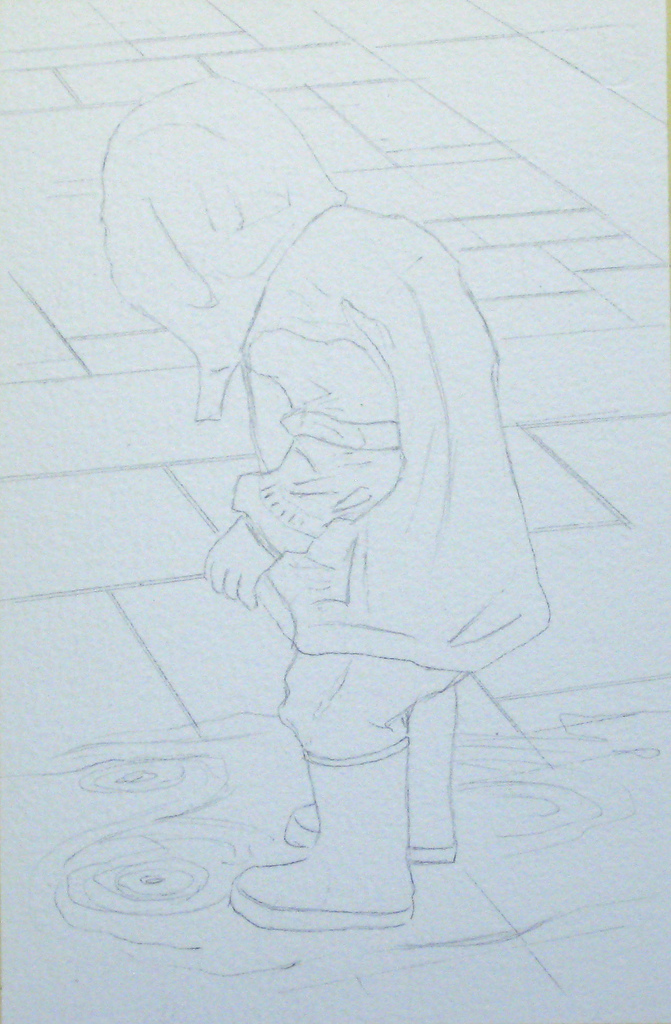
We always start off with an accurate drawing as we stress realism in our projects.
Step 3

I first mapped in the raincoat area with a clear wash of slightly tinted water. This helps to see where the water is going and establishes a base for what is a very staining colour. I used New Gamboge as the oilskin jacket has a lemon colour. Using a 1/2″ angle brush I covered the area, leaving that reflective tape area as white paper. Working wet-in-wet often helps where a staining colour might dry with a hard edge or show overlapping brush marks.
Step 4
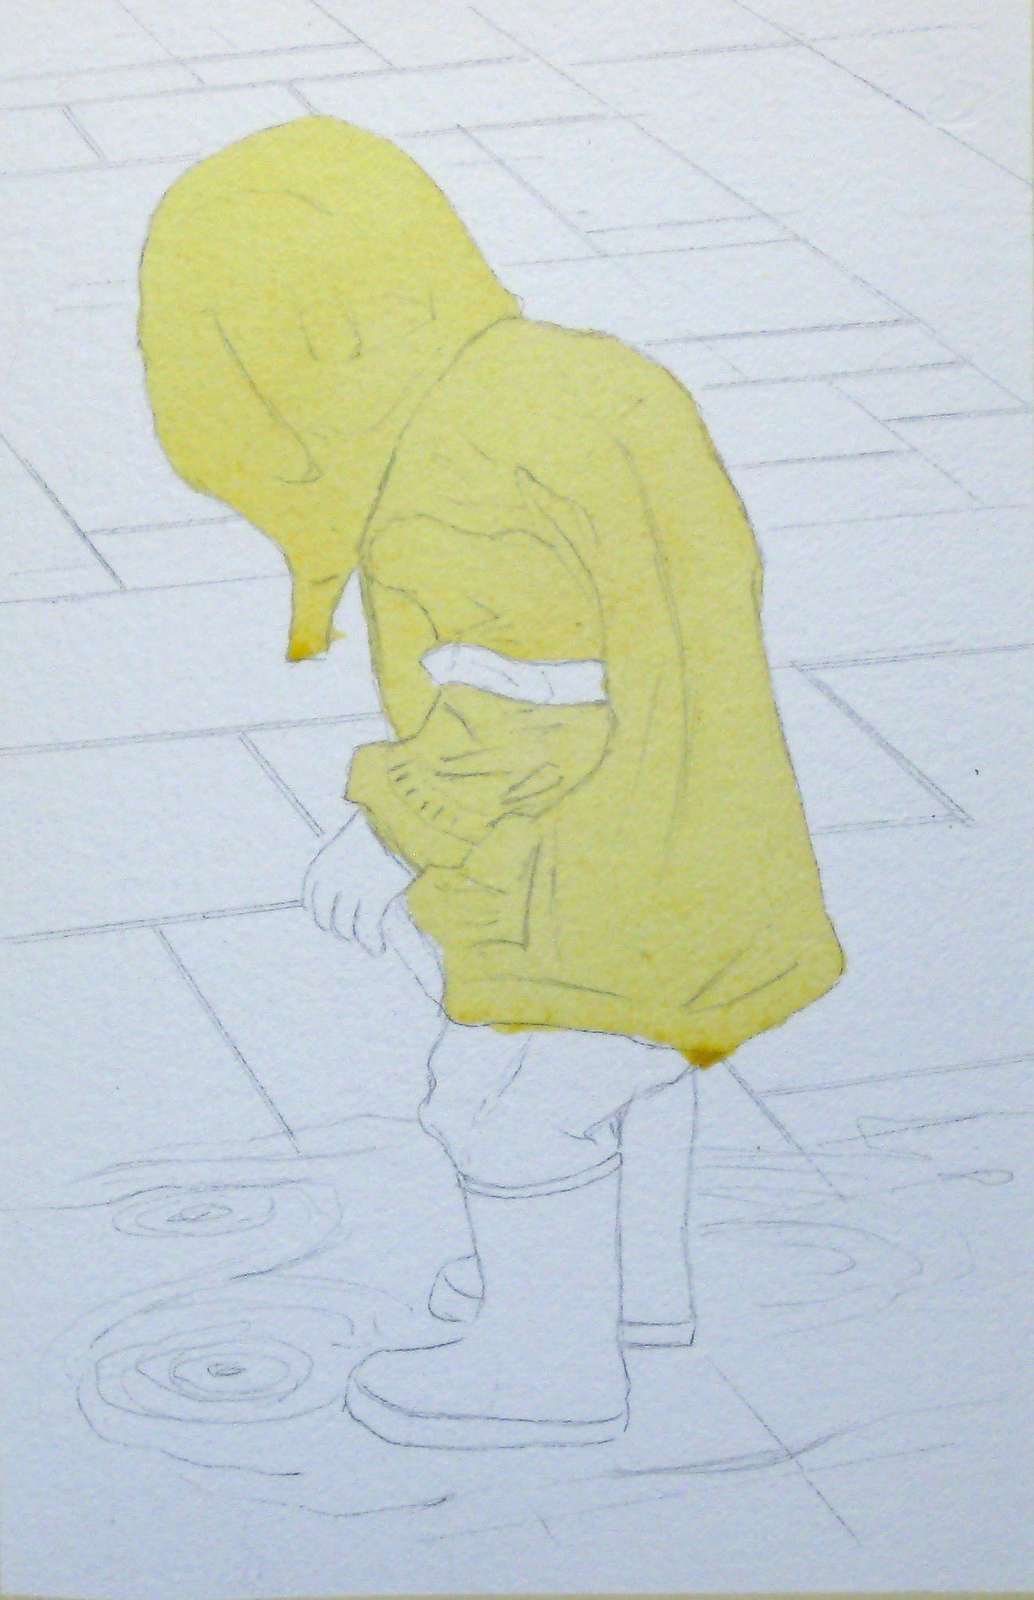
The completed first wash is done and ready for modification.
Step 5
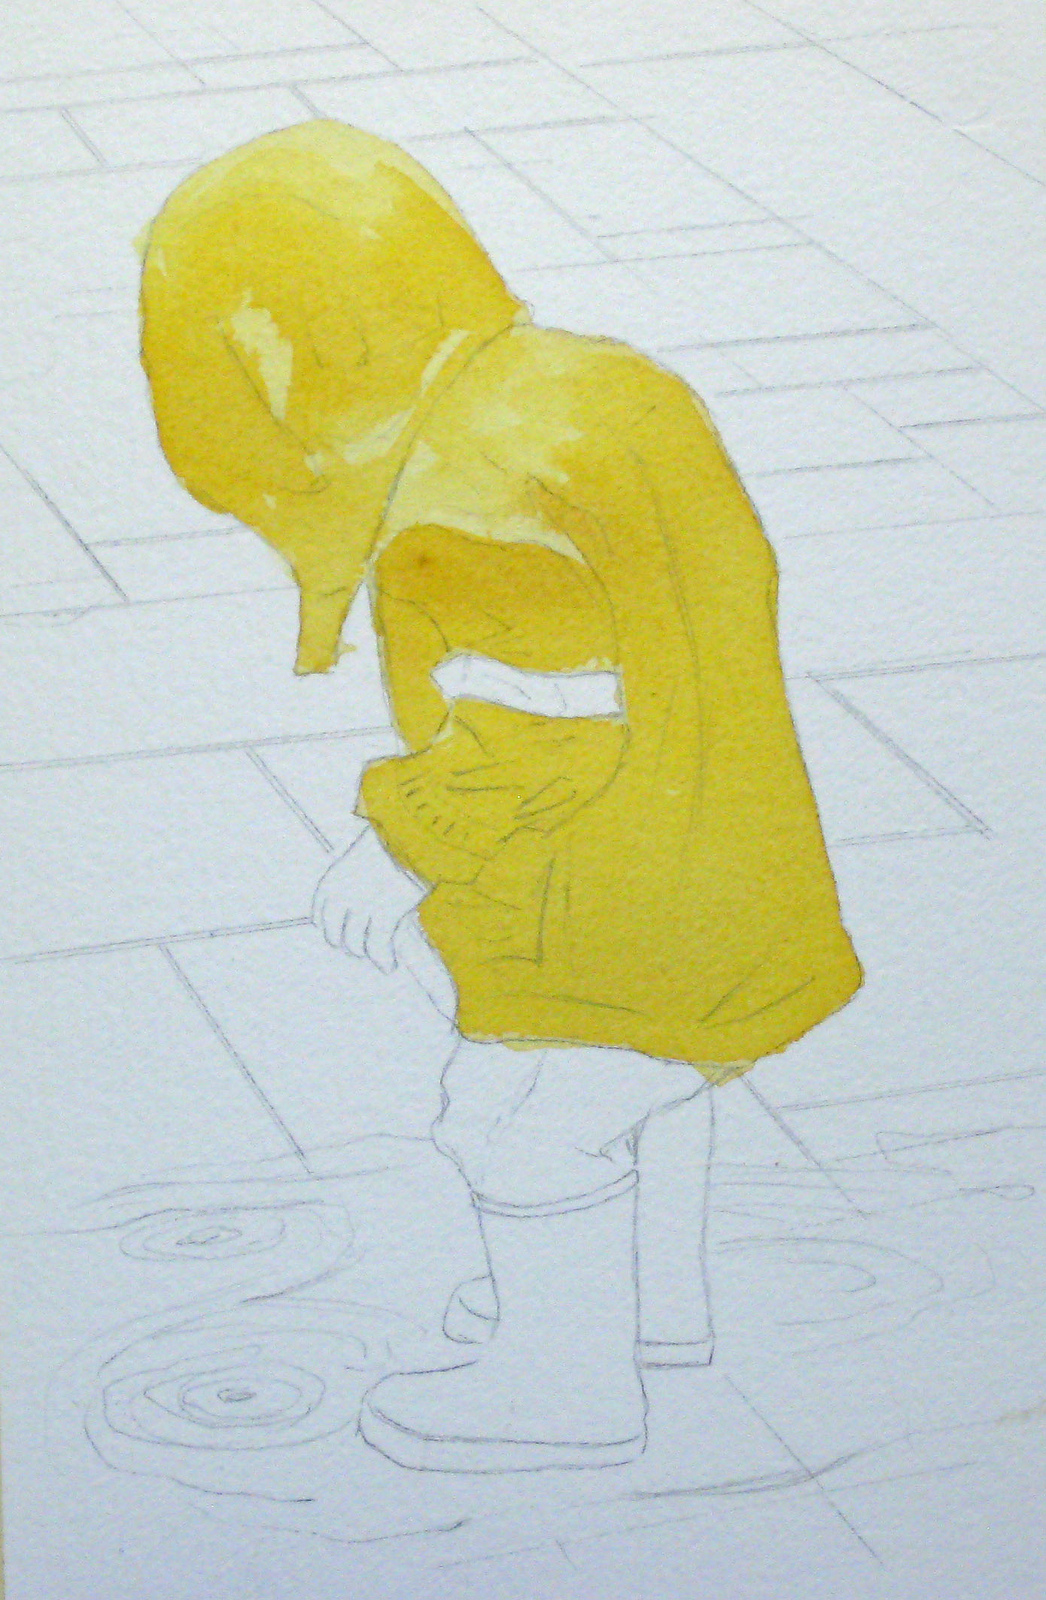
Here I’ve started on the shadow areas, using my New Gamboge with a touch of Raw Sienna. An oilskin jacket is similar in technique to painting metal in watercolours and you need to exaggerate the highlights to get that characteristic shine.
Step 6

Now I’m modifying the high shine with a small scrub brush, water and clean facial tissue. If you’ve never used this technique I suggest you practice first on some scrap paper. The exact amount of water, pressure and scrubbing depends on the paper and the colour you’re using. This colour stains like mad so you’ll need to leave as much white or lightly tinted are as possible.
Step 7
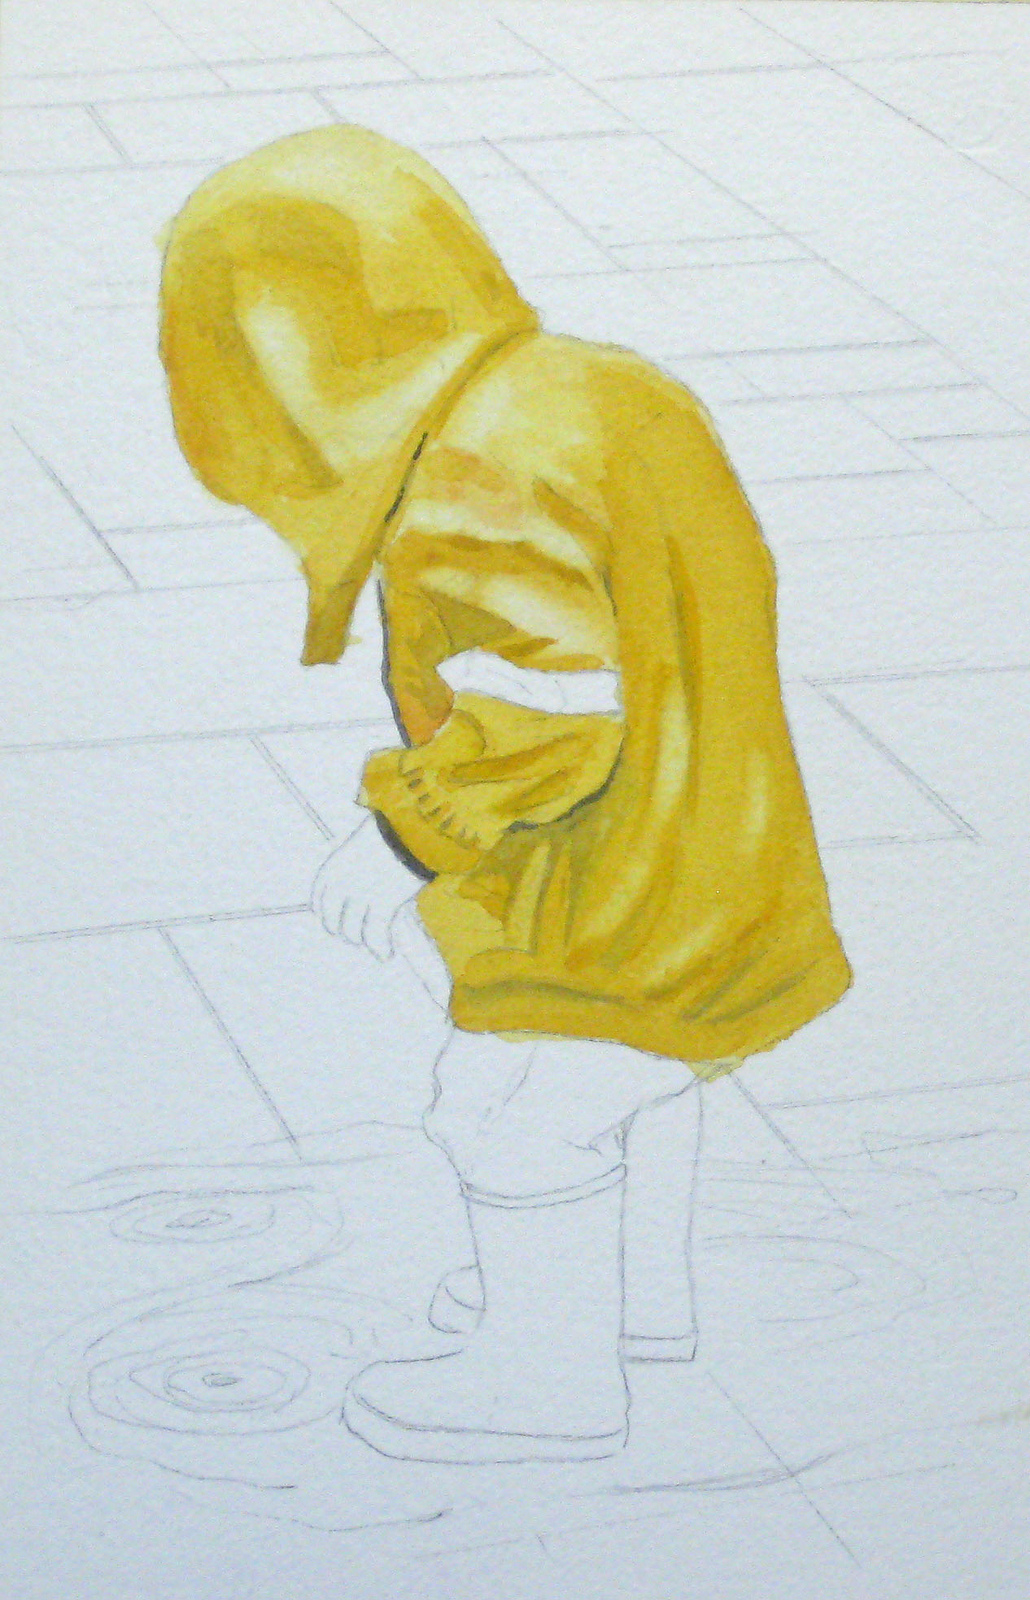
The completed oilskin jacket is left with that reflective stripe to be mapped in.
Step 8
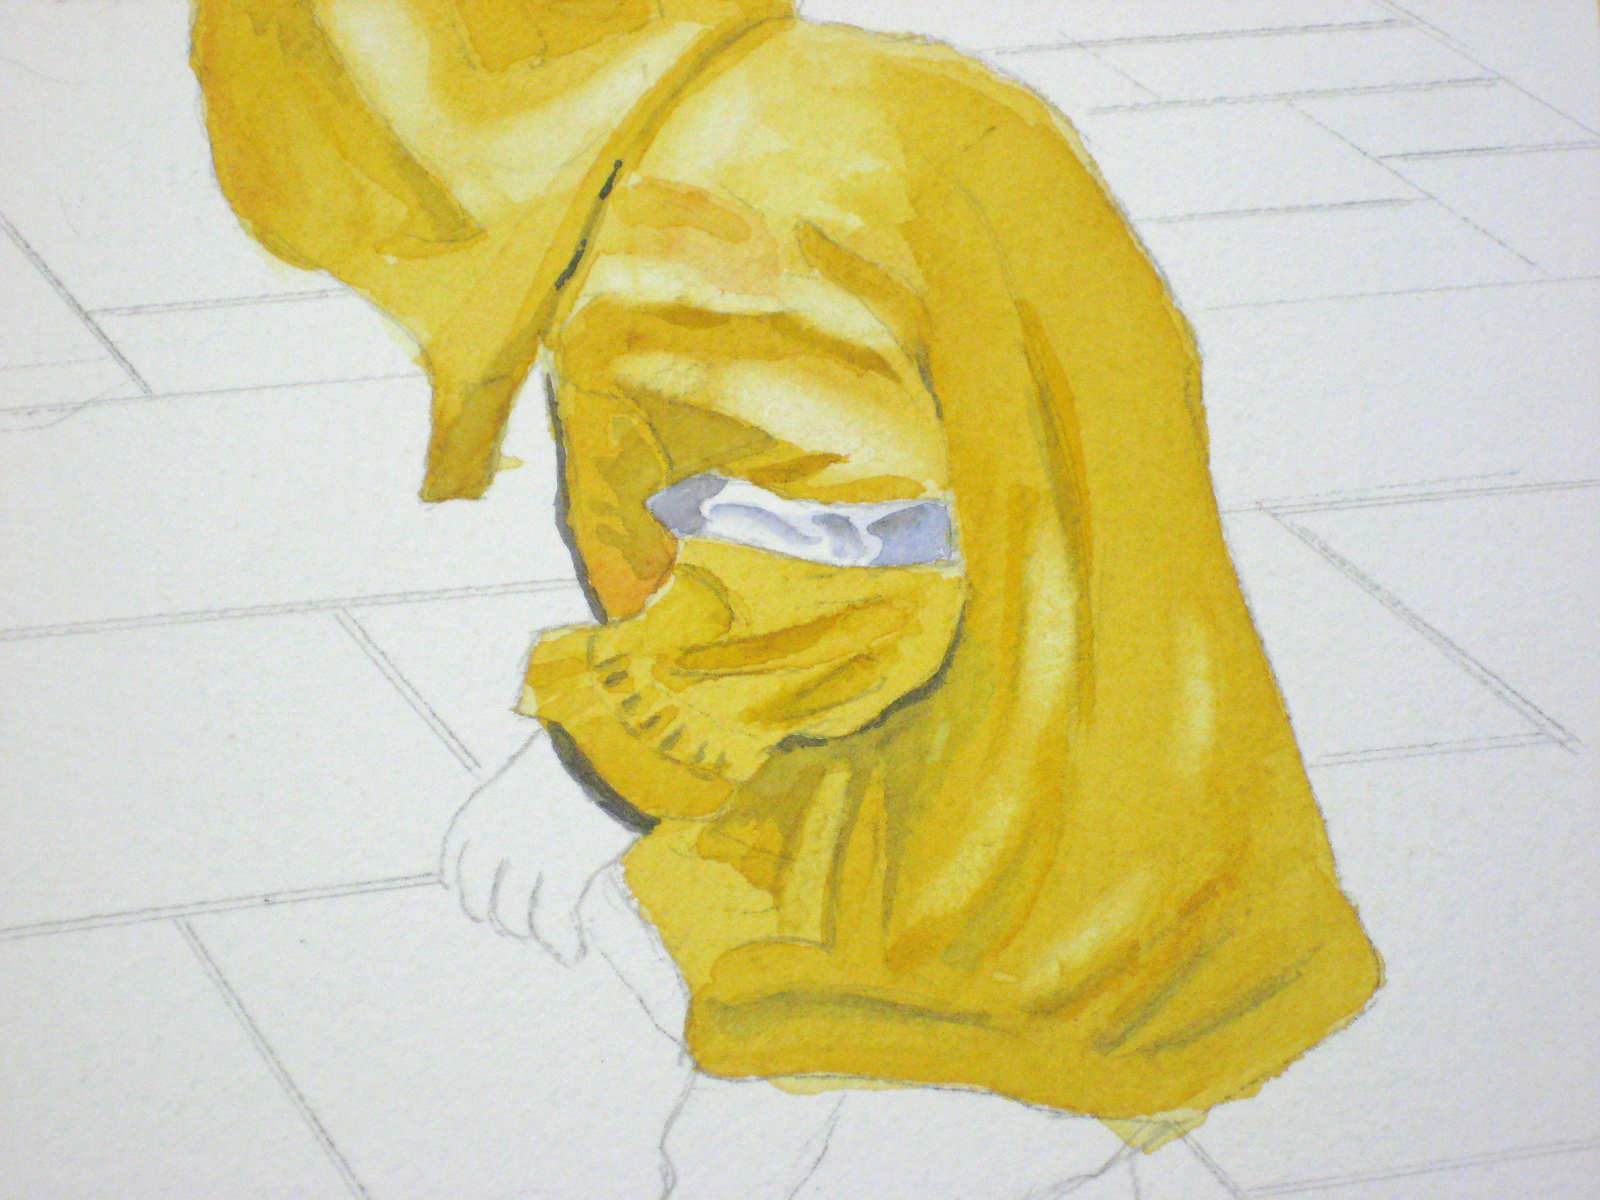
The reflective stripe is actually grey but in this watercolour I used Ultramarine Blue and a little shadow colour to resemble this stripe.
Step 9
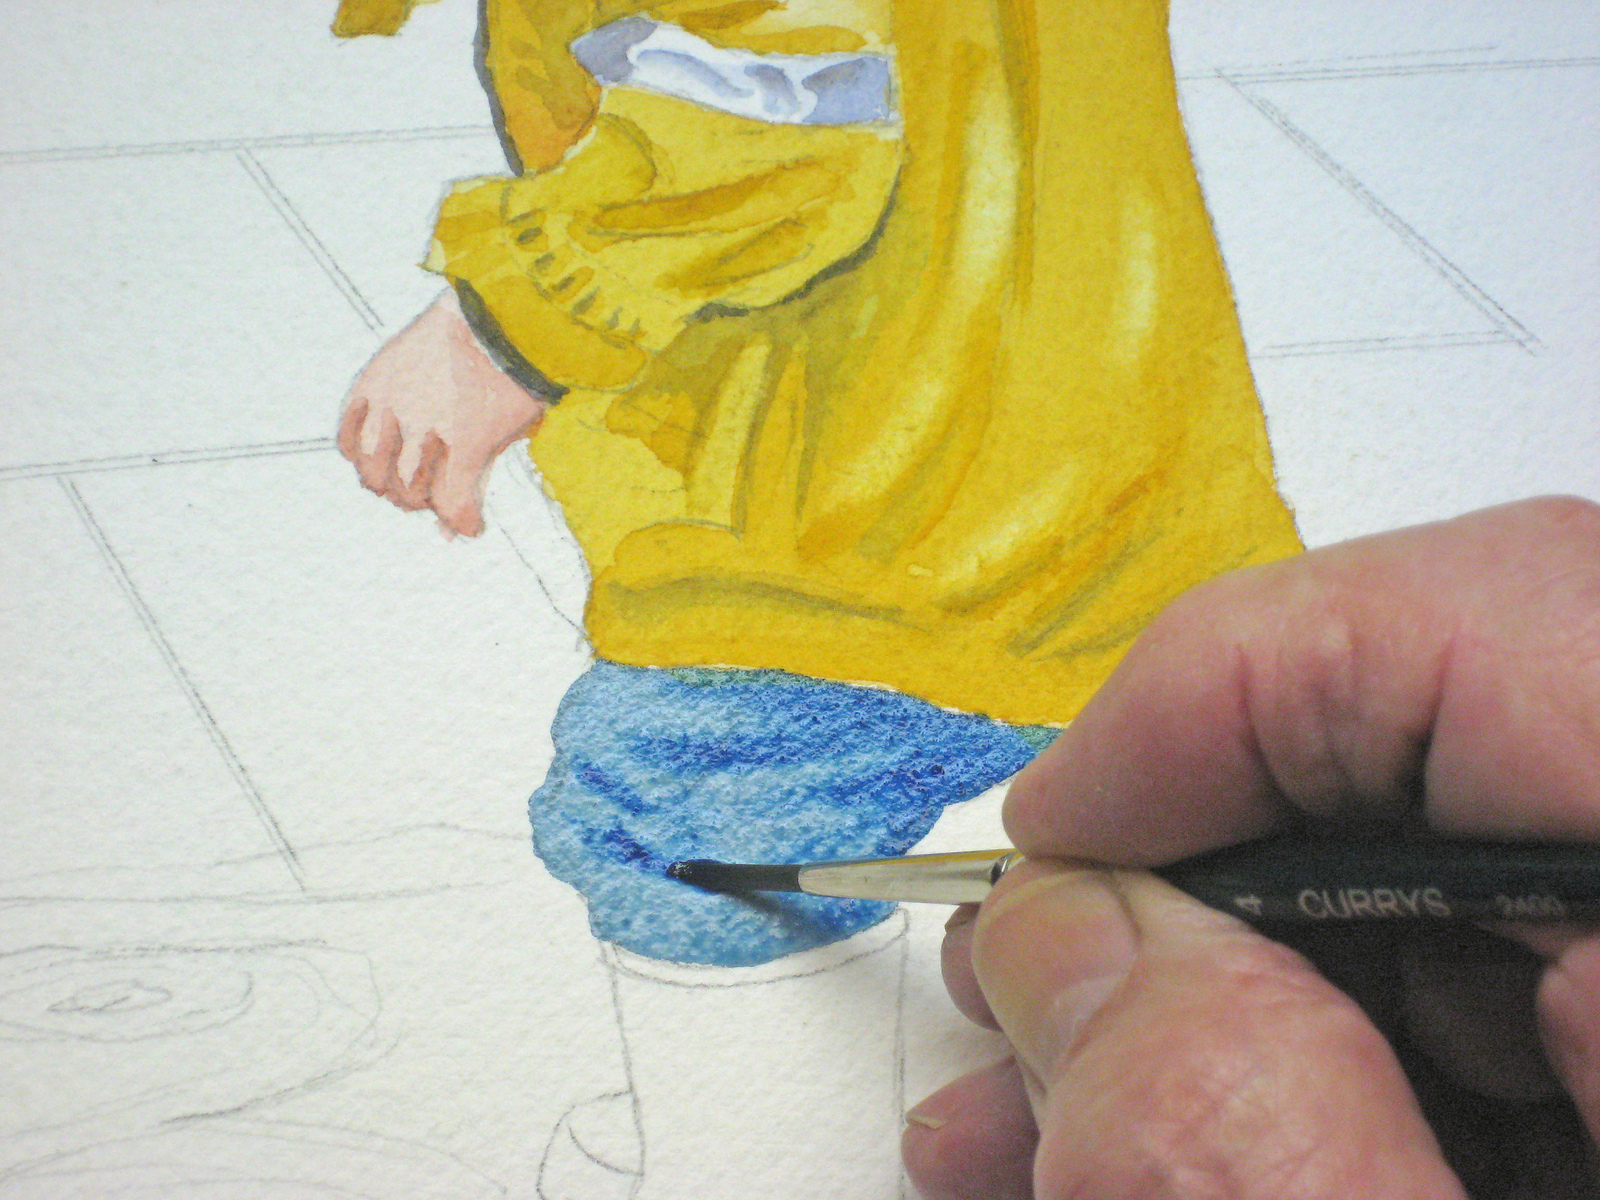
The jeans are a mixture of Antwerp Blue and shadow colour, painting from light to dark, with some colour lifting to emphasize the creases. I made them a little lighter than the original photograph to show some texture. I also used some pure Antwerp Blue right from the palette in a wet-in-wet technique.
Step 10
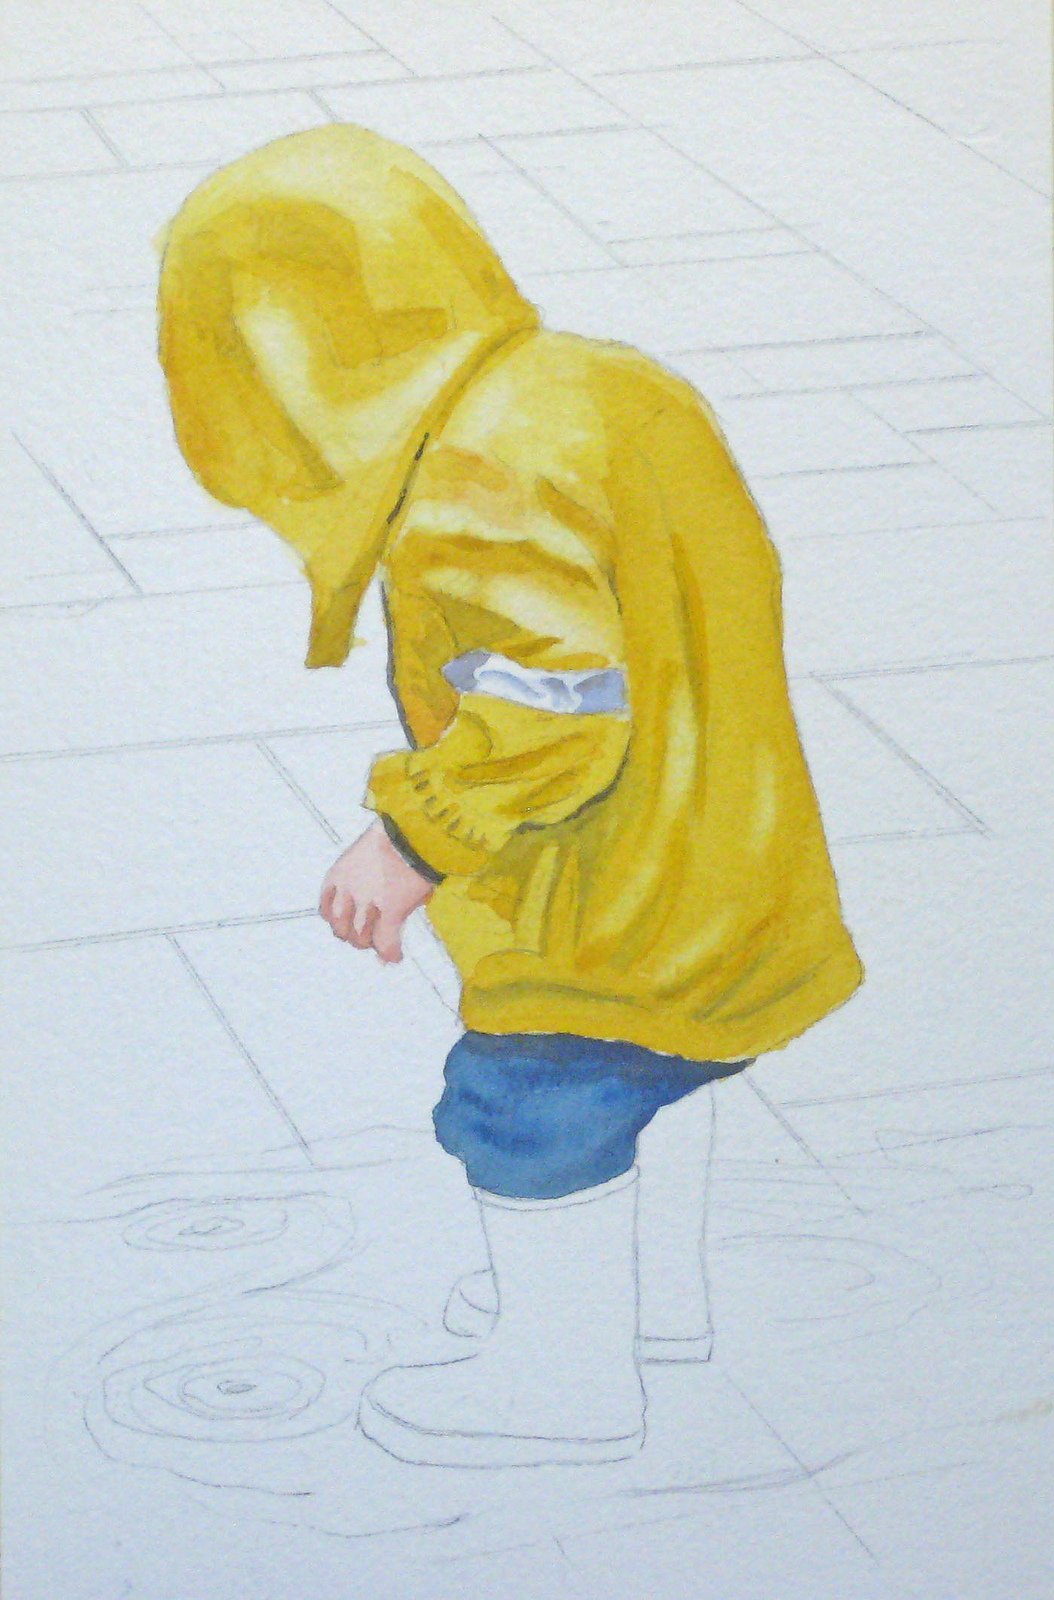
Here is the figure completed and ready for the Wellington boots.
Step 11
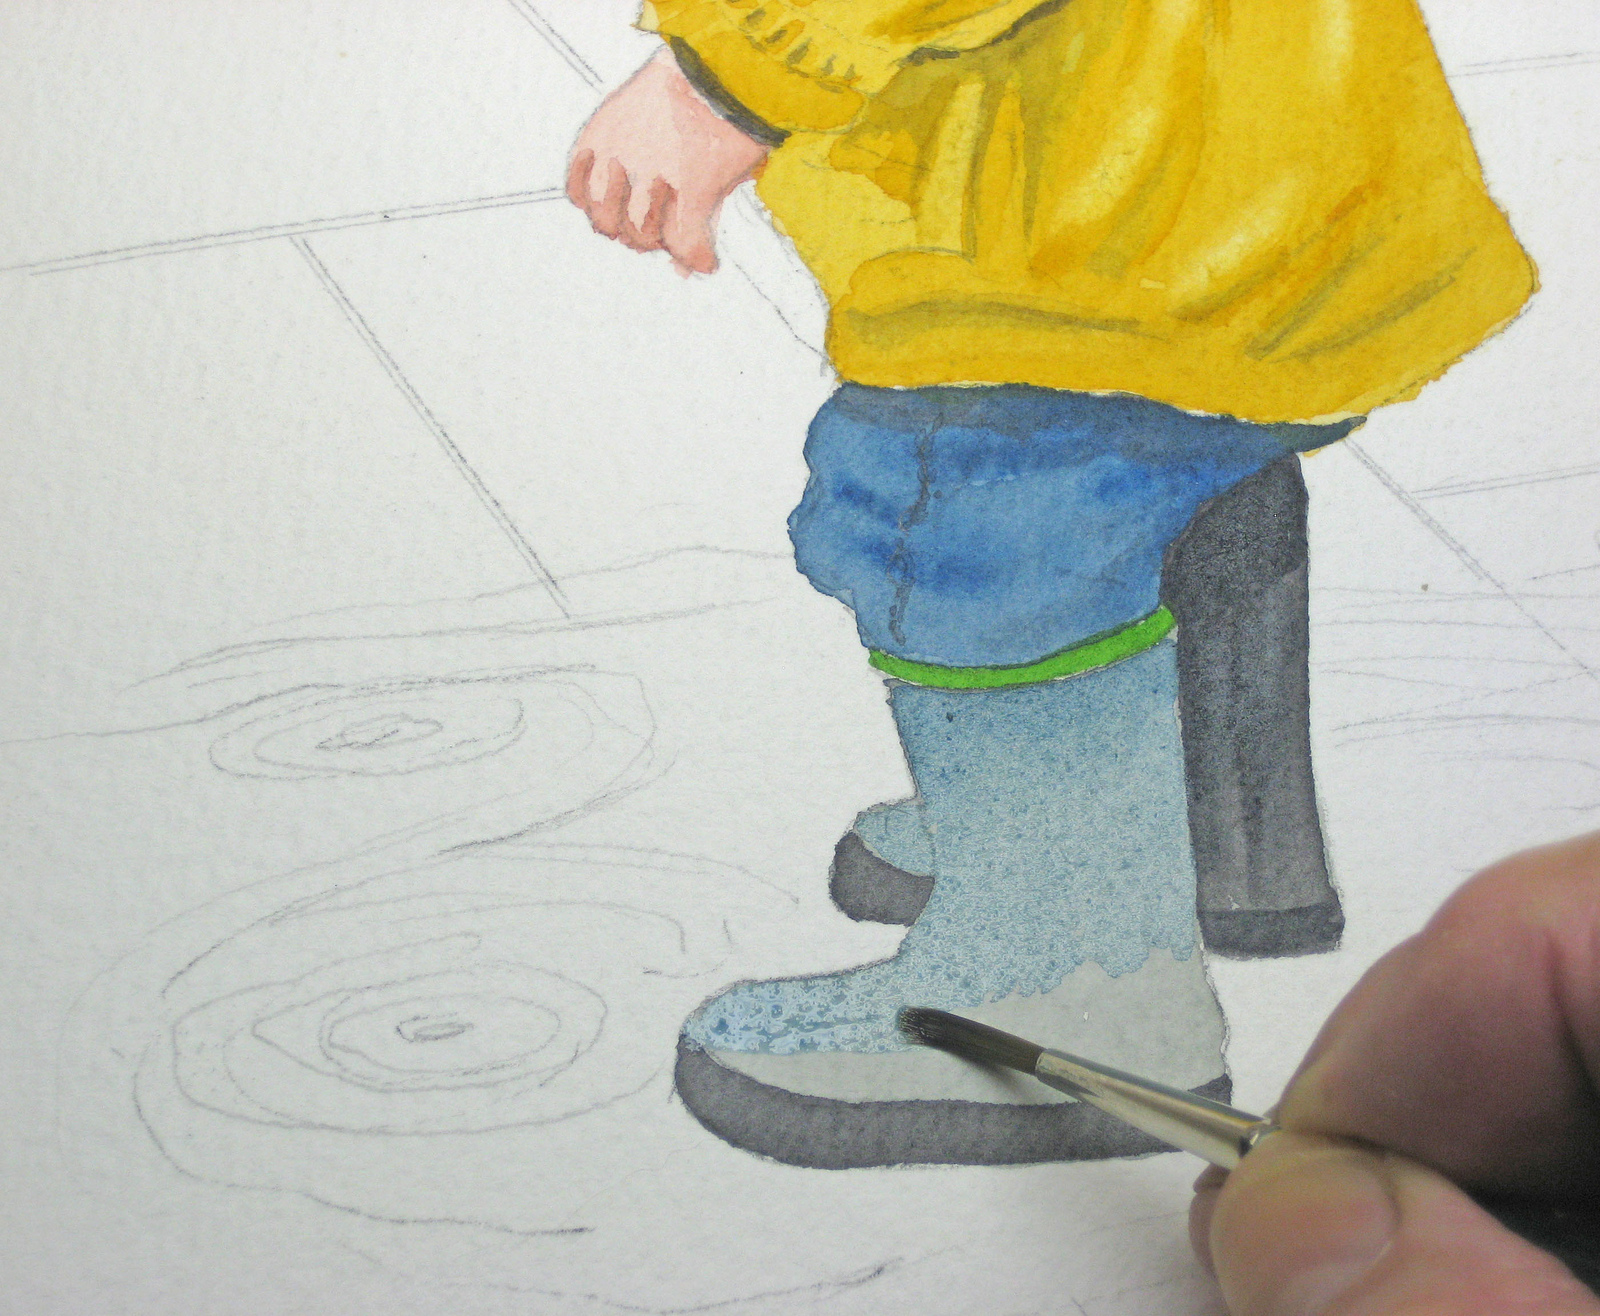
I made a judgement call here and decided to lighten the tonal value of the boots as the jeans and boots together were too dark. After putting in that green stripe around the top I used several layers of Antwerp Blue plus some shadow colour to build up the shiny surface. I did some colour lifting to emphasize the shine. Now we’re ready for the background interlock paving and the puddles. So far, so good.
Step 12
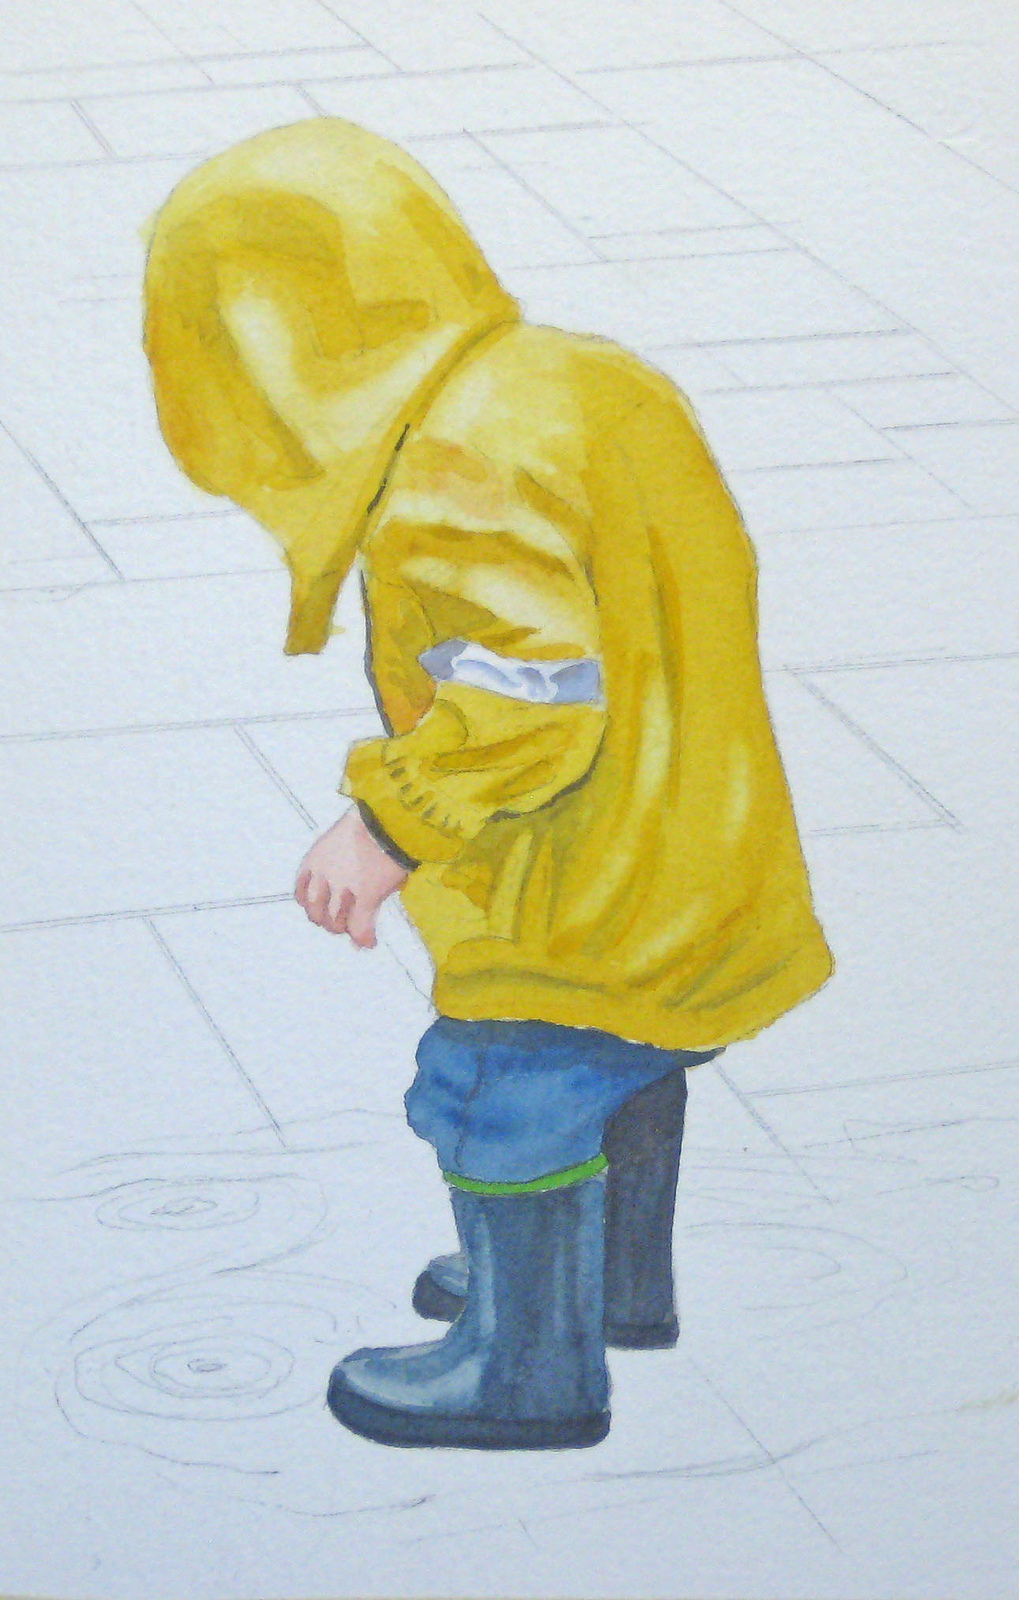
Apparently not! I had to do several sketches to arrive at some sort of technique I could teach. These puddles proved difficult to interpret as the little boy is actually standing a pool of water probably one inch deep and that was hard too show. I fell back on an experiment I’ve used in the past. I painted a full-sized section of my puddles trying out a suitable technique.
Step 13
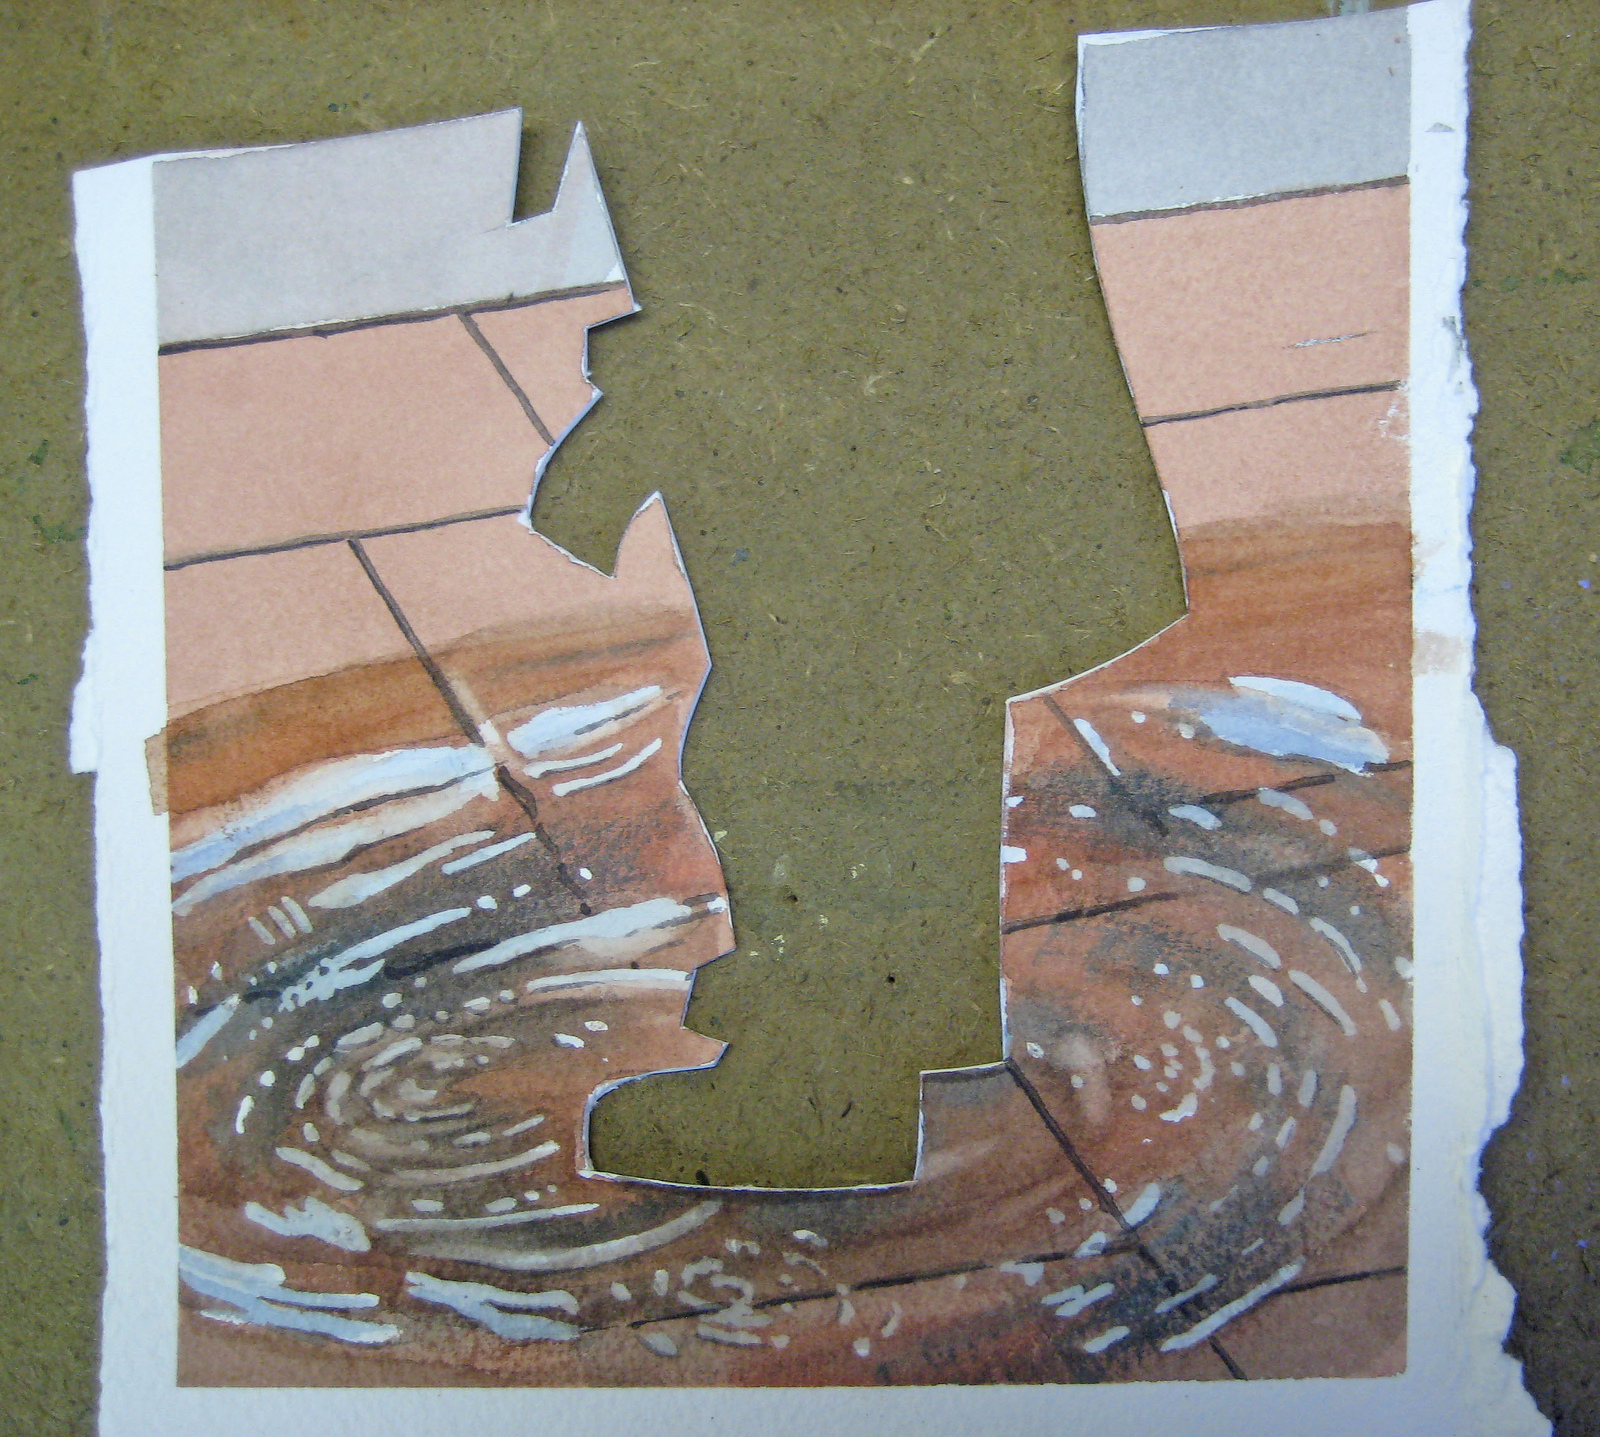
When I was satisfied I cut out the section and placed it over the main painting to see the effect. I was satisfied enough to work on the main painting using some of the techniques I had tried.
Step 14
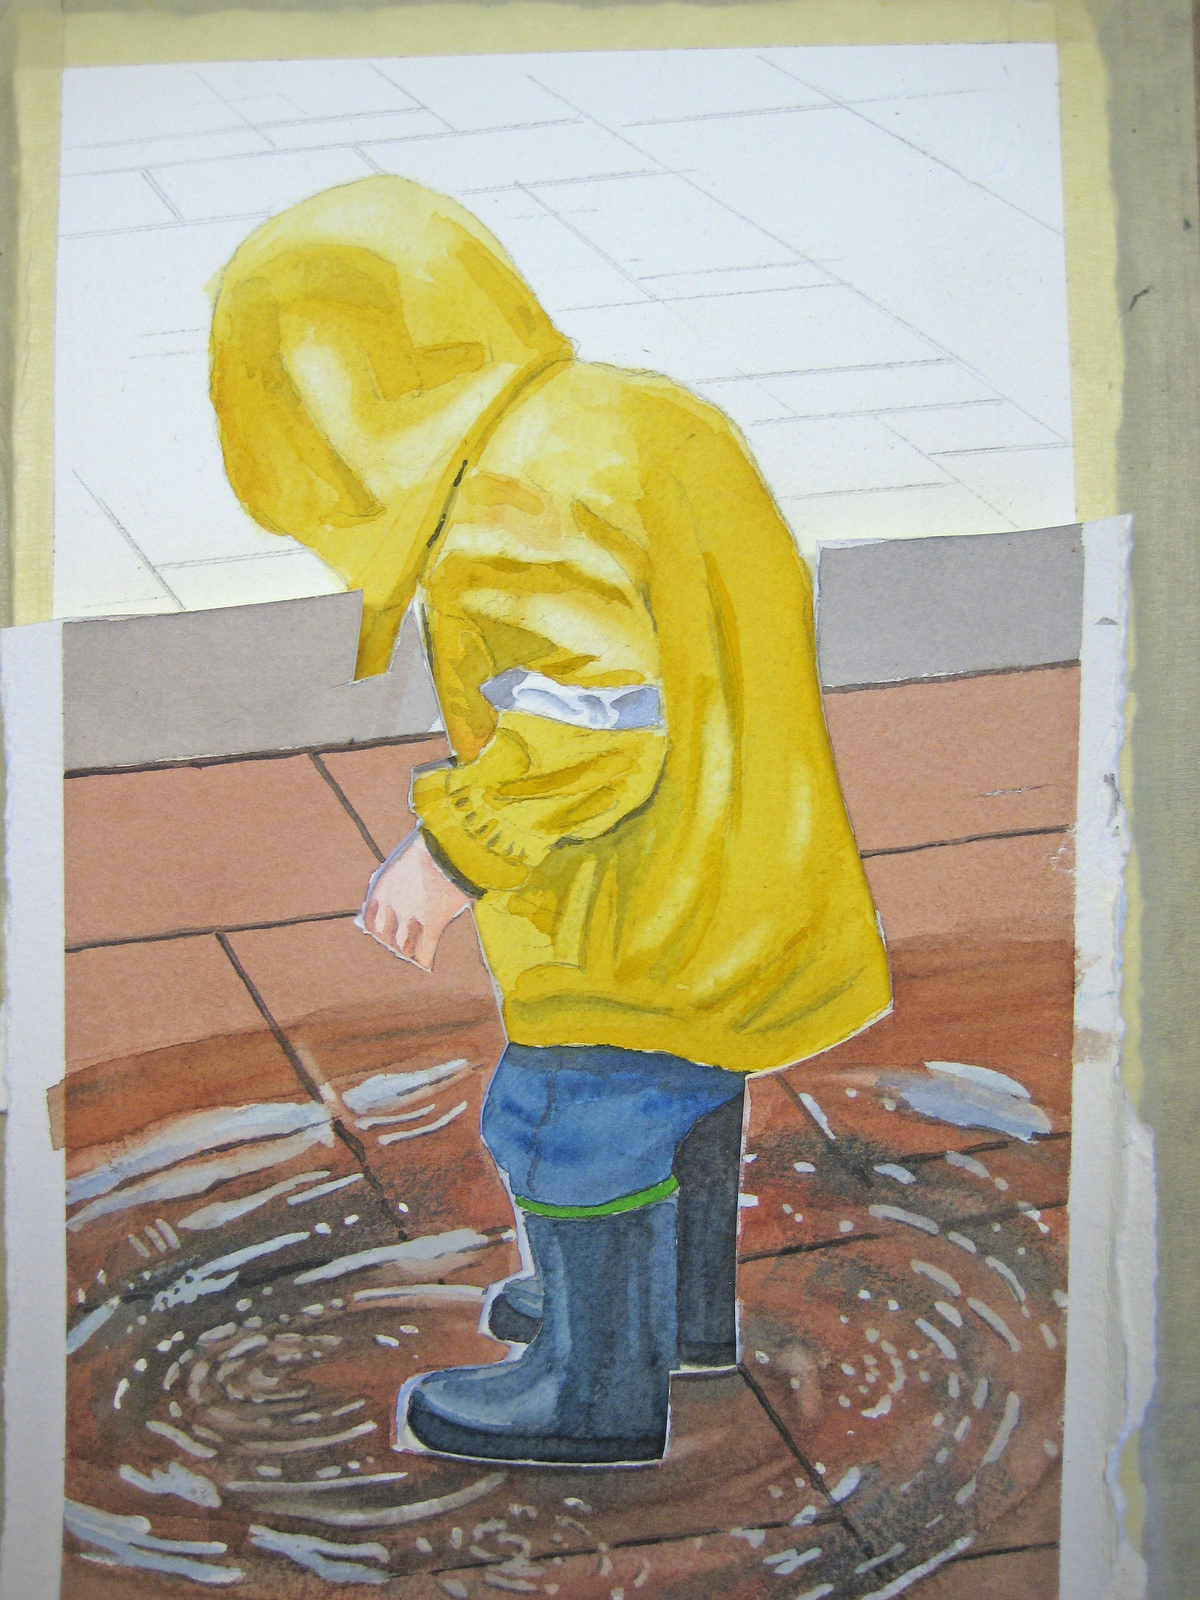
Here’s the cut-out placed over the painting.
Step 15

I used a 1/2″ angle brush and a partly dry-brush technique.
Step 16
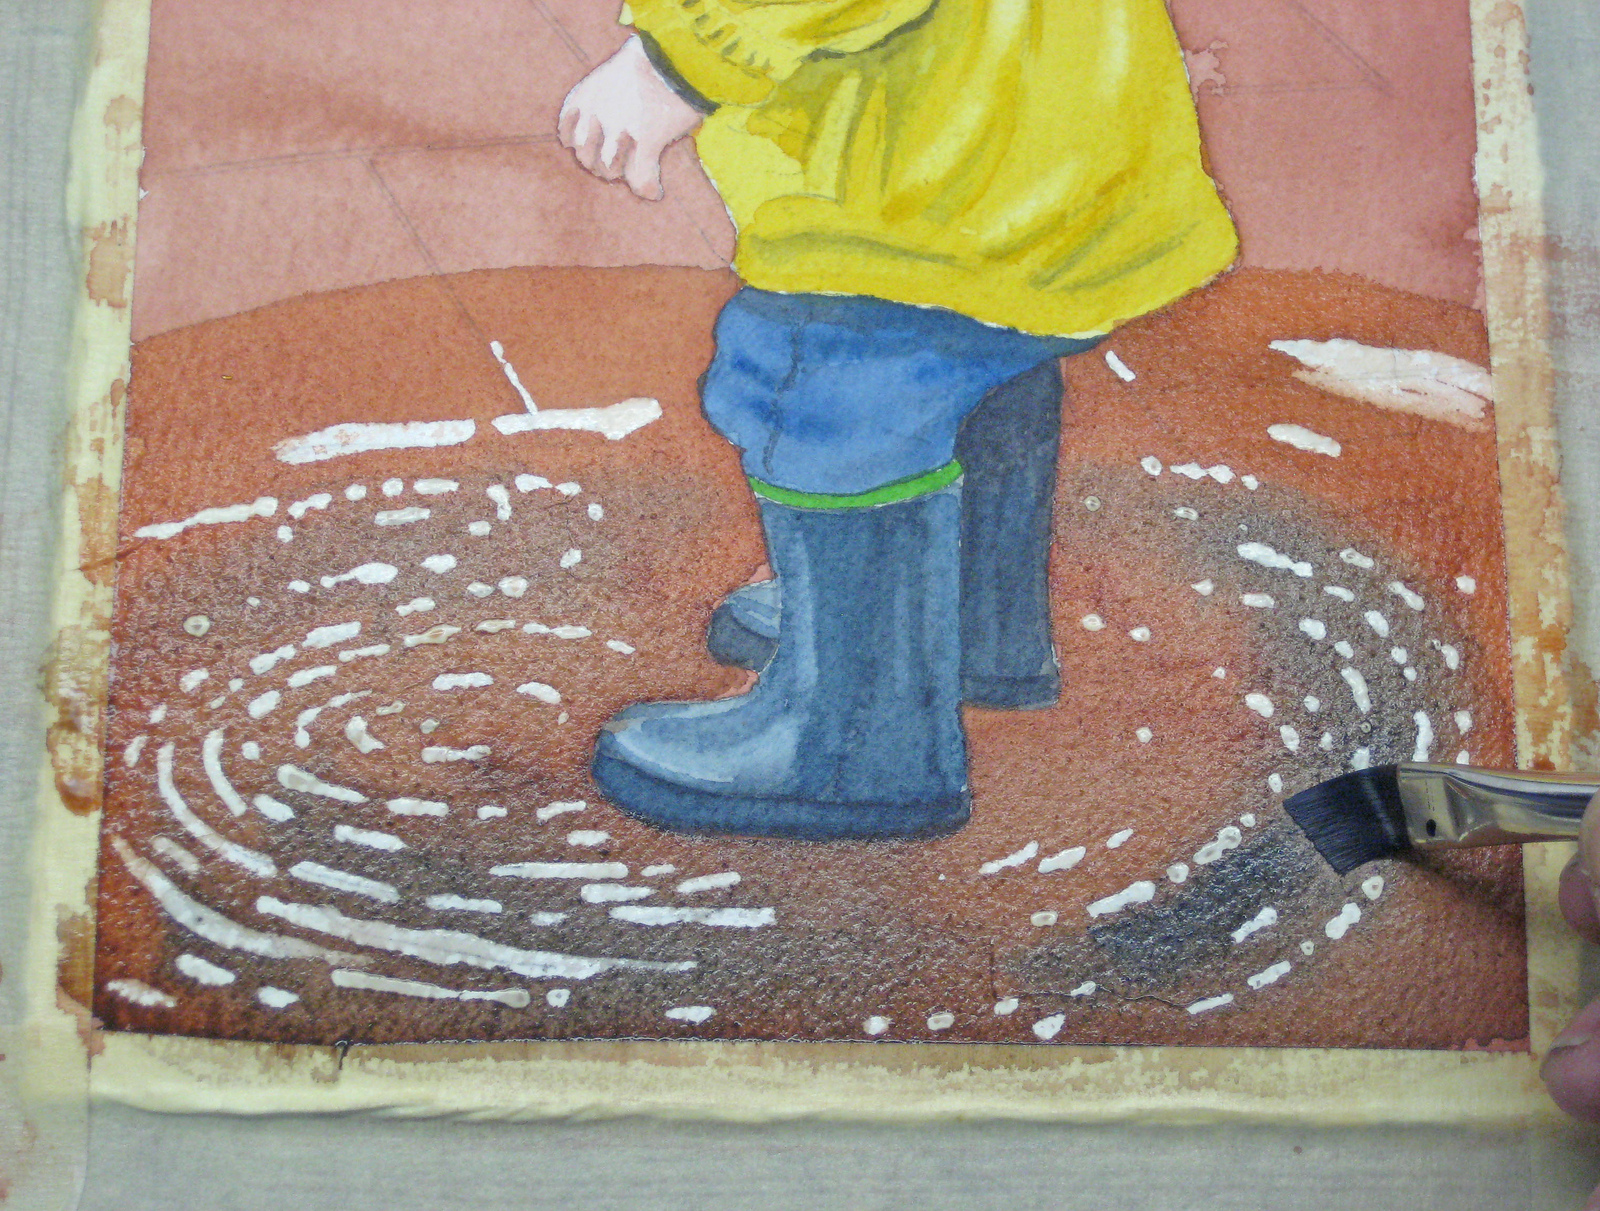
Here the reflections are much too white so modification takes place to soften and diffuse them.
Step 17
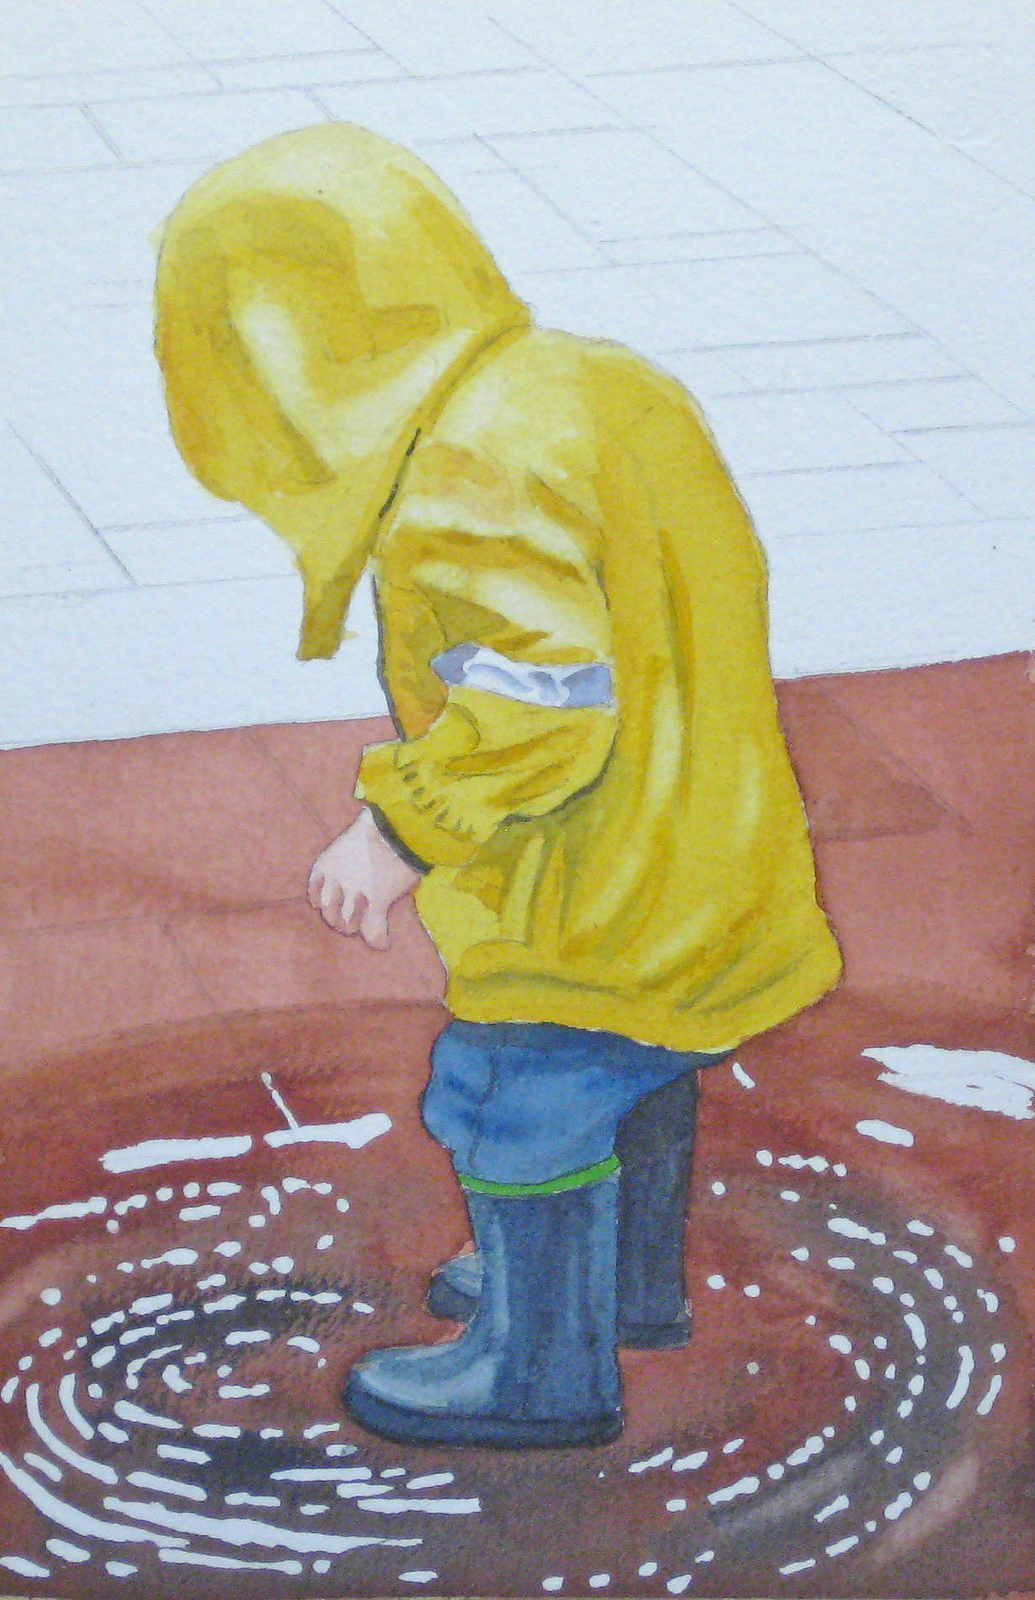
More modifications on the water.
Step 18
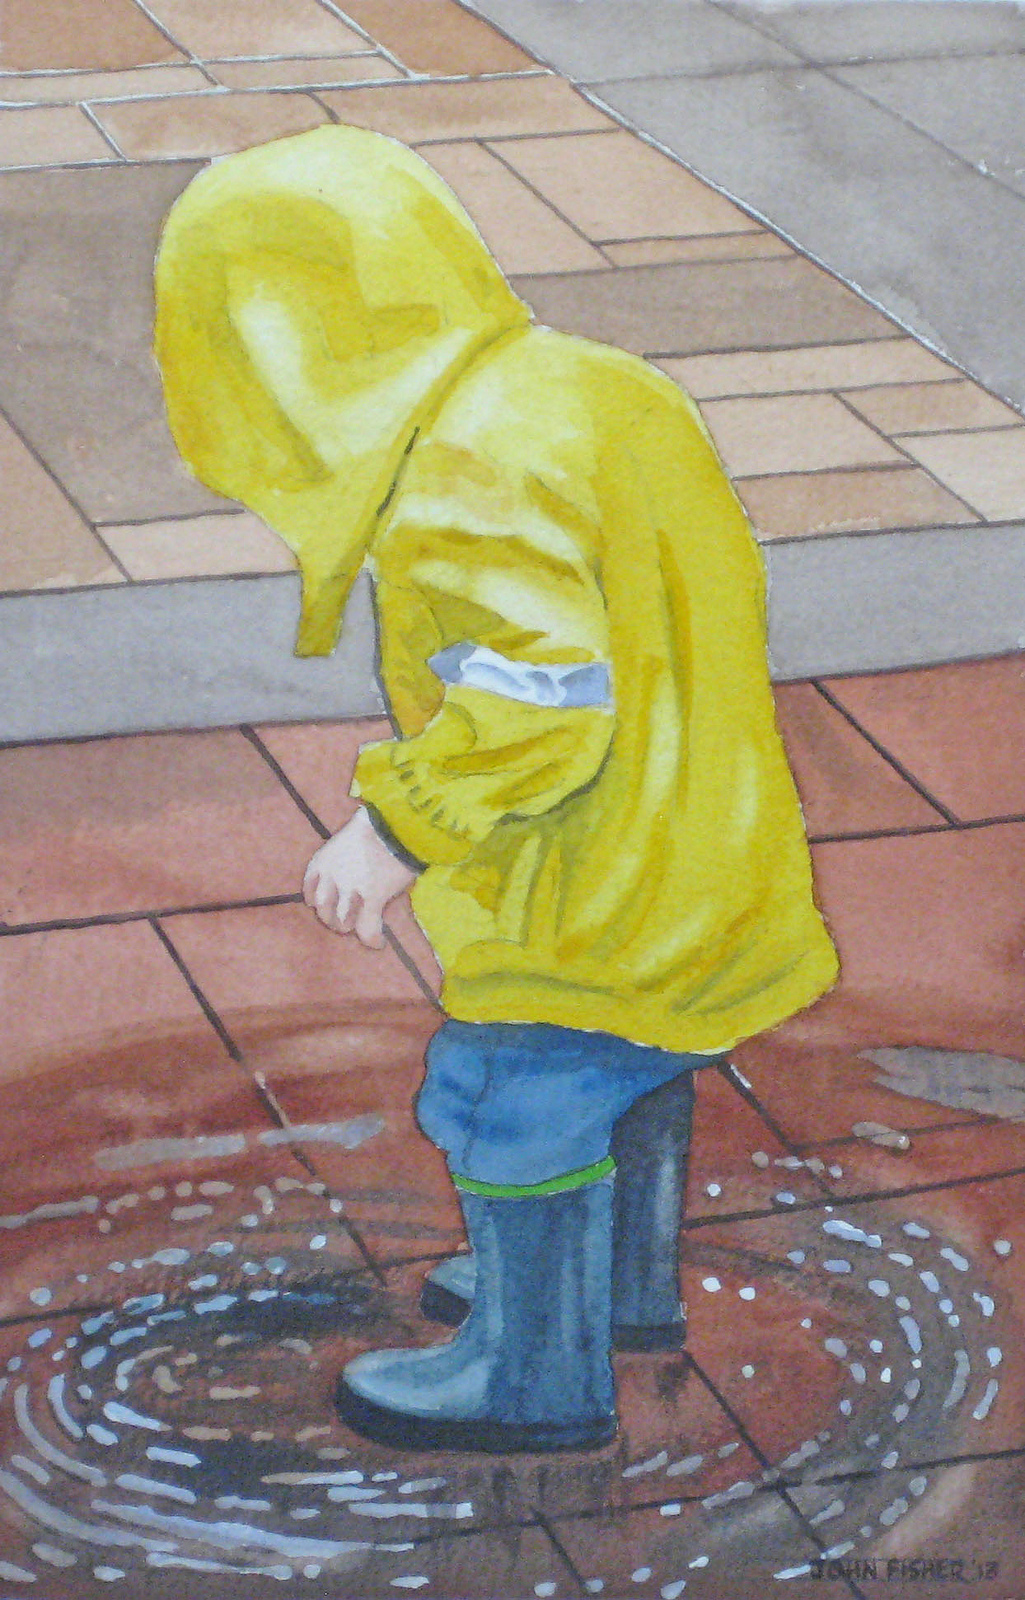
Our final frame shows the background mapped in and one or two modifications to enhance the water around the little boy.

I love the technique you use to teach others. This does not always happen with other artists. I find following your demo is very benefical! Thanks for sharing your gift. Pat
Well done!
Well done. I appreciated the clarity of the instruction. The simplified step by step will be useful no matter what the artist level of experience.
This is a very detailed lesson John, well done! Love your work
This step-by-step demo is a big help for me. Now I know how to approach a challenging subject . Thank you for the your generosity in sharing your knowledge. Much appreciated.
Since I have been using oil since the 60’s I know little about water color except that you start with the light colors first and that water colors could be difficult to correct.
However. I did enjoy your demo and the subject matter. Your colors are pleasing to the eye and I want to thank you for asking me for my comments. Keep up the good work and think Big thoughts.
Respectfully Submitted
Lorraine Degelia
lorart@sbcglobal.net
Simply loved the detailed demo of the pic.It makes watercolor painting look so easy…but I know it is a difficult medium to learn. I mostly work with pencils and do black and white drawings.I so wish that I could master watercolor,as I love to draw landscapes
That was a wonderful demo and really helpful especially the part about creating the whites/reflections on the yellow coat. I am always worried about that, now I will be brave.
My story extremely similar, I left Hungary 1956,in Australia I married a german girl in 1965 yes 48 years ago, worked all my years as a sign writer, retired 2001. Took up watercolour
as a hobby 1month ago. I search and self teach from www. Enjoying it and this how I stumbled across your site. Thank you and I enjoy lesson “in the puddle” Janos
Thank you. I really enjoyed doing this picture easy simple step by step. Im new at water colour and found hard to follow from a book. Looking forward to doing the other demo’s.
Leanne
Dear sir
I loved the way you paint with water color
nice
” a very lovely demo”
Like what you did gives me ideas when I have a problem with back ground. I have trash art when I like the subject but had a MUDDY mess of a back ground Thanks
I thought the tutorial was interesting – good ideas to do samples as in the puddle. In the final piece [decision on step 11], I feel that the boots would have been more interesting dark – sending the eye downwards and focusing on the puddle. The final piece needs some darker values. Well done otherwise. Hats off to watercolourists – I’m too heavy handed for this medium.
Note that there is a typo error in tep 16 – ‘soften’.
ty
Thank you Jacqueline for your comments and for letting me know about the typo. I appreciate it.
thanks a lot!this is great!!
Awesome tutorial. Wondering if I should bother getting masking fluid, or just trying a go with water, a clean brush and tissue paper.