About Julie Duell
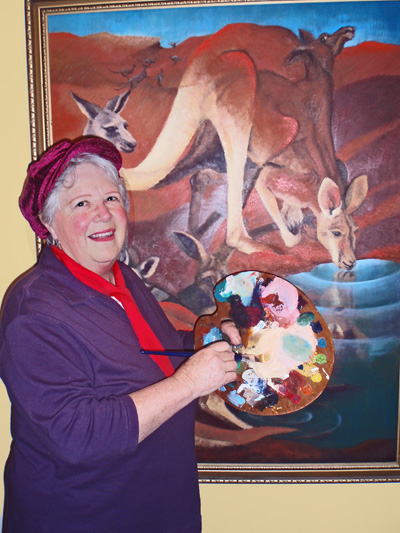
Julie Duell (nee Henderson) is a 6th generation Australian going back to the First Fleet of English convicts to arrive in Sydney cove in 1788. She also has a drop of American Shoshone Indian heritage for good measure! Julie was born in Sydney in 1941 and continued to reside in Sydney environs thereafter. Julie was named after the month of her birth, July.
Over many prolific artistic years, Julie has painted under the names Julie Ferguson and J. Ferguson-Duell before simply signing her works Julie Duell. As a child, she studied art at St. George Technical College, Kogarah and singing with a private teacher in Rockdale, entering numerous Eisteddfods as a soloist with some success.
Adult years saw Julie resume her art studies, once again at St. George Technical College and then numerous short courses on the Central Coast where she has been a prolific practising artist and art teacher since around 1970.
Inspiration: A deep love of nature, children and a fascination for human form, body language and portraiture. Also, the fairy realm.
Mediums of expression: Painting and drawing in charcoal, oils, pastels, inks, watercolour and acrylics with many works executed in mixed media. Her children’s book creations feature Australian fairies in the form of Sprites. Clay modelling and printmaking have been other strings to her bow.
Awards: Among a number of awards over the years, Julie’s Children’s book “Bush Sprites of Australia” attracted a special award from the Riso Educational Foundation of Japan in 1985, along with 3rd prize in an International Postcard Competition that year.
Visit Julie’s Websites:
https://artintegrity.wordpress.com/ – This is Julies main Website. This is a great site loaded with free art lessons. Make sure you stop by her Sales Gallery Here where you can purchase her beautiful artwork.
https://www.kidsfuncorner.com/ – Free site designed for children, teachers and parents. Julie has fun animating stories and creating learning aids that are fun, as well as giving kids an opportunity to showcase their work….
Perspective Drawing Help – Part 1
First of all I would like to point out that as Artists, we are free to paint and draw what we wish – so unless you are an architectural artist, please don’t feel that guides in drawing in perspective are RULES! They are simply powerful guides (or tricks) to use if you wish to create a 3 dimensional illusion on your flat surface. The choice is yours!
First, let’s have a look at how powerful the illusion of perspective drawing can be! The two blue trees in the drawing below, believe it or not, are the SAME SIZE in reality!
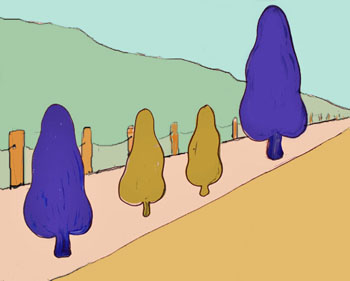
Hard to believe? Let me show you how this illusion works…
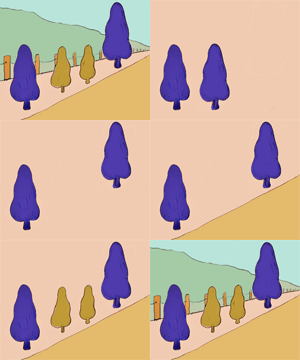
Isn’t that amazing! Just a few perspective lines can create that illusion. After all, we are just looking at a flat surface!
Maybe you would like to use this trick in your own drawing!
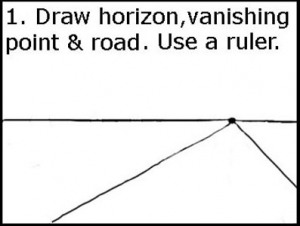
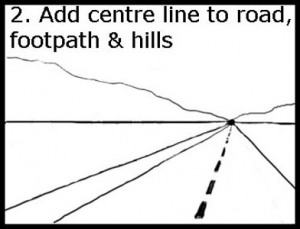
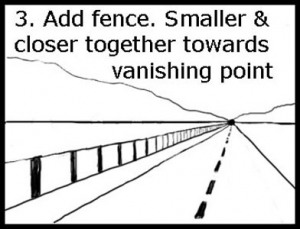
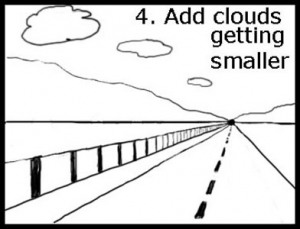
You might like to draw your own tree shapes on thicker paper or light cardboard so that they are stronger. First draw one tree and cut it out. Lay it on your card and draw around it. Now carefully cut out your second tree just INSIDE the line that you drew, so that they will be the same size. Hold them one on top of the other to check. Colour them black or a strong colour.
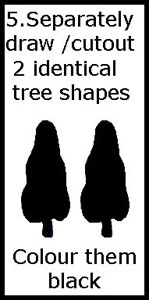
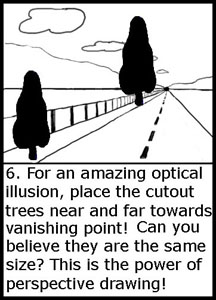
A little blue tack will hold your trees in place and you can move them to see how they look in different places on your drawing.
Now what about this next picture of the 3 men. Which of the two SMALL men is the bigger one do you think?
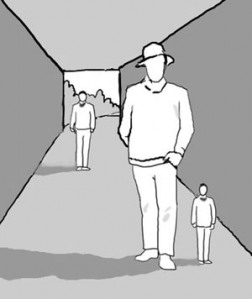
Can you believe they really are the same height? Let’s check it out!!! It is really amazing isn’t it!

OK now lets get on to the specifics of the Optical Illusion we call “PERSPECTIVE”. How does it work?
I hope to throw in a few hints that might help explain it- although I certainly don’t profess to be an expert in this.
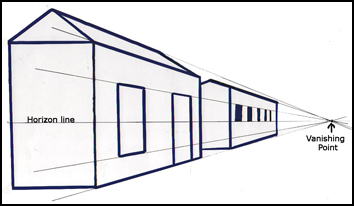
Firstly, let’s take a look at the most commonly known “trick” for the eye – single point perspective. This is when the alignment of objects in the painting or drawing become smaller towards a distant point, to create the illusion of distance…as you can see, the “horizon” line in relation to your viewpoint has a dramatic effect on the end result and appearance of things in those converging perspective lines.
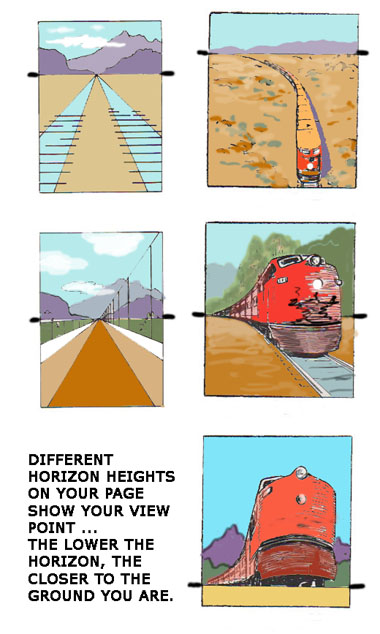
It is helpful to draw a single box in perspective if you are new to this. Here is an example below:
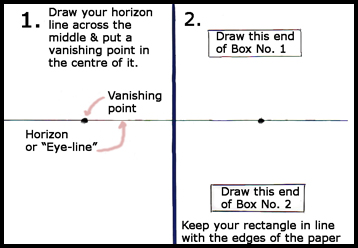
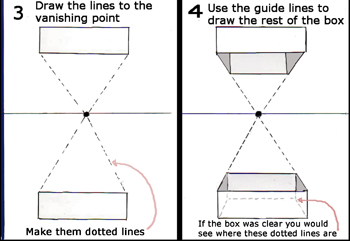
Construction lines (or guidelines) are usually drawn very lightly in pencil and erased later but without them it is very difficult to sketch things in perspective. Naturally there are countless different shapes of buildings, windows & doors so this is just a very basic guide and you can create your own variation.
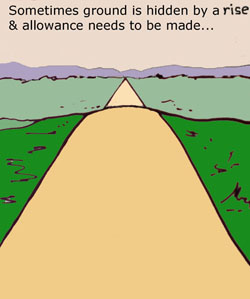
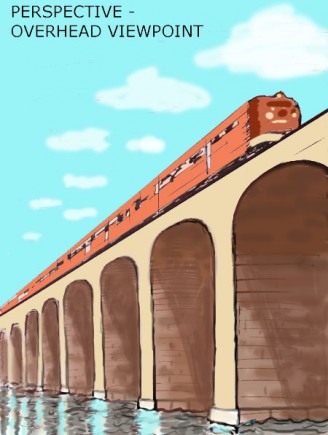
Handling some other tricky situations:

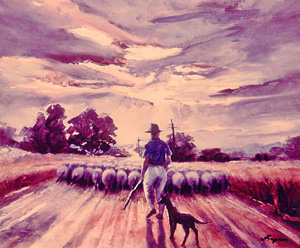
Below are some examples where I’ve used single point perspective in paintings… the first is called “Bringing them home, Inverell, NSW” painted from a photo taken through the windscreen of our car.
and this one is a semi-abstract cityscape “Spirit of a City”…
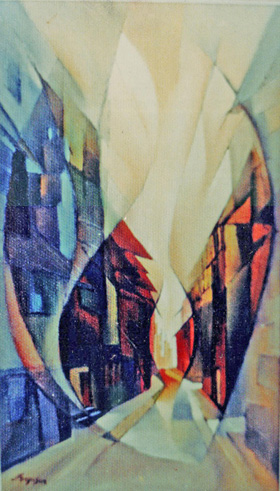
It is rarely that you can actually see a flat horizon (except perhaps looking out to sea or in a desert) but most of us have inbuilt in our balance system a feeling for “WHERE THE LEVEL OF THE HORIZON WOULD BE IF WE COULD SEE IT” and it is this “SENSE OF LEVEL” we need, to assess most traditional compositions we might wish to draw or paint.
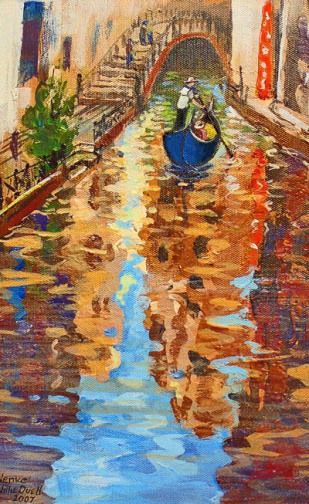
Here is one painted on our trip to Venice last year. Note the high placement of the “horizon” (where the perspective lines on each side of the canal would meet if they were shown to converge)…
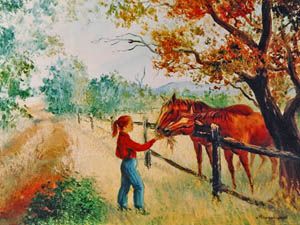
In this country scene, perspective is softly suggested in the diminishing track and fence…
This next example (a tonal rough) is straight-forward where the street perspective is concerned but look at the crazy angles of those rooves! How can we analyse those for drawing them into the finished painting?
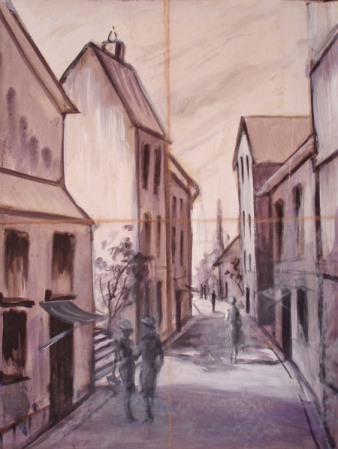
Well, this is what I do if lines do not all merge to a vanishing point! I pretend each angle I want to draw is coming from the centre of an old fashioned clockface. I hope you are familiar with clockfaces in this era of digital LED displays? Which number would that angle be pointing to if it were a clock hand in relation to the sides of the paper or canvas? When I decide that, it helps me draw it.
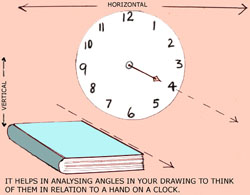
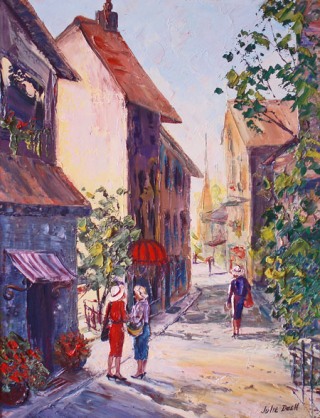
It worked pretty well in this study, although I decided along the way to alter some of the roof lines. Here is the finished painting below. I like the “not-so-precise” roof angles-I feel they look more interesting & less architecturally perfect – after all old houses tend to sag a bit as they age, just like us!
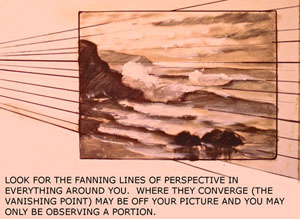
Sometimes in single perspective studies we find that the “vanishing point” where the lines converge is way off the edge of the area we are drawing or painting. Here’s an example…
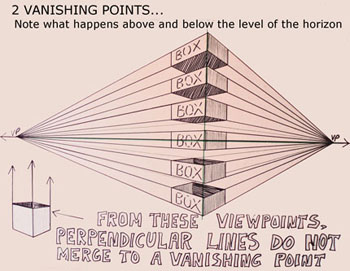
In some compositions, more than one vanishing point might be in play e.g. a corner of a building. The exaggeration of the perspective becomes less and more gentle the further away each vanishing point is from the other.


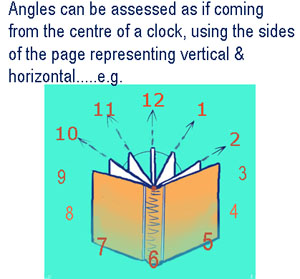
Let’s go to using that clock method again….So how to choose the angles when drawing from an actual subject? If you look at the corner of your building through a viewfinder (your camera lens works fine), it helps to ask yourself how the angles of the roof and bottom of the building relate to the angles of a clock…
Notice how lines above the level eyeline converge down to the vanishing points and those below converge upward? By drawing a simple box, you can see that above the eye level we can see underneath the base of the box. Below eye level, we can see into the box looking down.
Here is an example of how 2 point perspective can translate into a semi-abstract painting “Corner Gossip” where I had fun extending all the straight lines to form a semi-abstract design, treating it like a stained glass window with shafts of light…

wow thats very useful! thanks for sharing ! 🙂
Thank you. I really appreciate that you are putting information down for young artists to learn. Thank you, this was a wonderful tutorial.
And wonderful paintings!!!!
wow, this really helps clear up those perspective issues. thanks so much for your time and expertise.
Wow.
What an excellent elaboration.
Grateful for sharing the secretes.
Shyam
Julie, your tutorial is truly awesome !!! Thank you so much for sharing !
Thanks for this! I am thinking of introducing perspective to my 7 year old, and I think this will make it easy for her to grasp it. Thanks again!
Thanks, I’ve been struggling with perspective for years. You have helped me to really make sense of it all. My confidence in my artistic skills is starting improve. I have had a hard time telling visual stories because I could not tell when to set the horizon line at my eye level or from my point of view or the characters.
How does the clock work when you are using 2 or more vanishing points?
Thanks Again
I’m confused by the example of the illusion with the two blue trees. While I understand that trees are in nature similar in size, as per your example. But it would seem that in your perspective drawing, the tree further down the road towards the vanishing point should seem smaller, not larger. What am I missing? Thanks!