About the Artist
George Max is a Geologist, Fine Artist and Professional Translator from central Guatemala in Middle America. He was born in 1968 in a small town called of Cobán, 200 km north of Guatemala City. He traveled to the USA (Colorado State) in 1989 to study English under a one year scholarship program. He started getting acquainted with art since his first year in College in 1988. As an autodidact, he started his labor of art in 1992 making oil paintings on canvas. Nevertheless, it was until late 2004 when he began to produce formal artwork (oil paintings mainly) for exhibition and sale to date.
Artwork Website: http://www.georgemax.co.nr/
Translation Website: http://www.deensp.com/
Artist Email: georgemaxart@hotmail.com
Translator Email: geodirect07@hotmail.com
Pencil Portrait Drawing Demonstration of a Girl
View this drawing lesson in .pdf format
THE SUBJECT
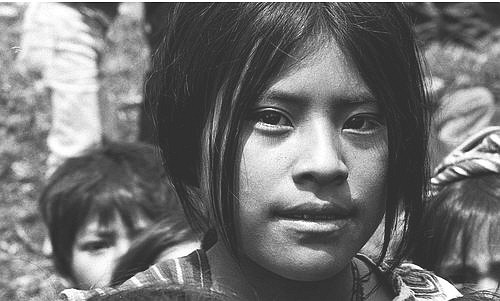
For this pencil portrait tutorial, I used a black and white digital image of an indigenous teen girl (1980s) from the Ixil ethnic group in Quiche, Western Guatemala. The picture has not been cropped and the background will be omitted from the drawing.
THE MATERIALS
Since I started drawing formally in 1988 (see Strathmore Art-ist Newsletter: Summer 2009), my fine drawing materials have al-ways been pencils and drawing paper. For this demo I used 6B and 8B pencils of any brand that are dark and soft enough to ren-der different shades, gradation and contrasts. This time I used Strathmore Drawing Paper 300 Series of 14″x17″ (35.6×43.2 cm), 50 sheets, 70 lb. (104 g/m2). A Faber Castell art eraser was also used. Other than that, I used a wooden easel to allow me draw on a standing position at about 1.30 m over a drawing panel of 45×60 cm adequately padded to avoid hard surfaces.
THE DRAWING PROCESS
The following sections named Stages do not follow an exact step to step process; rather they explain different stages to render a portrait drawing in pencil based on facial features, lighting and shading that affect their surroundings, shapes, surfaces and textures. I must stress that light areas are left blank first and later filled with the proper gradations as the drawing progresses. Clearing up light areas over already shaded areas is very unprofessional and will spoil the drawing and drawing surface. I also must point out that no blending stumps, q-tips or fingers are used to lighten or soften textures. It is all done with pencil. Also keeping to a minimum the use of the art eraser.

STAGE I
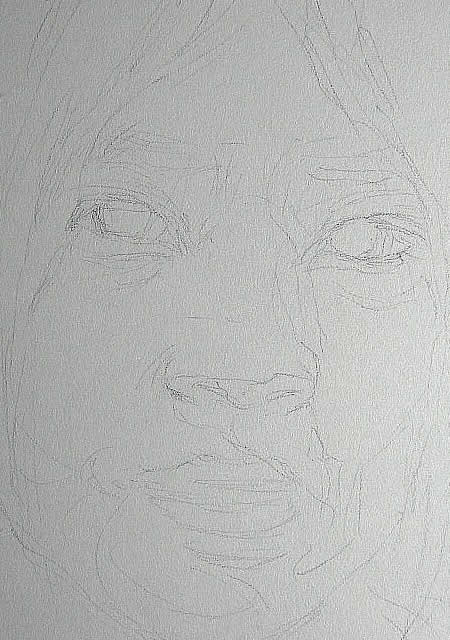
A precise and proportional pre-drawing sketch will guarantee a successful pencil drawing and will save time on cor-recting and verifying features position and proportions during the drawing process. The faded sketch on Figure 2 was done with a 6B pencil over the drawing surface.
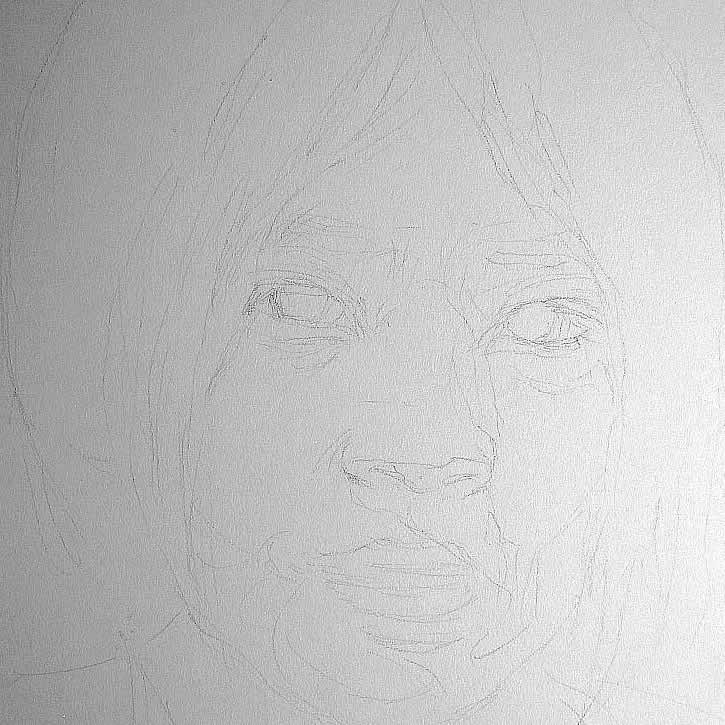
To achieve this base sketch, it is important to draw very gently over the paper to avoid spoiling it with a sharp hard pencil, for example. It is also important to draw in the air, that is, only with your pencil tip touch-ing the drawing surface as indicated in drawing text-books. In the close up below, you can see very light strokes that will later fuse into the drawing or be erased if required. Facial features are indicated by a set of short lines and curves that are drawn into posi-tion to compose the pre-drawing sketch.
STAGE 2
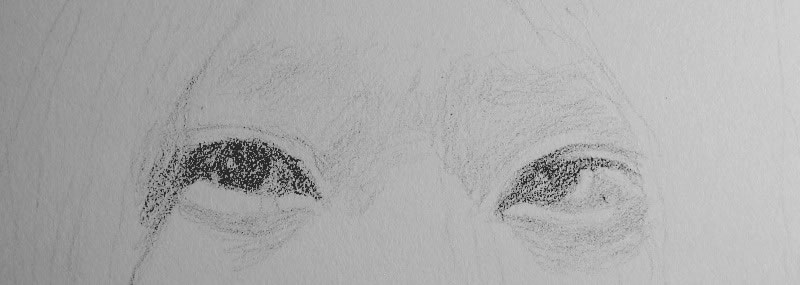
After having achieved our base drawing, the next step is to start with a flat tip 6B pencil and begin filling the lightest areas such as those above the eyes. These strokes are drawn very softly or hovering in a circle pattern; or according to the features being drawn: diagonal, vertical, horizon-tal, curved, etc. This initial filling is to warm up and gain confidence over the subject and drawing. A new drawing is always a challenge and one needs to make sure to be able to render the draw-ing at first and avoid wasting time and material. The figure below shows initial filling of the eyes and pre-shading above and below.
STAGE 3
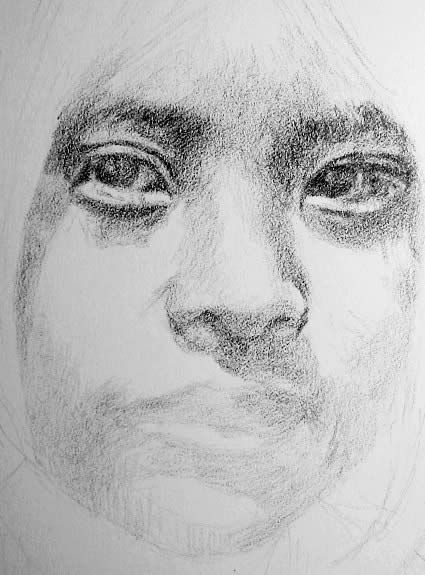
Following the initial shading and eyes layout, some details in darker tone (6B) are introduced but keeping them superficial so they can be removed or corrected with the eraser. Next, the mid-dle and bottom areas are filled to bring the nose and mouth into the overall drawing scheme at this stage. The eye on the right is advanced first as soon as its proper position and shape are con-strained. Note that the texture is still coarse and will be progressively saturated and refined during the following stages.
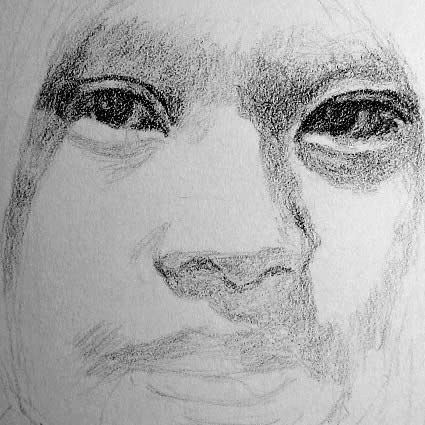
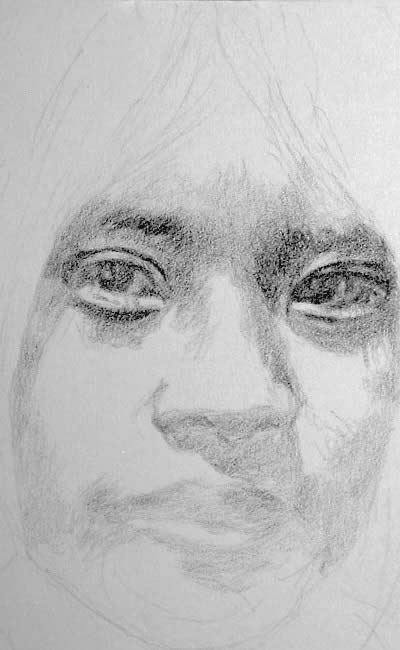
Figure 7 above shows further progression below both eyes and further shading to the sides and below the mouth. This defines some blocking in the middle and lower parts of the subject that is further advanced to the chin as shown on Figure 8 below. Also note that the mouth is still a featureless element with a weak definition and then constructed in Figure 9 below.
STAGE 4
From Stage 3 and Figure 9, continued shading and toning over the lower part show a prelimi-nary drawing layout of the face. Some dark shades have been introduced but always verifying their position, strength and extent. This work is still with 6B and will later be enhanced and empha-sized with 8B as required.


As soon as the preliminary shaded layout of the face has been drawn, I begin laying out part of the hair on the right side and upwards. Figures 10 and 11 show this sequence. Also note light filling below the chin on Figure 11. The darkest tone of the hair is left to the end so that I can separate highlights from the previous layer. Hair, shadow and hair strings on the forehead are also appar-ent on this stage. Note that as other tonalities are added the darker ones begin to recede.
STAGE 5
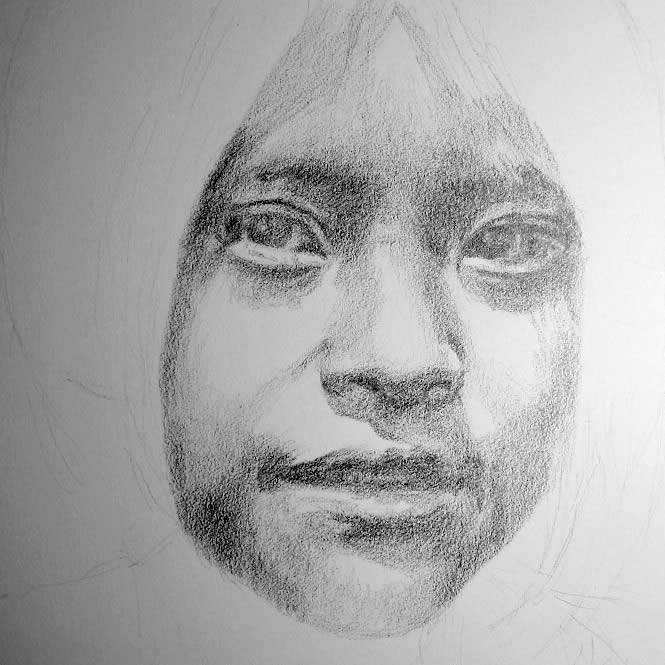
Figure 12 shows a close up of the drawing of the hair with a 6B pencil. Most of it is straight but it may be braided in some parts. This needs to be worked out separately to bring about the con-trasting patterns.
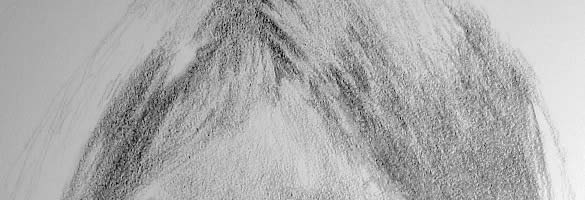
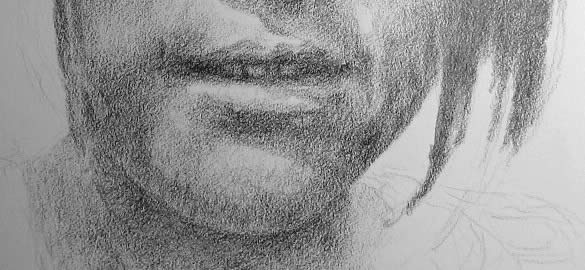
Figure 13 shows fur-ther shading below the chin of the subject and the chin itself. The mouth has been mostly drawn now but it still needs refining. Overall, the texture appears coarse yet and will be refined in the next pre-final stage.
STAGE 6
This stage shows continued reworking of the hair on the left. I do this as I continue balancing the dark tones in the face and reworking and reassuring lighter surfaces. The fine texture of the paper must be filled and saturated with corresponding tonalities. This is an interesting and entertaining part of the process to see a pre-finished drawing and taking it to completion by adding the last parts. Even at this stage, correction can be allowed to verify and adjust shapes and proportions. All dark tones must be done with 8B and fol-lowing the initial pattern. Patches of unfilled areas must be covered and leveled to the surrounding areas.
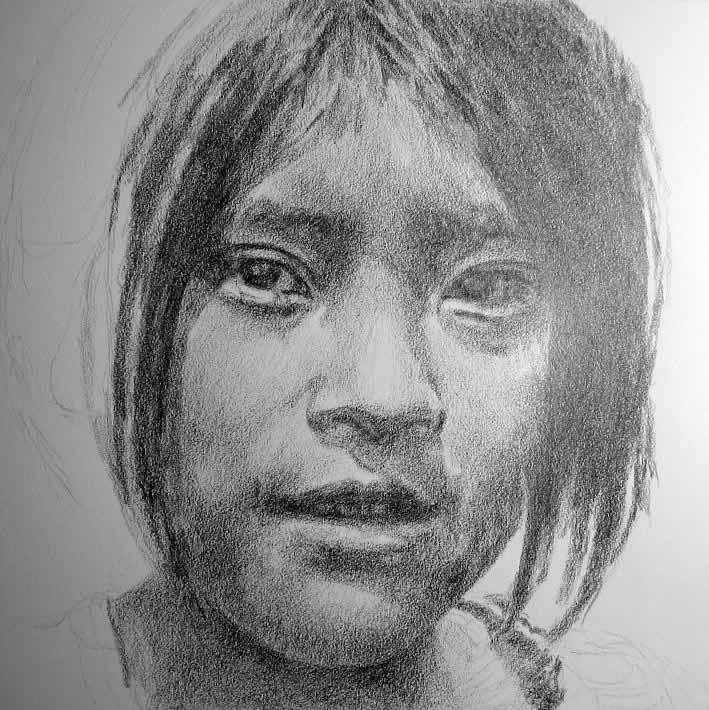
At this completion stage, all details must be carefully revised and re-stated. Facial detailing is important to achieve likeness in the portrait. The completion of the drawing of the hair must be continued carefully to not to saturate the surface before reaching a very good dark tonality.
FINAL STAGE
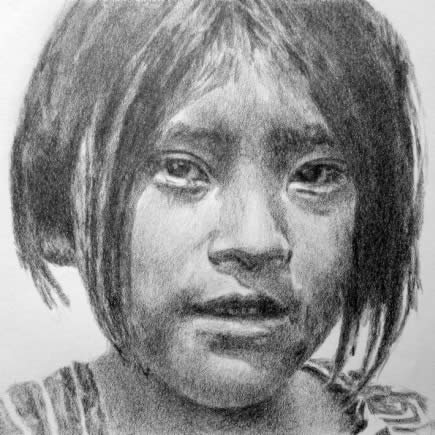
From Stage 6 and Figure 15, the completion of the portrait was achieved by continued filling and refining of the texture over the paper. No patches either light or dark should remain over flat soft surfaces. Extra work at the post-drawing stage should render more photorealistic effects.

FINAL PORTRAIT DRAWING / 25 X 17 cm
Please feel free to follow this pencil drawing demo to create your own drawing and self-teaching. The proc-ess does not start if you don’t take the courage to grab your pencils and begin to draw over the paper. It emphasizes the application of shades, tones, gradations and texture from small areas to extended filling as necessary and allowed by the drawing surface. Working this way will create more confidence in the artist and the skill and capability to render shading and toning to enhance pencil drawing with time. Until another art demo, best wishes in your everyday art making and take the most advantage of your pencil drawing ex-perience. Please send your comments to my following personal email: georgemaxart@hotmail.com
Thanks for your talent!
Thanks for the instruction!
Good luck with all your art.