About Eric Wilson
Eric Wilson has established himself as one of Britain’s leading wildlife artists, a multi-award winner whose paintings are now widely collected throughout the world. His artistic ability was evident from his earliest schooldays; “Eric has an artistic talent way beyond his years” wrote his art teacher in 1967.
As a child of Scottish parentage, Eric would spend his formative years roaming the highland mountains of Scotland where his lifelong love of wild places was born. It was natural and inevitable that Eric would combine his talent with his love of wildlife and become a wildlife artist.
Eric has exhibited widely in London, Germany and the United States, exhibiting at the prestigious Florida Wildlife and Western Art Exposition and The National Exhibition of Wildlife Art where his work has won several awards. His paintings have appeared in magazines and books such as “The Best of Wildlife Art” and “Keys to Painting Fur and Feathers”, by North Light Books.
Visit Eric’s Websites:
https://www.ericwilsonwildlifeart.com/
https://ericwilsonartist.blogspot.com/
Painting Demonstration of a Tiger
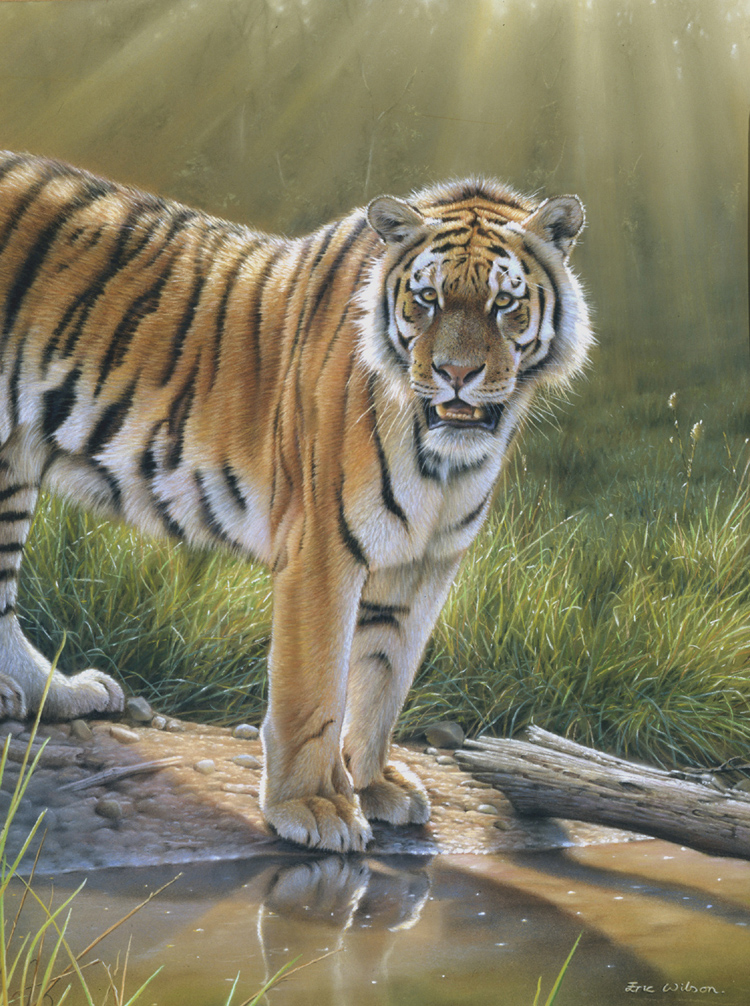
A tiger at the waters edge, Royal Chitwan, Nepal.
People often ask me “How did you do this?”
This is how….
I am using Royal Sovereign pastel paper as always, you will notice from the images below, that this painting started with very little drawing. This is often the case with my pastelworks. I like to make proportional marks where things might be, such as eyes, an outline or the stripes on the tiger, but these are no more than guide marks as any underdrawing would be immediately lost with the amount of pastel I lay ontop of it.
Picture One:
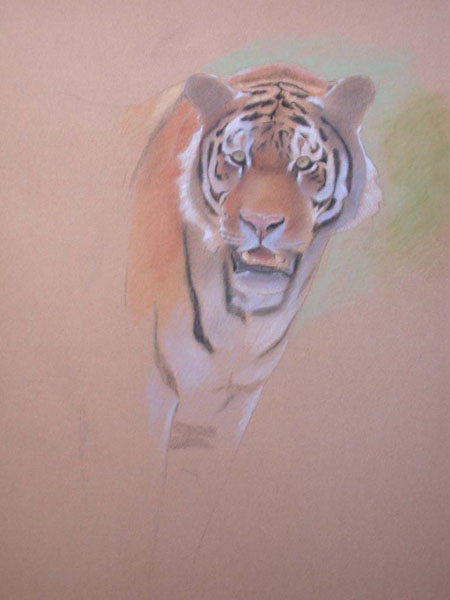
The second picture shows that I am working firstly on the head, concentrating upon the contrast it will have against it’s background. This is very important to the success of the whole picture, and so I take time to do a bit of detail and get a nice deep contrasting colour for the background firmly in place. Another reason for doing this is that I found it inspiring to have the face semi done at this stage, it made it easier for me to visualize the completed picture.
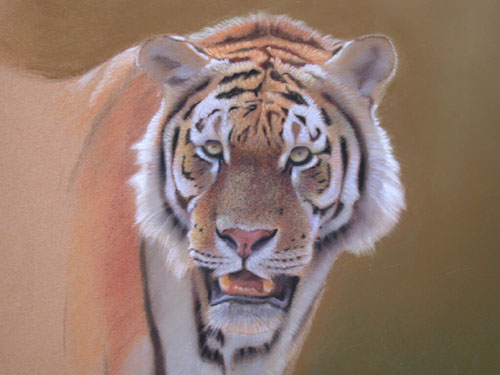
The third picture shows that I am working the background colours further down, testing my ideas out with experimental colours for the grass and also trying out some of the light shafts that will later enhance the picture. These are all just ideas at this stage and if you look at the finished painting, you will see I changed the direction of the light shafts to improve the composition.
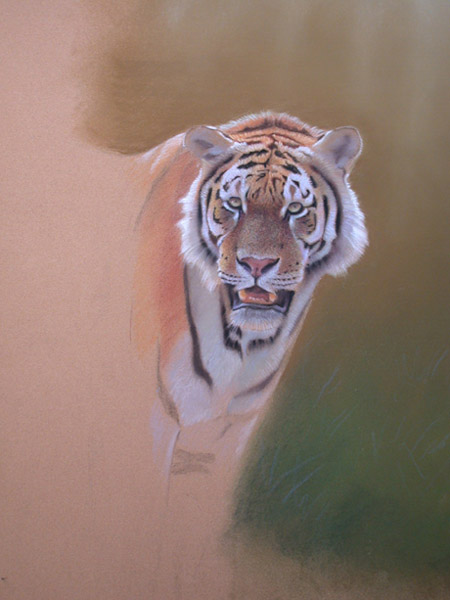
The fourth picture shows me spreading out undercoat colours across the body of the tiger and lightly drawing in the stripes. I’m also adding a few details to the legs.
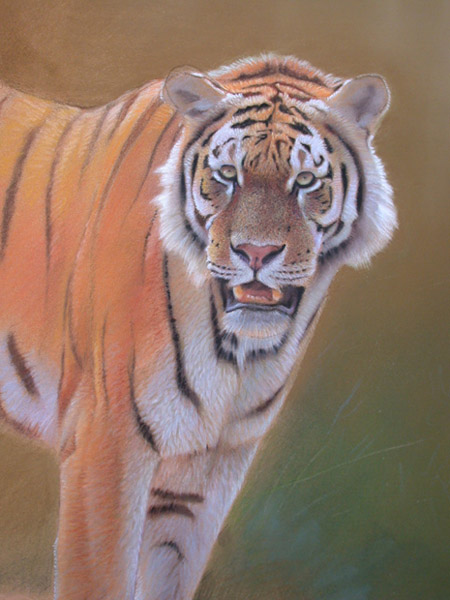
You may notice that everything is done lightly at this stage, nothing too drastic and severe. I often describe that I feel like I’m dipping my toe into the waters, testing things. I never rush in. If I make mistakes at this stage it’s easy to correct them and all options are always open for any new idea that might arise by looking at what I’ve done so far. I’m always looking, always stopping and thinking, this is the time when paintings are won or lost and what I’m after is a blueprint that I know I can safely take to the next stage.
People often ask me about composition. Was it all planned out? I hope to demonstrate with this post that it wasn’t. This painting began in Nepal one morning when I was on the back of an elephant looking for tigers, the jungle at Chitwan is shrouded in mist until the sun rises and burns it away. As my elephant went to the water to drink I soaked up the scene before me with it’s dramatic light and mist clearing away. I didn’t see the tiger that day, but in my minds eye I had clearly seen him and the painting was born. That is as far as my composition went, a misty background and an imagined tiger.
I returned to England with some tiger sketches and photographs but nothing as dramatic as I had imagined that day.
Months later I sketched out the tiger I wanted. You will see that he is oddly composed, he is entering the space of the picture, stepping into the frame incomplete, just as my imagination had placed him in the actual scene many months before. I like this type of composition, but it poses challenges if you are to get it right. I had my misty background to wrap around him and a vague idea of backlighting, but I knew that something more would be required if this painting was to succeed…
You will see that at this stage I am spreading out, ‘feeling’ for those compositional elements. At the top I have settled on the direction of the light shafts and at the bottom I have started the water. I always knew I would Have light shafts and water, but their exact positions I left until doing the painting. I like working with this kind of flexibility, it suits the cautious way in which I work, little decisions one at a time. It often feels like the painting paints itself because each decision leads effortlessly to the next.
You can see here in picture 5 that I am bringing in a few details of the grass, feeling for my colour/tonal range.
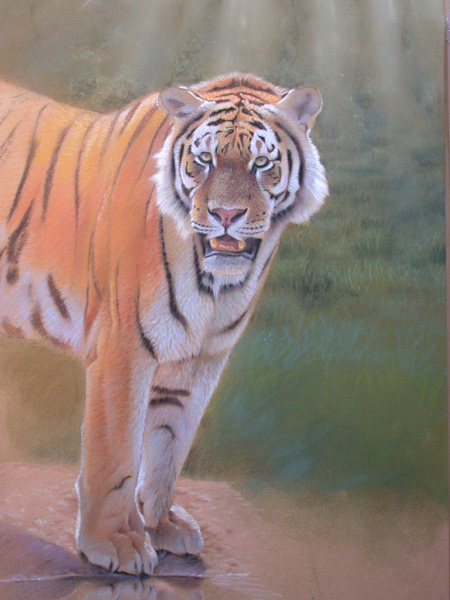
Picture 6 shows that having got a feel for the colours of the grasses I am now confident enough to lay down some of the foreground grasses, always mindful of the lighting, it had to be dramatic to suit the light on the tiger. I’m watching the composition carefully here, extending the tigers influence downwards in the reflected paws which I liked, but it began to feel as though the bottom right of the painting was uncomfortably empty. You have to be very careful when your animal fills so much of your canvas, very aware that anything else you add must enhance and not distract from the main subject.
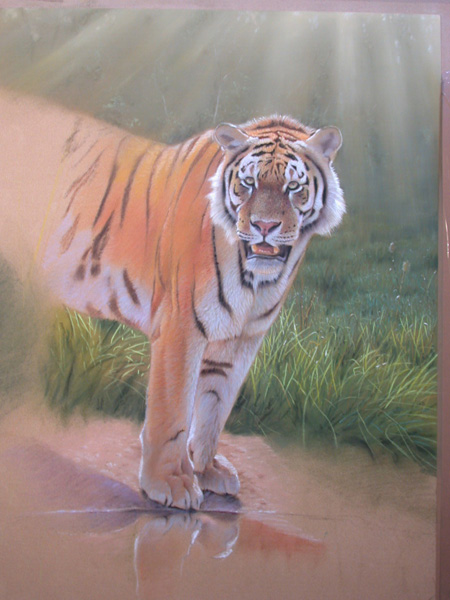
Picture 7 shows my answer to that problem. I decided upon a log to balance things up a little, and I also added the subtle touch of extending a stork of grass upwards on the right, both to balance a picture that was in danger of becoming unbalanced.
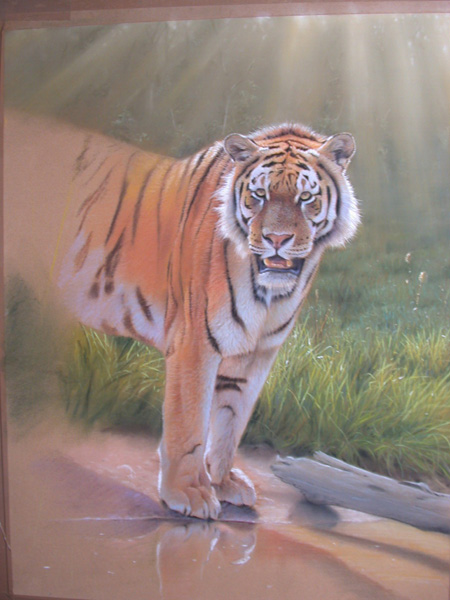
Picture 8 shows more refinement of the log, and a completion of the top section, light pencil strokes giving hints of a jungle in the far distance.
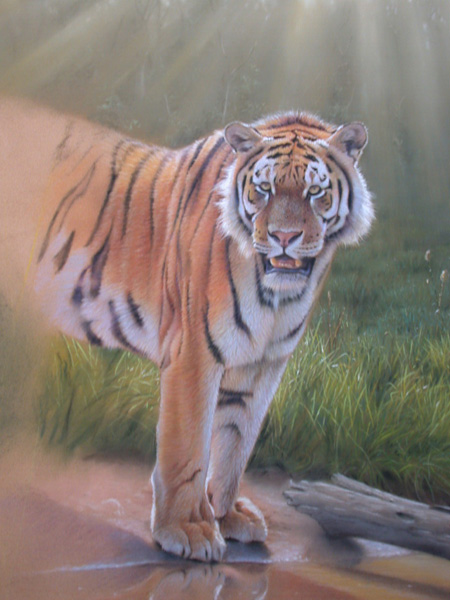
Picture 9 shows a bit more detail of how I am now finishing the fur across the tigers body, light strokes of lighter fur lifting out of darker richer undertones which suggest the underlying anatomy of the animal. All the time I am gently softening with my fingers.
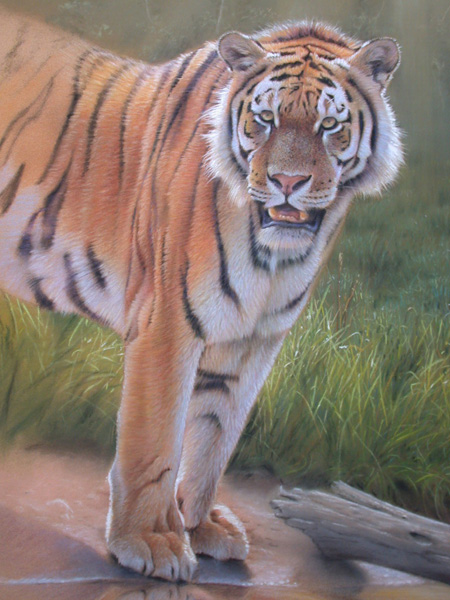
Picture 10 is a close up of the finished body, much lighter strokes on the top of the back and finally the darker stripes get carefully added. Whiskers and the brightest elements of the fur are always done last. Soft pastels being used for the high whites as they lay down more powerful pigments than the pencils.
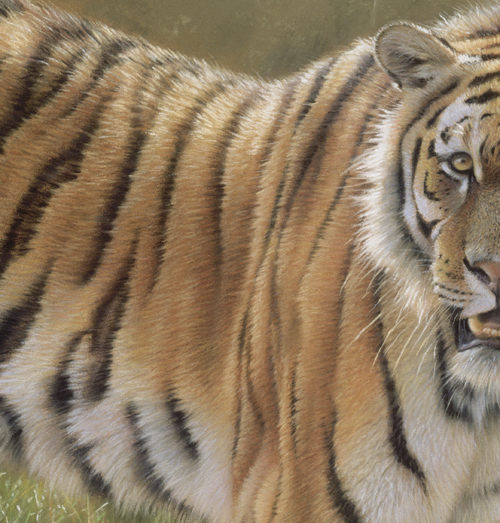
And there you have it!
I sincerely hope that this demonstration shows that photographic realism is not whats on my mind when I compose a picture. I am much more concerned with the challenges of colour and composition. My attention to detail might make me photo-realistic, but I’d like to think that people can see a lot more in my paintings than just the realism.
Eric 🙂

Thanks for sharing!! Helpful and inspiring post!
I am a grandma of 77 years and about 10 yrs. agoa i started
to paint on my own. I want to paint a tiger for my grandson
and looking at your steps, I think I can do it. But my question is this, can I print these instructions” Do you have
a DVD for it.
Looking forward to hear from you
grandma