Enjoy this free lesson from artist Karin Wells (see bio and website at the end of the lesson) painting techniques of the masters. There were certain effective and beautiful techniques that master painters from the past used again and again in their paintings and artist Karin Wells would like to teach you one of them in the following tutorial. I hope you find this technique helpful and it inspires you to try it out in your own painting!
[adinserter block=”61″]
Old Masters Color Banding Techniques in Portraiture
Color Bands are primary colors:
RED, YELLOW and/or BLUE.
They were used by the Old Masters to help make a painted face look “real.” Heaven help the poor artist who gets a color band in the wrong place!
Remember that the primary color bands are “worked into” the existing skin tones – and into both light and shadow.
Alas, this is so difficult to see in a reproduction that I chose a detail of Sargent’s “Lady Agnew” to exaggerate this technique so you can see it.
This really is easy to see if you go to a museum and look at portraits by the Old Masters. Sometimes when you know what to look for – you’ll see it.
The best secrets of the Old Masters are hidden in plain sight.
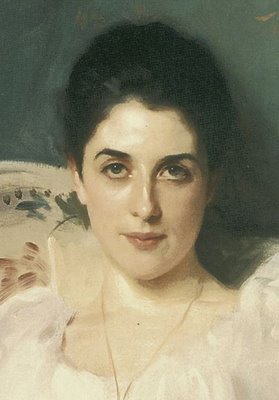
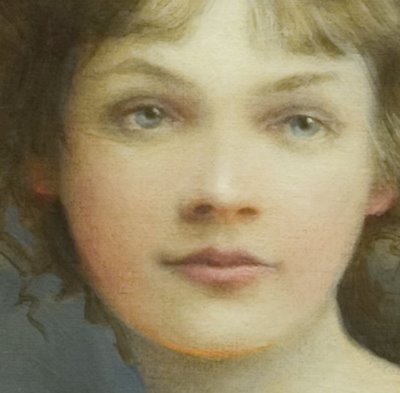
This is an untouched detail of Lady Agnew – a portrait by John Singer Sargent. Alas, the color bands are in here – but they are much too subtle to see on this blog.
However, I “doctored” this below:
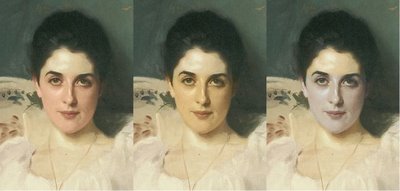
FACE BAND: RED
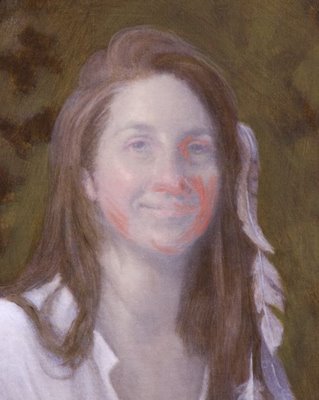
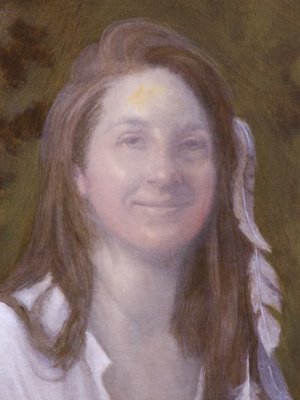
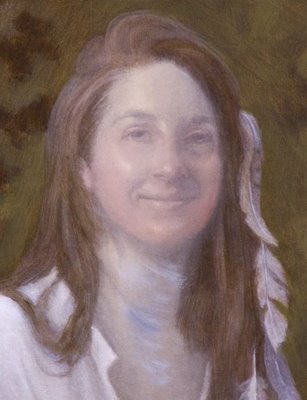
Face bands are in red (as in the example on the left). Even though it is exaggerated (Photoshop of course) it still looks “right.”
From the eyebrows to the bottom of the chin, the color red is added to the face. I use either Indian Red and/or Alizarin Crimson Permanent…whatever “looks right.”
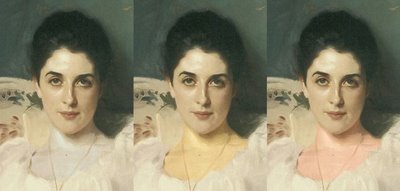
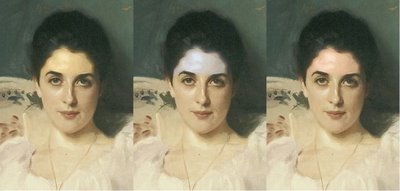
Wrongly, yellow and blue were added to the other two faces above.
NECK & CHEST BAND: BLUE
In the neck and chest, blue is added as in the example on the far left. Where yellow and red are in the neck and chest, it looks clearly wrong.
I like to use French Ultramarine blue in the neck and chest.
FOREHEAD BAND: YELLOW
The forehead (from the top of the eyebrows to the hairline) has yellow ochre in it. You can see this correctly added on the far left.
Blue in the forehead will make the subject look ill and red will look “lobsterish.”
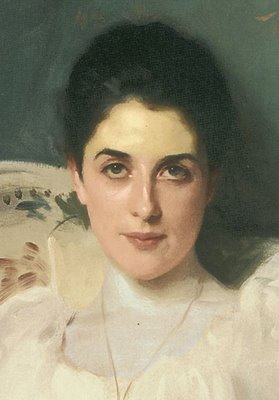
Above is the doctored version of Lady Agnew with the correct, but exaggerated color bands.
Today I was working on a portrait and got to the very first color banding stage and thought you might like to see it.
This is how I do it:
This is sort of a funny stage so I need to tell you what you’re looking at. I have already gotten a likeness, been through the “white stage’ and glazed the skin tone with raw umber, raw sienna and burnt umber.
Then I scumbled (a thin milky skin tone) over the skin so what was underneath would still show.
Note that I have not put color in the eyes yet.
While my paint is still wet, I add Indian Red into the face. I make it more intense on the shadow side of the face.
Then I “work” that color in.
Next, I add yellow ochre pale onto the forehead and work that into the wet paint.
Finally I work French Ultramarine blue into the neck and chest.
All blended, it looks like this.
I will continue to work in layers, adding scumbles, building light and working more color banding into the face and neck until I am finished.
When I’m all done (don’t hold your breath, it is a long process and I have a lot to paint) I’ll post the finished portrait.
I painted the following four portraits exactly this way – hopefully you can see the color banding:
[adinserter block=”61″]

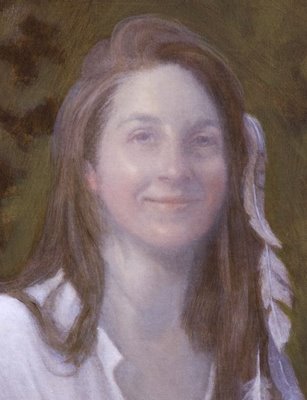
Whitney (detail).
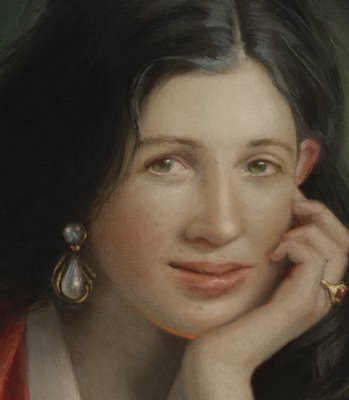
Elizabeth (detail).
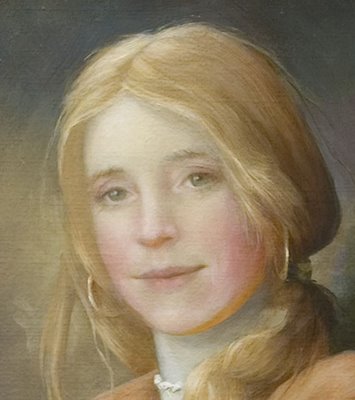
Zabie (detail).
Gwyneth (detail).
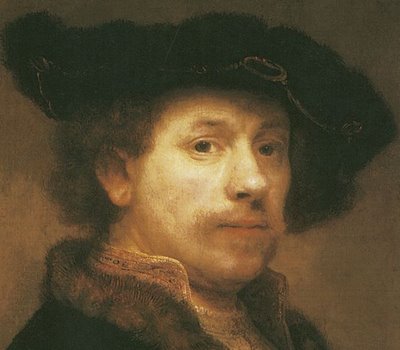
Rembrandt (as seen in this detail of one of his self portraits) obviously knew and used color banding.
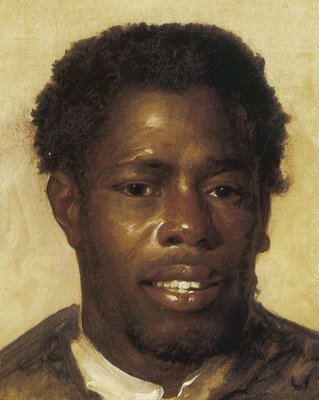
John Singleton Copley (painting detail above) used color banding in this dark skin tone. Skin color doesn’t matter – color bands are commonly used in virtually all of the Old Master’s successfully painted skin tones.
Next time you’re in a museum, check out the Old Master’s skill in painting realistic faces using this method. You might have to stand there and stare for a while, but eventually you’ll see those color bands.
[adinserter block=”61″]
I repeat, the best “secrets” always hide in plain sight…sometimes you just gotta look really hard.
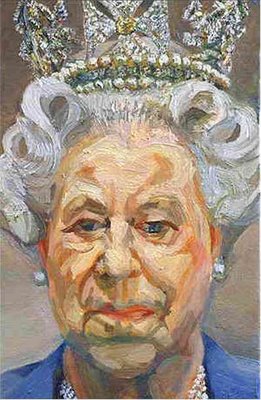
And by the way, it isn’t just the Old Masters that knew about Color banding – Modern Master Lucien Freud also uses this technique sometimes as seen in his portrait of Queen Elizabeth above.
I hope you enjoyed this lesson on Painting Techniques of the Masters from artist Karin Wells. Follow this link for more oil painting tutorials and techniques.
About Karin
Karin Wells is an artist of amazing versatility. She graduated with honors from both the New England School of Art and Design, Boston, 1965, and the Butera School of Art, Boston, 1986. Karin has enjoyed a career as an award-winning graphic designer, illustrator and sign painter. She also taught Life Drawing and Painting for many years. She has most recently studied for three years at The New England School of Classical Painting in Greenfield, New Hampshire, under the direction of Numael Pulido.
To expand her craft, Karin has traveled throughout Europe studying the Old Masters. Her art reflects the deep influence of these great works. Karin demonstrates a remarkable facility for likeness and for the use of light.
The artist is a member of The American Society of Portrait Artists, Portrait Society of America, The Portrait Society of Atlanta, and The Copley Society of Boston.
To learn more about Karin and to view more of her amazing work, be sure to visit her website and blog by following the links below:
Website: http://www.karinwells.com/
Blog: http://karinwells.blogspot.com/
If you would like to be notified when Karin updates her blog, be sure to click the “Follow” link in the upper left hand corner of her blog.
Love your work Karin, you are very talented.
Thank you, Karin. for sharing.
brilliant, I will try your method. But I do have a question. I know I’m going to sound ignorant.
Why is there yellow at the bottom again , as in the line on the chin.
thank you Amanda
I an new to portraiture. Likeness is easy for me. Colour is the challenge. Thanks for this.
John
You are such an awesome teacher. Thank you for your clear directions.