Enjoy this free tutorial on painting seascapes in watercolour by John Fisher (see bio and website link at the end of the lesson)
Seascape Painting Techniques – Step by Step Tutorial – Morning Calm
[adinserter block=”87″]
This is the first project of the 2013/14 season of The Testa Heights Art Club, and this season we’re leaving behind the old step-by-step system where I painted everything twice: once in our standard step-by-step process where I posted each step, with text, on my Flickr site, then again when I painted it with you step by step as you watched and then did the same. Now you’re all past the beginner stage and into what I term the intermediate stage, you will need to develop your observation and drawing skills as you venture into unknown territory. As usual we will be working from 5″ x 7″ photographic references and I will supply you with a suitable tracing aid made up from a full-sized B&W version of the subject matter. I will begin painting this the same time you do.
Step 1
There will be no completed painting to which you can refer as you create your own work. As before, I will demonstrate each step, showing you what colours I mix and what techniques I recommend. We will be using all the techniques we learned together over these past few seasons, and any new techniques will be carefully explained before we proceed. Do not paint ahead of your brain. By that I mean you must carefully think through what you are about to do next and why. All the past lessons we have done together now come into play and you must concentrate on what you are doing.
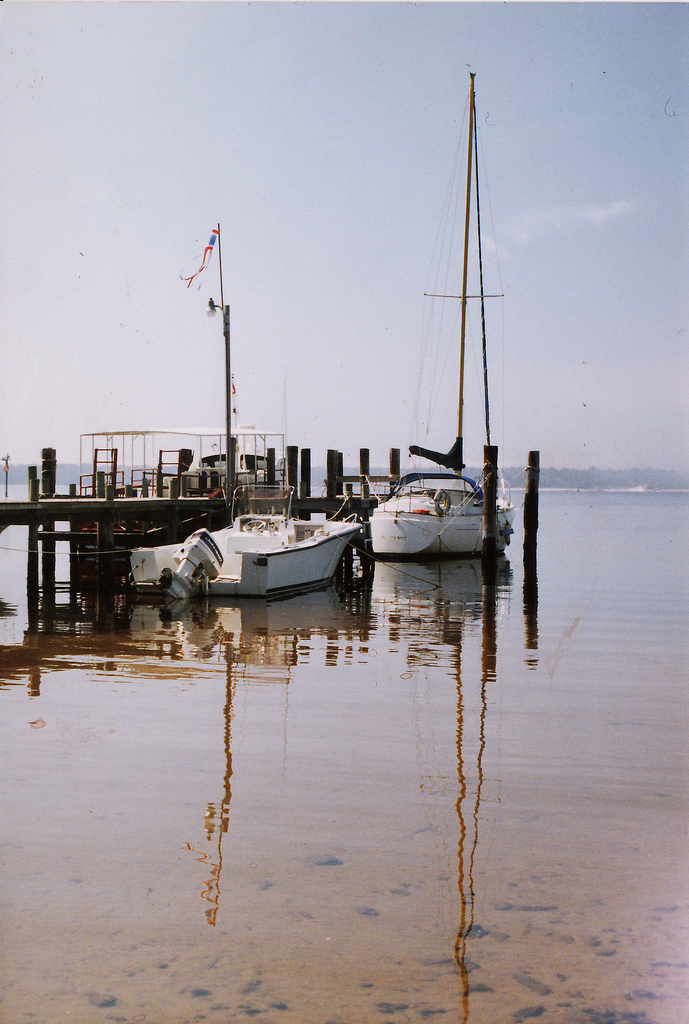
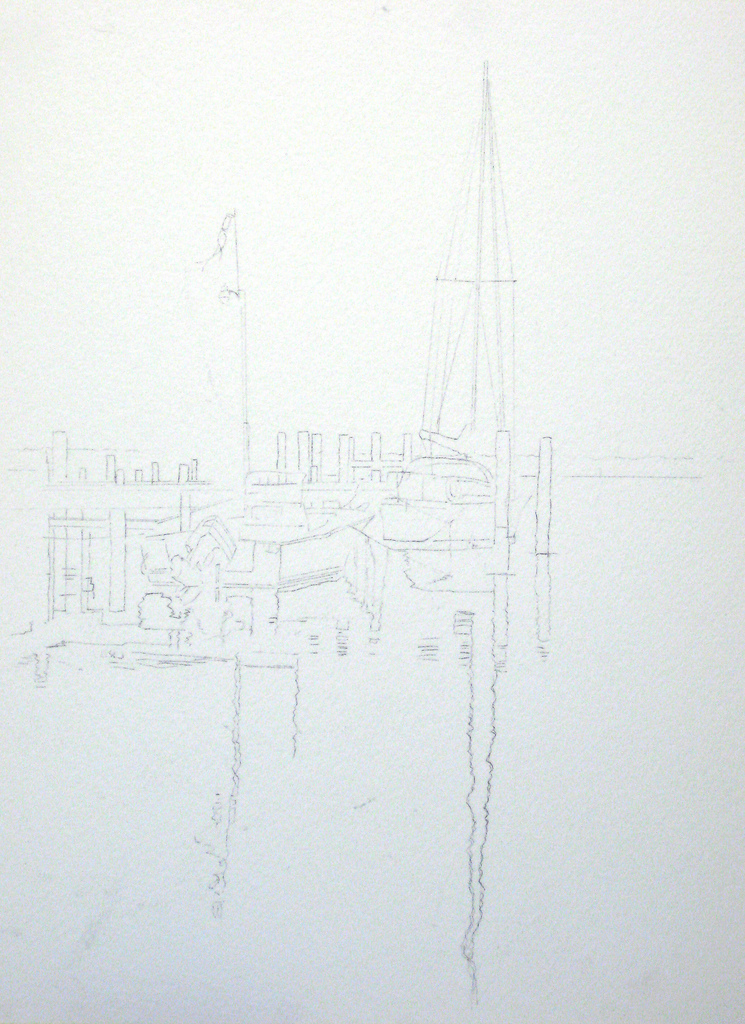
We start with our usual careful drawing of the image. This early morning marina scene in Panama City Beach, Florida, was taken in pre-digital camera days so it leaves lots of latitude for personal interpretation. Here is my first tracing image before I re-drew it to my satisfaction.
Step 2
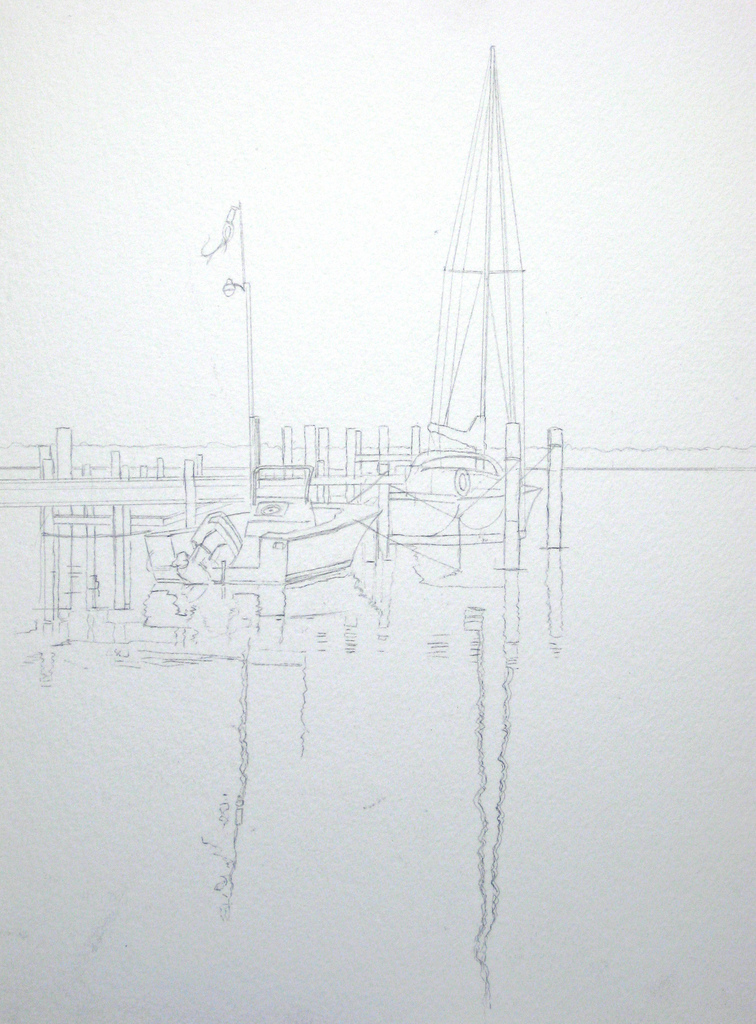
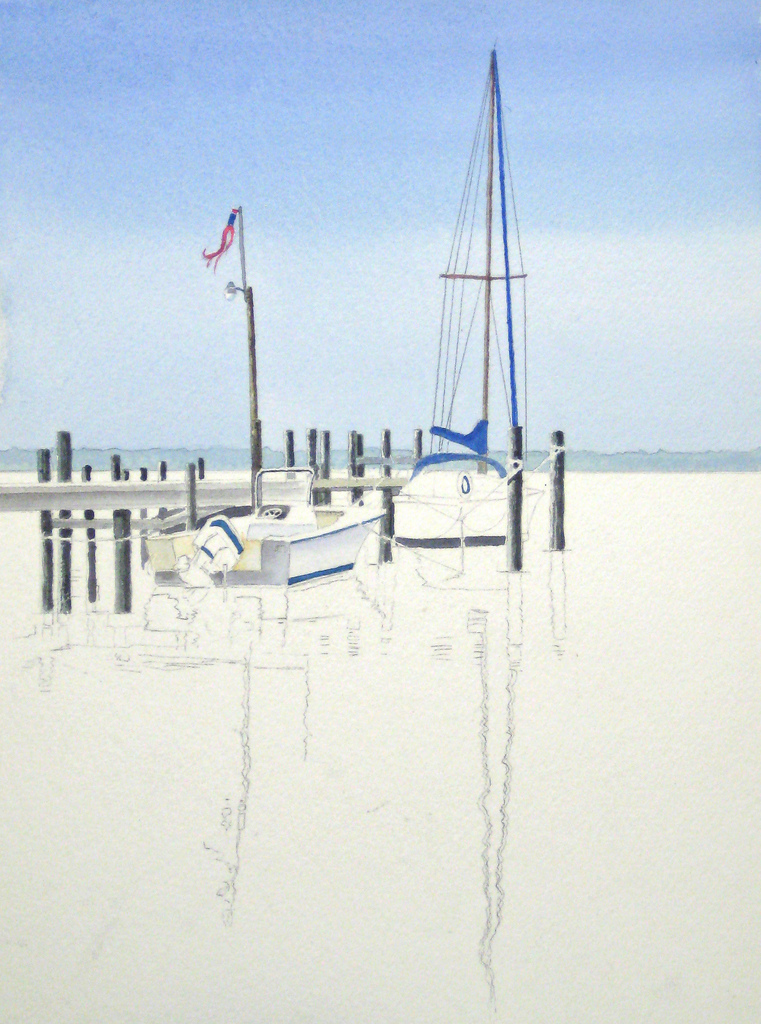
Now you must decide how much detail you wish to put in your final drawing image. Here is where we depart from the very structured method we’ve used in the past to where you begin to take risks and learn how to interpret a project yourself. I will advise and work with you one-on-one as we have in the past, but in a very real sense you’re on your own. Here is my re-drawing and interpretation of the scene as I see it. You may see it differently and that’s where your own personal style begins to show through. I will try to post our progress each week so you can track your own progress. Anyone else is welcome to join in the fun!
Step 3

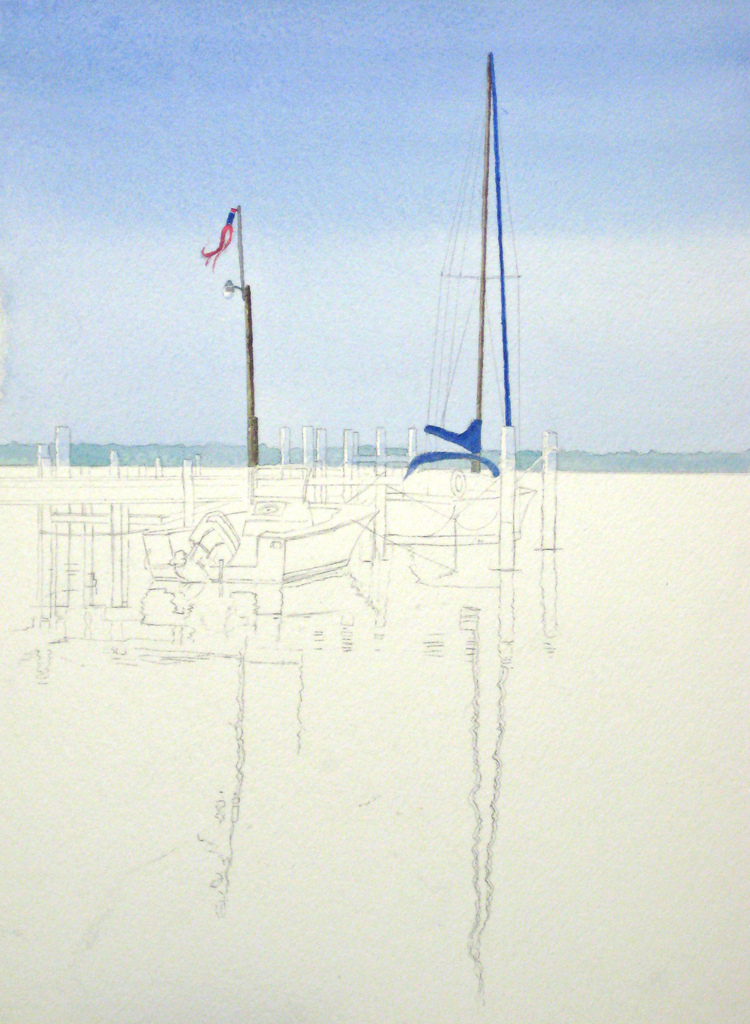
With the sky in place we should mask off the lower part and put in the distant horizon line of trees. Don’t paint ahead of your brain here and remember to carefully paint around the wooden pilings leaving that light struck side clean.
Step 4
Now remove the masking tape carefully, ready for our next step
Step 5
Most of you completed the horizon foliage and began on the pilings. Again I stress the problem of painting ahead of your brain. Unless you carefully consider what you are going to paint next you’ll run into problems that often can’t be solved. You cannot successfully freelance this project if you hope to reproduce something similar to the reference photograph. While I support your need to start developing your own style, you need to remember all the techniques from previous seasons. We are solving a number of problems in sequence here, and if you depart from the basic colour balance and tonal values you will end up with something you did not intend. I used Antwerp Blue and Sap Green with a touch of our summer shadow colour and added plenty of water to simulate distant foliage. It was important to paint around the ropes/lines to leave them white.
The pilings are made from pressure treated lumber and need a mixture of Sap Green, Antwerp Blue and darker shadows from adding our summer shadow colour. I kept the RH side of these pilings darker and made sure I stop at the water line. DO NOT ATTEMPT TO PAINT IN THESE REFLECTIONS YET. The water and reflections are almost a separate painting using differing techniques. I began painting in the two boats as shown.
Step 6
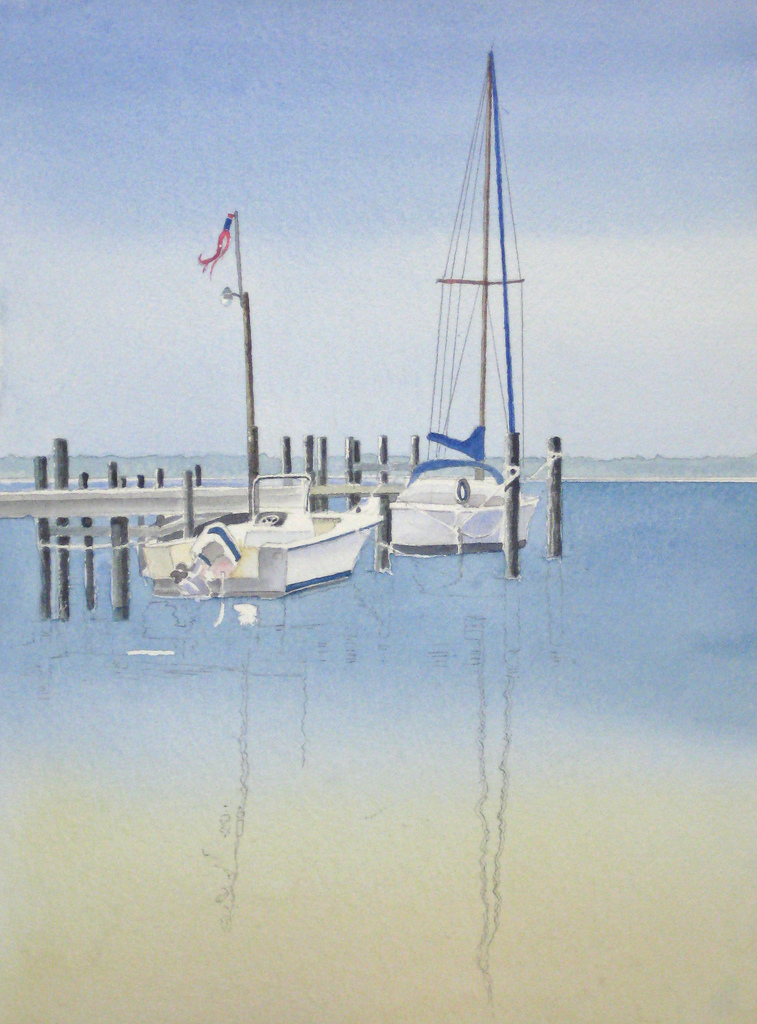
Most of you successfully managed the foreground wash blending the blue water into the sandy colour below. We used a wet-in-wet technique and throughly soaked the paper with clean water first, then at the “glisten” stage applied our mixture of Antwerp Blue with a touch of Ultramarine. About half way down we cleaned off our 1/2″ square brush and switched to our sandy colour made from Raw Sienna with a touch of Brown Madder. This switching between colours is tricky as you found out. You need to quickly dilute your basic blue wash about half way down so it fades into the sandy colour. DO NOT GO BACK IN AND ATTEMPT TO TINKER WITH THIS. You will have a disaster on your hands. Keep your brush strokes horizontal and go back and forth with steady strokes, not jabs of pokes. Sop up the surplus paint from the sides to avoid blossoms. As I explained, if in doubt practice on some scrap paper first. Don’t rush this. Take your time.
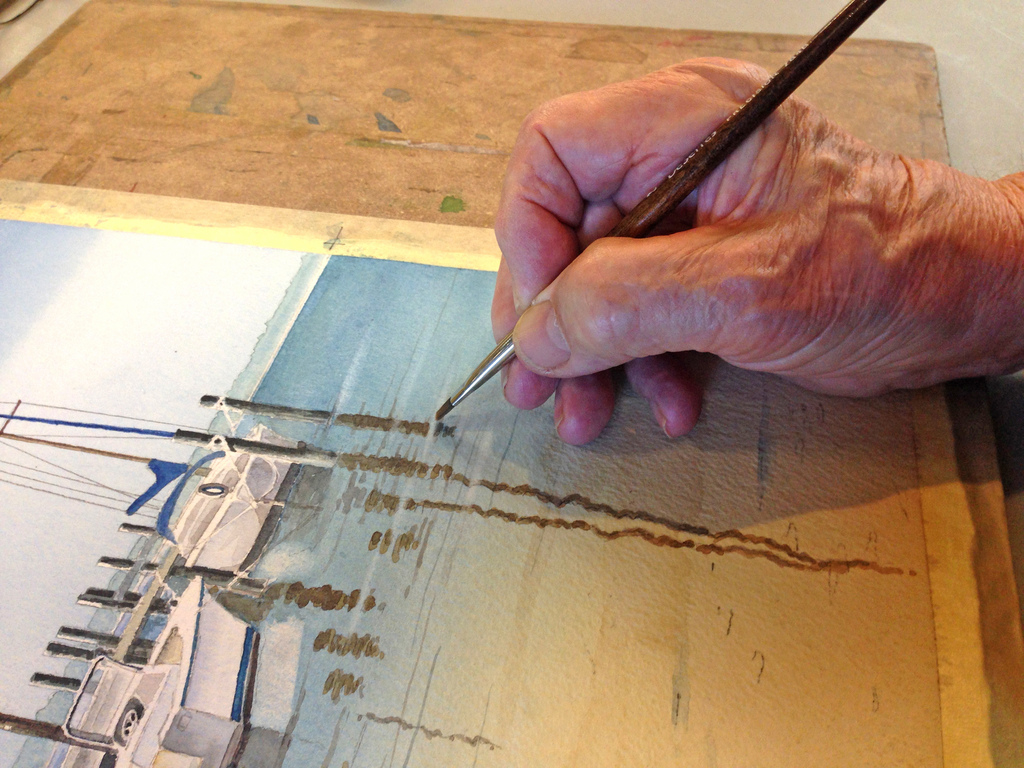
Step 7
Each of your foreground water wash attempts will be different but you all came up with something similar to this and began putting in post reflections. We used a mixture of Raw Sienna, a touch of Brown Madder and some of our standard summer shadow made from Brown Madder and Antwerp Blue. I always prefer to have a good well full of this to modify colours as needed. Keep the reflections loose and suitably wiggly. We’ll be going back in later to lift and emphasize certain areas. If you can, keep some light on the LH side of the posts. Some of you made these too dark and had to lift out the colour. That makes a lot of work and risks damaging the paper. Again – don’t paint ahead of your brain. Look carefully before you apply colour.
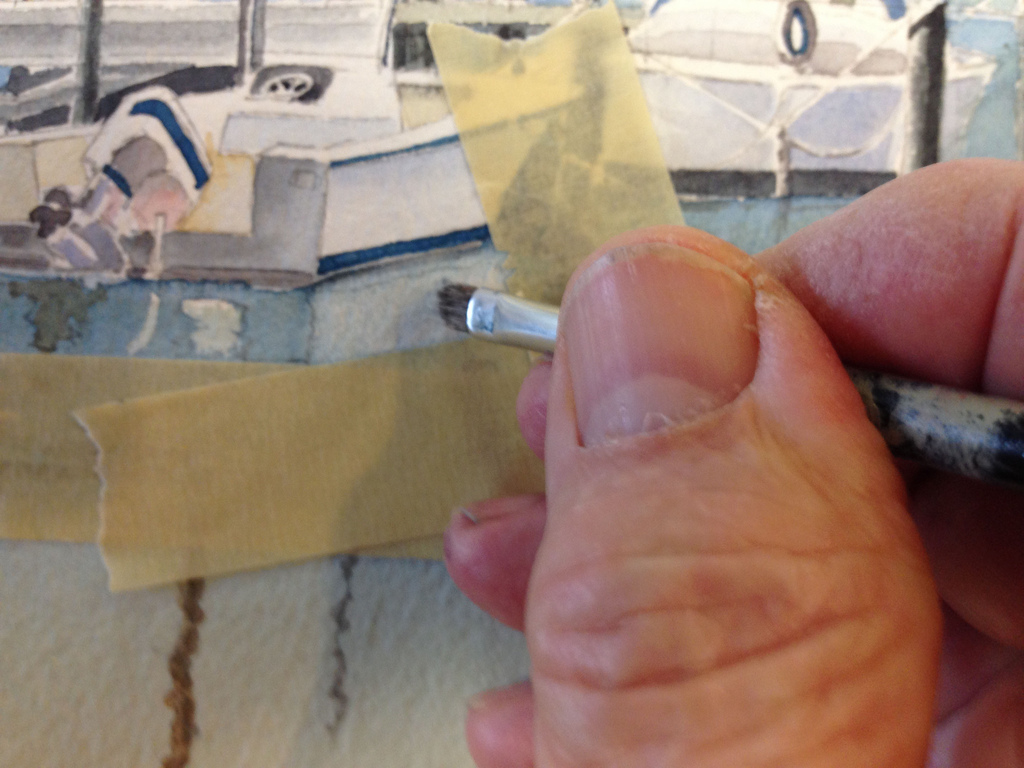
Step 8
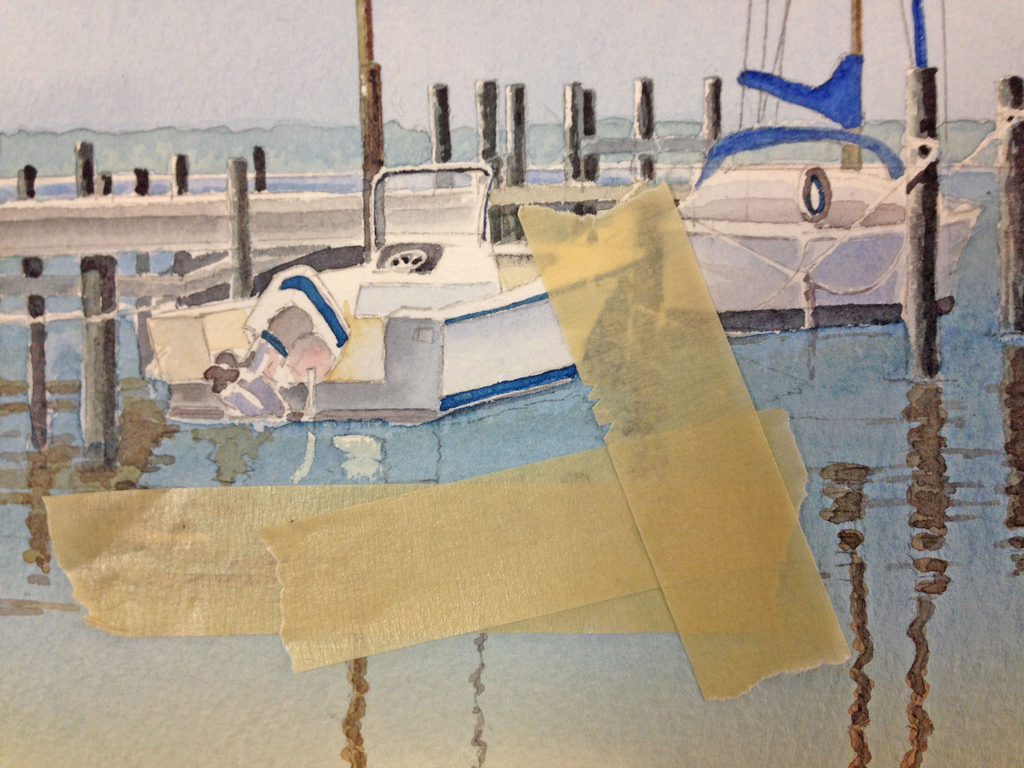
As everyone watched I boobed! However we turned this into a learning experience. I accidentally painted over the reflected white side of the boat when I was doing my foreground wash and I needed lift it out. Here I show how I used masking tape to frame the area needed.
Step 9
As we use only 300 lb paper we have considerable leeway to scrub and lift areas as shown. If you’ve never tried this, experiment first to see how much water and pressure to apply.
Step 10
Before further modifications this is an extreme close-up of the area.
Step 11
I used the same technique to lift out another area accidentally painted over,
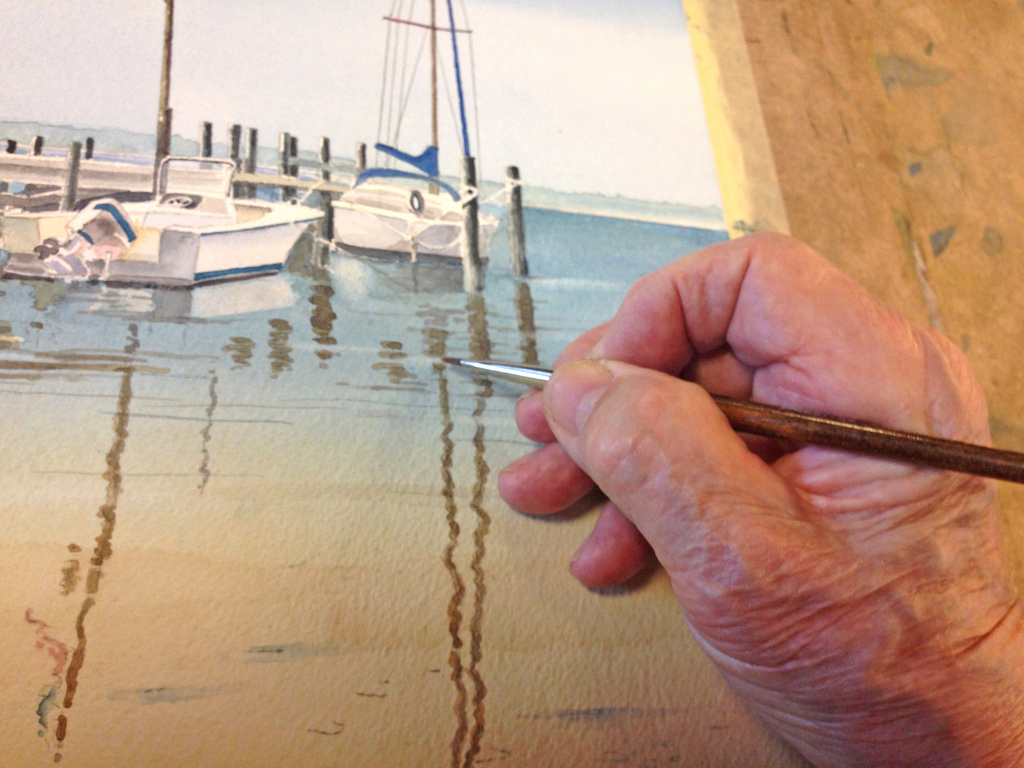
Step 12
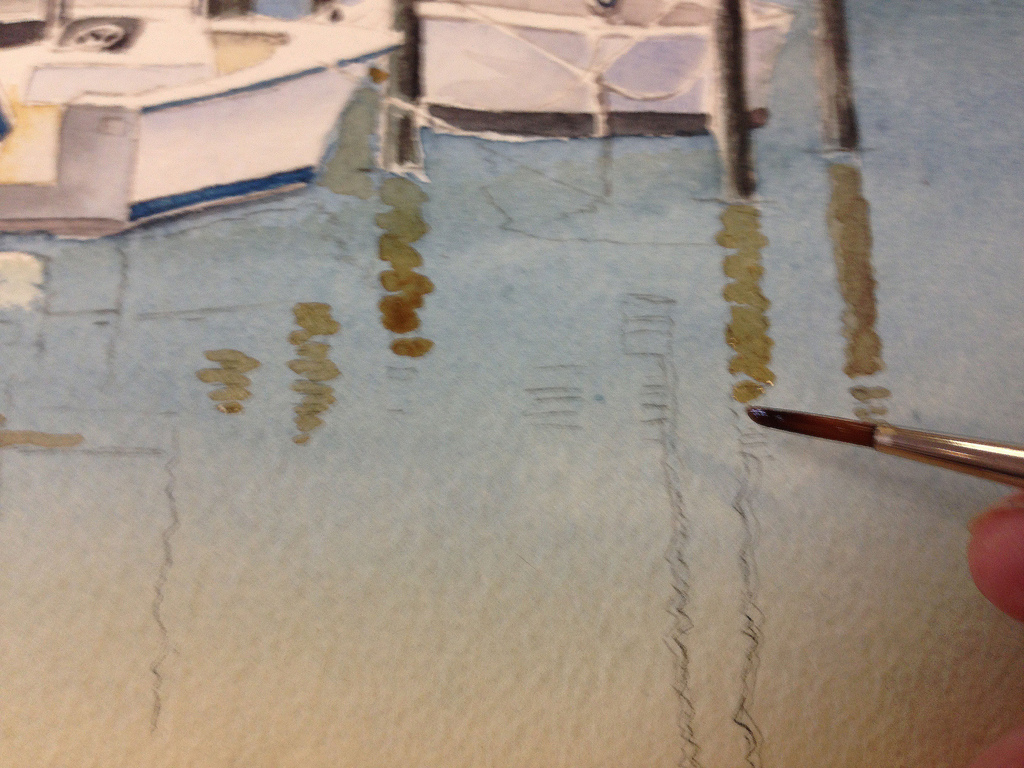
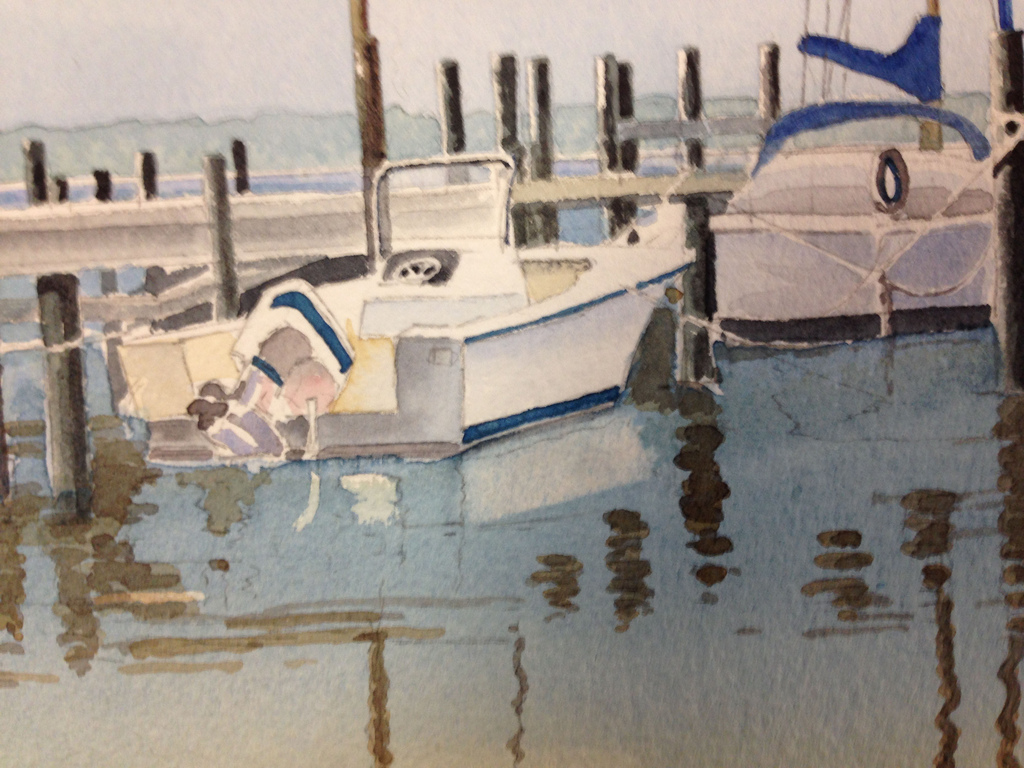
This should be the stage we are at today. The main reflections in place and ready for the foreground detail beneath the water. Then we can go back in and modify things according to our own style.
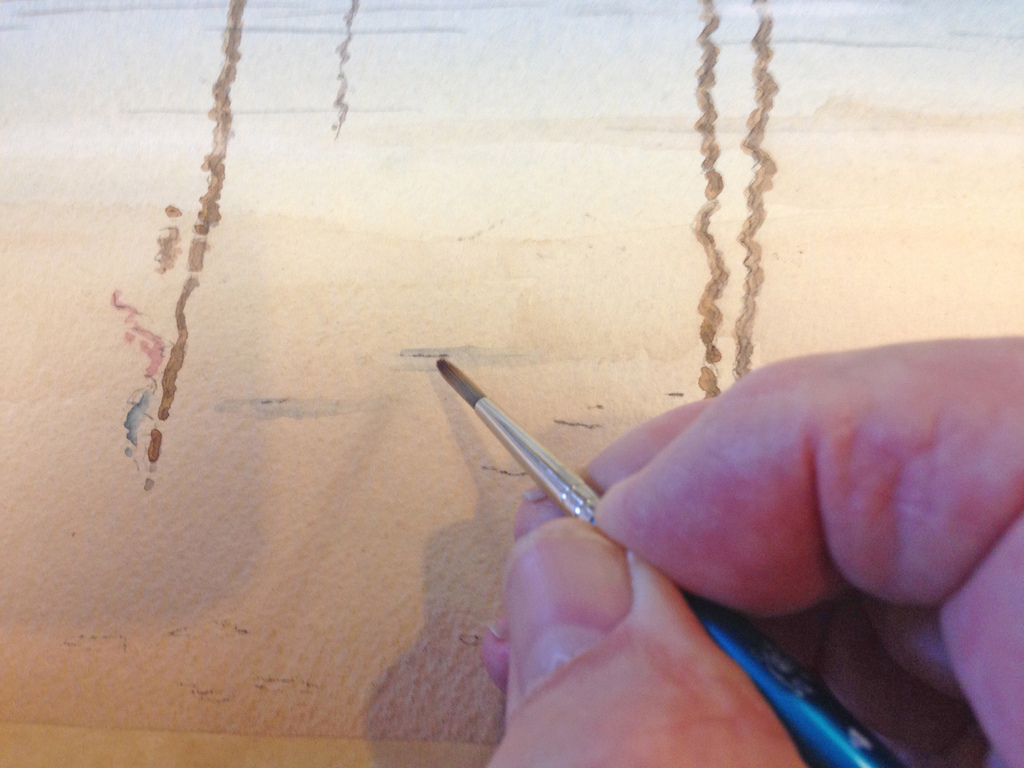
Step 13
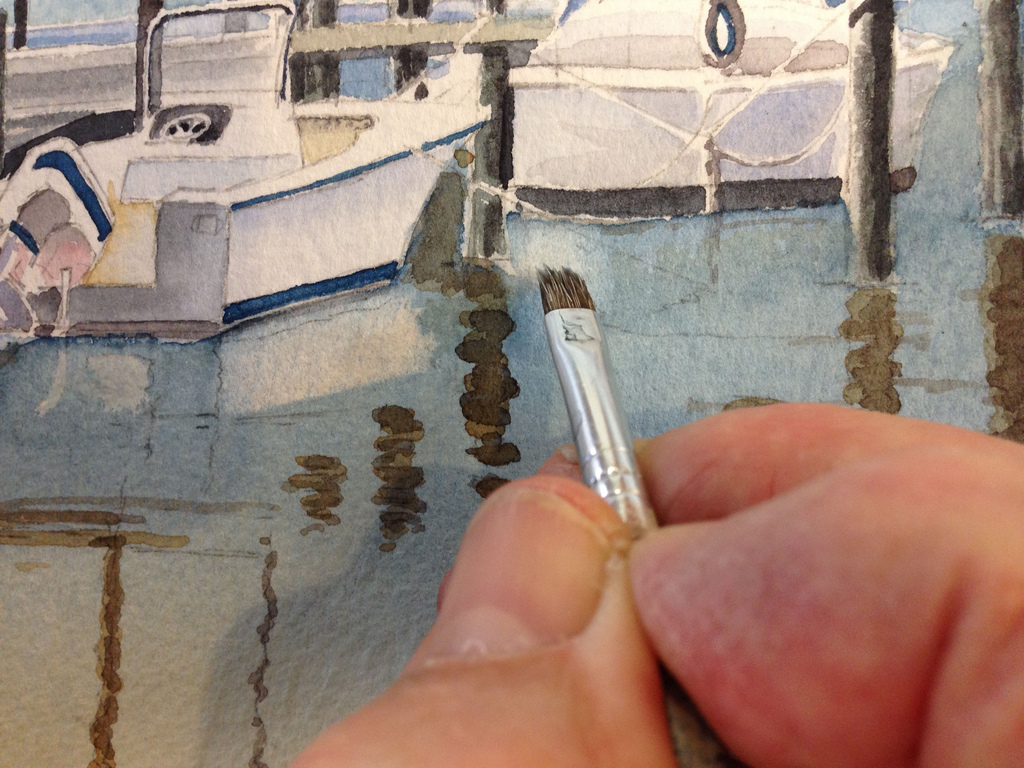
Here I am demonstrating , in this tutorial on Painting Seascapes in Watercolour, how we gently lift out the blue foreground water to give us highlights. Some of you failed to make those horizontal and made the water look choppy. Whatever you do keep these modifications parallel to the horizon. DON’T OVERDO THIS. You need a faint indication of highlights. I used a No.2 square brush. The exact amount of water, the number of horizontal strokes and the pressure on the facial tissue is up to you. EXPERIMENT FIRST ON SCRAP PAPER. You cannot repair this if you overdo it.
[adinserter block=”87″]
Step 14
Here is another view of this technique.
Step 15
For those underwater rocks we used a mixture of Cobalt Blue or Ultramarine with a touch of shadow colour wet on dry, Then we lost the edges with pure water. The idea is to make then look vaguely fuzzy and underneath the water not on top. You don’t want to draw attention away from your centre of interest.
Step 16

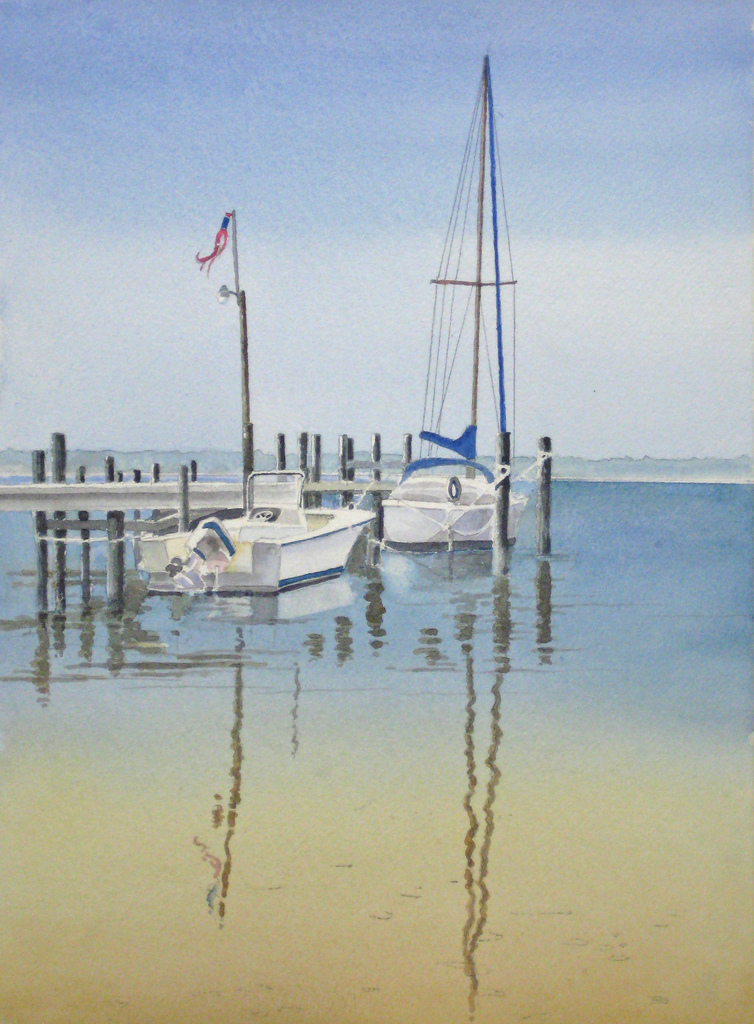
We’re almost done with this tutorial on Painting Seascapes in Watercolour. Now comes your own style and personal technique. Carefully look at this from the viewing distance of about 8-10 feet, and if you have a standard mat to fit this will help you visualize the completed painting. Now you can go back in and put the finishing touches if you need contrast or other lifting techniques. Well done everyone, and now on to the next project!
About John Fisher

I was born and educated in England, graduating from the Luton School of Arts (now Barnfield College) in 1945. It was my hope to become a graphic artist, but at the end of the Second World War returning service men and women had first crack at the few jobs available, and rightly so. I took a number of jobs while I tried to break into my chosen field, and ended up being a reluctant carpenter. Many years passed and I emigrated to Canada in 1952, married a Canadian woman, started a family, and in 1955 finally started on a career which took in graphic arts, owner of my own graphics arts company, art director at an advertising agency, and careers in marketing, advertising and public relations.
I wish I could claim that my passion for art burned brightly throughout those years, but alas, the need to make a living took prominence. As with many people, I always promised myself that when I retired I would get back to painting again. That time came in 1989, when my wife and I were living the winter months in our condo in Destin, Florida. Robert Long, a talented watercolour artist, was offering private lessons from his nearby condo. He was my mentor, and made my retirement years infinitely richer.
In those days Robert taught only technique, and there were rarely more than four to six of us in those early classes. From Robert I regained my interest in photography as an adjunct to painting, and as the cliche goes – I never looked back. I have had many paintings accepted and hung in exhibitions in Florida and Ontario, where I now live. I’ve won some prizes, come first in some exhibitions, and occasionally won the Citizens’ Choice awards. But I mainly paint for fun – hence the choice of name for this site.
To learn more about John and to view more of his work, please follow the link below:
===> https://www.watercoloursforfun.com/
I hope you found this tutorial on Painting Seascapes in Watercolour helpful and interesting. Find more watercolor painting tutorials and techniques here on our site.
THanks ,,you do great work ,,,, it’s hard to follow the lesson ,,,, would you ever consider a video demo?
Another stunning demo by the very kind artists here at artinstructionblog.com …
Very well explained!! And illustrated just what I was looking for.Prefer this mode to video!! Thank you very much. Lucky yougot a good teacher.
WOW!!!! Photorealistic!
I thank you for sharing your talent and knowledge with us. You’re work is stunning
Nice watercolor painting I like your painting.
Your instruction is excellent, easy to follow and precise.
Looking forward to seeing more your step by step but
Would love to see a video. Wish I had found you sooner!
Thank you