About Shalese
Ever since I could hold a pencil, I have had a love of drawing and animals. So it was only natural that I combine my two loves. My passion for art has only grown throughout the years and my love of animals has kept up with it. When my family and I took a vacation to Yellowstone in 2009, my inspiration skyrocketed. We were able to get very close to a large bull elk—something I’ve never done before but had always wished to experience. I discovered the sublime in a powerful way, a feeling I hope is portrayed in all my art. From that point on, I have wanted to excel in the field of wildlife art while continuing my passion for equestrian art. I have recently graduated from Northwestern College in St. Paul with a B.A. in Studio Art and hope to make wildlife/equine art my full time profession.
Follow this link to visit Shalese’s Site
Oil Painting Wildlife Demonstration
It’s always interesting to see how other artists create their work, and it can be a great learning tool. I will take you through my usual “technique” (if you want to call it that) that I use with almost all of my paintings. From start to finish, you
can see one of my paintings progress.
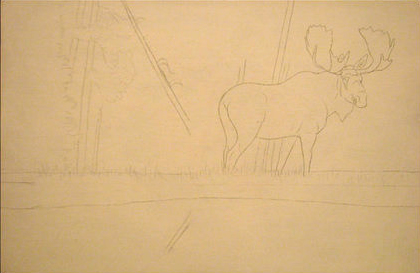
1.) In this first initial stage, I start by making a simple drawing/outline of the most important objects. I don’t have transfer paper, so I make my own by coloring heavy with graphite on the back of a piece of paper after my drawing is complete.
Then I tape it ot my masonite board and draw over the lines again.
2.) This next stage involves mixing a nice base color for the most common color in your background. In this case I used a dark green (Hooker’s Green) and brown (Burnt Umber) with just a little bit of black (Ivory Black).
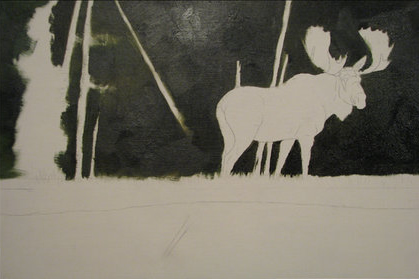
3.) Here I have started painting in some of the details, like the trees themselves and even some of the individual branches. I’m getting more detailed with my base coats and slowly build up the detail as the base coats are refined.
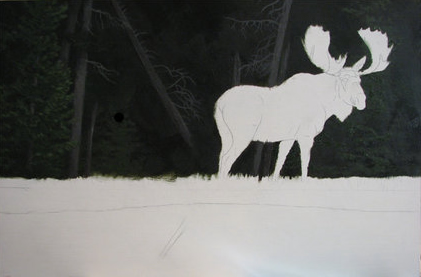
4.) At this point, I have most of the background completed. I went back in to darken some greens, brighten others, and even added in a dead/dying pine tree right behind the moose. This, along with the fallen tree, will subtly help bring the viewer’s eye towards the moose.
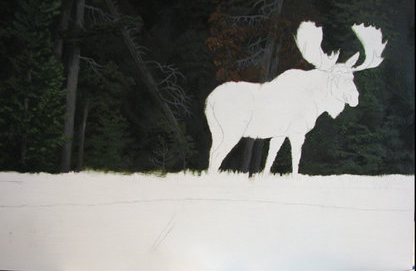
5.) With the background finished, I move on to my favorite part–the moose. Since this is a smaller painting, he won’t be as detailed as I would normally make him. I start by mixing a darker base coat and paint in where the darkest parts of the moose will be.
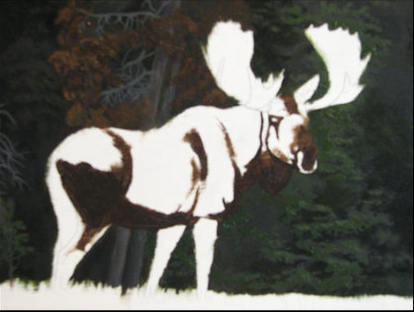
6.) Once the dark areas are dry ( I usually leave it overnight). I begin adding in simple patches of color for a more detailed base coat. No details are added yet–you just want the underpainting of the object to have accurate colors so that the details you put in later will have a nice ground to stand on.
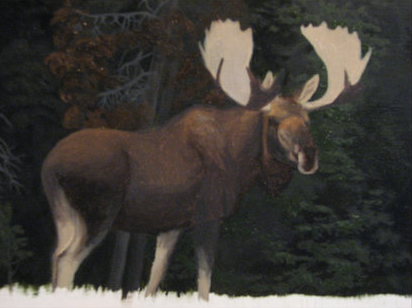
7.) Here is the finished moose. I added in the darkest parts as well as some blue highlights. Animals that have dark fur tend to have blue-ish highlights, not white. I’ve also increased the contrast by making the lightest areas almost pure white, though not comletely. Notice how i’ve also started on the grass. Once again, I put down a nice base coat, waited for it to dry, and then slowly began building up the layers and details.
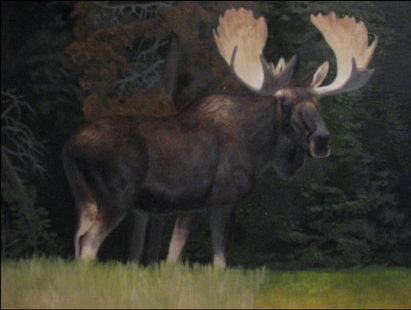
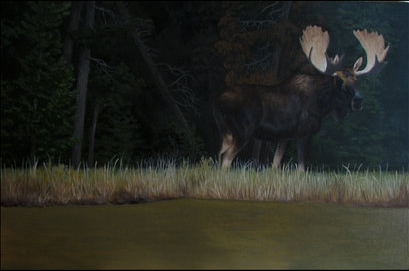
8.) Here you can see the grass completed. After more of the “grassier” base coats were applied (see previous photo), I went in with a Script brush (size 1) and lightly thinned down my paint with mineral spirits. This allowed me to get those fine, vertical blades. Since this will be the edge of a lake or river, I added in a tiny bit of browns and grays along the grass edge, where some mud and rocks would be. The grass along that edge is also very short because it’s new growth.
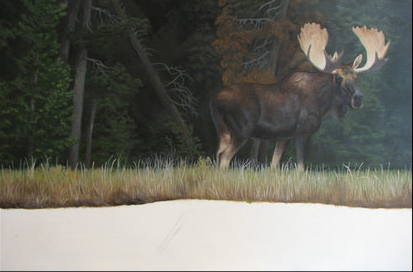
9.) As I was painting, I felt that the moose was blending in too much with his surroundings. I changed that by glazing the right side. This gave the area a lighter, almost misty blue effect. To do this, I took a small amount of flex gel (though Liquin probably works better) and added the smallest bit of a mix of Ultramarine Blue and Titanium White. I painted over the area I wanted to give that misty effect and tried to fade it into the trees.
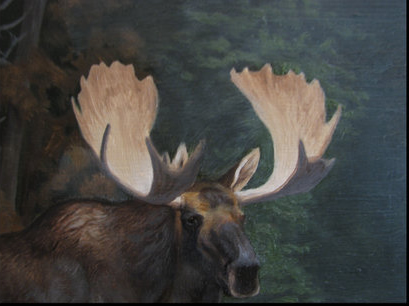
10.) Now onto the water. This is going to be that kind of water where you see some vague reflections, but also the pebbles and stuff at the bottom. I start by adding (bet you can’t guess) a base coat that resmbles pea soup. I let it dry overnight once again before adding anything else. I should also mention that I paint really thin, so you may need more drying time if you like thicker paintings. If I touch the area lightly with my finger and nothing comes off on it, it’s dry enough to work on.
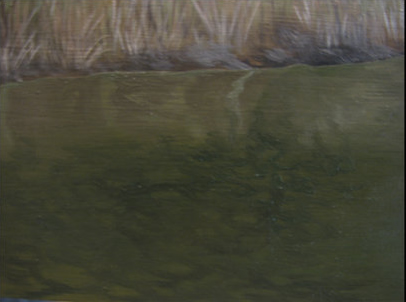
11.) Here’s a detail shot of the river/lake bottom. I’ve never made anything quite like this before, so it was a learning experience for me as well. I ended up painting simple shapes of rocks and pebbles on the bottom with a slightly darker color and fading it into the grass reflections. After the whole area was covered, I made some areas darker than others depending on where the reflections of trees and other objects were.
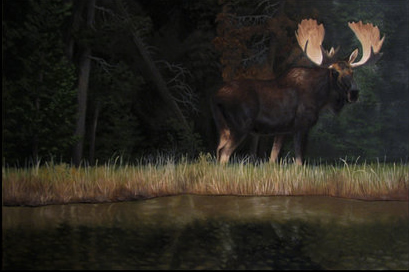
12.) And finally, the finished piece! The reflections in the water weren’t as difficult as they may seem. Since the moose is the darkest thing, obviously it’s reflection will be the darkest. In order to paint them, just make the lines and shadows around the rocks darker and fill in their centers lightly. That way it appears that there is a reflection, but you can still see that neat effect of the rocks below the surface. Hope this tutorial helped you out! Have fun painting. 🙂
All Images are copyright Shalese Sands.
Great demo. I’ve never seen one of these animals (here we are in Europe) but you have captured the power of the scene. His horns, light on dark, just make it. Lovely. Please keep up the demos. I am not an oil painter but your comments translate to other media.
Thanks.