Below is a beautiful free step by strep lesson on how to paint an apple with watercolor provided by artist John Fisher (see bio below). I hope you find this tutorial helpful and it inspires you to create something today! Enjoy fellow artist!
How to Paint Apples with Watercolor
I’m trying something new. I’ll post a series of free watercolor demos I use to teach a class of beginners. I photograph each stage and e-mail the appropriate images to my students prior to each class. Here is our reference photograph in a high key to avoid background washes which sometimes poses a challenge to beginners.
Step 1
The first step was to get the image on paper. Because none of my students had any drawing experience I got them going right away by supplying them with a full-sized B&W image for tracing purposes and a sheet of transfer paper. They then re-drew this with a 5H pencil to keep a faint but clear image. I’ll be incorporating drawing lessons for them as we go, but I feel it’s important to get people motivated by concentrating on painting techniques and early results. We live in an age of instant gratification and I find that beginners get quickly motivated and stay that way once they amaze themselves with what they can do without spending weeks learning how to draw.
I also introduced them to the techniques of masking by having them protect the stems with liquid misket as a learning experience.
Step 2
Using these step-by-step images displayed on my laptop computer I re-painted this project along with my students, who watched me do each step and then tried the same on their own paper. We began with a wash of Aureolin yellow with a touch of Brown Madder. It soon became apparent why the stems needed protecting in a realistic painting this sort..
Step 3
I encouraged my students to experiment on a piece of scrap paper before we put any actual colour on their finished project. Here’s how we did that, and it gave me the opportunity to show how we would “lift” the highlights later, rather than have stark white by using liquid misket.
Step 4
We began by applying a wash of Alizarin Crimson with a touch of Brown Madder, and I used the brush to follow the contour of the apple (see also Image 12). The I lifted out a highlight to reveal the yellow wash underneath.
Step 5
I added another layer of our AC and BM and began work on the stem area.
Step 6
I added another layer of our AC and BM and began work on the stem area.
Step 7
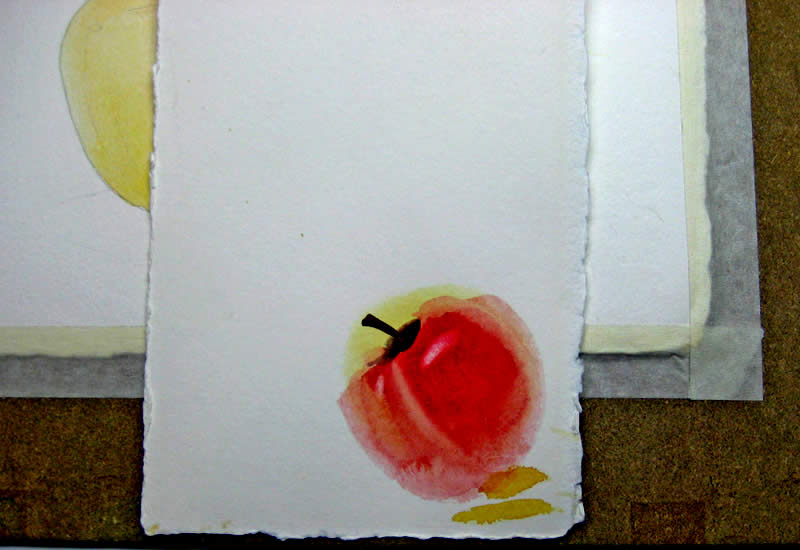
More wash layers and some tinkering to show in a step-by-step, and we filled in the stem for completion of our first apple, except for the final highlights. Because we are a small group I’m able to quickly work one-on-one with anyone in trouble, although I try to stay off their actual paining wherever possible
Step 8
Now for the next apple. I hasten to add this is not the only way for beginners to paint apples. Some people may wish to keep all aspects of the painting going at the same time and not concentrate as I have, but some beginners find this intimidating and feel more comfortable solving problems as they go.
Step 9
Because my beginners class had a limited experience of brush control I decided we needed to protect the outer edge of the RH apple in order not to lose the sharp distinction between the two. Here I’m showing how to use the end of a small brush to save your liquid misket brushes for finer work.
Step 10
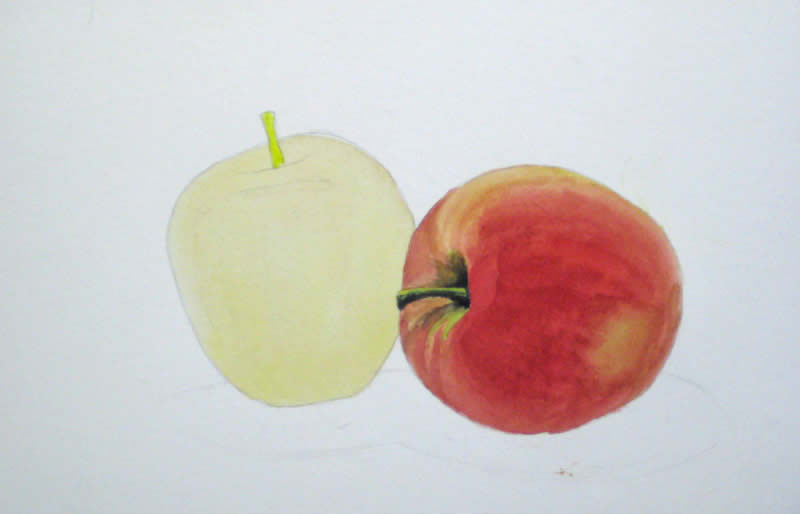
I used the same basic wash of Alizarin Crimson with a touch of Brown Madder to put in the first wash on the second apple. I left some reflected light on the LH side.
Step 11
Here I’ve shown how the next layer of wash goes on conforming to the contours of the apple. I was unable to photograph each step of this as I had to blend the edges quickly so they didn’t dry out. During my actual demonstration I was able to show how manipulating the colour helps to define the apple’s shape. Any accidental brush strokes which showed through helped to define the shape.
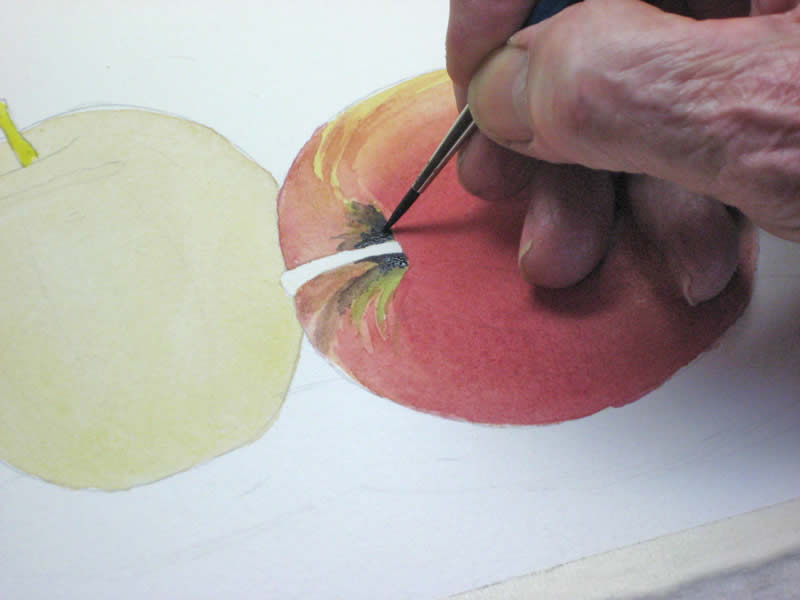
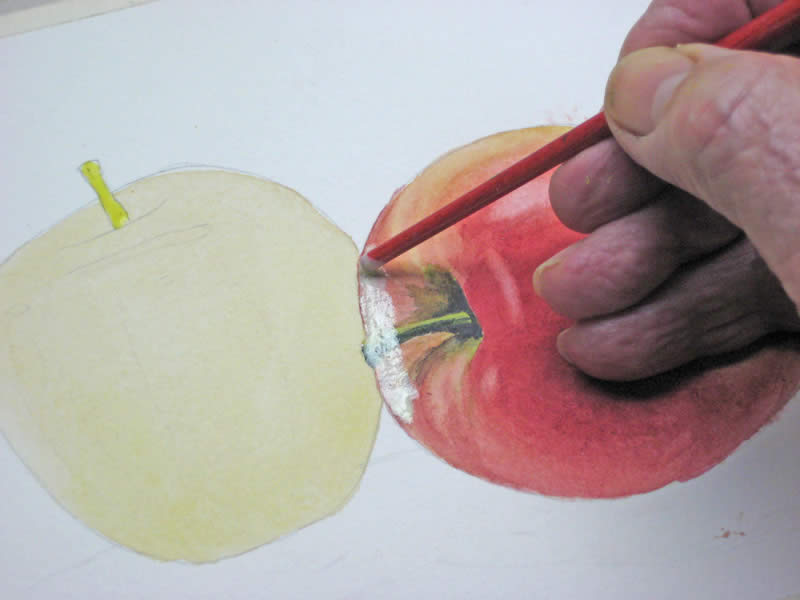
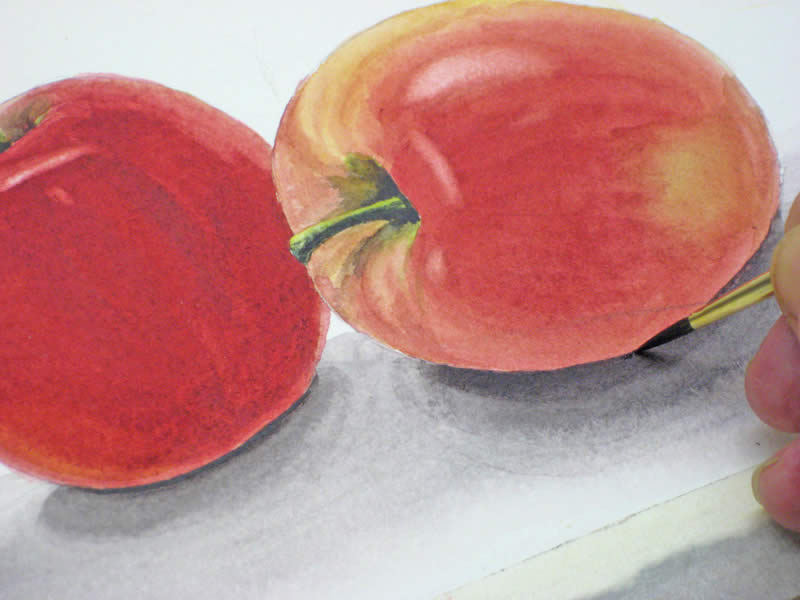
Step 12
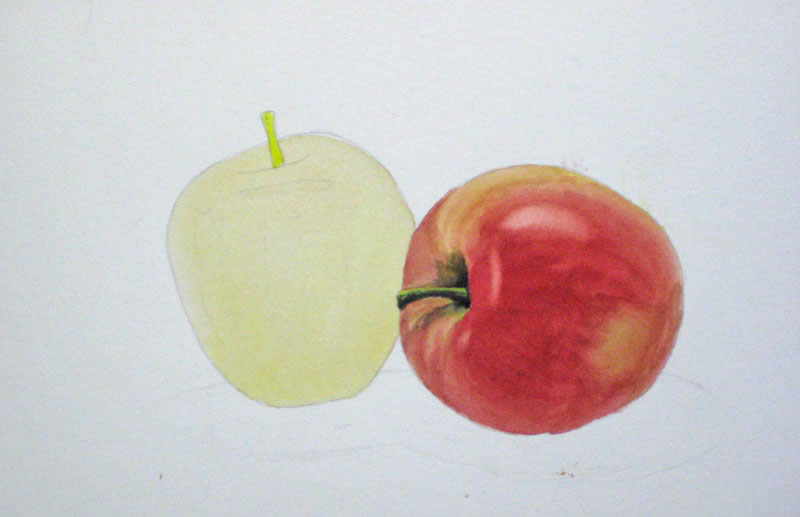
After applying two more basic watercolour washes with some lifting to represent reflected light, I used the same technique to lift out the highlights on the LH apples and paint in the stem after removing the protective liquid misket. I then removed the protective liquid misket from the RH apple to clearly show the separation of the two apples. This was helpful for my class of beginners who had yet to master the dexterity required to quickly paint in the LH apple washes and avoid running over into the RH image.
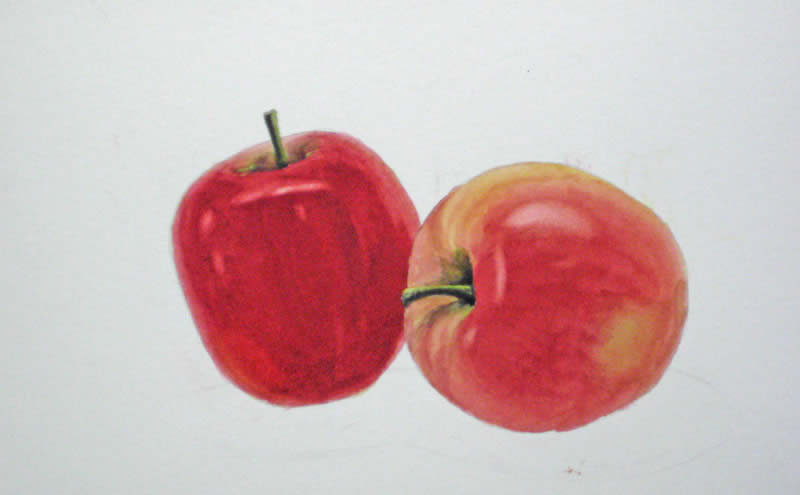
Step 13
As I’ve explained, I did not want my beginners to have to cope with a background wash at this stage, so I set up a high intensity photograph with simple shadows to anchor the apples to the base. The shadows caused us all some grief and I had to admit my demo shadows were far from perfect, but it made my students realize even the most experienced among us come a cropper once in a while. Here is the first wash using wet-in-wet to blend the edges. We used a mixture of Antwerp Blue and Brown madder to give is a cool gray.
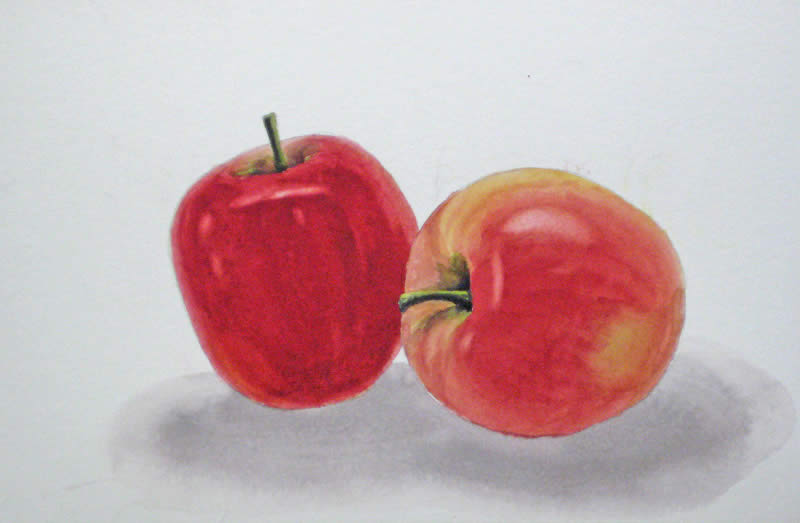
Step 14
The next step got a little muddy and had to be blended with later stages.
Step 15
Using a bit of a disaster as a learning experience I quickly put in the final darkened shadow under the apples and blended the whole with clear water and a 1/2″ square brush into a smoother graduated shadow.
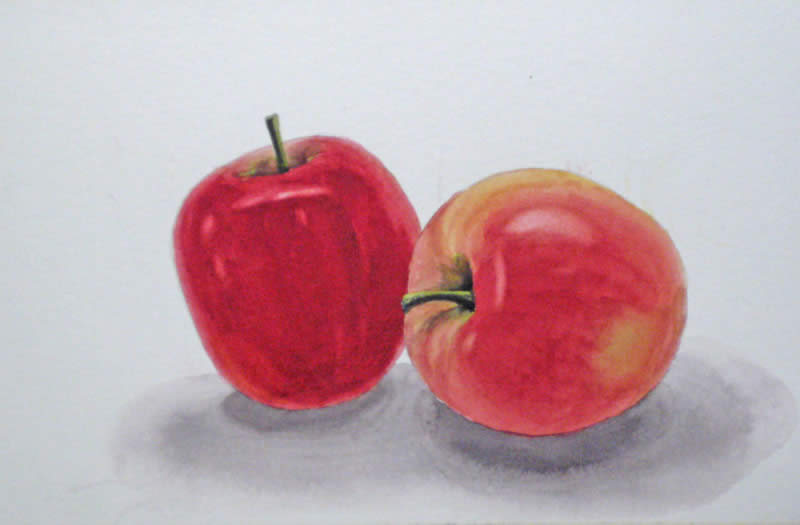
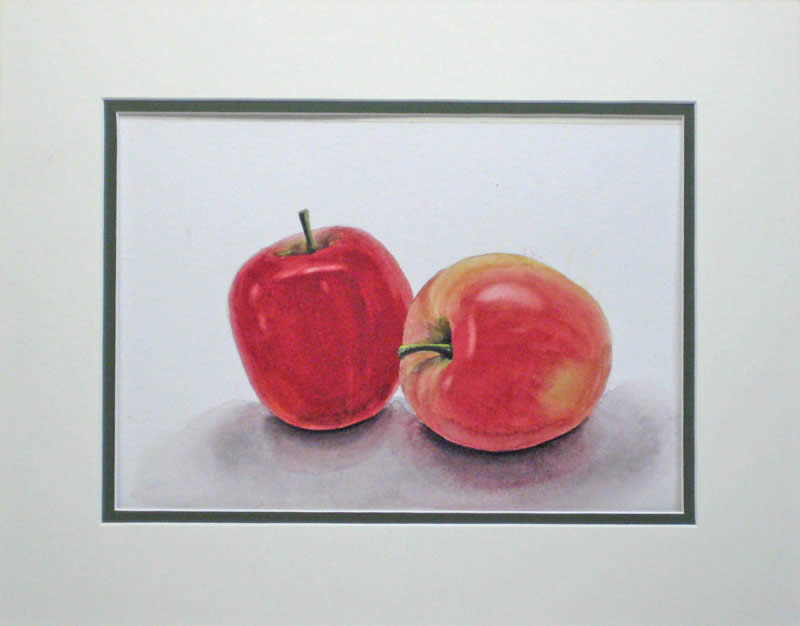
Finished Painting
Here’s the finished project in its mat. I’m still not happy with the shadows, but as my students learned – sometimes you just have to quit while you’re more or less ahead!
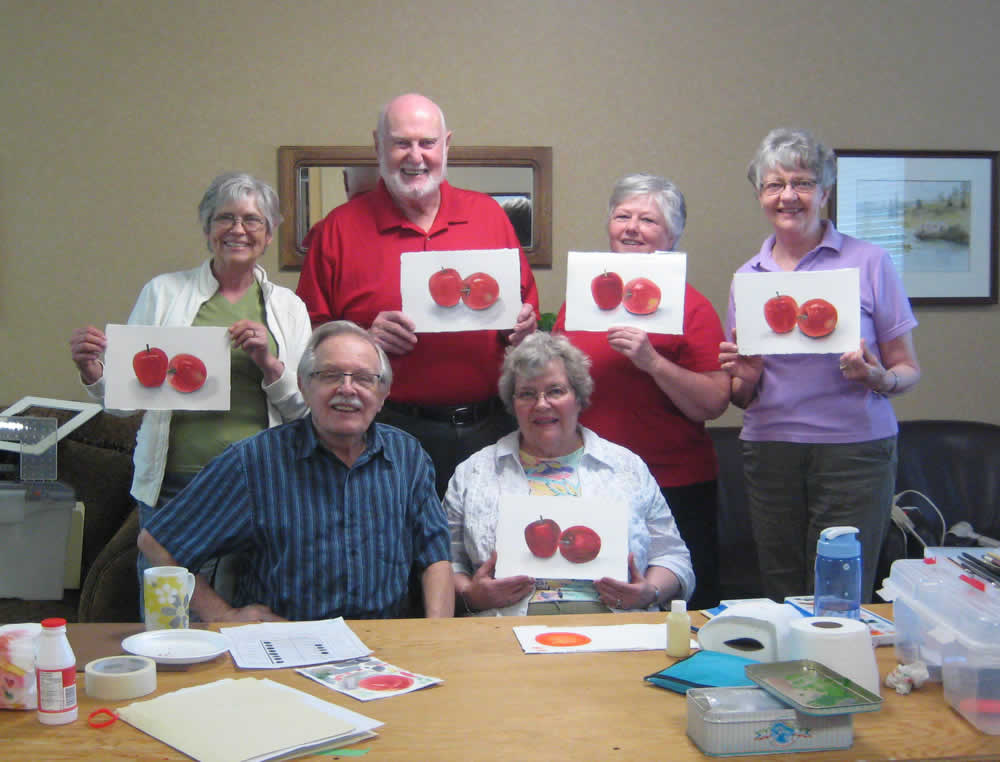
Group Picture
Here is our group with their finished project, and I think they were all pleased with what they did. I hope this watercolor demo was of some use to you. I’ll post others in the weeks ahead.
I hope you enjoyed this lesson on how to paint an apple with watercolor.
To learn more about John and to view more of his work, please follow the link below:
I was born and educated in England, graduating from the Luton School of Arts (now Barnfield College) in 1945. It was my hope to become a graphic artist, but at the end of the Second World War returning service men and women had first crack at the few jobs available, and rightly so. I took a number of jobs while I tried to break into my chosen field, and ended up being a reluctant carpenter. Many years passed and I emigrated to Canada in 1952, married a Canadian woman, started a family, and in 1955 finally started on a career which took in graphic arts, owner of my own graphics arts company, art director at an advertising agency, and careers in marketing, advertising and public relations.
I wish I could claim that my passion for art burned brightly throughout those years, but alas, the need to make a living took prominence. As with many people, I always promised myself that when I retired I would get back to painting again. That time came in 1989, when my wife and I were living the winter months in our condo in Destin, Florida. Robert Long, a talented watercolour artist, was offering private lessons from his nearby condo. He was my mentor, and made my retirement years infinitely richer.
In those days Robert taught only technique, and there were rarely more than four to six of us in those early classes. From Robert I regained my interest in photography as an adjunct to painting, and as the cliche goes – I never looked back. I have had many paintings accepted and hung in exhibitions in Florida and Ontario, where I now live. I’ve won some prizes, come first in some exhibitions, and occasionally won the Citizens’ Choice awards. But I mainly paint for fun – hence the choice of name for this site.
To learn more about John and to view more of his work, please follow the link below:
This is a wonderful demonstration, very clear and easy to follow. I look forward to seeing the rest of the class. Thanks for posting and sharing it.
Claresays
It is our loss that you don’t live in the UK anymore, I would love to attend your classes, so thank you for giving us the next best thing – your work is beautiful. I particularly liked the piece you did of the silver teapot – amazing. I’m looking forward to working through your apple demo lesson. Thanks again
John Ulmansays
My mother is English, Grand dad painted for Wonder Brother advertising. What combination of colors to develop the shade color on the apple did you use. Due you use white watercolor on this apple design? The reason you have multiple layer on the apple is to develop depth. John
Carolsays
This was a wonderful help to me. No one has ever stopped to explain some of the finer steps in a realistic water color painting. I look forward to future lessons – the enthusiasm you attain in your class might just be contagious! 🙂
eva mellorsays
Great demo! Easy to follow. I look forward to many more. Thanks!!
jj-momscashblogsays
I was making a thank-you for a friend that had sent over some warm homemade applesauce. Thought a watercolor of apples would be fun, and needed a quick peek at another artists w/c. Loved your demo. very well done. Thanks and am very glad I found this page of yours will bookmark it for sure. jj
Robsays
excellent demo. i’m a beginner and find watercolor very difficult but not impossible to learn with your demo I learned how to paint an apple. send more demos please.
Linda Hitessays
Very insiteful. Thank you. What is the brand name of the colors you used?
Shokusays
What a wonderful art class, i wish i were your student too, I’m really impressed by the students great results, they are perfect, thank you
Paulsays
excellent demo. i’m a beginner and find watercolor very difficult but not impossible to learn with your demo I learned how to paint an apple. send more demos please
Sharon Rubinsays
Thanks for the wonderful demonstration. I got iced in on Wed. norming and couldn’t get down the stairs or up the driveway. Unless there is another blizzard, I’m really looking forward to being there next Wed. Sharon P. S. I went to Mary Ann’s art opening. It was really interesting to see the works of several artists. I was right about which ones were Mary Ann’s, except for one!


This is a wonderful demonstration, very clear and easy to follow. I look forward to seeing the rest of the class. Thanks for posting and sharing it.
It is our loss that you don’t live in the UK anymore, I would love to attend your classes, so thank you for giving us the next best thing – your work is beautiful. I particularly liked the piece you did of the silver teapot – amazing. I’m looking forward to working through your apple demo lesson. Thanks again
My mother is English, Grand dad painted for Wonder Brother advertising.
What combination of colors to develop the shade color on the apple did you use.
Due you use white watercolor on this apple design?
The reason you have multiple layer on the apple is to develop depth.
John
This was a wonderful help to me. No one has ever stopped to explain some of the finer steps in a realistic water color painting. I look forward to future lessons – the enthusiasm you attain in your class might just be contagious! 🙂
Great demo! Easy to follow. I look forward to many more.
Thanks!!
I was making a thank-you for a friend that had sent over some warm homemade applesauce. Thought a watercolor of apples would be fun, and needed a quick peek at another artists w/c. Loved your demo. very well done. Thanks and am very glad I found this page of yours will bookmark it for sure. jj
excellent demo. i’m a beginner and find watercolor very difficult but not impossible to learn with your demo I learned how to paint an apple. send more demos please.
Very insiteful. Thank you. What is the brand name of the colors you used?
What a wonderful art class, i wish i were your student too, I’m really impressed by the students great results, they are perfect, thank you
excellent demo. i’m a beginner and find watercolor very difficult but not impossible to learn with your demo I learned how to paint an apple. send more demos please
Thanks for the wonderful demonstration. I got iced in on Wed. norming and couldn’t get down the stairs or up the driveway. Unless there is another blizzard, I’m really looking forward to being there next Wed.
Sharon
P. S. I went to Mary Ann’s art opening. It was really interesting to see the works of several artists. I was right about which ones were Mary Ann’s, except for one!