Chris Saper has painted commissioned portraits for fifteen years, following a seventeen-year career as a health care executive in Phoenix, Arizona. In addition to her painting schedule, she is an active portrait instructor, teaching both portrait painting and business skills. Chris is the author of Painting Beautiful Skin Tones with Color and Light
Step by Step Oil Painting Portrait Demonstration – “Tanner”
By Chris Saper
This step-by-step demo on How to Paint a Portrait in Oil is designed to show the actual steps involved in this commission portrait. It’s the same process I use for virtually every commission I paint.
Step 1 – How to Paint a Portrait in Oil. Client photos and photo selection.
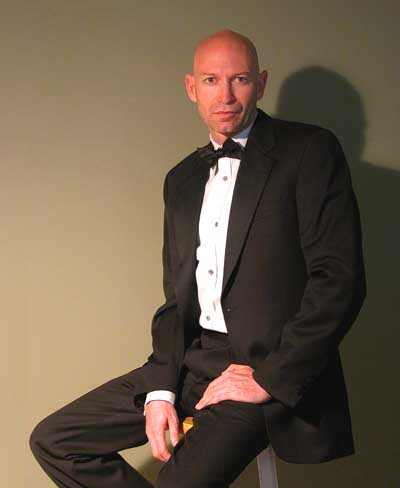
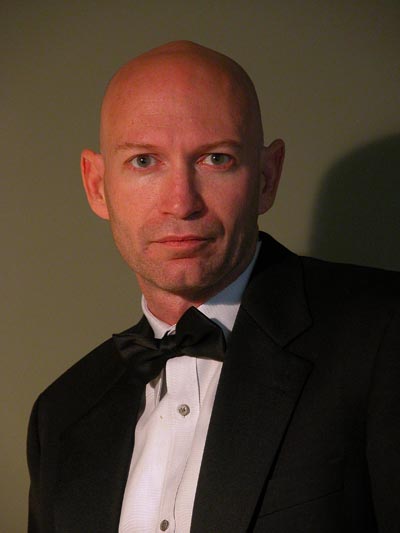
Having discussed clothing prior to the photo session, Tanner brought his tuxedo as well as a more casual outfit. Before even beginning, I asked him to tell me what he likes best, and least about his face, so that I can pose him in a way that will convey what he wishes. He asks me to avoid emphasizing his ears, He promises to be a wonderful client, and gives me a pretty loose rein.
I used a Nikon 5700 Coolpix, and a single artificial light (daylight corrected bulb), with a white board reflecting fill light, a TIF setting, and tripod.
We choose a body language and facial expression from within the same series of photographs, where neither of us moves from our position, and the light direction remains constant. By keeping those two variables constant, I can readily marry up images seamlessly.
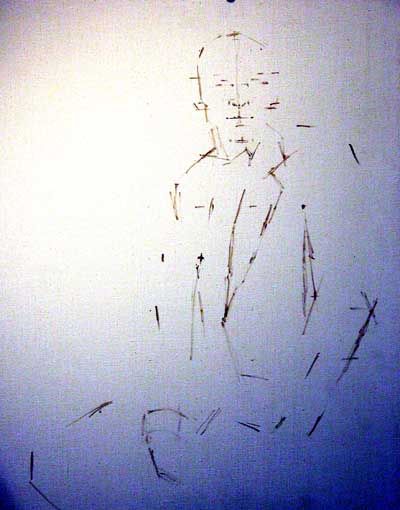
Step 2. Placing the figure on the canvas
I have decided to paint Tanner’s portrait in a vertical, 30 x 24 format, and have some challenges as to his exact size and placement, not the least of which is because he is a very tall man. I create a compositional thumbnail using the sizing function on Adobe Photoshop ( but you could simply use a pencil and paper, as I did for years before I even had a computer) to so as not to cut off the knee on our left, nor his hands, without leaving too much empty space anywhere else.
I find the center on my thumbnail, and mark the corresponding center of my canvas with a small +. I want to keep that mark in sight until the figure is fairly well-stated, so that the negative spaces don’t get away from me. I use a small brush and raw umber thinned with a little Maroger medium, and place vertical measurement marks, as in the Daniel Greene method. I sketch in just enough of the figure to verify that it is placed correctly, and to provide a blueprint for where I am going on the canvas. Depsite my best efforts in Adobe Photoshop, this canvas is untoned, and the marks are in raw umber.
This is a New Traditions Art Panel, Claessen’s L600 linen, mounted on Gatorboard.
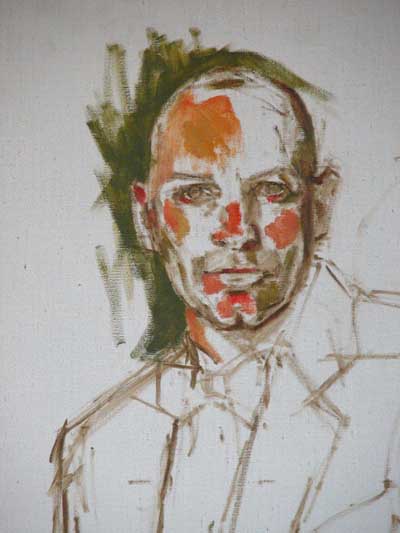
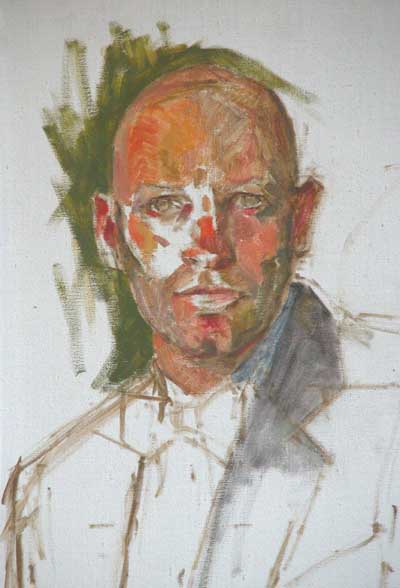
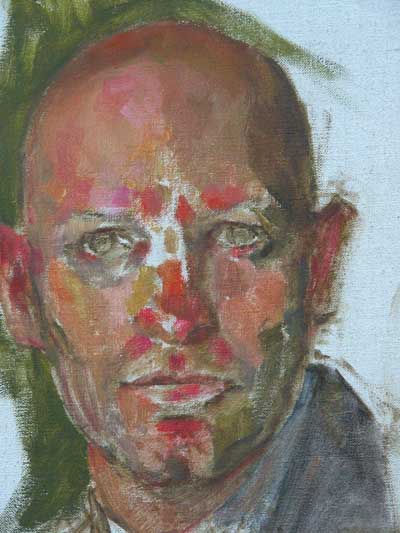
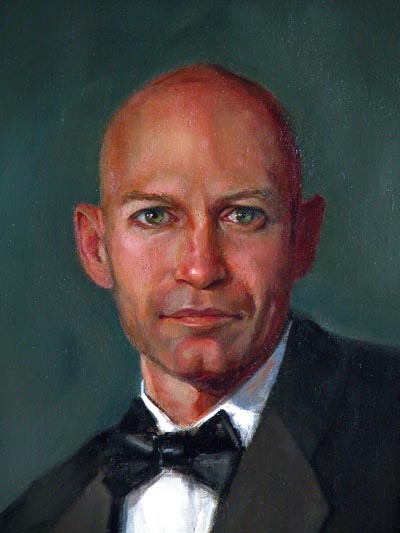
Step 3-5. Place marks of strong, saturated color in the face.
A method taught me by Bill Whitaker, the placement of strong, unblended saturated color in spots really helps set a vibrant layer of color, which readily allows you to desaturate chroma in later layers. In these images, you can see the strong unblended patchwork. Looks like a dermatologist’s dream case!
The palette is an adaptation of the Whitaker/ Greene palettes:
Flake white Titanium white Permanent Rose Cadmium Scarlet+Raw Sienna Yellow Ochre Transparent Earth Red Caput Mortuum ( thanks Peggy Baumgaertner) Asphaltum Raw Umber Ivory Black+Raw Sienna Cadmium Yellow+Ivory Black (a mixed green) Alizarin Permanent+Thalo Green (a mixed black) Ultramarine Blue
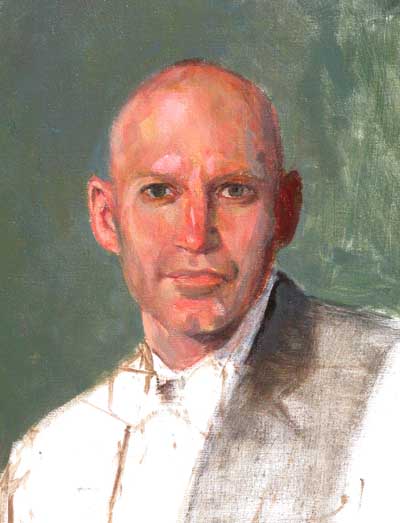
Step 6. Place solid color notes to indicate the value and hue of the background.
It’s important to do this early on in the painting, because each stroke you place is judged by its adjacent color. In this case, where I have a background color that is a grayed-down (desaturated) mid-value green, it’s even more important because the green ground will make all of the reds appear even redder, and I want to keep the relative temperatures under control. The ability to properly judge value and color is best when you are working with colors placed adjacent to one another. (Well, at least it’s easier for me)
Leaving the white background until the face is finished, and then trying to paint it in, will cause me to have to repaint the colors in the face. Again. Sigh.
Step 7: Continue refining image
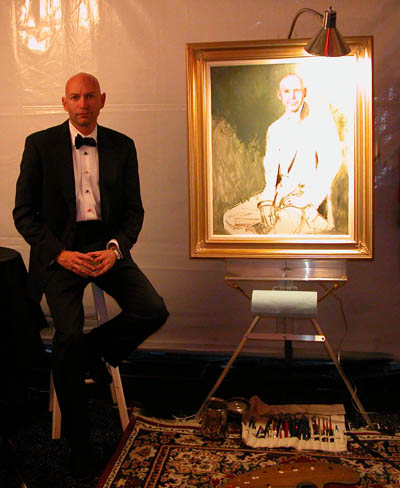
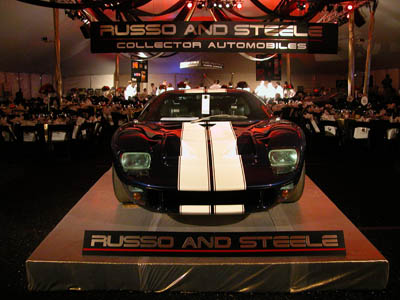
In this unusual case, I was able to get a in a couple of hours working from life. Tanner and I attended a black-tie auction as part of the large auto auction held each January in Scottsdale.
When I arranged this, I couldn’t recall what vantage point I used in taking the original photographs. In order to be able to continue from a live model, the painter and model need to be at the same eye level as in the source photograph. I was lucky to have placed my tripod and camera at a comfortable standing height, but that was sheer serendipity. In the future I won’t leave this to chance.
Here is the demo set-up, painter in action photo-op, and one of three collectors’ cars that were auctioned off that evening. The dance floor was a big checkerboard. I only mention this because it was such a cool event.
3/3/07 Note: there has been some confusion about this demo and I wish to clarify: the fact that I was able to get couple of hours painting from life does not mean that this is portrait from life. It is not. The overall painting took me about 50 hours or so, and the approach I used was based upon photographic images, just as I do with my commissions.
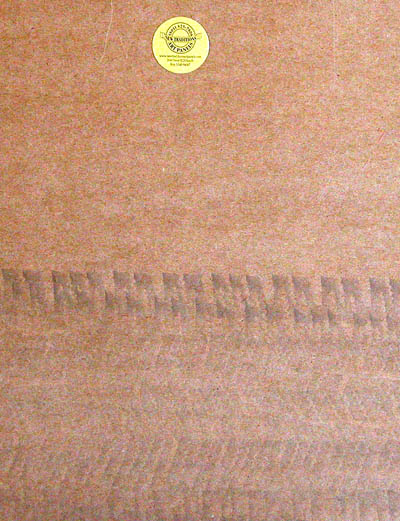
Step 8. Drive over the portrait.
Here you can see the track marks from my SUV. And it’s a big car.Thank heavens the painting was face-down at the time.
As my dear teacher Bill Whitaker would say, “I didn’t mean to.” I’ll have to show this one to Tim Giles.
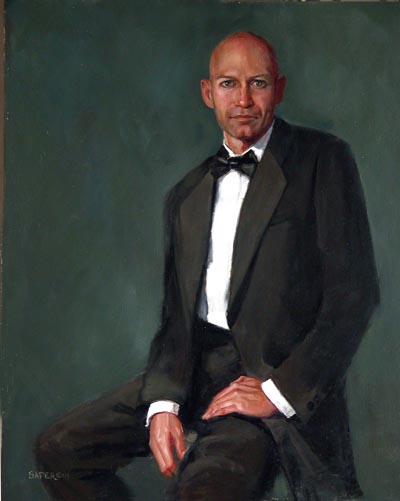
Step 9. Finalize the portrait painting.
I experimented with an underpainting medium, mixed right into the mixture of background color, as well as the suit color. I was really delighted with this medium: the paint layer dries very, very quickly, and it has a uniform matte finish. It leaves a bit of tooth, which is great as additional layer are added, but works well if the final varnish is applied right on top of it. It works fine for me a final layer of paint, as I am not a glaze painter.
One if the paintings problems that has always been a problem for me is the painting of large dark passages, which tend to sink in, and make it difficult for me to deal with them. To paint the tuxedo, I painted the underlying black first – using a mixture of ivory black+ a mixed black made from thalo green and alizarin. To indicate the lighter areas of the fabric I used Grumbacher’s raw umber straight from the tube, mixed with the underpainting medium.
I let the dark first layer dry completely before the raw umber layer. In some areas I painted the raw umber on the dry black, and in some areas I used Maroger to wet down the black areas first. I have now been using the underpainitng medium in every background or other other area where there is a large expanse of similar color.
When I felt I could no longer do anything to improve the portrait, I showed it to Tanner, who was completely thrilled. Only after client approval do I apply the final varnish.
Tanner will be hosting an unveiling party later this spring, and I’ll let you know it goes.
I am not a good painter but I want to so I have to check the demo then…
Jeannie7901says
Thank you Chris, I have often seen you on different art sites; as I am self taught; but a museum has offered me 3 years of classes and I will be taking a portait class “uh again!!! Well anyways I was released of guilt because I also do not paint in glazes. Good luck at the unveiling, maybe someday it might be me. Love always Jeannie

I am not a good painter but I want to so I have to check the demo then…
Thank you Chris,
I have often seen you on different art sites; as I am self taught; but a museum has offered me 3 years of classes and I will be taking a portait class “uh again!!! Well anyways I was released of guilt because I also do not paint in glazes. Good luck at the unveiling, maybe someday it might be me.
Love always Jeannie