About Mara

I enjoy being an artist! And I’ve been at it longer than this internet blogging stuff. In fact, blogging is all new to me! So I will start by telling you a little about myself. Our nest is not quite empty because we still enjoy the presence of our college-aged kids at home. And because they are busy with work and school I am able to enjoy uninterrupted painting sessions during the day-light hours instead of in the middle of the night like I did when they were little. A bit here, a bit there and I keep my projects alive! One project I’m working on is a cookbook. Originally written for my husband and children, I re-structure classic recipes we love, to make them healthier. I’m also writing and illustrating a series of children’s books. Finding time to Draw, paint, and teach has been a challenge while raising a family but finishing a project is very rewarding to me. And I hope you like my artwork and lessons and enjoy watching my progress with various projects!
Please follow this link to visit Mara’s website to view more of her art lessons.
How to Mix Grays in Watercolor for Atmospheric Perspective
(Click Images For Larger View)
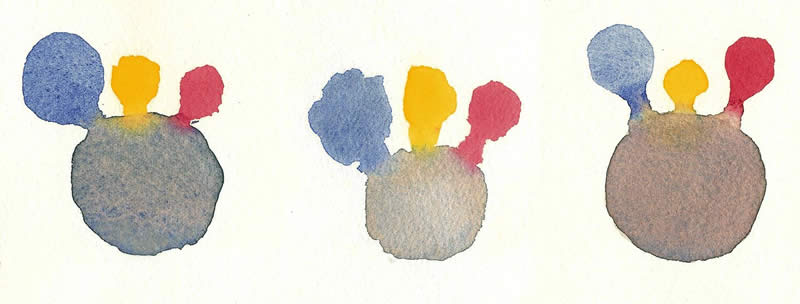
I have gotten several inquiries about mixing warm grey and cool grey with watercolor. It’s really very simple to do with the three primary colors of blue, red, and yellow.
Some art teachers say, “Never use black”. I say, “Use whatever you want if you like it!”.
But if you go outside and really look at grey shadows on the ground or on the side of a building you will notice that they are not really light black…I mean if you look really, really hard! Shadows and grey actually have a lot of different colors in them. Some are warm grey (with yellows and reds) and some are cool grey (with blues and greens).
An example of cool grey would be snow-covered fields on a cloudy day.
An example of warm grey would be a bonfire on a beach with a fiery orange sunset.
Or you could have both warm and cool grey in a cold, dark cave looking out the opening into the warm sunshine.
Above are three greys. The one on the left is cool with more blue in the mix. The middle one is neutral with equal amounts of blue and red. The one on the right is warm with more red in the mix.

I hope you’re not tired of perspective…because there is another kind of perspective that shows distance called Atmospheric Perspective. When you look at mountains or water far in the distance it looks faded. Colors look bright up close and cool and faded when they are far away, especially on a hazy day.
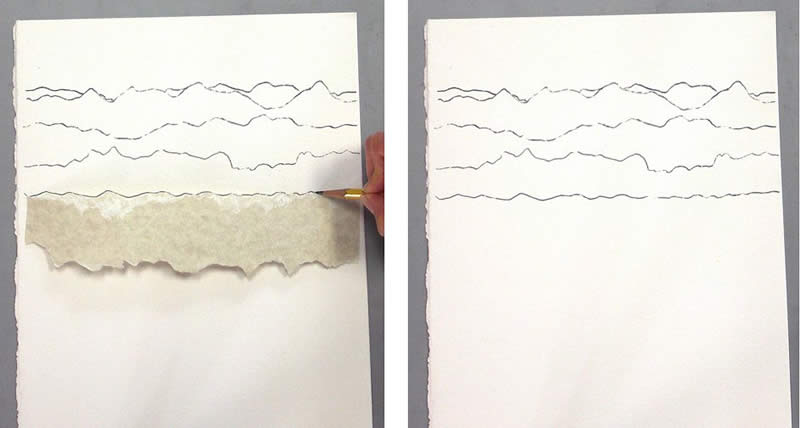
This lesson will prepare you for painting a beautiful lake scene in a few weeks. Start by tearing some strips of paper. Place strips one at a time on a piece of watercolor paper as a guide to draw the outline of the top of some mountains. Start about 1/3 from the top of your watercolor paper.

Use another torn paper strip or flip the same one over and draw a second row of mountains a little above the first one.
Do a third and forth row, a little closer together than the first two because things look smaller in the distance.
[adinserter block=”25″]
Draw one last line on the bottom that is a little more flat. If your lines are too dark erase them a little with an eraser.
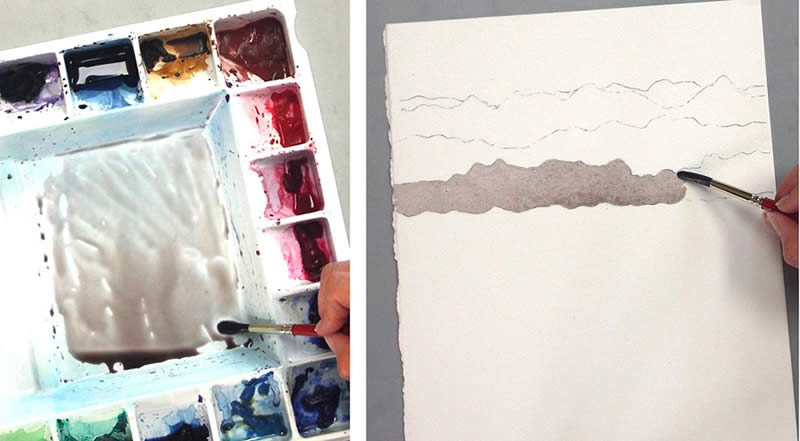
Now mix a bunch of warm grey (Look back up to the beginning example of the three grey colors I mixed in the first picture) with the three primary colors. Test your color on a scrap piece of watercolor paper and paint in the first row of mountains.
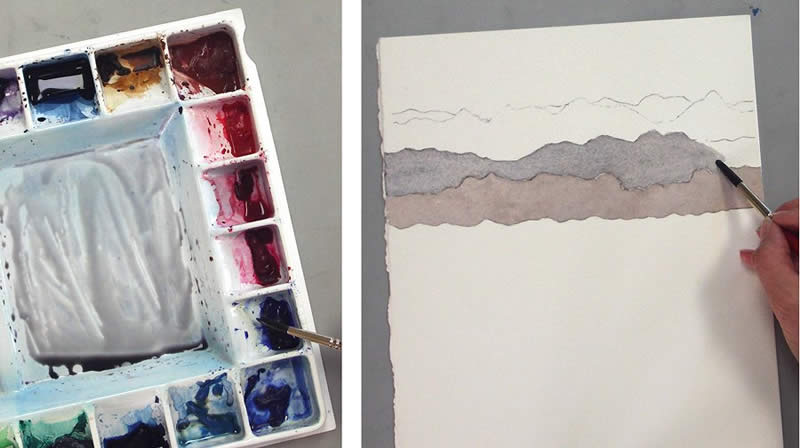
Add a little blue to your mixture to make a more cool grey. Paint in the second row of mountains.
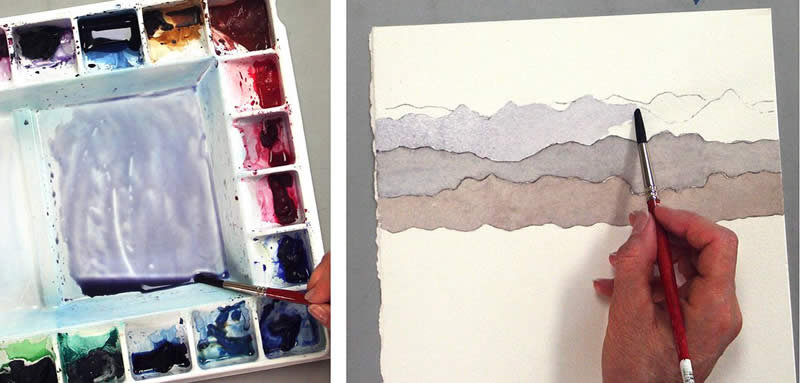
For the third row of mountains add a little more blue plus some more water to your mixture to make the paint thinner. This will look lighter when you apply it to your white watercolor paper. Paint the third row of mountains.
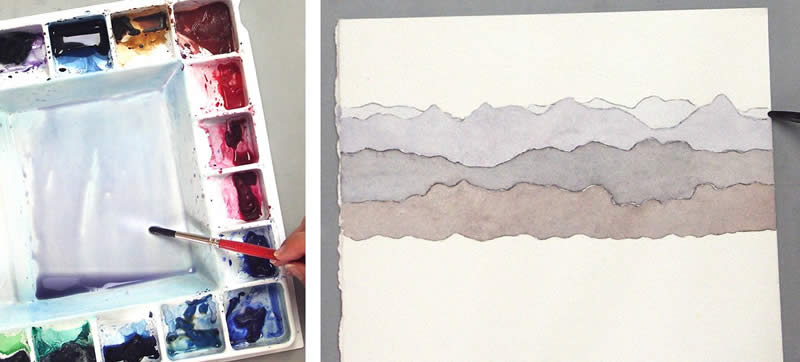
Now add even more water to your paint mixture, test it on a scrap watercolor paper to make sure it looks very light. Paint the fourth row of mountains.
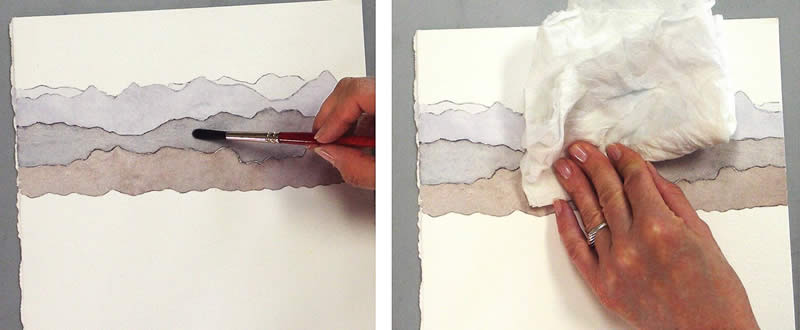
I noticed that my second row of mountains looks a little too dark. So I am going to lighten that section by applying clear water with my brush, then blotting it with a paper towel. I could do it again if it is still too dark.
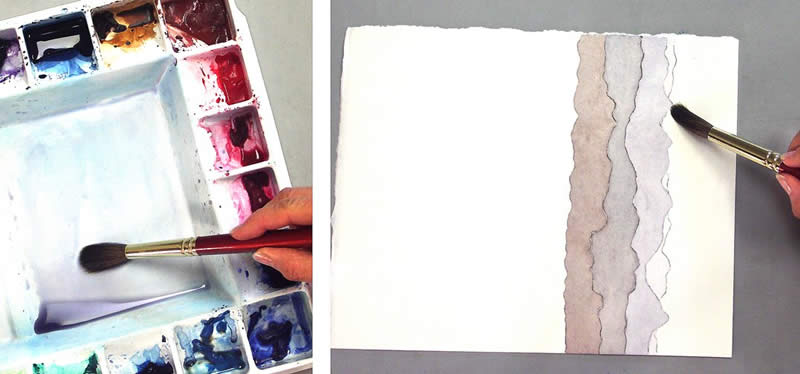
Now the sky! Prepare your paint mixture first, by adding some blue back into it and maybe just a touch of red. Test it. Add a touch of yellow if it is not grey enough (if it looks too purple). Remember it should look very pale and not very colorful because it is far away on a hazy day.
Then paint clear water onto the entire sky area.
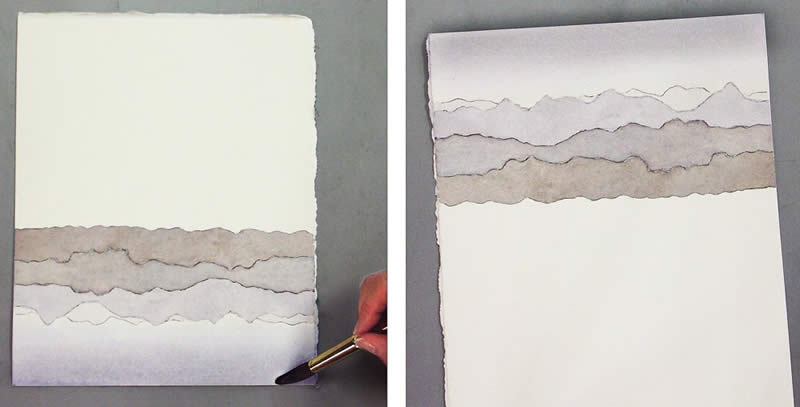
Turn your paper upside down and start from the bottom (top of the sky) and paint in your sky paint mixture onto the wet area (wet into wet). Let it settle so it is darker toward the edge of the page. Let it dry.
There. You have a mountain ridge on a hazy day! Try painting in a foreground that gets more intense with color as it gets closer to the viewer. See what you can do and have fun!
Wow, that torn paper technique for mountains is ingenious.
Hi I have a quick question. whats the coolest computer program to use to color/line/watercolor manga styled art? more?
whoah this blog is excellent i love studying your posts. Stay up the great paintings! You recognize, a lot of individuals are searching round for this information, you can aid them greatly.
Hi Mara , thank you so much . This is very clear instruction with good tips on mixing grays. I also like the torn paper technique
Those mountains look brilliant! I never thought of using torn paper! Great idea! thank you!