How to Draw an Ear with Pencil
In this step by step beginners lesson we will learn how to draw an ear from the side using pencil. Drawing the ear is something that most artists are afraid of, yet if you understand how the ear is constructed and can do basic shadings, then drawing the ear is actually not so difficult.
[adinserter block=”83″]
Let’s start off by looking at the anatomy of the human ear.
Ear Anatomy

As you can see the ear is made up of 6 “parts”. Each “part” of the ear has it’s own shape which means the light will affect each of them differently. When drawing the ear the secret is to draw each of these “parts” as though they are individual items. That way you only have a small amount of shading to concentrate on at a time and won’t get overwhelmed by the mass.
Construction Lines
We will draw this ear today:
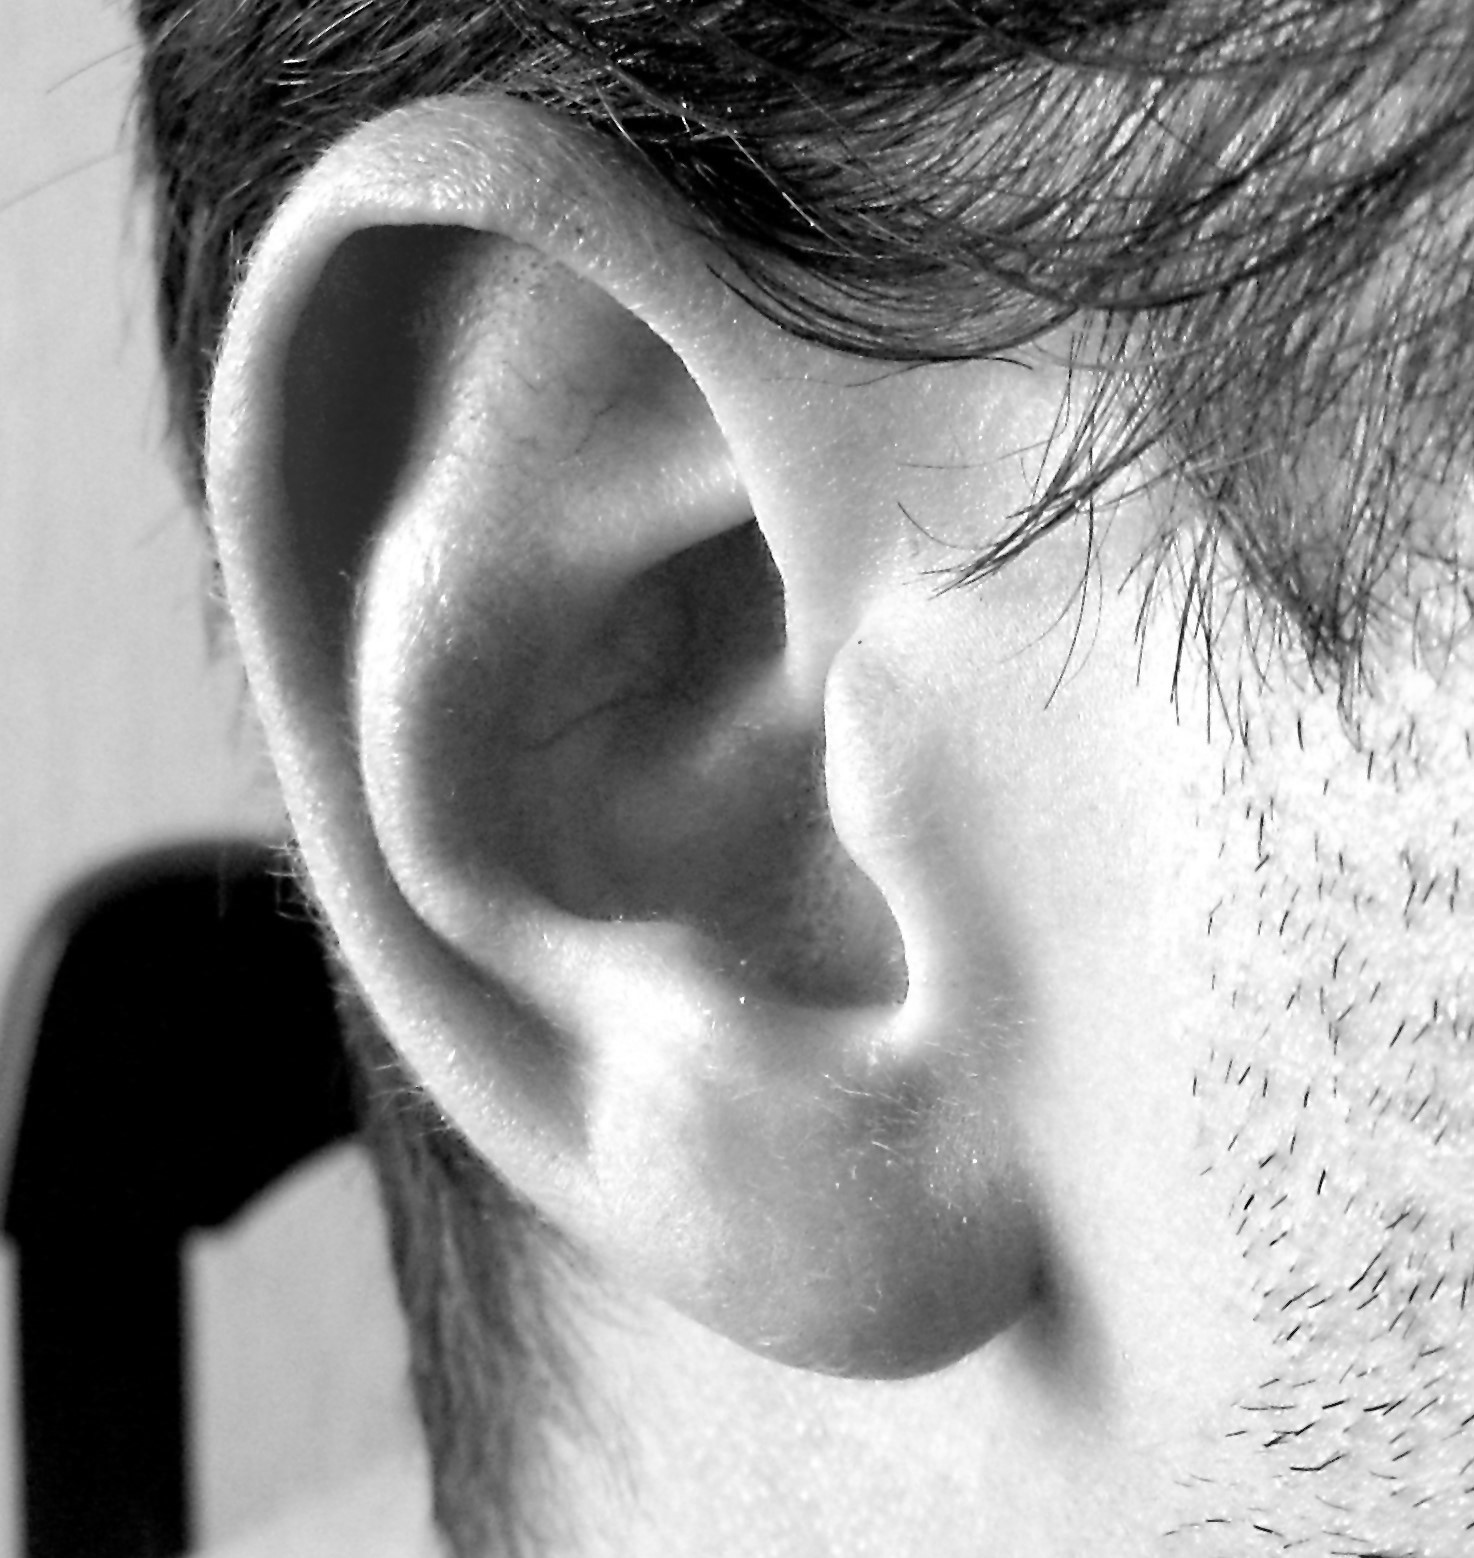
When drawing the ear look out for found lines as well as transitions in tone. Just to be sure you know what a found line is, here is a quick explanation:
Lost and Found Lines.
A found line is an instant transition between two colours or tonal values so that they form a line or edge. Here are a few examples to illustrate:
You would see a found line when looking at the corner of a wall. In this case you have a sharp change in angle between the two walls so the light will hit each wall differently.
You would get a found line when you have two overlapping objects. As you have distance between the two objects you see the edge where the one object stops and the other starts as a sharp line.
Another example of a found line is when you paint two colours next to each other. Where the two colours meet forms a distinct edge.
A lost line on the other hand is when two colours or tonal values blend into each other so that you can’t see where the one stops and the other starts. The best example of this would be a ball. As it is round, the colour and tonal value gradually changes from light to dark without any edges or discernible lines where the colours change.
You will find both lost and found lines when looking at an ear, let me show you.
Here you can see the found lines marked in our reference photo:
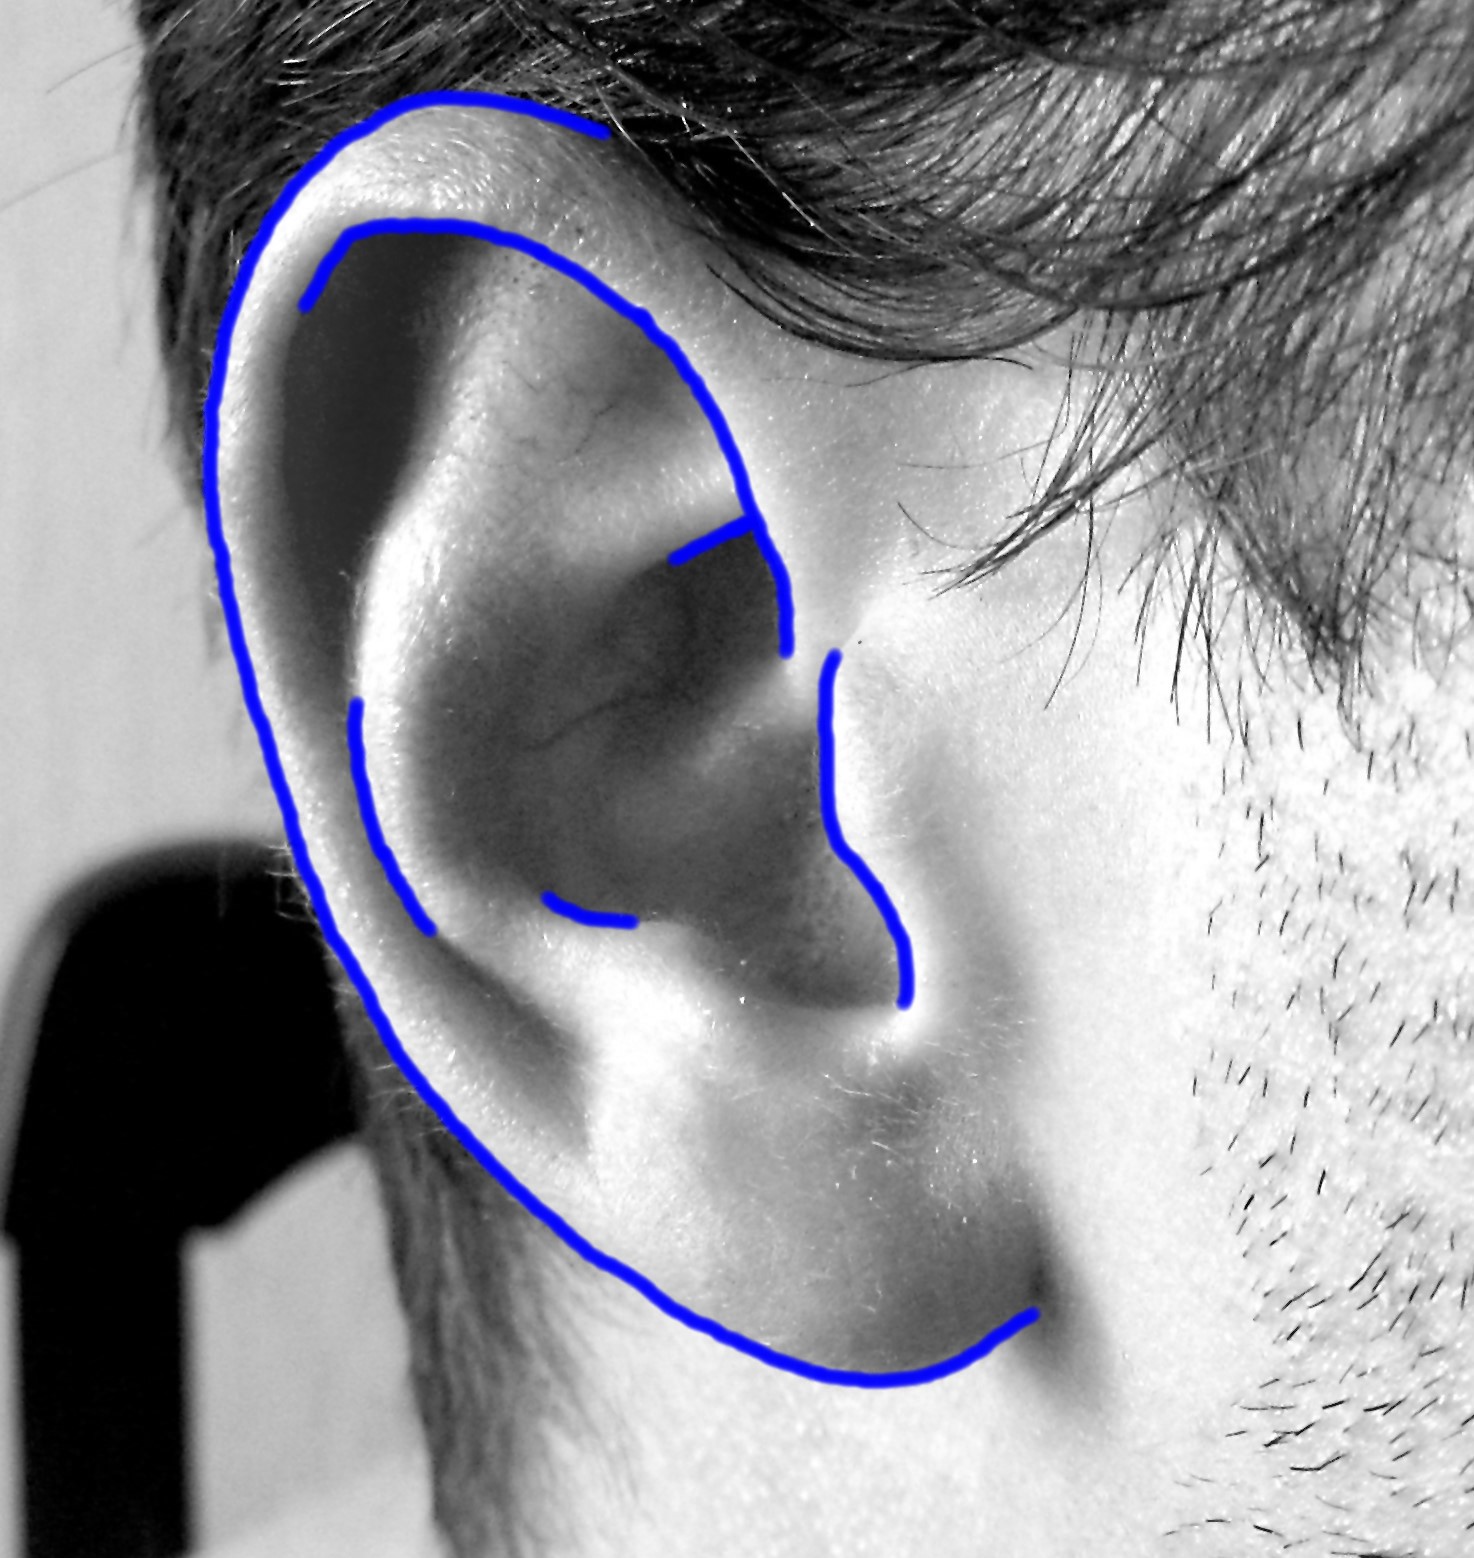
All these found lines are formed because of overlapping so you see the edge of the front object and then the back object.
There are also many lost lines in the ear. These are formed because of tonal value changes. The light catches the humps and bumps of the ear in varying degrees. As these humps and bumps are roundings and not corners the transitions between light and dark are smooth as well. These transitions are usually found where the one “part” of the ear starts and the other stops. When drawing my construction lines for the ear I will look out for these lost lines and draw them in lightly.
Here you can see the lost lines I have sketched in for our drawing:
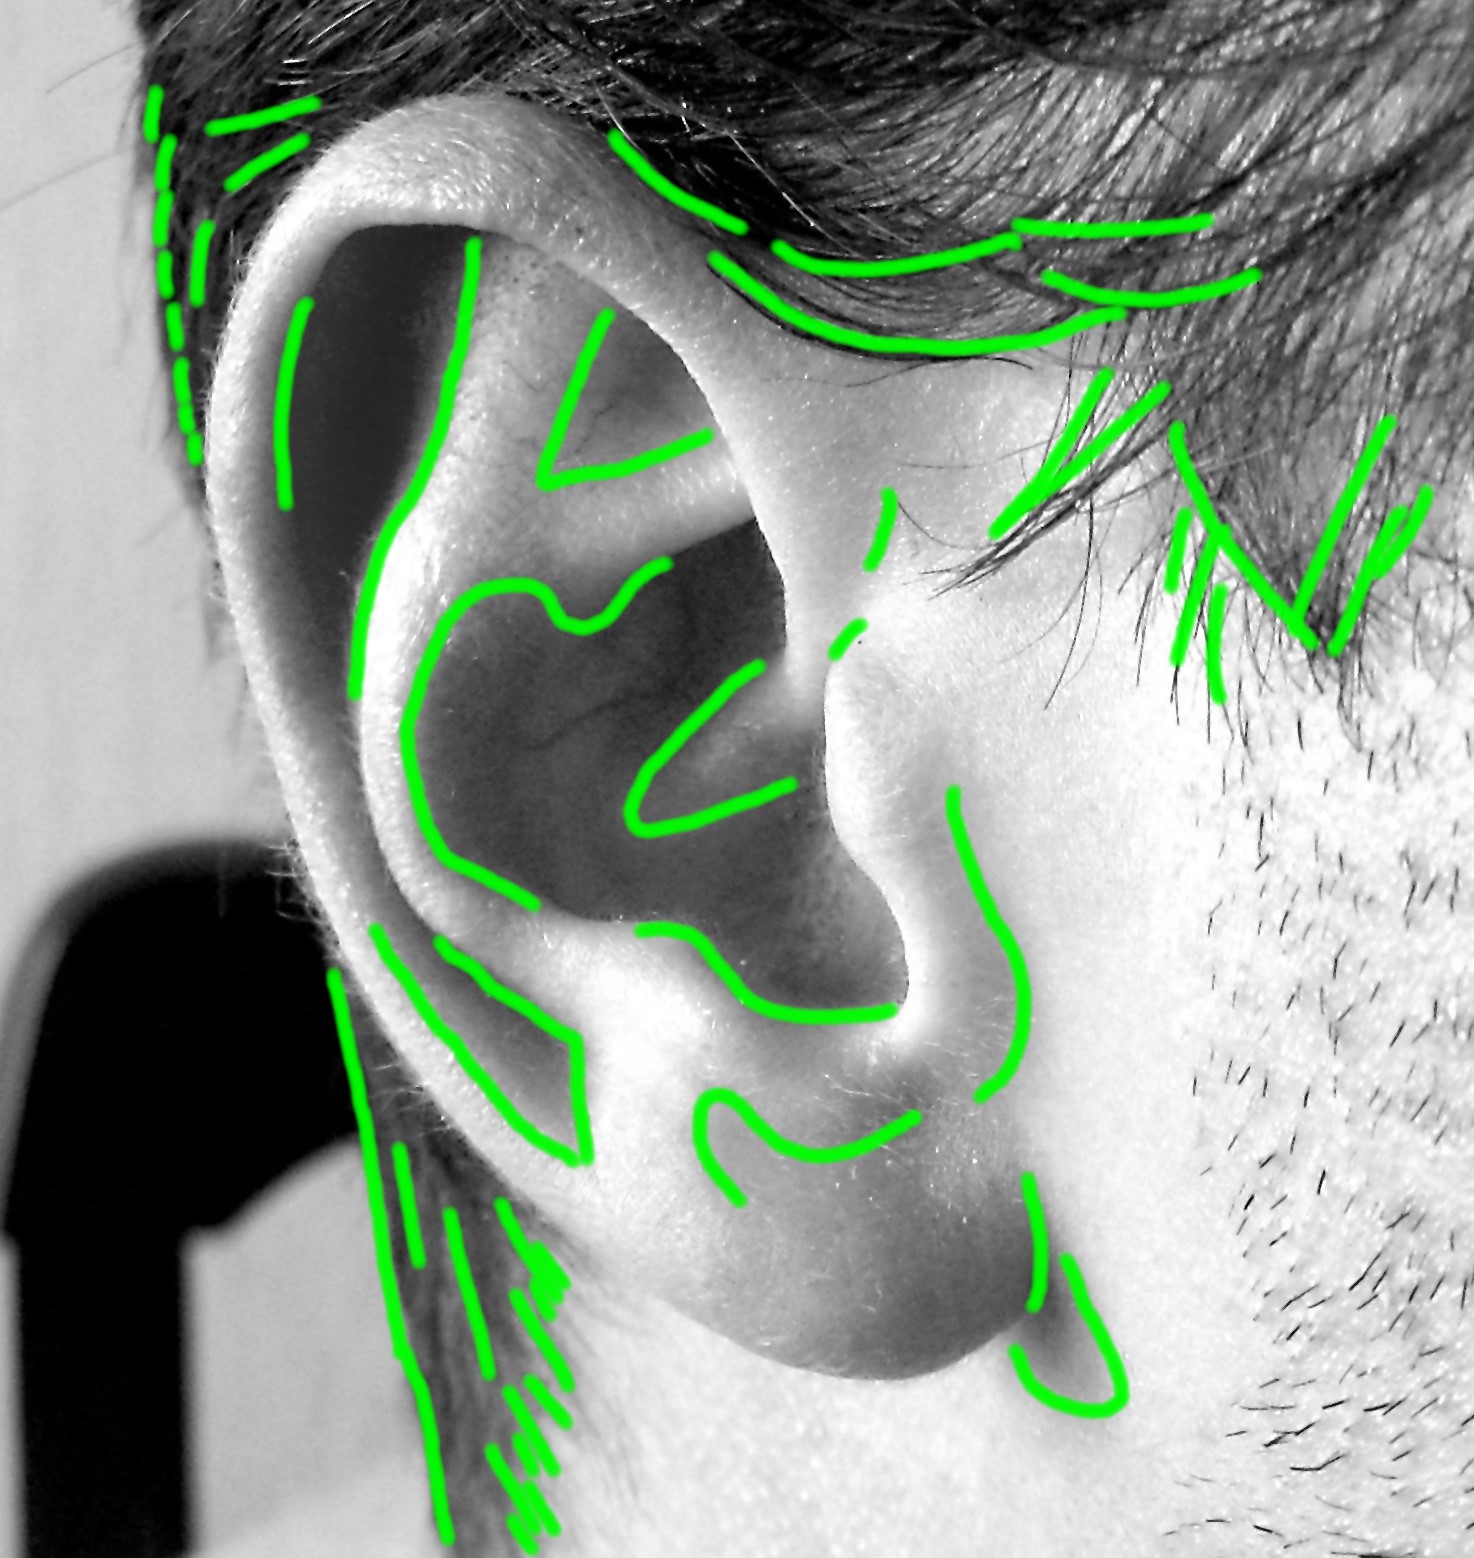
Just remember to draw in these lines lightly, they are just there to remind you where the transitions are so they can’t be so dark that they shine through in the final drawing.
Where to Start Drawing
I usually recommend that you start drawing from the back objects to the front objects, but as the ear is pretty much one continuous series of shadings you can start almost anywhere.
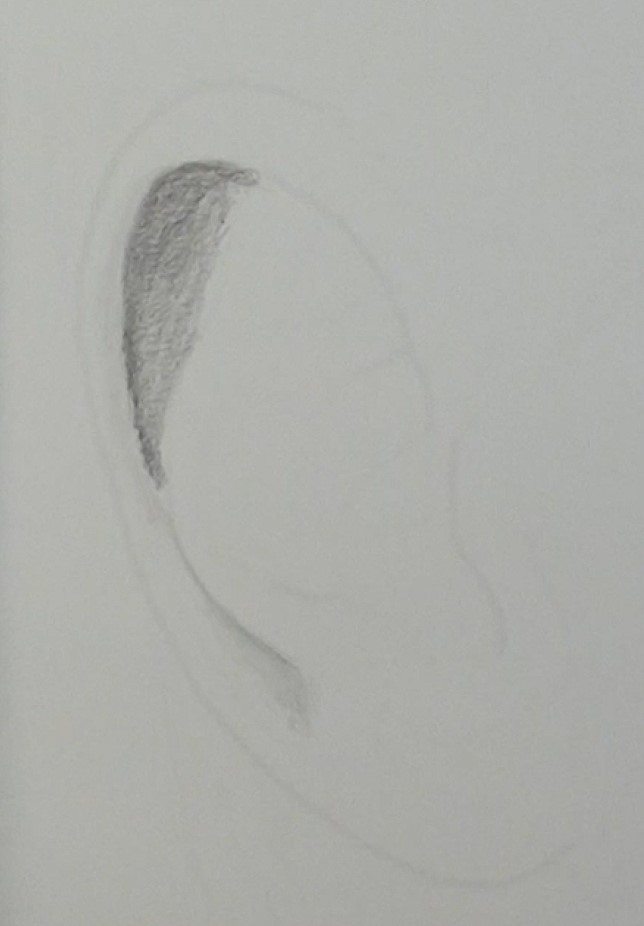
I will start with the Helix. Using a 2H start to shade the outer curve of the Helix. Then use a B pencil to lay down the basic shading of the shadow cast by the Helix on the Anti-Helix. What I do at this stage is just get the basic shading in place and don’t try to get the tonal value correct. This way I can quickly get a feel for the shadings and shapes in order to better visualise the ear, but can easily correct any mistakes.
When shading with pencil it is important to not press hard with your pencils. That is why you get different grades of pencil. The H pencils are hard and will give you light shadings, the B pencils are softer and will give you darker shadings. This is how the pencils are graded:

[adinserter block=”83″]
By not pressing hard you are able to erase any mistakes you make at any stage of the drawing process. The only time you apply pressure with your pencil is with the softest pencils (6B to 9B) in order to get your darkest dark tonal values. You only do this at the final stage of the drawing process.
Here you can see what the ear drawing looks like at this stage:
With the basic Helix shading added move to the Concha. Add some basic shadings into this area with a 2H pencil:
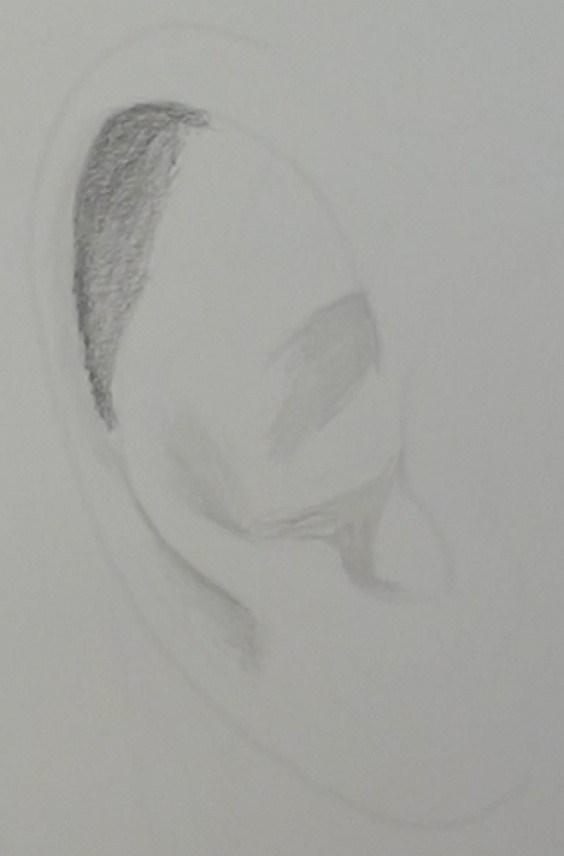
Do the same with the Lobe and Anti-Helix:
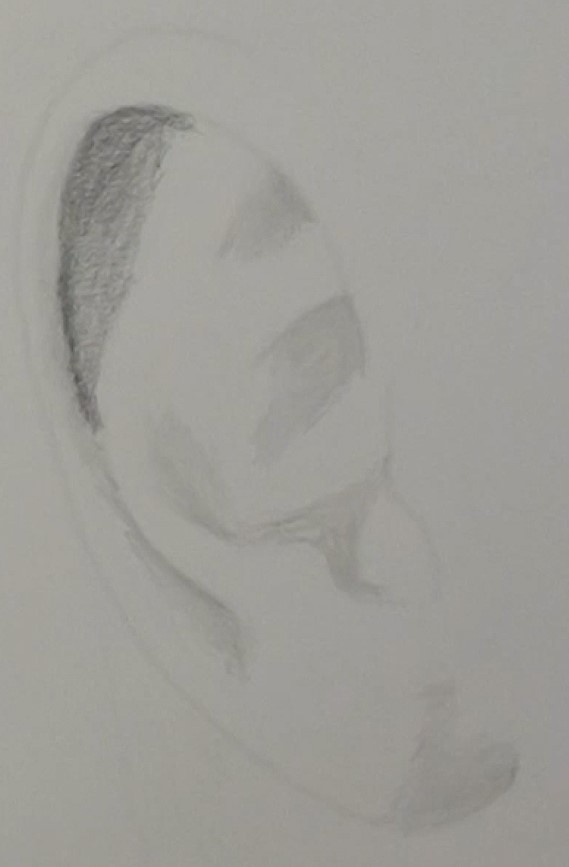
As you can see we now have a good feel for the shape of the ear. From now on we will gradually build up the tonal values of each part of the ear.
What is important at this stage is to keep comparing the tonal value of the area you are drawing with the tonal value on your reference photo to ensure they are similar.
Then also look out for changes in tonal value to ensure you get the changes correct. For example this dark area of the Helix is not just one tonal value, it gradually shades lighter and darker as more or less light reaches each area:
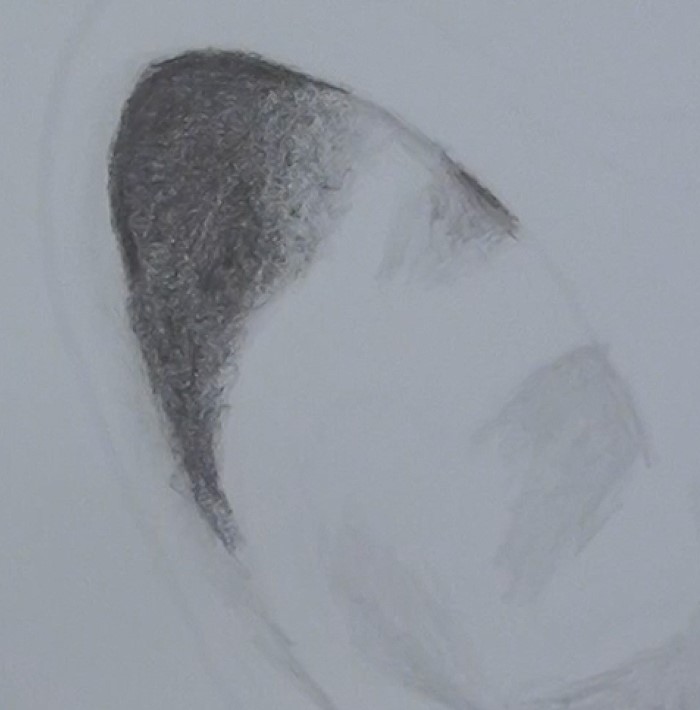
Start with a harder pencil like an HB or B and gradually go darker by moving to a 2B then 4B and so on until the tonal values are correct.
As a general rule of thumb you will find that areas you can “look into” will go darker and areas that are higher will be lighter.
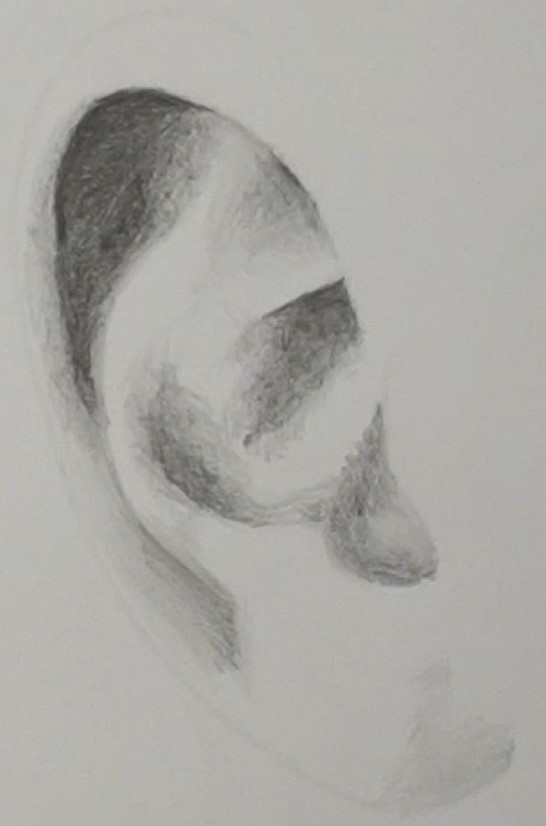
Next move on to the Concha and gradually build up the tonal values in that area. Ensure that any found lines end in a nice sharp edge. This is what my drawing looks like at this stage:
[adinserter block=”83″]
With the Helix and Concha shaded it is an easy task to complete the Anti-Helix as all you need to do is see how the Helix and Concha meet to form the Anti-Helix. Look to see if they meet as a narrow quick shading or a broad slow shading:
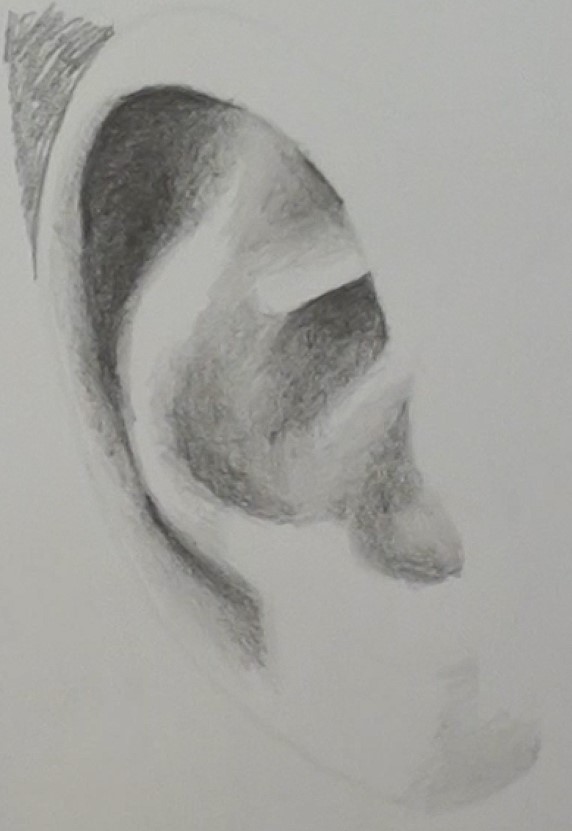
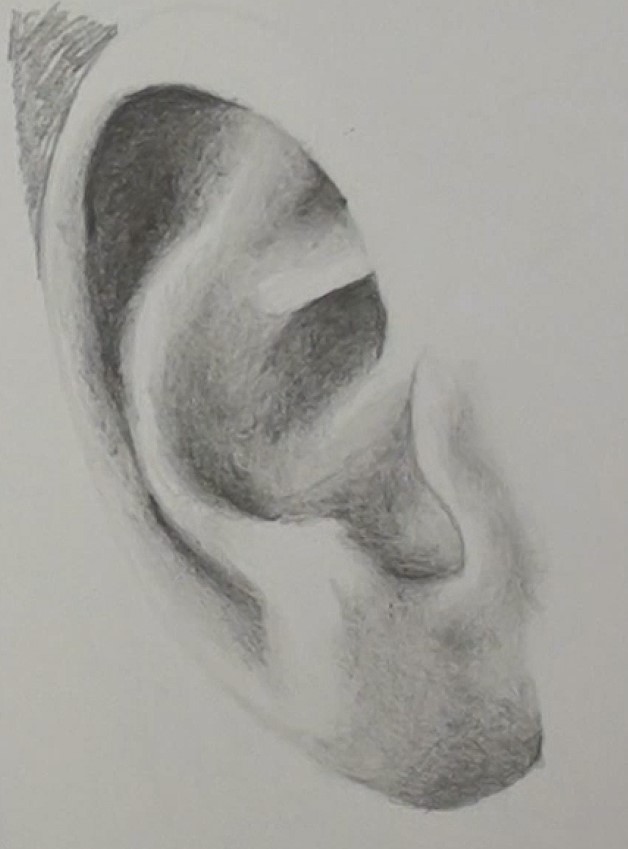
Our ear is nearly complete so let’s move on to shade the Lobe, Tragis and Anti-Tragis :
When shading the Tragis ensuring you have a nice sharp found line where the Tragis overlaps the Concha. You will notice that I have actually added a very thin line to really emphasise this sharp edge. If you do the same, ensure that you don’t make the line too thick, it must look like you have outlined the edge. If you step back this line must not be visible.
Also add a light shading to the skin in front of and behind the ear.
You can now suggest hair using short, sharp strokes with a 6B or 8B pencil:
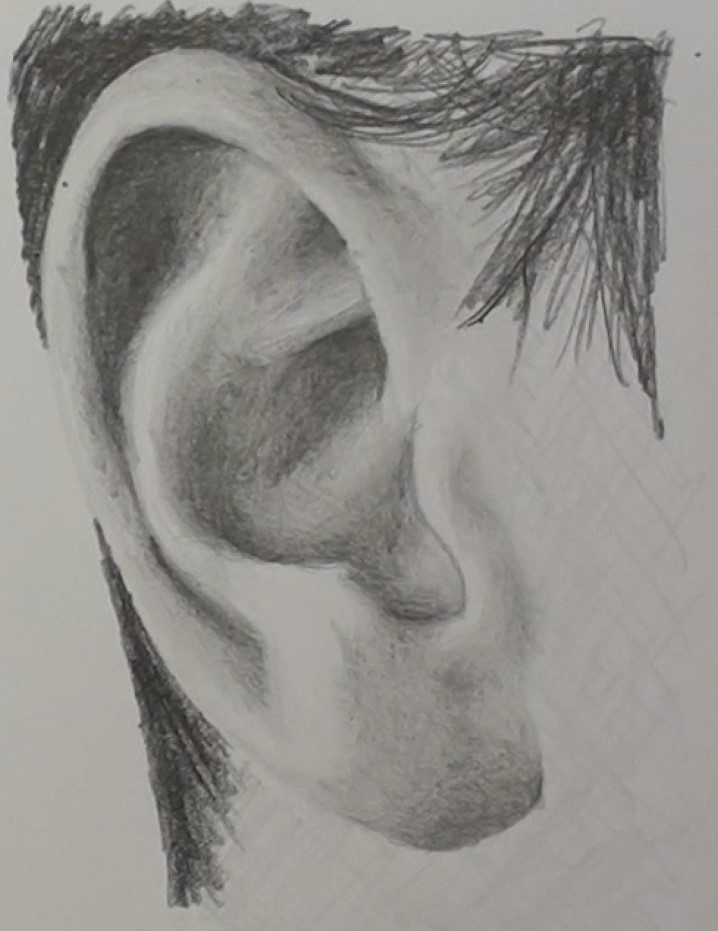
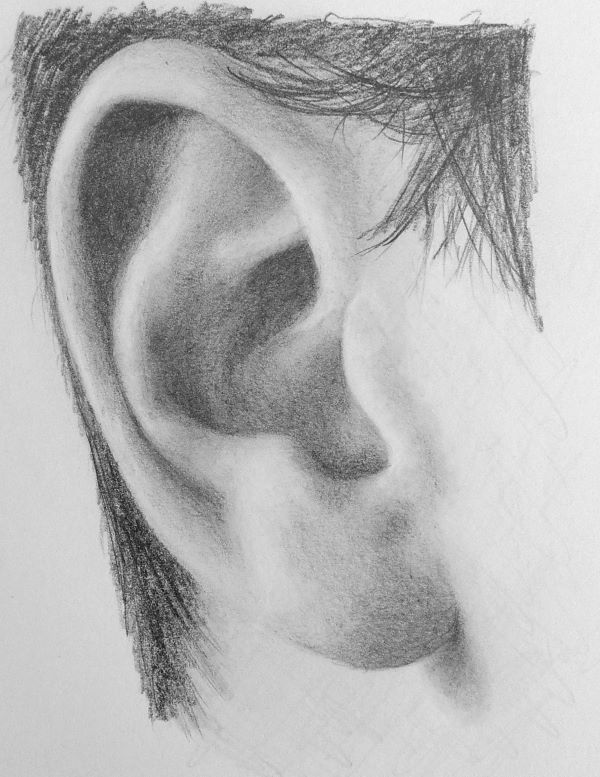
Lastly to show that the ear is not flat against the face add the cast shadow below the Lobe. The shadow is dark against the Lobe then quickly fades lighter.
Finally stand back from the drawing and see if there are any tonal values that need to be refined.
Here is the completed drawing:
I hope you enjoyed this lesson on how to draw an ear from the side!
Be sure to visit Nolan’s Website and Download his Drawing Course Today!
Artist Bio
Nolan Clark has been teaching artists to draw and paint since 2000 in his studio in South Africa. In 2008 he emigrated to New Zealand and took his teaching online. Since then he has taught over 3 million people to draw and paint. He works in many mediums including pencil, pastel, oil, acrylic and scraperboard. He specializes in taking beginner artists and teaching them how to draw and paint realistically using his easy to master techniques.
Pencil Drawing Made Easy

I wanted to also take this time to tell you about a course Nolan is offering via his website here.
It is a pencil drawing course that specializes in teaching beginners how to draw. The course itself is online video, so you can access it from anywhere in the world – the videos worked perfectly on my tablet and phone.
The course teaches you how to draw ANYTHING realistically – from onions to hands to hyper realistic portraits.
The course is brand new and is currently available at less than half price as a launch special.
Go check it out, you will be glad you did:
Leave a Reply