About Leslie
 Leslie Tribolet lives on Kauai with her husband and her animals. She studied at Santa Barbara Art Institute back in the 70’s, but with pencil as her medium of choice. During her battle with both cervical and breast cancer, she decided to try to learn how to paint for something to do. She dabbled in watercolors and loved them, but seemed that everyone on Kauai was painting with watercolors, and that she found to be boring…..
She was introduced to the Genesis Heat Set Paints in 2007, and loved it because of the ease of finishing her work quickly, without having to wait for the paint to dry and it was “different”. These paints are dried with heat, (heat gun or an oven) which speeds up the process and it is great, especially with living in the humid air of Hawaii. She has always been drawn to ethnic faces, so she decided to try her hand at painting them with these paints, and it worked. She hopes that you enjoy looking at them as much as she enjoys painting them.
Visit Leslie’s Websites today:
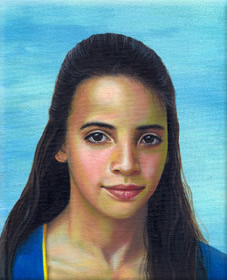 Portrait Painting in Genesis Heat Set Paints
My name is Leslie Tribolet and I am going to walk you through painting a portrait with Genesis Paints. First let me introduce these paints, as they are virtually unknown in the art world. These paints were invented by a couple of artists who were tired of their mediums being in control of their painting experiences. When they painted in oil, they would have to wait and wait for the paintings to dry, and when they painted in acrylics, their paintings very often dried too fast. Thus, the invention of Genesis Paints came about. Genesis paints allowed the artist to have complete control of the painting process as Genesis Heat Set Paints will only dry when heat is applied, hence the name “Heat Set”.
I was introduced to Genesis approximately 6 years ago and have never looked back. I paint in watercolors now and then, but other than that, I strictly use Genesis. I was hooked from the beginning for many reasons, the ease of use and the lack of wasted paint being at the top of the list. With Genesis, because the paints never dry, I could set up as many palettes of colors as I wanted, and never have to worry that they would dry up and be wasted. Amazing! This also meant that I could leave my brushes out, filled with paint to come back to and use another day. No clean up which was a huge time saver for me and wonderful that I wasn’t ruining my brushes with all the excessive cleaning. A time and money saver!
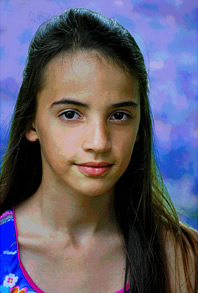
When I start any of my paintings, the first thing I do is to put a copy of the reference photo on my Ipad. I paint from the Ipad as it allows me to zoom in and out and see details more clearly. The second thing I do, is posterize the photo. This allows me to see the undertones very easily – this can be done with a number of photo programs available on the iPad, or in photoshop.
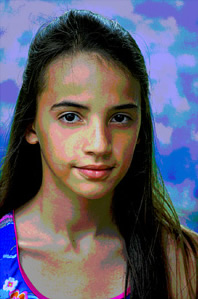
The three examples below clearly show those undertones, or colors that are necessary to get on the canvas. I have a difficult time seeing them with my naked eye, so I let the computer do it.
 |  |  |
The canvas has been prepared here with a simple look of blue and white. I chose these colors because orange, or the basic color of her skin, is the color compliment to blue. You always want to make sure that you are using colors that are complimentary to one another.
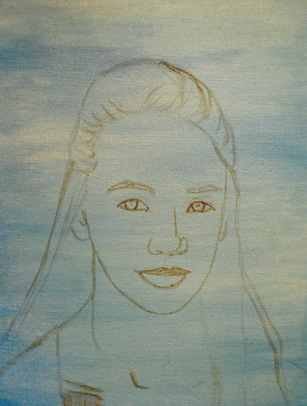
To get perfect proportions from the beginning, I imported her photo in photoshop and converted it to a grayscale image. I then printed a light copy of the image in a size that is appropriate for my canvas. I then attached the print to my canvas using masking tape (IMPORTANT: Do not use scotch tape as it will leave an unwanted residue on your support). I then put a piece of transfer or carbon paper in between the copy and the canvas. I then go over her picture with a hard pencil. This will give me a nice outline to work from. Now I have my proportions correct, so I won’t be continuously erasing and correcting my lines.
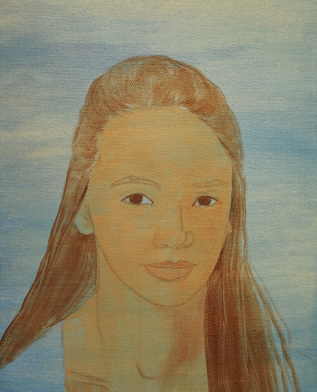
I like to paint in layers. This is a photo of what the painting looks like after the first layer of Genesis has been applied.
It is thin and dull and will look like that for several layers, so don’t be alarmed or discouraged. I dry each layer of paint completely before applying another layer. There are several different ways you can dry these paints. You can use a heat gun, a toaster oven, a kitchen oven or a special Genesis cooking box. I have used all of them with success. I do however recommend that you start with a heat gun before investing in something larger and more expensive. Heat guns can be conveniently purchased at any hardware store, like Home Depot for instance. They work very well and are very easy to use. You simply run the heat gun back and forth, across the surface of the painting for approximately 2 minutes to completely dry each layer.
At this point of the painting process, I am going to the posterized photos to see what undertones I need to get on her face. The painting is going to look awful for a while, but trust me that you have to do this for the face to look real. Your skin is orange and your veins are blue – what happens when you put orange and blue together? You get green, thus the green hue to the skin. I have a hard time seeing these colors, so that is when I go to either the Ipad’s program or to the computer and Photoshop and posterize the photo. Believe what the programs show you and paint what you see. All of these colors will be undertones in your painting that you must have while painting a portrait. If I were to paint her with only what I see, the fair skin tones, she would look like plastic or not real. Get them on the canvas and dry these layers before moving on to the skin tones.
There isn’t much difference here, but you can see how these undertones are very important to have on the canvas. They show, but just lightly under a new layer of skin tone colors. Again, this layer is dried before moving on to the next layer.
One advantage of having a dry canvas, is that I can lean my hand directly on the painting if I want to. You can’t always do that with oils. My paintings are bone dry in 2 minutes with Genesis Heat Set Paints.
When I get to this point with my paintings, I often want to throw them in the garbage. Seriously, I have tossed them in there only to retrieve them to keep going. Often it is only because I don’t want to start from scratch again! So don’t be discouraged, the painting will come to life with a couple more layers of paint.
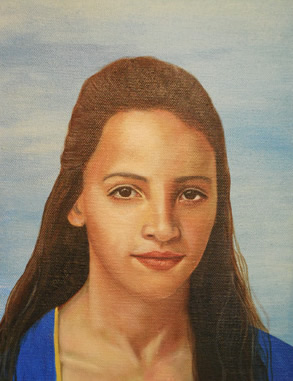
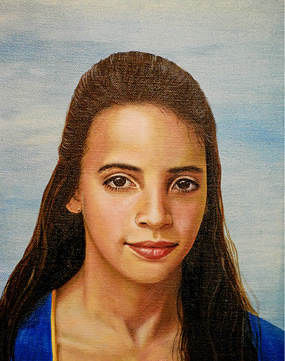
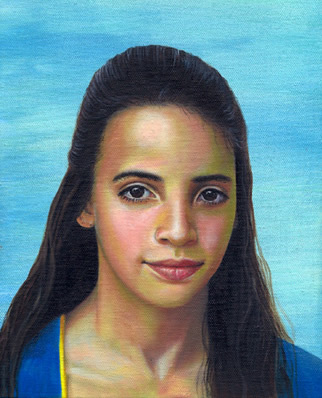
This little girl was adorable and I wanted to show her sweetness in the painting for her folks. So, I stared and stared at her face trying to pick out the features that showed that and then tried to get them onto the canvas. Layer after layer, painting and then drying, she started to come to life and show herself. Don’t give up when your paintings don’t look the way you want them to…they will come about eventually.
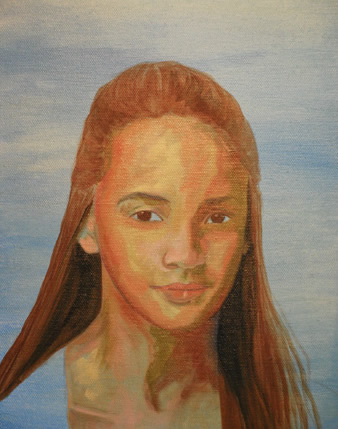
This photo below shows a bigger problem that I have run into. I have lost her. She is gone and I am having a hard time seeing where it happened in the painting..
There are two different techniques that I use to show me where I have gone wrong with the painting. The first thing I do is to hold the painting up in front of me facing a mirror. I look at t in the mirror as it is like having a new pair of eyes. You will be amazed what you see in the mirror that you don’t see with looking straight at the painting.
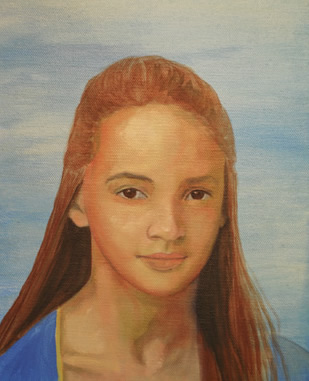
The second technique I use is to take a photo of the painting, put into the computer and then bring it up next to her actual photo. You will quickly see where you are off. I was able to see that her nose was too low and her lips were too high. That mistake had changed her features so much that it no longer looked like her.
This is not a great quality photo, but it shows the painting right before I was considering it finished. I am pretty happy with it, but also thought that it looked a little dull.
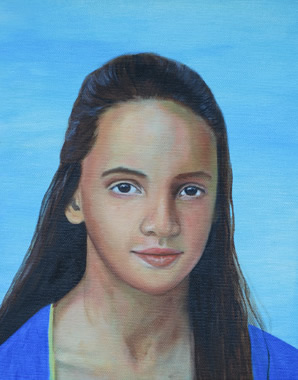
So I went back to my posterized photos and took another look at some of those undertones. I decided to add them back into the painting and then add another light layer of skin tones. Below is the photo of the completed painting with those changes. I am happy with how she turned out and her mom loved it and that is the real critic that I cared about.
With the painting completed I now want to talk about the benefits of the Genesis Heat Set Paints. I have been painting with these paints for about 5 years now and other than an occasional watercolor, which is completely different, I do not paint with any other medium. The fact that these paints never dry unless you want them to, allows me to have several “permanent palettes” I keep my paints on glass in a couple of double decker boxes. They won’t dry, but they will get dirty, so I keep them covered. When I start a new painting, I go to my palettes first an take the color that I will need, instead of making every color from scratch. When I am done with the painting, I scoop them up and put the left over paint on the glass palette and back in the box for another day and another painting. I don’t clean my brushes until I am done with the painting. Could be weeks. A big advantage!
For more information about the these amazing paints, either visit my Website here or contact me at leslie@leslietribolet.com.

Those instructions , are the best I had seen Thanyou.