Gelli plate printing with stencils offers artists a unique method to create layered, textured art pieces. This technique involves applying acrylic paint to a gel plate and manipulating it with various stencils to produce intricate designs. Artists press the paper against the plate, capturing vivid prints that reflect their creative vision. The process is direct and visceral, allowing for spontaneous expression and experimentation. As colors blend and patterns emerge, each print becomes a distinct reflection of momentary artistic impulses.
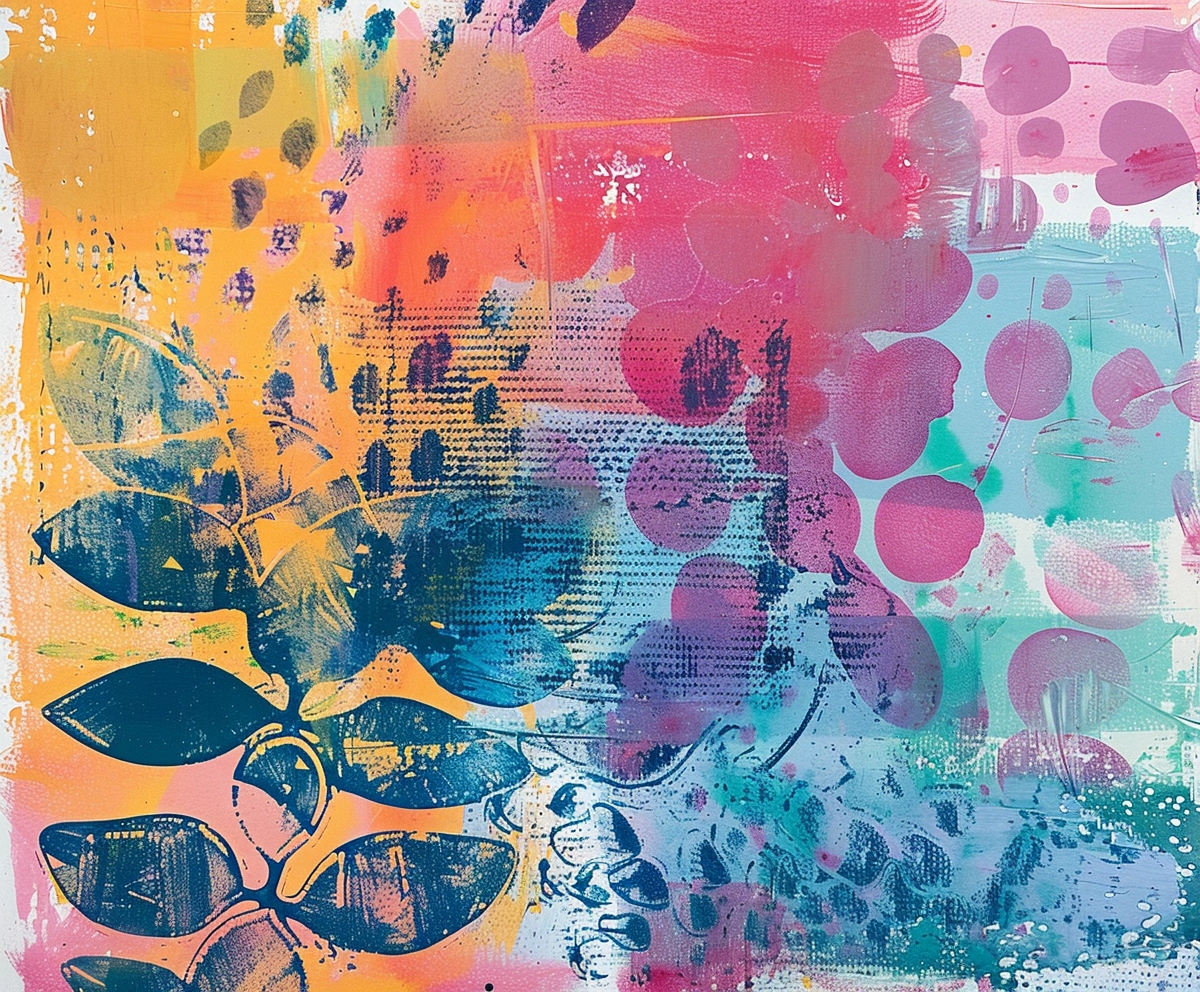
In this video, Vikki Reed introduces us to Gelli plate printing with stencils. She combines these stencils with custom shapes to create unique images for greeting cards. Vikki uses a 5×7 gel press plate and materials like 24-pound copy paper and Tyvek shapes, demonstrating the process from color base preparation to stencil application. She mixes primary colors—quinacridone magenta, primary cyan, and Indian yellow hue—with fluid white for the base prints, then overlays with stencils to achieve intricate designs. The session includes troubleshooting common issues like unwanted lines from stencils, and practical tips.
As Vikki continues her demonstration, she experiments further with color and shape. Choosing to stray from her initial limited color palette, she introduces a vibrant dioxazine purple. Vikki uses this to set off a butterfly design on her gel press plate, blending it with white to achieve a softer lavender tone. She then overlays this with a stencil, remarking on the unique, personalized effect achievable with such techniques.
Vikki uses a phthalo green-blue shade, adding a touch of white to roll out a new layer. She applies a new stencil, demonstrating the unique results that stencils provide so that no two prints are exactly alike. Her enthusiasm shines as she picks up “ghost prints” from the plate, layering these to create additional visual interest and depth in her work.
She also demonstrates troubleshooting techniques for unwanted lines in prints, using a catalyst wedge to incorporate more color and blend out imperfections.
Vikki wraps up the demonstration by planning to create another video focusing on attaching these prints to note cards, responding to viewer requests, and encouraging interaction. Her closing remarks underscore her passion for teaching and helping others explore their creativity through art.
Visit the Artist’s Youtube Channel Here
Color in Color – Stencil Fun with Gelli Arts® by Birgit Koopsen
In the video, “Color in Color – Stencil Fun with Gelli Arts® by Birgit Koopsen,” Birgit Koopsen, showcases a specific technique of Gelli plate printing with stencils to create layered, colorful prints. Here’s a more detailed walkthrough of the process:
- Preparation of the Printing Plate: Birgit begins by applying an even layer of acrylic paint onto the Gelli Arts® gel printing plate, which forms the base color of the print.
- Placing the Stencil: Birgit carefully places a stencil over the gel plate once the base layer is ready. The stencil has various cut-out patterns that will define where the second layer of paint will be applied.
- Removing Excess Paint: With the stencil in place, Birgit covers it with paper and presses down firmly. This step is crucial as it helps to remove excess paint from the open areas of the stencil, ensuring that the colors do not blend prematurely and that the patterns are crisp.
- Applying Contrasting Colors: After lifting the paper, she uses a makeup sponge to dab contrasting colors into the open areas of the stencil. This step is where the ‘color in color’ effect starts to take shape, as these contrasting colors fill the negative space with vibrant patterns.
- Removing the Stencil: Carefully, Birgit peels off the stencil from the gel plate, revealing the multi-colored design, which is now ready for the final layer.
- Final Layer and Pulling the Print: A thin layer of white acrylic paint is spread over the entire plate to complete the print. This layer helps to pick up all the underlying colors and patterns when the print is finally pulled. Birgit ensures the white paint is still wet when pulling the print to maintain the vibrancy and clarity of the design.
- Revealing the Final Product: The paper is then gently lifted from the gel plate, showing a colorful, patterned print with a professional finish.
This method opens up a world of exploration for artists, inviting them to play with a myriad of color combinations and stencil designs. It’s a technique that sparks creativity and offers endless possibilities. Birgit’s clear and practical instructions make this technique accessible for artists at any skill level who are eager to dive into the world of gel printing and stencils.
Visit the Artist’s Youtube Channel Here
Gel Plate and Stencils – Tutorial Tidbits
In the video “Gel Plate and Stencilsidbits” by Elizabeth St. Hilaire, Elizabeth shares a creative process using Gelli plate printing with stencils during shelter-in-place. Elizabeth demonstrates the therapeutic aspects of art, inviting viewers to engage in the simple joy of pushing color around with no specific end goal—just the act of making art for art’s sake.
The video serves as a guide for those new to using gel plates and stencils.
Elizabeth uses basic materials:
- Any available paint
- Simple paper (not necessarily high-quality or expensive)
- A stencil of her design
She stresses that the activity is accessible for all ages and skill levels, encouraging viewers to involve family or housemates in the creative process.
Elizabeth prepares her workspace with a non-stick craft mat and a gel plate. She then demonstrates how to apply a base layer of paint using a brayer and introduces a stencil, explaining how to add designs over the base layer. Throughout, she uses a book on plasma physics as a source of paper, humorously noting that the content, which is complex and unrelated to art, makes the book perfect for crafting without reservations about wasting valuable resources.
The tutorial is relaxing and enjoyable, and focuses on exploration and play rather than perfection or productivity. Elizabeth’s approach is straightforward and inviting, making it easy for viewers to start creating their art with whatever materials they have.
Leave a Reply