The following oil painting demo is courtesy of Philip Howe of Philip Howe Studio. When you are finished viewing this demonstration, please take a moment to visit Philip’s site to view more of his artwork. Thanks and enjoy!
“Caverna Magica”
Here is a fairly comprehensive oil painting demonstration of the painting Caverna Magic. This 7 ft painting took approximately 2 weeks total, but I worked on this for nearly a month, skipping several days in between to allow for glazes or reworking areas opaquely and letting paint fully dry.
This painting was unusual for me in that I usually am very direct about the
overall feeling of light and the final look I want is clear in my head before I start.
The background and the final overall lighting went from a cooler tone, initially, to a warmer final look, and that was a bit of a surprise.
I like when a painting takes on something of a life of its own and begins to suggest new ideas and a psychology to interpret.
Artists who paint more expressionistic or impressionist works, even realists, know how a painting can become something more on its own as the color and mood shifts in each stage of finish. Its a fascinating thing to watch, often frustrating, but if you stick with it, as I encourage any student to do, you often come up with something that is much more fulfilling than your initial idea.
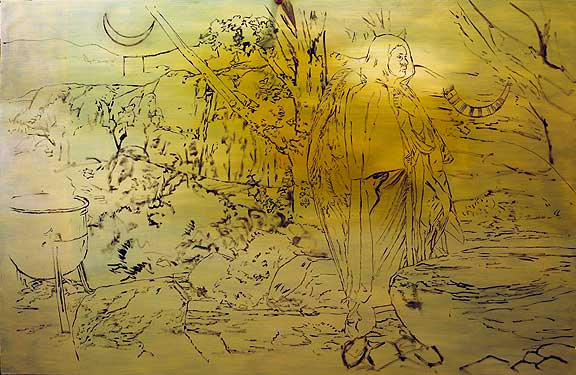
Caverna Magica- rough line over ocher toned canvas
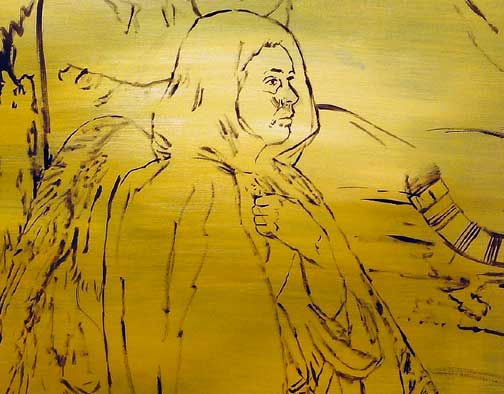
Alkyd black rough drawing detail
I started this piece by coating a tightly stretched canvas with an opaque tone of yellow ochre and let this dry for days until I was ready to draw out the design. On the computer I worked out a full design digitally and was fairly confident I had something close to work from than encompased the overall idea I had initially sketched out.I used an alkyd black and drew this out quite rough, just indicating tick marks here and there and some line work to indicate where the shadow and light breaks were.
I intentionally kept this drawing loose and knew that the black would barely come up through my initial block in layer, which is always opaque. Over the ochre tone, as opposed to white, I immediately could feel the halftones without spending a lot of time indicating unnecessary detail at this stage.
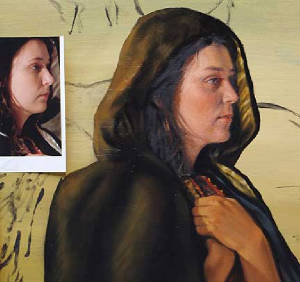
Blockin of figure
Here you can see the photo reference for the head, which I followed somewhat faithfully. Most of my work is made up from an initial source, whether its photographic, sketches, studies or what I see in my head.I see no advantage to working with models from life, in fact its a real hindrance and it can lead to a very limited conceptual and creative approach.
The reason being that if you limit yourself to only what you can set up and see, meant to follow as you paint, then there is a natural limitation as to what you can realistically set up and the tendency is to set up whats available, including the lighting.On the other hand- some of the best work is done from live models and I can say honestly that you can see a lot more to work from and the color is more natural. But after having illustrated for so long I find it easy to make up color and certainly prefer to invent rather than copy.Either way, whatever works for you is best, but for those unfortunate critics who feel the only good art is that produced directly from life, thats just so much sales talk and hype and ignorance.
Its like saying the best landscapes are plein aire works, when there are great landscapes created with no reference at all and some with nothing but copied photos while others are done with a completely different design or painted approach, even abstract.I think its like every thing else, listen to your inner voice and do what you want and enjoy doing- work the way you like and you will get past the how and onto the final quality of the finished pieces.
I prefer to have friends in both camps.
Below you will see stages of the background being roughly laid in.
My usual technique is to quickly and loosly apply opaque paint with no medium and lay it on with either a 1″ bristle flat or filbert or a 1″ flat sable that gives me a good edge to flip around and pull edges into each other.
Once this heavy block in throughly drys, my intention is to patina or glaze over every area with more transparent paint and oil is perfect for playing with such color effects.
Whistler did this effectively in many of his works, especially in backgrounds where he wanted a more abstract and textural look.
Its the only way I can get rich, earthy, brilliant color as opaque paint alone can not give the same full inner sheen as a patina or glaze.
A true glaze, by the way, is done in multiple layers of thin transparent paint on white with no opacity in between.
I tend to paint, then correct, if needed, by obliterating what needs to be changed, then patina again.
Unfortunately monitors, transparencies, prints, and certainly book reproductions can not begin to show the true translucent rich color that an original oil shows,especially under the warmer studio lighting that I use to paint under. I can only shoot these detail shots to give an indication of what the original looks like.
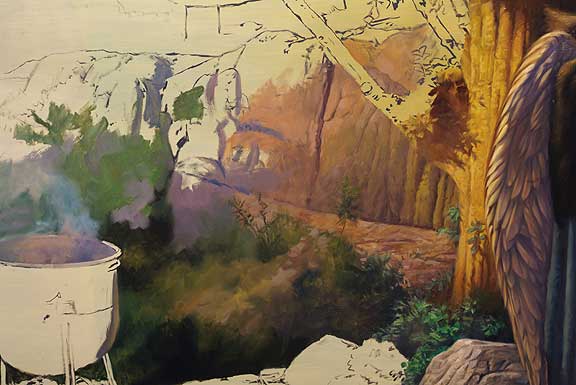
Initial background blocked in

Block in moving left
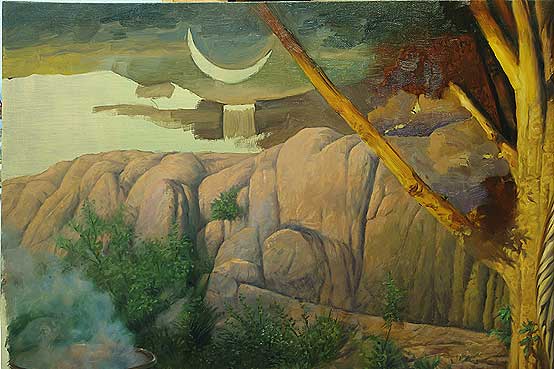
Upper left block in
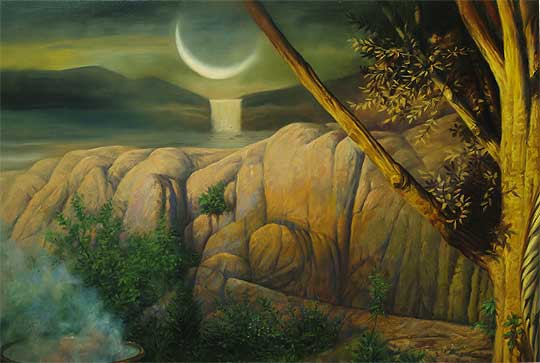
Upper left smoothed out
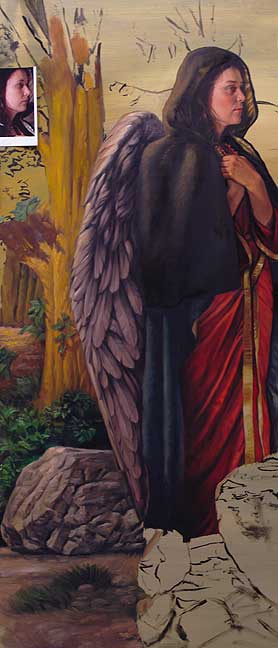
Figure blocked in fully
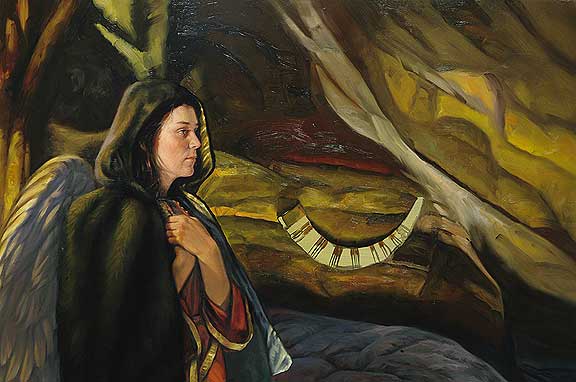
Upper right blocked in
Below is the final. If you compare this shot to the images above you can easily see how the patina layering works to warm up the opaque underlayers and give a much richer overall tone.
I use Liquin Medium for this as its the best I have found for faster drying effects and the Liquin is viscous enough to set into the dryed, matte paint to bring out all the darker areas for closer tonal matching. If you aren’t used to a slick medium, it might be a bit tricky at first, but after a few minutes it will begin to set up and eventually, in a few hours, begin to get sticky, and thats when I have the most control.
Its sounds weird, but slightly sticky paint grabs better, so if you have control of the strokes as you put them down, you will have a more receptive pull, or drag, off the brush that you can push and pull a bit for refinements, even with smaller brushes. I usually go for the bristle flats at this point and work fast, but an occasional squiggle or quick strokes of a sable flat or round often give a great transition from one area into the next without overblending, which looks boring and lifeless.
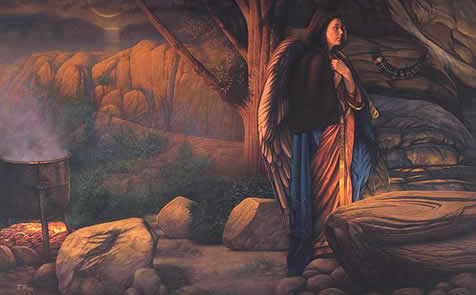
Caverna Magica Final 5×7′ oil canvas
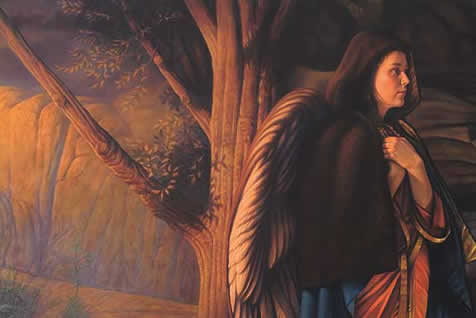
Closer shot of figure and tree final
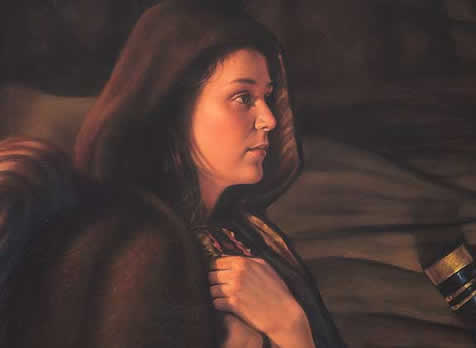
Final head detail
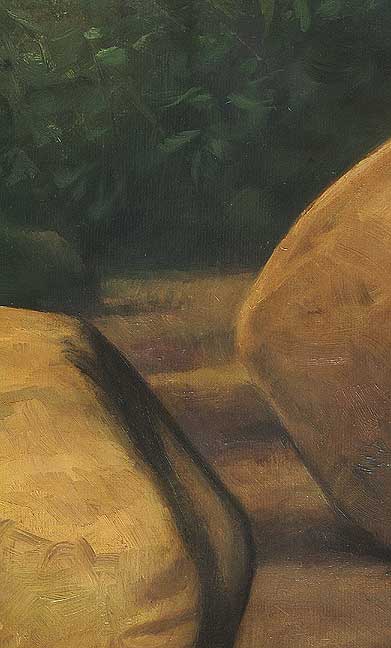
Rock showing translucent patina over heavy blockin
You can start to see a bit of the effect of the patina gold over the initial block in heavy paint in the closeup of the rock section above. The original is richer but the idea shows here, even some of the texturing.
Many students get so wrapped up in putting paint on heavily, for various reasons, and they never develop their drawing skills to be able to correct opaquely and freehand.The act of continuously painting opaquely in itself is a good learning technique as, for realists, it forces you to search for better drawing within the paint.I remember seeing a Valsequez being cleaned and restored, in process, at the National Gallery, D.C., conservation department.
The top layers had been removed on an area in the lower right of the painting, and you could see how Valesquez had drawn in black over a greenish-gray wash or canvas stain.His drawing of the hand was very clean and simple but accurate- just a thin easy black line that floated over the green tint. From that he had worked opaquely with the flesh tones and was confident from the start that he could fill in the areas within the hand line drawing and outside of it if needed.
There is another way to get a great effect, although time consuming but the finished look results in beautiful skintones or other patina effects. Simply work transparently from the start.
I don’t have the patientce for it and like the current effects I get with the opaque block in first and transparency over that, so long as its bone dry when applied as the overlying paint will dry quicker than whats underneath.
That takes some patience as well. Tinting or glazing from the start over a white ground can take several layers and the artist needs to learn which colors are opaque and which transparent (most are marked on the tubes, as a start) and I certainly have my favorites, but the results can be just beautiful.
Maxfield Parrish, Titian, Rembrant, and many others used glazing to great effect and, again, you simply can’t tell how rich and full of light the original oils are until you see them under a warm light in a museum.
They glow, and there is no other way to get that effect. Its especially effective in adding red blush and other skin coloring with a very subtle touch.
If you think about the physics of what you are painting then you can approach the work in sections and apply paint in such a way as is natural to the properties of what you are seeing. For example, the cauldron, below, is a heavy, opaque metal, so I painted it heavy and with blocky strokes.
But the steam or smoke is natually diaphanous so to achieve transparent effects you can either paint the areas intersecting the steam as it billows up, blending in and out of the background and working slightly more opaque. Or- you can paint the background as if there were no steam and then, when dry, paint the steam OVER the background, using more translucent paint as the real steam would rise naturally.
I did the 2nd approach, running 2 passes of semi-transparent cool and warm coloring as cloudy, medium heavy whispy paint that I smoothed out over the solid greenish background below it. The 2nd pass was just enough to introduce some more tinted highlighting as the smoke, where it is thick enough, would pick up some of the warm sky light just like the rocks, although less opaquely.
Think of surfaces in terms of physics and the surfaces are much easier to interpret, even made up like I did here.
Skin is naturally opaque, but there is a luminence to it as well, so some sheen, some transparency and some opacity can be considered.
Natural wood, like a tree trunk, tends to be very opaque and matte, not shiny, so the light on it has less reflective quality and more flat opacity, picking up less reflective color as well. Shiny objects reflect light better because their sufaces are smooth- like glass or metal- where polished metal reflects more shine than dull metal which has a scratched, work surface. Dull objects tends to be a little less rich or saturated.
If, say, paper is wet, or sand, then the area where the wetness is, is much more shiny- because the moisture creates a smoother shiny surface. Its fascinating to start to think of how every surface is different and can be figured out for the painter who wants to achieve more realism in his or her work.
Every realistic painting is a simulation of what is real anyway, placed on a flat surface.
Its all tricks to fool the eye, so why not learn how physics react on surfaces to make it easier to interpret or invent new images.
Once you get the basic ideas down you can begin to see how everything is relative and how easy it is to create or invent areas rather than elaborately copy what is before you.
You can retain information simply by looking and observing nature and translate those experiences into a visual statement that makes sense and has clarity and logic instead of just painting what you see and not relating to or understanding why objects look real in any given space.
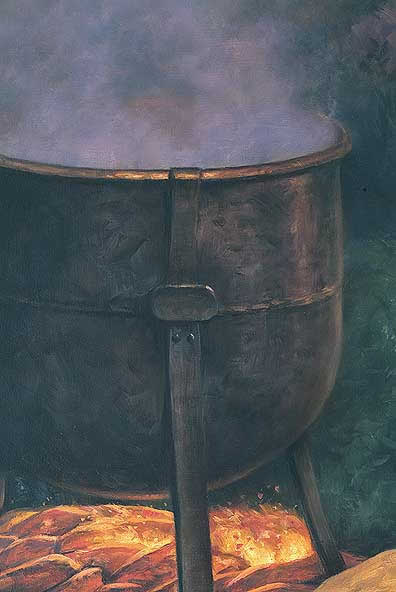
Cauldron section
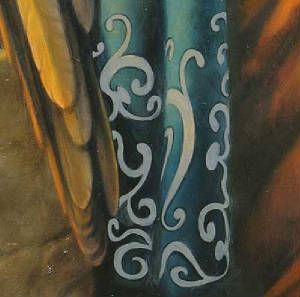
Cloth design blockin
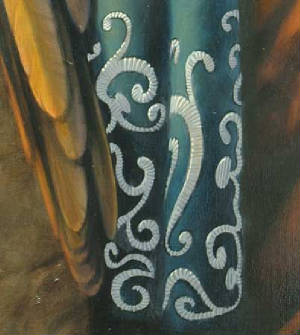
Cloth detail stage 2
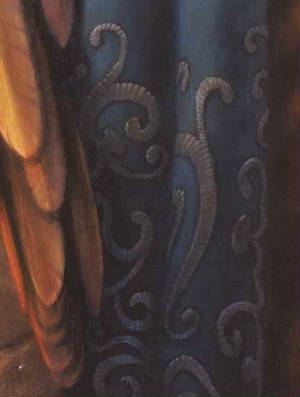
Final darkening of cloth detail
Hi Philip,
Love your site, it helped me to think consciously about visual contrast of textures in a painting instead of just instinctively. What should give me more control in my paintings. I am still new at using glazes and oils, but will now try them! Your work is beautiful and mystic.
Thanks, Sherri
Really comprehensive demonstration, thanks for giving this chance to see the process of art borning. I love oil painting but I’m an amateur, my problem is coloring.
That was so coll paint. It helped me to think consciously about visual contrast of textures in a painting instead of just instinctively. What should give me more control in my paintings. Thank you.