About Brandi
Brandi Deziel is a self-taught photorealism painter living and working in Toronto.
She creates the illusion of a photograph by layering crisp images with soft, blurred backgrounds and foregrounds thus shifting the attention to the focal object and deceiving the eye.
Her work is included in private collections world-wide.
Enjoy the following step by step tutorial that will demonstrate some essential acrylic painting layering techniques that every acrylic artist should know. Enjoy!
Brandi Deziel’s Acrylic Painting Method – Layer by Layer
The following is a step by step look at how I layer acrylic paint. Its not a right way or a wrong way, its just how I do it. The process has evolved over a few years and will continue to evolve as I grow in my painting career. It doesn’t go into detail about brush strokes or the colors/materials I use, but is meant to show how I achieve my blending and final luminosity in my work. Before all of this begins, I have set up a still life composition (this one in particular was set up on my bedroom floor) and then I photograph it from various angles using various lighting techniques. That all then goes into my computer and I come up with a composition to draw from. Enjoy.
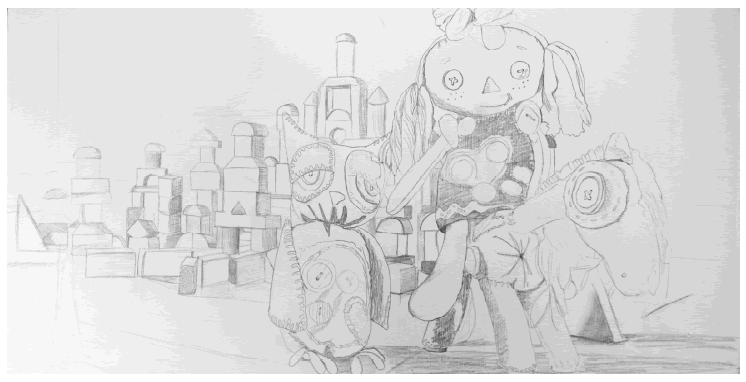
I start with a line drawing. I do this straight on the board. I don’t make it as detailed or refined as I would a finished pencil drawing, but its enough to give me the shapes and the basic darks and lights.
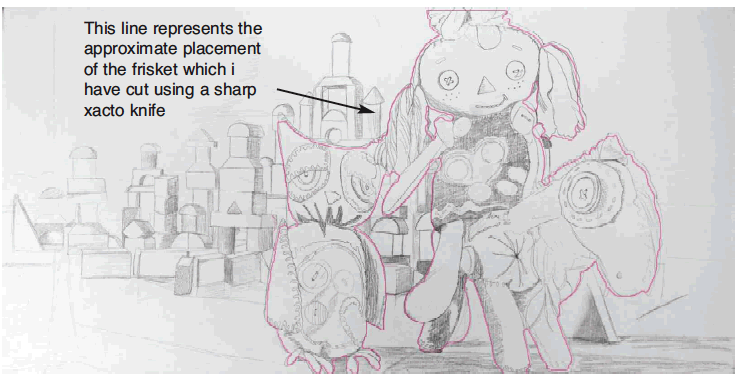
For this particular painting I used frisket (clear masking paper with a slightly adhesive backing) to mask off the foreground characters. This technique, usually employed by air brush artists, is something I’ve only started recently. It allows me to blend my background over my foreground while keeping the foreground clean. Later this will help give the impression that the background is behind the foreground and not butting up against it.
Next I apply light washes of the most prominent colors. I don’t worry too much about being tidy here since there are still lots of layers of paint to come. The paint is thin and watery at this stage. No need to add any blending fluid to the paint yet. I want it to dry quickly so that I can move onto the next layer.
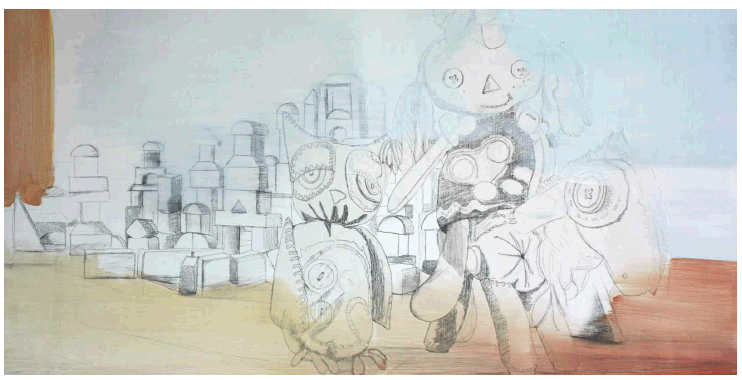
Here I’ve started quickly blocking in the background colors. Still keeping the paint light and watery and not worrying too much about details.
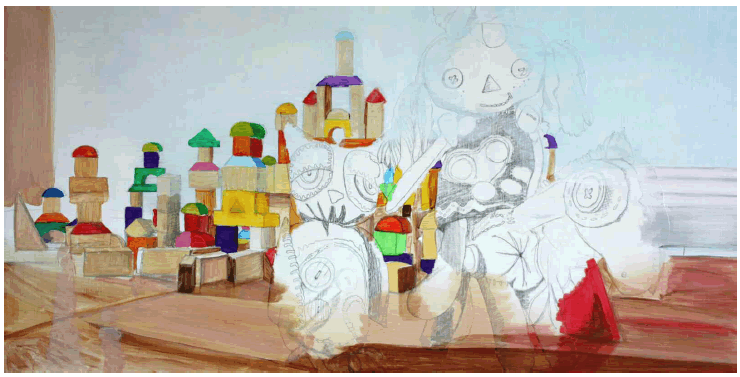
Now that I know where most of my background colors go, I start using heavier layers of paint. I add slo-dry blending medium here to start smoothing things out more. I’m still not worrying about the foreground at this point. It is protected by the frisket.
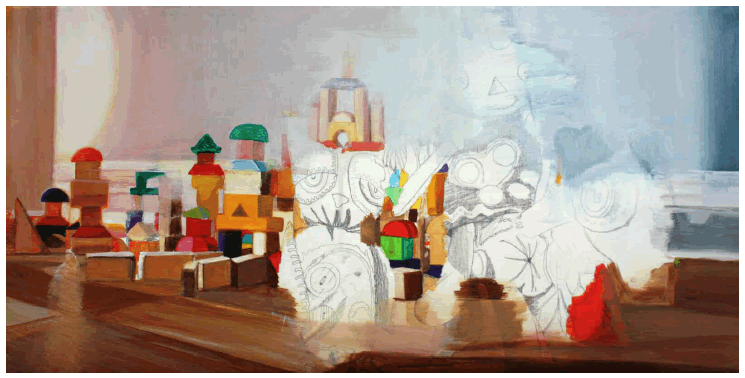
More layers of paint here. I’ve gone back and filled in the blocks that I covered when blending the far background in the last layer. I’m starting to put some of the reflections into the floor and define the dark and light areas more.
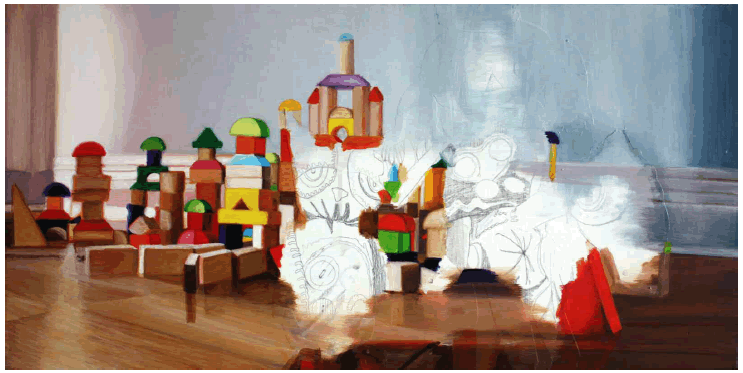
With the background mostly complete it is time to remove the mask. This shows how the frisket keeps the area clean.
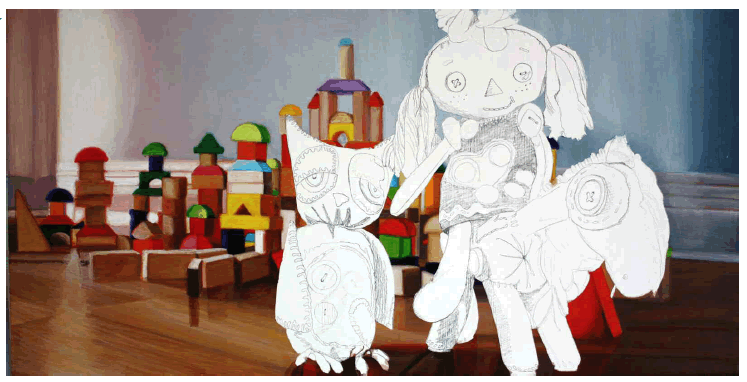
I’m basically going to repeat the layering for the foreground now. The only difference is I’m going to use more controlled brush strokes and start creating crisper edges and finer lines. I start with a light wash of colors.
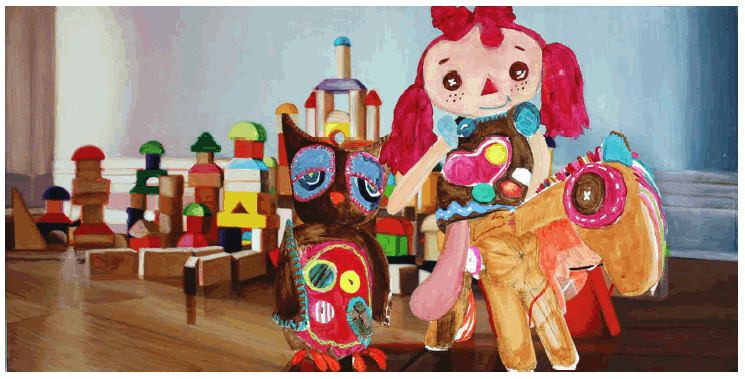
Here the foreground is in various stages of completeness. From the doll’s face being nearly completed to the horses head which only has a couple of layers of paint on. I’ve gone in with white and recreated some of the horses mane. This will help the bright colors go on clean and stand out. I’ve also added a yellowish glaze layer to the background to alter the lighting slightly.
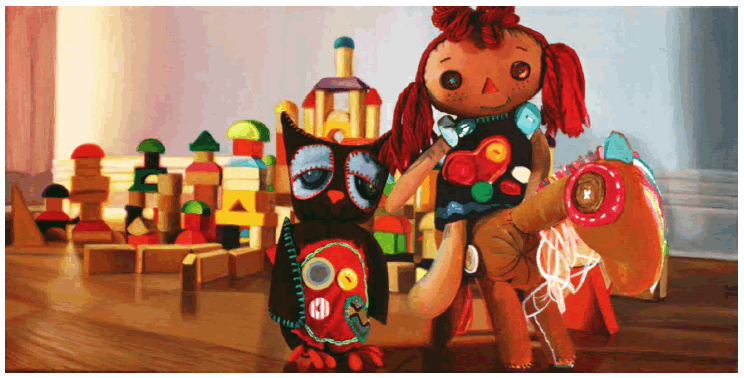
Here is the finished painting!
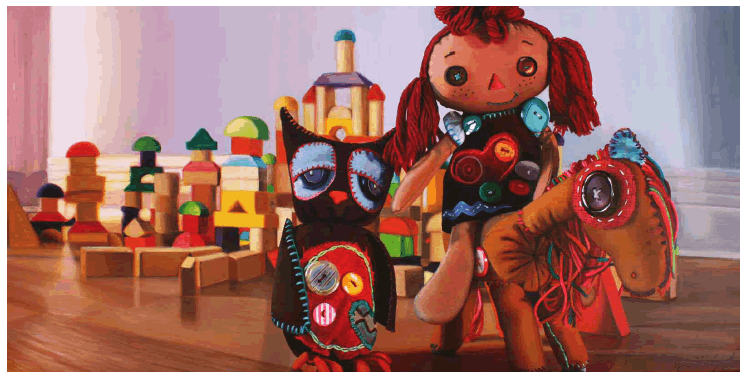
That’s it! Hopefully it gives you an idea of how I achieve my final painting. If you have any questions please feel free to email me: art@brandideziel.com.
Text and images copyright 2008 by Brandi Deziel. All rights reserved.
I hope you enjoyed this tutorial on acrylic painting layering techniques. Find more acrylic painting tutorials on our site here.
Leave a Reply